Tag

Yeast Dough

Browsing

Yeast dough is a classic that many people love. However, you absolutely have to let the yeast dough rise properly! For a fluffy yeast dough, both the pre-dough and the main dough or the topped sheet cake must rise in a warm environment. You can also use your oven for this.

The dough should be nice and fluffy but is often compact and firm. One reason for this is that the yeast dough cannot rest and “grow” long enough. In addition, the wrong temperature is often decisive. We’ll show you the right tips to make your dough rise safely!

Properly “feeding” the yeast for the yeast dough

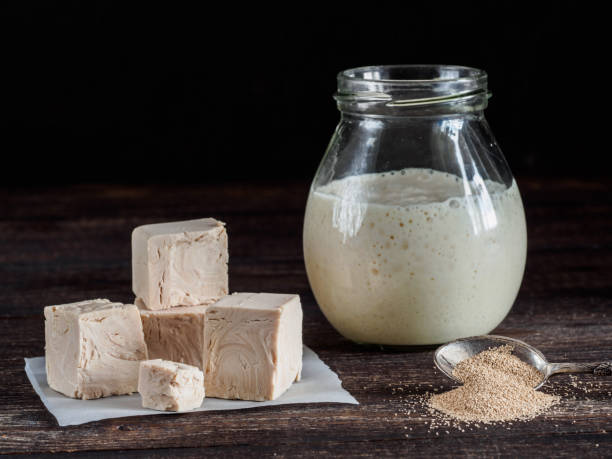
With fresh baking yeast, you must first make a pre-dough. This step is usually omitted with dry yeast. Whether you prefer to use fresh or dry yeast for your dough is up to you. A cube of fresh yeast (42g) corresponds to 2 sachets of dry yeast (each 7g). For the pre-dough, put the amount of flour required according to the recipe in a bowl and make a well in the middle.

In this well, mix the crumbled fresh yeast with a few tablespoons of water or milk and some flour from the edge of the well. The liquid used should always be lukewarm (30-35° Celsius), as the yeast can “work” better that way. Yeast consists of unicellular fungi that feed on sugars. Therefore, “feed” your yeast with a pinch of sugar to make the pre-dough succeed. Salt as an ingredient in a recipe should not be added to the pre-dough as it inhibits the action of the yeast.

The pre-dough forms bubbles in the warm oven

Yeast develops its fermenting effect best at temperatures of 32°C. In summer it is a good idea to leave the pre-dough covered in the sun. In cooler seasons you can simply use the oven as a helper by letting the pre-dough rest in the oven at 32°, covered with a damp cloth. The oven light that is on should produce approximately this temperature.

In addition, you can set this low temperature in a steam oven. Otherwise, any place with a constant temperature of 32°C without drafts would do, such as a sunny window sill or under the covers. If the yeast has bubbled after about 20 minutes and the volume of the pre-dough has increased significantly, you can take the bowl out of the oven again.

Knead the ingredients and let the yeast dough rise

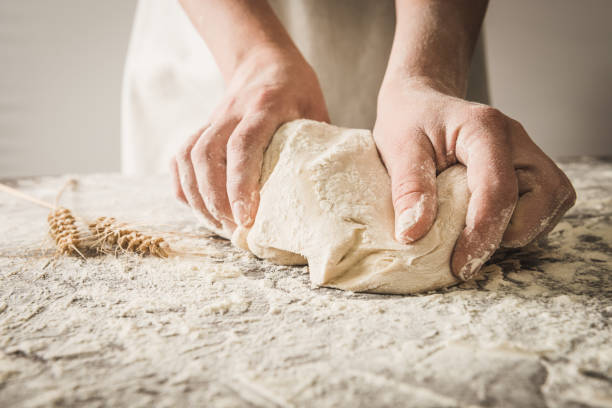
Finally add the remaining ingredients such as fat, eggs, the remaining liquid, and salt to the dough and knead everything for at least 10 minutes. If possible, the ingredients should be taken out of the fridge one hour before baking so that they are hand-warm when preparing the dough and the yeast can do its job better. Now knead the dough well with your hands or the food processor for 10 minutes.

If it’s sticky, add a little more flour and knead again. Depending on the recipe, the yeast dough must now usually be covered for at least one hour in the 32 °C ovens or in another 32 °C warm and draught-free place. When the dough has doubled in volume, you can remove the bowl from the oven. Otherwise, you have to be patient and give the dough enough time.

Let the filled yeast dough rise a third time

After kneading again, shape, braid, and cover the dough until you hold the desired end product in your hands. For a fluffy yeast dough, it is once again important to cover the dough in the finished form with a damp cloth and let it rise with the topping for about 15 minutes, for example on a warm windowsill.

Finally, heat the oven to the desired baking temperature to bake the yeast dough, which will hopefully have risen nicely. Before baking, brush your yeast pastry with egg yolk, but milk is also suitable so that it does not dry out during baking. Finish baking your pastry and enjoy your fluffy yeast cake with a good breakfast or brunch with friends.

You can let the yeast dough rise and store in the fridge overnight. This reduces the effort for fresh rolls or yeast buns in the morning. Here we show you what you should consider.

Many recipes with yeast dough state: the ingredients should not come cold out of the refrigerator, the yeast should be dissolved in lukewarm liquid and the dough must rise in a warm place. These clues are there because yeast is a leavening agent and consists of yeast fungi. These yeasts die off when the yeast is processed too hot and do not become active when it is too cold.

But the last aspect is not entirely correct. Yeast fungi also work in the cold, but much more slowly. Some recipes take advantage of this and let yeast dough rise in the fridge rather than in the heat. This has many advantages that you can take advantage of when baking with yeast.

Leaving yeast dough in the fridge has advantages

If you let the yeast dough rise in the fridge, you benefit from a number of advantages:

You can prepare the yeast dough the night before, let it rise in the fridge overnight and use the risen dough straight away in the morning. So you can look forward to fresh, homemade cinnamon rolls, rolls and more for breakfast. Doing it yourself is particularly worthwhile for pastries, as you can do without many of the additives. You can find out more about this in the article: This is why many people can no longer tolerate bread.
If you have made more yeast dough than you can handle at once, you can store the rest in the fridge for up to a day and don’t have to throw it away. Alternatively, you can also freeze it. It lasts like this for several months.
In addition, you only need half the yeast for refrigerator yeast dough.
The refrigerator dough is prepared with cold liquid. This avoids the risk of your yeast dying from water that is too hot.
Yeast dough from the refrigerator is often looser later. Because he has enough time to rise. Pastries made from frozen and thawed yeast dough are in no way inferior to fresh yeast pastries. The taste does not change when stored in the cold.

Yeast dough in the fridge: you have to pay attention to this

You can let yeast dough rise in the fridge overnight and store it there for up to a day. Pay attention to the following:

Prepare the yeast dough with cold liquid so that it doesn’t puff up too much.
You don’t need a pre-dough and you shouldn’t let the yeast dough rise in a warm place first.
Immediately after kneading, dust the yeast dough all over with flour and put it in a reusable and sealable bag or tin. This should be large enough for the yeast dough to spread out.
Now put the yeast dough in the fridge and let it rise overnight. The ideal duration for this is 12 to 18 hours. You can use the dough first thing in the morning or keep it in the fridge. However, it should not be left in the fridge for more than 24 hours, otherwise it could ferment.

Tips for the yeast dough in the fridge

You can form the yeast dough into balls, snails or braids before you even leave it. If you have formed small balls or pastries, you can store them in a bag that you blow open after filling. This creates more space in it and the yeast pieces do not hit the bag and deform when they rise.
Alternatively, place the yeast pieces on a baking sheet lined with parchment paper or on a floured board. Pay attention to the distance between the individual pieces of dough. You then slide the baking sheet or board into a large bag, which you seal and put in the fridge.
The bag or tin should always be closed tightly so that the dough does not dry out.
After rising: The yeast dough has risen well in the fridge overnight. If you want to bake it now, shape it as you like (if you haven’t already done so) and let the shaped pieces of dough rise again at room temperature for 20 minutes. This makes the pastry particularly fluffy.

Freezing yeast dough: What you have to consider

If you don’t want to use your yeast dough immediately after rising, you can store it longer. To do this, you put it in the freezer. There it stays at minus 18 degrees Celsius for up to six months. You can store yeast dough in the freezer as follows:

Shape the dough into a ball or patty before freezing. Then flour the dough.
Place the dough in freezer bowls or freezer bags and place in the freezer.
If you want to bake the dough later, let it thaw thoroughly beforehand.
After thawing, you can process it like conventional yeast dough. So he has to rise first. Give the yeast dough enough time to do this. Defrosted yeast dough takes about twice as long to rise as fresh dough.
Once the dough has risen, you can process it like conventional dough.