Tag

your

Browsing

Clever gift idea for young and old in the pre-Christmas period. Why always buy an advent calendar? Rather make an individual advent calendar yourself and fill the self-made advent calendar yourself. Then hobbyists and especially the recipients will have much more fun with it.

Craft instructions for the advent calendar

Tips and creative suggestions for making your own advent calendar. Because not only small children are happy when a surprise awaits them every day during the Advent season. The partner also enjoys it. That’s why you can make your whole family happy and design individual advent calendars. Since a few nice ideas already have a great effect, it doesn’t have to be that complicated and expensive. Here are a few inspirations for crafting and filling:

1) Sew the calendar bag yourself

The completely self-made calendar, in which you sew or knit the bags yourself, is relatively complex. However, sewing sacks is an easy way to get started, even for sewing beginners. If you want to save time, you can also buy bags or sachets. Then all you have to do is fill it up. But the advantage of doing it yourself is of course that each tag has an individual size, adapted to the size of the content. You can then hang the bags on a clothesline, put them in a box, or hide them.

2) Make your own advent calendar out of paper bags

Just as nice and easy is the use of paper bags to make your own Advent calendar. Because these look good and are available cheaply in the supermarket or on the Internet. Then you can paint and write on them. Stars or fir trees made of paper or felt can be stuck onto white paper bags. The fine golden wire is also always very decorative. After filling, you can then hang them up on a ribbon with clothespins, arrange them like a mobile, or just stand them up. If you are short on time, you can already buy beautifully decorated bags:

3) Use a kitchen roll or cardboard

Sometimes old rolls of paper are also useful. Because these are also well suited for handicrafts. For this purpose, the roles are painted according to the motto and glued to a substrate. You can then fill them with small gifts and close them with a lid. It fits, for example, homemade Christmas cards or vouchers.

4) Make your own calendar with matchboxes

Crafting with matchboxes is a cute idea. So you can paint them brightly and then make a house or train out of them. To do this, disassemble the individual matchboxes into two parts. Then tape the string to the bottom of the inner part of the first matchbox with scotch tape. But please put the outer part of the box right back over it. Then repeat this process until the 24th box. Also, always leave about 5-10 cm of cord between the individual wagons so that you don’t have any problems opening them later. You can design the 24th box differently than the 23 others. Because this box is supposed to represent a locomotive.

5) More ideas for making an advent calendar yourself

Of course, you can use pretty much anything to make a beautiful and individual calendar for the Advent season. You are completely free in your imagination. If you need more suggestions, we have collected more tips. Also, note great ideas for Christmas decorations.

  • Four small flower pots, number them, and fill them with small things.
  • Use discarded boxes. You can also design these creatively and set them up or hang them up.
  • Wrap small gifts in wrapping paper, label them with numbers and hang them up.
  • Fill in ideas for the advent calendar yourself

You can also design the content in a variety of ways. It’s easy, of course, if the recipient has a hobby, you can sweeten every day with a surprise related to the football club, your favorite car, free tickets, building blocks for handicrafts, etc. But even if you don’t have a hobby, there are plenty of ideas you can use to fill the advent calendar yourself. Our tips for decorating the Christmas tree are just as useful.

6) Fill the advent calendar with sweets

You can fill the homemade advent calendar with sweets in a classic way. Children in particular are happy about chewing gum, chocolate, or gummy bears. Or fill the calendar with homemade Christmas cookies. So you will be able to fill the 24 doors in a variety of ways.

7) Use drugstore items for filling

You will also find many small useful items in the drugstore with which you can fill the advent calendar yourself. So buy small perfume samples, jewelry, hand cream, or a small brush. You can also make small bath bombs yourself and give them away in the calendar.

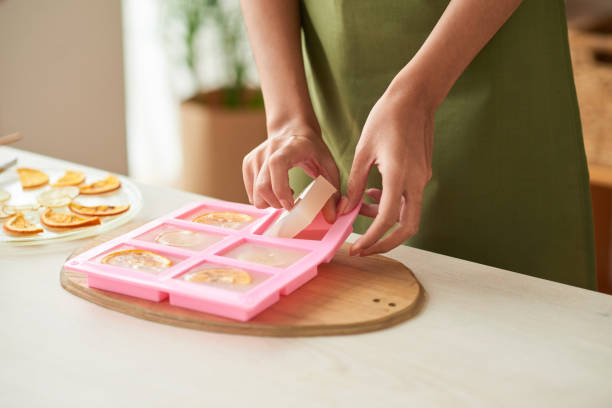
8) Fill the advent calendar with homemade items

If you like to do handicrafts and give away things you have made yourself, filling the advent calendar will be easy and give you a lot of joy. So you can make soap yourself and give it away. Homemade room spray, vouchers, or worry dolls are also great ideas for your calendar. In addition, note other tips for homemade Christmas gifts.

9) More tips for filling the advent calendar yourself

So that you can spend Christmas without stress, you should start making your own advent calendar early on. You can start buying and collecting things to fill two or three months in advance. So that you have enough filling material, we have more ideas for you:

  • Small toys such as marbles, bouncy balls, games of skill, and the like.
  • Photos, photo stands, small candles, or Christmas tree decorations.
  • keychains, stickers, jewelry, and fragrance oil.
  • Lighter, flashlight, pocket knife, etc.
  • Gift cards, vouchers, or scratch cards.
  • Socks, underwear, or stationery.

Every year in the time leading up to Christmas, the question arises of how to decorate for Christmas. Which color and style should the Christmas decorations have this year and how can you implement your creativity inexpensively? We have creative ideas for making edible Christmas decorations yourself with little money.

Decorate for Christmas

If you rummage through the boxes with Christmas tree balls, fairy lights, angels, Santa Clauses, and reindeer before the first Advent, you will always find broken decorations or less trendy colors. So that you can still decorate for Christmas, you should consider redesigning the entire decoration for Christmas. And with a little imagination and dexterity, you can create an inexpensive and all-natural alternative to the usual plastic balls and plastic ornaments. Because making edible Christmas decorations yourself is fun and can be redesigned every year.

Ingredients for making edible Christmas decorations yourself

The beautiful Christmas decoration is often far too expensive for the fact that it is only used once a year. In addition, you usually need several decoration sets so that you don’t use the same decoration for the Christmas tree and the rest of the apartment every year. Therefore, an edible Christmas decoration can be just the thing to bring variety into the house every year. For this you should look out for certain sweets and foods when shopping in the run-up to Christmas:

  • Biscuits such as cinnamon stars, speculoos, or gingerbread in various shapes.
  • Traditional foods such as cinnamon sticks, anise stars, dried apple, or orange slices.

Make ideas for edible Christmas decorations yourself

As soon as you have gathered the necessary groceries and ingredients, you can start. Of course, you can also bake cookies yourself and get creative with them. Because cookies are a good way to decorate the Christmas tree. As a result, we have collected some ideas on how to decorate your home with festive and Christmas decorations:

1) Decorate the Christmas tree with edible Christmas decorations

You can decorate your Christmas tree with gingerbread hearts, stars, and pretzels as hangers. To do this, take a fabric ribbon about 10 cm long and attach the edible decoration to it. And speculoos also looks great on the tree. To do this, thread a thin gold cord through the small opening and hang up the delicious biscuits. You can attach the decorative apples to the stem and crown the top of the Christmas tree with an almond-decorated gingerbread angel from the bakery or Christmas market. And stored in a dry place, everything – apart from the ornamental apples – will last until the next Christmas. Also, note valuable tips for buying a Christmas tree.

2) Christmas decorations for the window sill

Cinnamon sticks, orange and apple slices, anise stars, and cinnamon stars are ideal for Christmas decorations with little money. Attach them with floral wire to the fresh Advent wreath or to other fir branches that you can place on the windowsill. Then combine this with a chain of lights and you already have nice smelling jewelry and a cozy living room for Christmas.

3) Groove marzipan balls for decoration

Marzipan balls are not only delicious, but they also make a good Christmas decoration. You can also easily make this edible Christmas decoration yourself. Because all you have to do is dress up the balls with edible gold powder. You can also dip some of the balls in white or dark chocolate and decorate them with colored sprinkles. You can then decorate your tree with them or use them as table decorations.

4) Make the salt dough and use it as a decoration

A cheap way to decorate at Christmas time is to make salt dough. Because decorating the Christmas tree with salt dough is not only sustainable, it also looks good. And the good thing is, this is a fun activity for the whole family. So take an afternoon and get creative. So you can punch stars, fir trees, or figures out of it.

5) Decorate with sweets for Christmas

You can also bake cookies and use them to make your Christmas decorations. Because from the self-made Christmas village to the Christmas tree, you can make a lot out of it.

Steam cooking is a centuries-old cooking method in which food is prepared in a way that is particularly gentle on nutrients and flavors. Here you can find out how steaming works, which methods are available and which ingredients are particularly suitable.

Steam cooking refers to cooking methods in which the food is not cooked directly in water but in steam. Steam cooking has a long tradition, especially in Asia, but here in Europe it only became popular in the last century.

This makes steam cooking particularly healthy

When you cook your food in water, many nutrients dissolve and are lost in the water, such as vitamin C and the B vitamins. In addition, the food loses its taste because it also releases flavorings into the cooking water. This means that steamed dishes are not only particularly healthy, they also taste more intense and you don’t have to season them as much.

Steam cooking: one word, many methods

Basically, you can distinguish between two steam cooking methods:
Steam cooking at normal pressure, i.e. at normal atmospheric pressure.
Steam cooking at increased pressure in a pressure cooker. This has the advantage that the water does not boil at 100 degrees under increased pressure, but only at 120 degrees, which means that the cooking time for the food is shorter.
There are several ways you can steam your food at atmospheric pressure. Steaming inserts for pots or woks are particularly simple and inexpensive. These can be made of metal or, as is common in Asia, of bamboo. Multiple inserts can often be stacked on top of each other so that you can prepare different dishes at the same time.

Pressure cookers are also very common. There are now even oven-sized steamers that can be permanently installed in new fitted kitchens. These are the most suitable for you if you want to steam particularly large quantities.

Another old method is steam cooking in the so-called Roman pot. This is a clay pot that is soaked in water before use, then filled with the food to be cooked and placed in the oven. Soaking the clay prevents moisture from escaping the pot. Thus, the food cooks in its own juice.

This is how steam cooking works

If you use a pot as a steamer, you need to fill it with a large enough amount of water. How much that is is often stated in the recipe. For pressure cookers, it should be in the instruction manual. It is also important that the lid of the pot closes well, otherwise the steam can escape.

So that your ingredients are cooked at the same time, you should cut them according to their cooking time. This means that foods that take longer to cook should be cut smaller than those that cook faster.

Once everything is in the pot, unless the recipe says otherwise, boil the water once and then let it simmer over medium-high heat. Steaming works best if you don’t lift the lid of the pot during the cooking process. Then no steam can escape. Instead, it condenses on the pot lid and drips onto your food – so it stays particularly juicy. Only towards the end of the cooking time should you check whether the food is done. Caution: The steam that escapes when you open the pot lid is very hot. The best way to protect your hands is with glove-shaped pot holders.

If, on the other hand, you want to try steaming in a Roman pot, it is important that you water the pot really well. He should stand in the water for 10 to 15 minutes. Then put the pot in the cold oven and only now heat it up. This is important as the clay may crack when placed in the preheated oven.

All steaming methods do not require the addition of fat. For even more flavor, you can briefly roast or caramelize ingredients such as meat or vegetables before steaming. You can then add the resulting brew to the water in the pot. Your dishes will also be particularly tasty if you enrich the water with a little vegetable broth or wine.

Which ingredients are suitable for the steam cooker?

In principle, you can steam almost anything. Steam cooking is particularly advantageous for delicate foods such as young vegetables or fish. With other cooking methods, these quickly lose their fine taste. Potatoes, yeast dumplings, rice or smaller pieces of meat are also well suited for steaming. Only foods with very long cooking times are not particularly suitable, since steam cooking takes a little longer than other cooking methods anyway.

You can best benefit from the gentle preparation in the steamer if your ingredients are really fresh and have not already lost most of their nutrients through storage. It is particularly important here that you should buy seasonal and regional products, preferably at the weekly market.

Our conclusion on steam cooking

All in all, we can recommend steam cooking as a particularly healthy, tasty and gentle cooking method. You can compensate for the slightly longer cooking times either by using a pressure cooker or by chopping your ingredients sufficiently small. Then you even save energy when steaming, because you only have to boil the water once and then set the stove to a medium temperature.

You can also cook different ingredients at the same time without their flavors mixing.

If you want to gain weight healthily, you should consider a few things when it comes to nutrition. Find out here how to achieve your desired weight with healthy food.

Thin people are often envied for their figure. But there are also many who would like to gain a little weight. At the same time, they want to continue to eat healthily. This initially sounds like a contradiction. But even with a healthy diet, it is possible to gain weight.

Gain healthy weight: what is your goal?

If you want to gain weight, you should set yourself a specific goal. If you are currently underweight (this corresponds to a body mass index below 18.5), you can calculate what the approximate normal weight is for your height. But even if you are of normal weight and would like to gain a little weight, it is good if you set yourself a goal.

Food diary and nutrition plan

Basically, gaining weight is very simple: you just have to take in more calories than you burn. The Apothekenumschau recommends that you estimate your current daily calorie intake and try to increase this value by 500 kilocalories.

In practice, however, this is more difficult. Keeping a food journal can help you figure out what your eating habits are and how you can change them. If you are underweight, you should also have a doctor examine whether your diet is really the only cause of the underweight.

In order for you to manage to consume the necessary amount of calories, you should create a nutrition plan. In the following sections you will find some tips for this.

Gaining weight healthily: More meals

For a healthy diet, three meals a day with sufficiently long breaks in between are usually recommended. However, this is rather impractical for gaining weight. A better choice is five to six small meals a day, which will give you enough calories without feeling stuffed.

Eat right

Basic principles of gaining weight:
Foods with a high energy density such as potatoes, rice or cereals will help you gain weight.
Equally important are fats, especially unsaturated fatty acids. These are found, for example, in many oils, nuts and avocados.
But high-fat animal products such as cream, cheese and sour cream also help you gain weight.
Some types of fish, such as salmon or herring, are also healthy and rich in fat. And finally, it can also be a piece of high-quality meat every now and then.
Vegetables and fruits are generally low in energy density, but they contain important nutrients. That’s why they also belong in your nutrition plan.

Practical tips:
Vegetables and fruit are best combined with high-calorie foods: You can refine soups and sauces with high-quality oils, cream or crème fraîche and top salads with pickled vegetables, cheese cubes and seeds or nuts.
You can also make your breakfast richer: stir crème fraîche, linseed oil or nuts into your muesli, for example. Breads can be lavishly topped.
Snacks are also important: Muesli bars, nuts and dried fruit are particularly healthy and nutritious. Shakes and smoothies can also quickly provide you with a good portion of energy without being too filling.

As spring draws to a close and temperatures rise, many people think of the upcoming bathing season. Numerous outdoor pools open their doors at the end of May, weather permitting. It’s high time to look around for the latest swimwear models.

Time for a new swimsuit?

The bathing season officially begins in most regions of Germany at the end of May and the beginning of June. Outdoor pools throughout Germany open their doors and give residents of the country the opportunity to cool off in the water when the temperatures are hot. In the outdoor pool, every woman wants to show her most beautiful side.

Although not every woman corresponds to the 90-60-90 ideal of beauty, that doesn’t mean that every woman can’t look good in a bathing suit – quite the opposite. With the right choice, every woman can show her most beautiful side in the outdoor pool.

Cover the O-figure with the tankini

Women blessed with an O-shape are curvy in the hip and waist area. Some of them have a small belly, an above-average décolleté, and expansive hips. The legs are comparatively slender. Neither legs nor the décolleté are a problem when choosing a bikini. Women can only conceal the abdominal region with a suitable swimsuit.

The bikini is and will remain the favorite in swimwear. However, it is not ideal for women with an O-shape. Stylists tend to recommend the tankini instead. It is a good choice for women with this figure to cover the problem area “stomach”.

Tankinis are the best choice for women who weigh a little more. That doesn’t mean that the tankini can’t be worn by slimmer women – quite the opposite. Their figure is particularly emphasized by the tankini. Women with a lush décolleté choose a variant with a halterneck top, which is low-cut.

When buying the bikini alternative, make sure that it is made of a material that dries quickly, as this swimsuit is made of a lot of fabric.

Accentuate the X-shape with the bikini

Women with the X shape have a physique where the hips and shoulders are about the same size. This comes very close to today’s ideal of beauty 90-60-90. Women who have such a body have feminine thighs, a firm bottom, and a beautiful chest area.

For women with an X-body shape, the bikini is without question the right swimwear. Practically every shape, look and color choice of bikini is suitable for this year’s bathing season. The selection of the bikini should be based on personal preferences in terms of design and material. In this online shop, women can be inspired by the current bikini fashion and get an overview of patterns that are in demand this year.

Ladies with large bust sizes should not only pay attention to the pattern. For them, it is important that the top fits well and does not slip when bathing.

Emphasize the A-figure with sporty tops

Ladies with an A-figure are very curvy underneath and their upper body is rather narrow and delicately built. Many women whose bodies are A-shaped also have strong buttocks and thighs.

Those who belong to this figure type wear sporty tops, as they conceal the problem area of ​​this body type (from the hips). The aim is to direct the focus to the upper body with a sporty top.

To achieve this, women have the option of choosing eye-catching tops with patterns. From the waist down, women can hide a little with bikini bottoms that have high-cut legs.

Showing off the Y-shape and her slender legs

The Y-shape is the opposite of the A-shape: these women’s shoulders are broad, but the waist and hips are narrow. Women with a Y-shape usually have long, handsome legs that are slender in shape. Any woman who has such beautiful legs should accentuate them with a matching bikini. But with the Y-shape, the focus is also on the hips. In addition, women buy eye-catching bikini bottoms with colorful patterns or elaborate seams that draw everyone’s attention.

Create sexy curves for the H-shape

Women whose bodies are H-shaped have less rounded curves. That’s why these ladies should wear monokinis that have side cut-outs. The aim is to create volume so that the waist is more visible.

Large-busted women create volume by opting for a deep décolleté. High-waisted pants give the impression that the waist is feminine and curvy. This effect can be enhanced by using playful patterns and bold colors.

Lots of useful tips and home remedies for caring for your hair in winter. In the cold season, the hair is exposed to great strain, because in addition to the cold air outside, there is also the warm air from the heating. There is a risk of hair becoming dry and brittle and, in the worst case, split ends. In the wintertime, in particular, intensive care is now necessary to protect the hair effectively so that it remains beautiful and well-groomed in the long term.

Use mild hair shampoo

Particularly warm living spaces ensure that the hair is deprived of moisture and thus dries out. When washing your hair, you should therefore use a very mild shampoo. Preferably one that is enriched with oil and definitely has a low PH value. When applying, the scalp must be thoroughly and intensively massaged, as this is where dead skin particles are often deposited.

Cold mineral water

It is also very helpful not to rinse your hair with normal tap water afterward, but to use common mineral water instead. This has a great advantage that there is no lime and the hair does not become dull. Never use hot water when rinsing your hair, as this can remove important fat and the hair will lose its shine. Lukewarm water is best, as this avoids this unsightly effect. Do not dry with a hairdryer at the highest setting, as strong heat can also cause damage here.

Do a hair treatment

A hair treatment is particularly helpful for very brittle and dry hair. A banana can be mashed and mixed with olive oil (about a teaspoon). Due to the fat content of the oil, the hair gets a protective layer. For this, it is necessary to distribute the created treatment in the hair and let it work. The whole thing should take about 10 minutes and can then simply be rinsed out with water. During the hair treatment, a warm and slightly damp towel should be wrapped around the hair. During the exposure time, the active ingredients can be absorbed much more into the hair tissue. You should definitely avoid smoothing with an iron later on.

Don’t rub your hair dry

Under no circumstances should the hair be rubbed dry or rubbed after washing, as this can roughen the skin layer. On the other hand, it is much better to dry out the long hair completely with the help of a towel. It is also a big mistake to comb your hair before you actually blow dry it. This puts particular strain on the hair. A drying process must first be carried out on the head before you can start combing your hair.

If possible, the blow-drying process should be short, because the heat only puts unnecessary strain on the hair. If possible, it is best to avoid it completely, because hair can also dry very well in the air. If there are dry ends, they can be made supple again with olive oil, and they should be trimmed at regular intervals when you visit the hairdresser. As a result, they stay healthy longer and do not become shaggy.

Hair looks electrifying

Especially in the wintertime, the hair suffers from constant cold or very dry room air and can quickly stand on end. A conditioner can help to remedy this. Glycerine or shea butter with special substances are also suitable. An ionic hair dryer should be used to prevent the hair from being charged. But a hairbrush with gold plating is also very helpful. However, it must be noted that the hair should not be combed when it is cold, but only wait until it has reached room temperature.

Scarves and woolen hats are popular in winter, but these are not very good for the hair because they create friction and the hair can break more easily. A silk or satin scarf, which must lie under the hat, can help.

Simply get a summer tan and finally have longer brown skin after the summer. You can easily maintain a fresh summer tan and naturally prolong it. The skin stays toned longer if you follow the following home remedies and tricks after sunbathing. So you can enjoy the summer tan from your vacation for much longer.

Extend your summer tan with carrots

Who doesn’t want to be able to enjoy their summer tan for as long as possible? This is easy to do with a remedy that is in every household: carrots. Simply rub the skin with carrot juice, so the skin receives moisture and is cared for at the same time.

Moisturized brown skin for longer

Brown skin needs a lot of moisture because UV light dries out the skin. The drier the skin, the sooner the body will renew the skin and remove the top layers of skin.

Avoid peelings, sauna and steam baths

You can prolong your tan by avoiding skin peelings, steam baths, saunas, and very hot showers. Only then will the skin shed and renew the uppermost horny layer less quickly.

Self-tanner

Probably the most effective trick to staying tan longer is self-tanners. There are very gentle tanning creams these days that don’t look artificial. The same applies to self-tanners: always keep your skin moist.

Lots of drinking

Moisture must also be maintained with the food and fluid in the body for that of the skin. Therefore, a supply of the body must be supplied. Drinking enough and eating healthy are important. You should drink lots of mineral water, spritzers, or teas without sugar. Antioxidants in green tea also darken the skin.

Food

A diet rich in vitamins and fiber maintains the tan. Protein from dairy products or eggs also helps. Especially carotene from carrots is good. Good foods are:

  • spinach
  • mangoes
  • fennel
  • Red pepper
  • chili
  • cabbage

Zinc is important

Zinc in particular is very important in nutrition because zinc stimulates pigment formation. It is best to be off immediately after zinc-rich food:

  • oatmeal
  • cocoa
  • Fish
  • Corn
  • beef
  • kernels and nuts

If you shave frequently, you run the risk of not doing your skin much good. Nevertheless, skin irritation, burning, itching, and red spots can be avoided. If you use the mildest possible treatment methods when shaving your beard and help the skin to regenerate itself.

Tips on how to shave properly

Frequent shaving damages the skin’s protective barrier and can cause facial irritation that can cause severe burning, itching, or just an unsightly red color and pimples. However, this is usually not due to the shaving itself, but to the pre-and post-treatment of the skin. These problems can be eliminated with a few simple tricks. Also, note our home remedies for razor burn.

1) Cleanliness is the top priority

The cleaner the razor blade, the fewer skin problems you will get from shaving. And if you know that, you can already eliminate a major source of danger. After every shave, the smallest particles of skin, soap, dirt, and other impurities stick to the blade and cannot be washed off. If these come into contact with the smallest wounds on the shaved skin, pimples or impurities can form. To avoid this, the blade should be disinfected before each shave. There are special liquid solutions and UV devices for this purpose. The shave can only be successful with a really clean blade.

2) Water, soap, and lotion only

Before shaving, you should treat the skin as well as possible with warm water. To do this, take a cloth soaked in water and place it on your face. The heat penetrates the skin and opens the pores. The warm water also causes the whiskers to soften slightly and the skin to become more elastic. The shave can therefore be softer and without injuries.

Soap the beard areas well. Avoid aggressive shaving soaps, instead, use mild skin soaps or try homemade soaps with natural ingredients. These put less strain on the skin when shaving than shaving soaps do. It is best to use caring soaps made from natural products that are greasy (e.g. with milk or honey). This cares for the skin while shaving.

3) Close pores after shaving

After shaving, immediately close the skin pores again. If you previously opened them with warm water, now close them with cold water in the same way. Quiet freezing. This will prevent dirt from getting into the pores and irritating the skin. Instead of drying off, let the cold water soak in for a few minutes. Now apply a gentle lotion and massage it into the skin.

Measures to remove dark circles under the eyes and get rid of them permanently. Find out everything about the causes and development of dark circles under the eyes. And how you can treat the unpleasant shadows under the eyes with home remedies.

Many sufferers suffer from the dark shadows and blue veins under their eyes. That is why home remedies and measures are in demand that can be used to remove dark circles under the eyes. We have collected all the remedies for dark circles for you, from cucumber slices and creams to CC treatments.

Home remedies for dark circles

If you can rule out a disease or genetically inherited dark circles under the eyes, you have various options for getting rid of the dark circles. The first thing you should do is make sure you are getting enough fluids in your body. Sufficient sleep, exercise, and a balanced diet are also factors that you should definitely pay attention to.

1) Get rid of dark circles under your eyes with ice cubes

Ice cubes are a popular home remedy for bags under the eyes and dark circles under the eyes. Because with them you can cool the area under the eyes. This promotes blood circulation in the skin area under the eyes. As a result, shadows under the eyes can be reduced.

2) Cucumber slices against dark shadows

Equally effective are cucumber slices. With this, you can treat stressed eyes and get rid of dark circles. However, for this method to be effective, the cucumber slices should be cold. This stimulates blood circulation in the eye area. So cut a cucumber into large pieces and place them on your closed eyes. If the cucumbers get too warm, you should change the cucumber slices. You can stop the treatment after up to 20 minutes.

3) Cold milk as a home remedy for dark circles

You can also put some milk in a small bowl, but for the milk to be effective, the temperature needs to be ice cold. Then moisten a cotton pad or clean washcloth with the milk. Then you can put these on your closed eyes. You should make sure that you replace the cotton pads with new ones as soon as they are too dry or warm. After 20 to 25 minutes you can wash your face. And cream the skin under the eyes with a moisturizing lotion. In order to effectively get rid of the dark circles under the eyes, this application should be repeated several times a week.

4) Light massage to get rid of dark circles

You can also remove your dark circles with light and extensive massage. Watch the video below and try it yourself.

5) Strawberries against shadows under the eyes

Along with cucumber slices, using strawberries also has a similar effect on under-eye circles and puffy eyes. The strawberry slices not only reduce the shadows but are also rich in vitamins and ingredients. Thus, they make the skin look fresher and younger. In order to be able to get rid of dark circles effectively, the methods and home remedies described should be combined with one another. So you can alternately treat your shadows under the eyes with cold milk and strawberry and cucumber slices.

6) Fight dark circles with potatoes

Another insider tip is to use it with potatoes. To do this, you have to peel the potatoes and then grate them with a grater. Then you can stuff the small pieces of potato into a thin cloth. And cover your closed eyes with it. Or cut the potatoes in half circles and put them under your eyes. As a result, dark circles under the eyes are reduced over time. In addition, the potato slices reduce swelling.

7) Remove dark circles with an egg white mask

One of our readers gave the tip to make an egg white mask for the eyes. All you have to do is beat the egg whites. Then apply to the eye area and leave on for about 15 minutes. Then wash it all off with lukewarm water. The positive effect of this method was already known to our grandmothers. Also, note our instructions for making face masks yourself.

8) Apply caffeine eye cream

Eye creams with caffeine are also helpful. Because caffeine improves blood circulation, which in turn means that the capillaries in the skin under the eyes do not narrow as easily. Thus, the dark color of the blood does not appear so quickly. Other substances that should be included in creams to effectively get rid of dark circles are peptides, glycerin, retinol (vitamin A), ceramides, Q-10, and urea.

9) Hyaluron treatment against dark circles

Treatment with the miracle cure hyaluronic acid to remove dark circles is in demand. It is often used for wrinkles. But what exactly is hyaluronic acid? Well, hyaluronic acid is an important component of connective tissue. It, therefore, occurs naturally in the body. It can be injected under the eyes with a syringe by trained doctors. It is intended to fill in a deepened eye trough and reduce shadows under the eyes.

So if you have a deepened eye groove, you can consider this method. In the case of dark and blue shadows caused by skin that is too thin, I can say from personal experience that this procedure is not very effective. You also have to keep in mind that there are always risks and side effects. However, there are many hyaluronic creams that you can try. Also, note our home remedies for dry eyes.

10) CC Eye Treatment for dark eyes

Another new method to get rid of dark circles is the so-called CC Eye Treatment. This method originally comes from Brazil. Specially mixed colors are tattooed under the eyes. Thus, it is like a permanent concealer. Again, this should only be done by professionals. Since risks and side effects are also possible here.

Making your own soap is made easy. You can make many different soaps with just a few ingredients. Your creativity knows no limits. We now show you three recipes that definitely work.

Great ideas for making soap yourself

This saves you the purchase of expensive soap and you can live out your creativity freely. Just make your own soap and then give it away. Every friend is happy about homemade soap.

1) Coconut Exfoliating Soap

You can create your own soap with just four ingredients. So let’s go and make a simple coconut peeling soap yourself. You can also make natural cosmetics yourself.

Ingredients for the coconut peeling soap

  • 250 g curd soap
  • 50 g coconut cream or coconut oil
  • 2 tablespoons coconut milk
  • 3 tablespoons tender rolled oats (or granulated sea salt)

How to make your own soap

Follow the instructions below to make your own soap

  1. Grate the curd soap into small pieces. This works best with a coarse kitchen grater.
  2. Gradually add a little water and let the curd soap melt in a saucepan over low heat.
  3. Now add the coconut cream/coconut oil and coconut milk and mix them well with the cured soap.
  4. Now you can fold in the oatmeal
  5. Then you can put the finished mass in a baking pan and let it cool down. If you want, you can also form small balls or something similar yourself, but the mass has to be a little firmer for this.
  6. Finally, you can carefully remove the soap from the mold.

Keep in mind that you cannot use the soap straight away as it needs to rest for a while. You can use them after a week or two. Using the soap earlier can cause skin irritation. In addition, note our tips for making your own deodorant without aluminum and ideas for a homemade shower gel.

2) Orange soap with olive oil

You need the following ingredients for the orange soap:

  • 250 g curd soap
  • 1-2 tablespoons olive oil
  • essential organic orange oil
  • Alternatively: bergamot or lemongrass oil
  • if necessary soap color (otherwise the soap remains white)

Instructions for the orange soap

  1. Grate the curd soap into small pieces and mix them with a little water by hand to form a mass. Make sure that the mass is neither too solid nor too liquid.
  2. Now you can add the olive oil and 10-15 drops of the essential oil. This will give your soap a pleasant smell.
  3. Mix everything together well again.
  4. Pour the soap into a mold and let it cool for a few days.
  5. Finally, cut them into pieces and let them rest for a few days.

3) Make natural soap

There is a simple recipe for making the natural side yourself. In addition, note how you can store soap in a dry place.

Ingredients for the natural soap

  • 250 grams of coconut oil
  • 230 grams of olive oil
  • 300 grams of rapeseed oil
  • 100 grams of almond oil
  • 70 g shea butter
  • 120g sodium hydroxide (NaOH, available in the pharmacy) for a 9% overfitting
  • 260 grams of distilled water

Instructions for natural soap production:

  1. Because of the highly caustic sodium hydroxide, wear safety goggles and gloves, and cover your work area with newspaper.
  2. You can carefully pour the sodium hydroxide into the water outdoors, under the extractor hood, or by an open window, while stirring constantly.
  3. Whisk together until clear, then set the liquid in the sink to cool for about an hour.
  4. Now you can heat the oils and mix them together. With constant stirring, you can slowly and carefully mix the lye into the oils. Stir until the liquid has the consistency of thick cream of soup.
  5. Now you can pour the mass into a mold and cover it with cling film and a towel for 24 hours.
  6. Wear rubber gloves to test whether the soap has been set. If this is the case, you can take the soap out of the mold and cut it into pieces.
  7. Now let the soap dry in a dry place for 5 weeks, as this will lower the pH value.