Tag

your

Browsing

The skin is exposed to a variety of stresses every day. Sun, cold, and our diet affect the health of the skin. But there is an effective remedy.

What is a face serum for?

More and more people are using a face serum for their daily skincare routine. Because there are suitable serums for every skin type, which are perfectly adapted to individual requirements. With a facial serum, specific skin problems can be addressed and winter-tired skin will shine again. The serum is enriched with highly concentrated ingredients that are optimized for various problem areas:

  • pimple
  • blackheads
  • combination skin
  • Dry skin
  • Fold

The high concentration of active ingredients ensures that the desired results are achieved quickly. Since there is a serum for every skin type, this type of facial care routine is suitable for everyone. Tip: Optimize your daily facial care with a well-thought-out diet and rely on foods for beautiful skin.

When should you use a face serum?

Since the serum is available in many variants, every skin type can be treated with a serum. They are suitable both for the treatment of acute problems and for prevention. High-quality facial serums not only offer care but also a sun protection factor. In addition, you can find use to actively counteract the aging process of the skin.

How do you apply a face serum?

Depending on the selected facial serum, the care product is integrated into the care routine in the morning or in the evening. A moisturizing serum with a sun protection factor is best applied to cleansed skin in the morning. Anti-aging face serums can make skin photosensitive and are best applied in the evening. In general, so that the skin can absorb active ingredients of all kinds, it should be clean and dry.

How do I choose a serum for my skin?

A big advantage of a facial serum is that you can choose a combination of active ingredients that is specially tailored to individual skin problems. Therefore, it is important to know exactly what skin type you are and what problem areas exist. A professional skin analysis is best for this.

For example, use an online consultation at asambeauty. Just answer a few questions and the portal’s experts will choose the perfect offer for you. Find your face serum to quickly see the results you want. Discover many other beauty products in the shop’s range.

How to choose a serum for combination skin?

The so-called combination skin is the most common skin type. Since the individual parts of the face each have different characteristics, suitable care for combination skin is particularly difficult. Because those affected usually have to struggle with dry and oily skin.

It makes sense to care for the individual areas of the face with the right products. If the cheeks and eye areas are rather dry, a moisturizing serum is used there. In order to care for oily skin on the chin and forehead, for example, care that prevents inflammation makes sense. Oily areas of skin tend to have large pores, which in turn increases the likelihood of pimples and inflammation developing.

Instructions and tips for peeling yourself. Because natural body peeling or facial peeling is not only sustainable but also does without harmful ingredients and unnecessary packaging waste. Use creative recipe ideas with natural home remedies for peeling production and ensure effective skincare.

Skincare with a scrub

Most people want beautiful, smooth and supple skin. Because that has a positive effect on your well-being and your own charisma. But the reality often looks different. Skin blemishes can occur especially in different age phases, such as puberty. Pigment spots, pimples, enlarged pores, or wrinkles on the face can also be unwelcome companions.

On the other hand, peeling can help to improve the complexion. With a peeling treatment, dirt and dead skin cells are removed. As a result, the skin becomes smoother and firmer. In addition, the pores become finer and the depth of the wrinkles can also be reduced by peeling.

Application and instructions for peeling

If you want to do something good for your skin and improve your complexion, then skincare with peeling is just right for you. The application is very simple and you only have to pay attention to a few things. So, use the following guide to applying scrubs to your skin:

  • Face peeling: First, wash your facial skin well. After that, however, do not use creams or toners. Now apply the peeling to dry and clean skin is very gentle circular movements. Give yourself about two to three minutes to rub it in. Since the peeling ingredients are quite coarse-grained, avoid applying too much pressure. Otherwise, redness may occur. It is also important to avoid the eye area. After rubbing in, the mixture can remain on the skin for a few minutes like a mask. Then gently wash it off with warm water.
  • Body peeling: You can also use any facial peeling as a full-body peeling. When making your own peeling, you should only pay attention to the higher amount required. Then proceed as described above and leave out sensitive parts of the body. It is also recommended to use it in the evening if redness occurs, but it disappears after a few minutes.

Make your own peeling ideas

In order to be able to make a peeling yourself, you only need coarse-grained ingredients (sugar, salt, sand) for the abrasion of the skin. And some lubricant, such as oil, yogurt, or quark to soothe and care for the skin. You have most of the ingredients ready to hand in the household, which makes the production so easy and quick. So let yourself be inspired by the following recipe ideas for homemade scrubs:

1) Olive oil, sugar, and honey scrub

You can make an effective peeling with 2 tablespoons of pure olive oil, 1 teaspoon of sugar, and 1 teaspoon of healthy honey. To do this, mix the ingredients in a bowl until a solid mass is formed. However, the sugar should not dissolve in the process. Consequently, all components of the scrub should be at room temperature. If you are using the scrub on larger areas of the body than the face, you will need to use more olive oil, sugar, and honey according to the proportions above.

2) Make a sea salt and oil scrub

Making a peeling yourself is even easier: Take a few teaspoons of normal salt or sea salt and add some oil. The oil gives your skin pleasant moisture. Depending on which oil you use, the skin also gets additional nutrients. So simply stir the mass well so that a creamy substance is formed. Then massage it into the skin. If you want a great scent, add the essential oil of your choice. Learn more about healthy oils and their effects.

3) Make your own peeling with quark

Since quark is known as a tried and true remedy, use it to make scrubs. Accordingly, mix some quark with sand. You can also use well-tolerated healing earth as an abrasion tool. The finer the sand, the more sand you can use. If the sand is not so coarse, this peeling is gentle on the skin. In addition, the quark provides your skin with plenty of nutrients and moisture, so that the skin becomes more supple after use.

4) Make your own refreshing peeling from coffee

For a nourishing body scrub, mix coffee grounds with olive oil to create a mushy paste. Then apply the peeling to your body with circular movements. Then leave it on the skin for about 15 minutes before rinsing it off with warm water. So you have effective skincare and can reduce orange peel skin thanks to the caffeine it contains.

5) Make scrub from coconut oil and sugar

The miracle cure of coconut oil is also well suited for peeling yourself. For soft and tender skin, you must first heat 2 tablespoons of coconut oil in a water bath. Then you can stir in the sugar and massage it into your skin. But make sure it’s not too warm. After waiting a few minutes, you can gently rinse everything off.

The effect of peelings

After the peeling, the skin feels wonderfully soft and it is no longer necessary to apply the cream. The sugar removes dead skin cells. As a result, the skin looks fresh and impurities are treated preventively. Honey, olive oil, and quark also contain nourishing substances. Thus, the result of homemade peelings is a nourishing and sophisticated care product. You can use this anytime to promote healthy skin. In addition, note how you can make shampoo yourself and how sustainable shower gel production can be achieved.

Know the difference between hair masks and hair treatments and make them with natural home remedies. We have collected the best recipe ideas for making your own hair mask and conditioner. As a result, you can achieve intensive hair care with simple ingredients without much effort. This saves money and packaging waste.

The best hair care for beautiful hair

Hair treatments are used for intensive care of the hair. There are different types of hair masks on the market. Then you will find them in small containers, tubes, spray bottles, or disposable packaging. A hair treatment should do a lot, so one is all the more disappointed when it doesn’t work as promised. Because hair treatments from the drugstore do not always work for every hair structure and are expensive. Consequently, it is easier to design your own hair treatment. We want to show you how easy it is. And making a hair mask yourself is very easy.

Difference between hair masks and hair treatment

There are so many hair care products out there that it’s easy to lose track. The difference between a hair mask and hair treatment is minimal. Both should intensively nourish and moisturize your hair. They both often contain very similar nourishing ingredients that develop their full potential with regular use. The only difference between hair masks and conditioners is that most hair mask products contain more oils. They are therefore more intensive in their care. However, it depends on the product and brand.

Make your own hair mask

Since some hair masks contain a higher proportion of oils, you can use them to care for your dry hair. If you now want to avoid unnecessary plastic waste and rely on natural products without chemicals, then you can make your hair mask yourself in the future. We have collected a recipe idea for you that does not contain any artificial ingredients.

Make your own hair treatment

Since the difference between the hair mask and hair treatment is not very big, the recipes are similar. Consequently, you can not only make your hair mask yourself but also a hair treatment. You only need a few home remedies for the intensive care of your hair. Because olive oil, egg yolk, lemon juice, honey, milk, quark, or avocado make your hair supple again. The treatments also moisturize your hair and give it more shine. They also strengthen your hair fibers and are easy to use in everyday life. The ingredients are usually mixed together and left on the hair. Afterward, you can easily rinse out the hair treatments. The cure should not be stored but used fresh.

1) Almond oil as a hair treatment against split ends

Hair treatment is particularly important for hair affected by split ends. Almond oil does a lot. So just knead it into the ends of your hair. Then let it sink in. After about 15 minutes, rinse it off. Here, too, the oil can act overnight. Because it makes your hair look even better. Oil with lemon has a very positive effect and brings a new freshness to the hair. The affected hair recovers and the hair color looks refreshed. At the same time, it is a good home remedy for long and well-groomed hair.

2) Homemade Coconut Oil Hair Treatment

The miracle cure of coconut oil is not only good for facial care. It’s also good for your hair and moisturizes it. You can simply spread some coconut oil on your palms. Then spread it in your hair. After an exposure time of about 20 minutes, you can rinse it off with lukewarm water. Haircare in winter is particularly important.

3) Make hair treatment yourself from avocado

If you suffer from extremely dry hair, treat your hair with an avocado mask. Because the tip for the avocado is well known. Because it provides plenty of moisture. To do this, buy a ripe avocado. Then you can mash the avocado flesh in a bowl with a fork. You should also add 2 teaspoons of olive oil and 1 teaspoon of lemon juice. Mix well and work into hair. But be careful not to use the mask on the scalp. Then wrap your hair in a towel and leave the mask on for about half an hour. Finally, you need to rinse the avocado hair mask well with shampoo. You should also note other tips from Avocado against damaged hair.

4) Homemade hair treatment from healing clay

If you suffer from hair that gets greasy quickly, a homemade hair treatment made from healing clay will help. To do this, mix the effective healing earth with water to form a paste. After that, you can massage the mixture onto your scalp and hairline. You should avoid the ends of your hair to prevent them from drying out. After an exposure time of approx. 10 minutes, rinse your hair well.

5) Olive oil is the easiest hair treatment in the world

This cure comes from the south and is becoming more and more popular. The use of olive oil, which is massaged into damp hair, is sufficient for this. Then the whole thing has to act for 10 minutes. Then wash it off with shampoo. After that, your hair will be incredibly shiny. If you wrap a towel around your head, the homemade hair treatment can work even better. You can also leave the olive oil on overnight if your hair is very stressed. This allows it to recover well.

Blanching is a handy trick for processing many types of vegetables and fruits. We’ll show you how your vegetables stay fresh and crunchy for longer.

Benefits of Blanching

Blanching is a simple and very effective technique for processing vegetables and fruit. Typically, you blanch by adding your fresh veggies or fruit to a large pot of boiling, salted water, and shocking them in cold ice water at the end of the cooking time. In the case of numerous fresh vegetables, a process is set in motion which, depending on the variety, inhibits toxins, releases important nutrients or makes the vegetables last longer.

Due to the short time in boiling water, your fresh vegetables do not lose their taste and remain crisp and fresh. It is often advisable to blanch vegetables before freezing them. In this way, it withstands the cold temperatures better and cooks more quickly when processed later.

Blanching vegetables sets important processes in motion:
It deactivates certain enzymes and thus stops unwanted changes in the fresh product. (such as progressive maturation and the associated changes in taste)
It preserves valuable ingredients such as vitamins and minerals.
It allows vegetables to retain their fresh color.
It makes many types of vegetables last longer and prepares them for freezing.
It draws out toxins and harmful germs.
It softens inedible flavors and substances that are difficult to digest (e.g. some types of cabbage).
It cooks sensitive vegetables ready to eat (e.g. leaf spinach or chard).
Blanching is also suitable for some types of fruit and nuts: Almonds, peaches or tomatoes, for example, can be skinned more easily after a short time in the bubbling cooking water and processed into mush or sauce, for example.

Blanching – that’s how it works

You can blanch in no time at all. It is only important that you take into account the individual cooking time depending on the variety.

For blanching you need:
a large pot full of water
Salt
Skimmer or sieve for chilling
That’s how it’s done:
Bring the water in your pot to a boil. Carefully add some salt, making sure the water doesn’t overflow.
Add your vegetables or fruit to the boiling water and let it simmer according to the cooking time.
Lift it out with the slotted spoon or drain into a large colander.
Pour cold water over your vegetables or fruit to stop the cooking process immediately. It’s even easier to have a second pot of ice water ready to dump your blanched veggies into after cooking time.
Wait for the vegetables to cool.

Blanch – note individual cooking times

Depending on the variety, you have to wait a certain amount of time for blanching. Our overview will help you. The times are for one 500 gram serving in a large saucepan.

Artichokes: 6 minutes
Beans: 3-4 minutes
Cauliflower: 3 minutes
Carrots: 2 minutes
Peppers: 2 minutes
Brussels sprouts: 3 minutes
Peas: 2 minutes
Corn on the cob: 5 minutes
Spinach: 1/2 – 1 minute
Apples: 2 minutes
Pears: 2 minutes
Blanching cabbage simplifies the preparation. The leaves, which are often brittle, become softer with a short boil and are then easier to roll.

Chinese cabbage (leaves): 2 minutes
Chard: 1-2 minutes
Leek: 3 minutes
Pointed cabbage leaves: 2 minutes
White cabbage leaves: 2 minutes
Savoy cabbage leaves: 2 minutes
To make raw vegetables more digestible – for example in a salad – you can also blanch them. Just add the following types of vegetables to the boiling water for a short time before you eat them al dente or freeze them for later.

Broccoli: 3 minutes
Kohlrabi: 3 minutes
Celery: 5 minutes
Zucchini: 3 minutes
Sugar snap peas: 2 minutes

Brain food refers to foods that are said to be particularly good for the brain. But which nutrients do our gray matter need? And what foods do they provide? We have the answers.

The human brain is the central control center of the organism, in which all information comes together. In order for it to function smoothly, the brain needs three things above all: enough oxygen, blood and the right nutrients. Brain Food is supposed to provide the right nutrients.

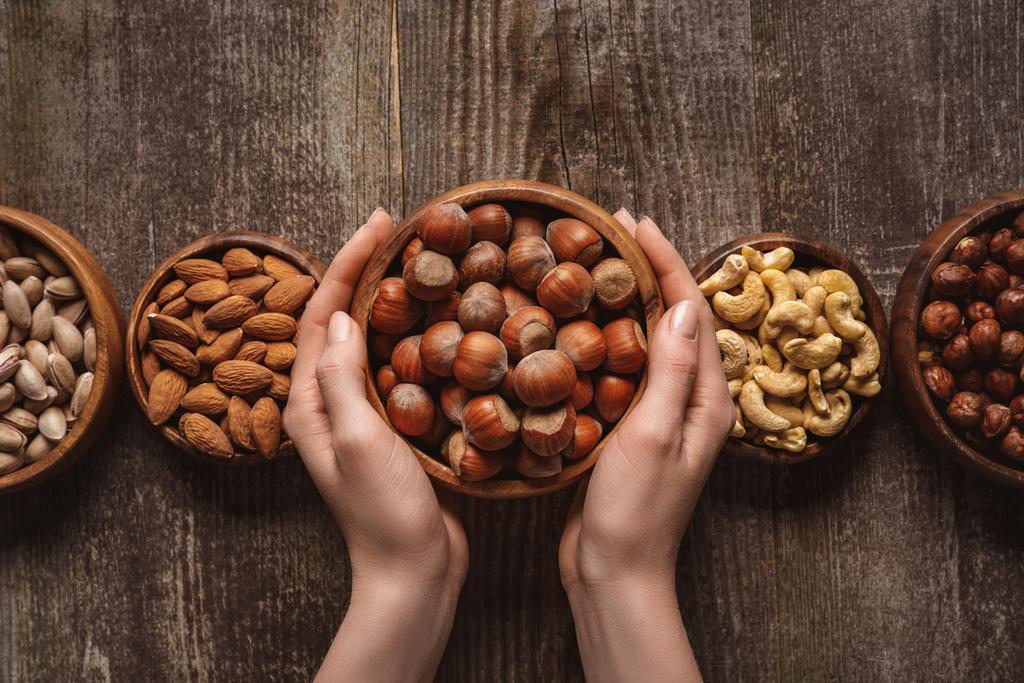
Brain Food: The brain needs these nutrients

Our brain is so complex that we are far from fully understanding it and how it works. Nevertheless, science agrees on a few points. When it comes to the right care, the following points are particularly important:
Water: Even before the actual brain food comes “brain liquid” – the brain needs enough liquid. A lack of water is quickly noticeable in the form of headaches, tiredness or poor concentration. That’s why you should drink about one and a half to two liters throughout the day – preferably water or tea. On hot days or physically demanding phases, it can be more.
Carbohydrates: The brain gets the energy it needs from carbohydrates. Instead of fast sugar, you should rely on complex carbohydrates (see below). These are slowly broken down into glucose in the digestive tract – this is how the brain gets the necessary glucose over longer periods of time.
Protein: Protein consists of amino acids, which serve as building material for the messenger substances. These are also called neurotransmitters and are responsible for the transmission of information in the brain. Of the 20 amino acids, eight cannot be made by the body – they must be obtained from food.
Fat: Brain and nerve cells are padded with fatty tissue for protection. The unsaturated fatty acids, especially the omega-3 fatty acids, are important for the functioning of the brain and make up two-thirds of the fatty acids in the brain.
Vitamins: The brain needs vitamins to produce messenger substances and to protect the cells from free radicals. The most important vitamins include vitamin A, vitamin E, vitamin C and the B vitamins B1, B6, folic acid and B12.
Minerals: Minerals and trace elements are important for many tasks in the brain, especially for information transfer. Calcium, magnesium and iron are particularly important here.

This brain food provides the right carbohydrates

The brain needs about 120 grams of glucose, also known as dextrose, every day. Sweets provide this simple sugar quickly, but after the brief energy boost, the sugar level drops rapidly again. However, the brain needs a steady supply of glucose, which long-chain, complex carbohydrates provide. The best suppliers for this are:
Whole grain cereals, such as bread made from whole grain flour
Legumes such as lentils, beans and peas
potatoes
some fruits and vegetables, such as bananas
Dried fruit, muesli bars or trail mix
Especially if you put a lot of strain on your brain, you should avoid long breaks between meals: After five hours or more, the blood sugar level has dropped so much that the ability to concentrate decreases.

Good protein sources for a healthy brain

In order for our thinking apparatus to remain in top form, it also needs sufficient protein. Meat or animal products such as eggs and yoghurt are not necessarily required to cover the necessary intake. Although these are good sources of protein, you can also meet your protein requirements with a vegetarian or vegan diet. In this category, the best brain foods are:
Legumes such as lentils, beans and peas
soy products
whole grains
Nuts, especially peanuts, hazelnuts and walnuts
Seeds, in particular hemp seeds, pumpkin seeds, sunflower seeds, linseed and chia seeds
animal products such as cheese, turkey breast, beef, salmon, shrimp, low-fat quark or eggs

Brain food: foods with unsaturated fatty acids

With fats, a distinction is made between saturated and unsaturated fatty acids. Saturated fatty acids are mainly found in hydrogenated fats (e.g. in margarine or animal fats) and should be consumed with caution.

Above all, our body and brain need unsaturated fatty acids, which are divided into monounsaturated and polyunsaturated fatty acids. The polyunsaturated fatty acids are also called essential fatty acids. The best suppliers of these healthy fatty acids are:
Nuts, especially walnuts and Brazil nuts
almonds
high-quality vegetable oils, for example rapeseed oil, linseed oil, walnut oil or soybean oil
Seeds, in particular hemp seeds, cashew nuts
fatty fish such as salmon, mackerel, eel, herring, tuna or sardines

Vitamins for the brain – the best foods

The various vitamins are important for the human organism and are also needed in many places in the brain. Vitamin A, beta-carotene, vitamin E and vitamin C protect against free radical damage. The B vitamins are crucial for the metabolism of messenger substances and the ability to concentrate. You can meet your vitamin requirements with the following foods:
Vitamin A: Dark green, yellow, and red fruits and vegetables (such as carrots, squash, sweet potatoes, corn, peppers, tomatoes, spinach, broccoli, or apricots) and some animal products (especially liver, butter, cheese, egg yolks, and oily fish)
Vitamin E: Cereals, wheat germ, nuts, seeds, vegetable oils and eggs
B vitamins B1, B6 and folic acid: whole grains, wheat germ, nuts and seeds, legumes, potatoes, cabbage, vegetables, fish, cheese
More information: vitamin B1, vitamin B6, folic acid, vitamin B12
Vitamin C: peppers, citrus fruits, kiwi, berries, sea buckthorn, potatoes, rosehip

The most important minerals – this brain food provides them

The most important minerals for the brain include calcium, magnesium and iron. These all have different functions for the brain.

Calcium: Vegetables (kale, broccoli, fennel, Chinese cabbage), nuts and seeds (poppy, sesame, almonds, hazelnuts), whole wheat bread, milk and dairy products
Magnesium: Vegetables (Brussels sprouts, kale, kohlrabi, broccoli, spinach), legumes, whole grains, brown rice, cocoa, nuts and seeds
Iron: Legumes, oat flakes, nuts and seeds (pumpkin seeds, sesame, pistachios, linseed), vegetables (spinach, broccoli, lamb’s lettuce, rocket), sugar beet syrup, wheat germ, currants, meat, fish

A healthy brain through diet and lifestyle

So it’s true: some foods can rightly be labeled “brain food”. In particular, nuts and seeds, high-quality oils, legumes and fresh vegetables are important for the brain – be it for the right fatty acids, sufficient protein intake or the necessary vitamins and minerals.

Nevertheless, you don’t have to analyze each nutrient individually and adjust your food accordingly by gram: With a balanced diet, you usually provide your body with all the nutrients it needs. It should be colourful, diverse and varied. Include various seeds, nuts and germinated sprouts as well as whole grain products and legumes in your diet and combine them with as many fresh vegetables and fruits as possible.

However, a healthy lifestyle does not stop with nutrition: Sufficient exercise and lots of fresh air are just as important as a positive attitude and relaxation. You can also train your brain in a targeted manner and keep it fit. Meditation and mindfulness exercises have also been shown to promote a healthy body and mind.

If you want to make your own cough syrup, you should read our tips. In this way, a very good and helpful juice can be made. We have collected 4 ways to make your own cough syrup.

Cough syrup from the pharmacy usually also has some side effects. Therefore, more and more home remedies are in demand. You can make a good cough syrup yourself with our tips and know exactly what it contains.

Cough syrup is sometimes a must

Cough syrup is sometimes just necessary. Because often a persistent cough torments. The mucus doesn’t want to come off and you can’t relax. Of course, you could also simply get a cough syrup from the pharmacy, but this is usually associated with side effects. This is not the case with natural remedies and home remedies unless you are allergic to a substance. Even our grandmothers made their own cough syrup so that the problem quickly resolved itself.

For a time conventional medicine was heavily relied upon, but now we are in a state of transition. People understand more and more that you can try home remedies first or that normal medicine must be taken in any case for certain diseases. But if you have a cough, you can first try to fight it with homemade cough syrup. If the homemade juice doesn’t help, you can always go to the doctor and rely on conventional medicine. Especially with a cough that is just beginning, homemade cough syrup is often a great help.

1) Make your own cough syrup with onion juice

A good home remedy for dry cough is onion juice. Onion juice is very popular, even with children. With this, you cut onions into pieces or slices and put them in a container that can be closed. A good portion of sugar is added to this and the whole thing is stirred again and again. As soon as a liquid settles on the floor, take a teaspoon of it every half hour. The cough syrup should be closed so that the refrigerator does not start to take on the smell. Onions are anti-inflammatory, loosen mucus quite well and calm the urge to cough. Anyone who tries it will quickly be amazed.

2) Thyme, Peppermint, and Sage

A lot can also be achieved with thyme, peppermint, and sage. This is boiled with a liter of water, a handful of the herbs at a time, then the tea is strained and the brew is additionally sweetened with honey. Honey has a calming effect on the cough. You drink the tea over the tea with small sips and you will see that the special cough syrup works very well.

3) Own cough syrup with anise

If you like anise, you have another option for a good cough syrup. The anise is crushed and three teaspoons of it are mixed with 2-3 teaspoons of thyme. Half a liter of water is poured over the whole thing. After 5 minutes of steeping time, lemon and honey are added to the brew. Take this now and then throughout the day, preferably a teaspoon every hour, and the cough should stop.

4) Homemade cough syrup with black radish

Black radish can also be used for homemade cough syrup. This is halved and hollowed out. Then the two hollowed-out parts are filled with honey. This must now steep for 12 hours, ideally in the refrigerator in summer. After the 12 hours, you then take a tablespoon of the cough syrup daily. This is stored in the refrigerator and should bring an improvement after 2 days. Few people take this cough syrup due to the fact that it has to stand for so long before it can be used. But it is an effective home remedy for coughs.