Tag

yourself:

Browsing

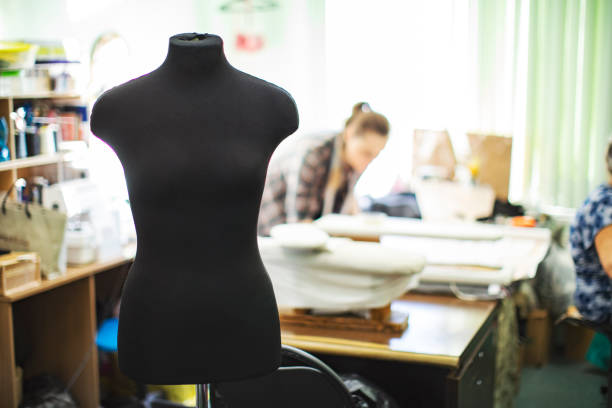
Tailor’s dummies are the be-all and end-all for people who like to tailor and sew themselves and form the basis for creative sewing work. Both professionals and amateurs work with appropriate tailor’s dummies in order to be able to mark out their sewing work in the best possible way.

Especially if a direct fitting is not possible. But finding the right tailor’s dummy for you and your sewing skills is not always easy and requires a number of criteria to be taken into account.

Only a tailor’s dummy makes it fit perfectly

If you want to make sure that the tailoring result is as accurate as possible when sewing yourself, you will probably not be able to avoid buying a tailor’s dummy. Because in most cases, a flesh-and-blood person is not always available for fitting.

A tailor’s dummy is indispensable for sewing work because tailors can use it not only to check and plan their patterns but also to drape the fabrics and pin them out for sewing. You don’t need a dressmaker’s dummy for smaller jobs like patching small holes in T-shirts or repairing loose stitches and pulling threads.

When choosing a suitable tailor’s dummy, consumers should pay attention to a number of criteria, such as the dimensions of the dummy or whether the dummy has various adjustment and movement options. The cost of a tailor’s dummy can also differ significantly from one another and depend, among other things, on the material properties.

Adjustable dress form

Anyone who counts sewing as a permanent hobby or who tailors professionally usually needs an adjustable tailor’s dummy since the sewing work is largely intended for different people. However, if you primarily want to tailor for yourself, you will also be happy with a fixed tailor’s dummy to create your own individual garments. Long-term use of tailor’s dummies works best with an adjustable variant since the dimensions of many people do not remain constant over time.

Before purchasing, it is highly advisable to take the measurements of the person in question so that the choice of the appropriate bust size is not based on pure estimates. The selection of models of tailor’s dummies is very large with most suppliers, there are female and male busts, but also children’s torsos for children’s clothing. Some tailor’s mannequin manufacturers even offer models for maternity wear and elaborate designer mannequins.

Pay attention to the material properties

Earlier tailor’s dummies were mainly made of wood and were very robust. Most commercial dolls today are made of polyurethane foam or Styrofoam. Ideally, the cover of the doll should be removable and therefore washable so that new patterns or fabrics do not get dirty.

When it comes to choosing colors, light colors are ideal, as the marked patterns stand out better with light tones. Otherwise, the look of the tailor’s dummy is a matter of taste, many dummies are also used as decorative elements if the dimensions no longer match.

Instructions for cooking plum jam with lots of useful tips and delicious recipes for making plum jam yourself. Now make grandma’s plum jam yourself quickly and easily.

Almost nothing looks as good on bread, on pancakes, or in baked goods as tasty plum jam. When is it “pure”, when “normal” and what is the best way to prepare it? Plum jam is a small delicacy that stands out from conventional types of jam in its very own way.

The sticky-sweet plum puree is prepared differently, is much thicker than other “jams” and makes it not only wonderful on breakfast sandwiches, but also in baked goods, on pancakes, or on American-style pancakes.

Simply make plum jam yourself

But how exactly do you make a delicious porridge out of a few ordinary plums? The first trick is that the cooking time can be up to an hour at best. Of course, the plums melt much faster at the highest temperatures – but the aroma is lost in the process. Cooking it down quickly is not recommended for really good mush. So give yourself and your project time.

The basic recipe for the plum jam preparation

There are differences when making plum jam yourself. There is a “normal” and a “pure” plum jam and many more variations. However, since these usually only differ in different ingredients that are added or not, we leave them out.

The most well-known way of preparing plum jam is the “normal” way. With this, the fruits are first cored, extensively chopped up, and mixed well with sugar. The amount of sugar required is at least a quarter of the weight of the fruit used. In other words: If 500 grams of plums are to be boiled down, you should add at least 125 grams of sugar.

Even before the stove is turned on, the typical standard spices should be added: cinnamon and cloves. As an example calculation, with our already mentioned 500 grams of plums, it would be half a teaspoon each of cinnamon and cloves.

Interesting plum jam recipes

  • 478 recipes at chefkoch.de
  • Making plum jam in the oven
  • Prepare plum jam without sugar

Useful tips for cooking delicious plum jam

Incidentally, the puree will be more aromatic if you use more ripe or even overripe plums. However, the amount of sugar required is reduced here, since ripe plums have a much higher fructose content than normal ones. In order to avoid bitter mush, however, you should not completely avoid sugar. In any case, it should be one-fifth – based on the amount of fruit.

If you would like to try small, technical spice modifications, you can add a little vanilla. However, this taste is very peculiar and therefore really only recommended for fans of the silky sweet pod.

The so-called “pure” plum jam is a matter of taste. It is mainly known in Mecklenburg-Western Pomerania, but also has many friends in the rest of Germany. No spices are used in this one. Only the usual amount of sugar, already mentioned, is added.

Proper storage of plum jam

Storing plum jam is really easy. Once boiled, the delicious porridge is extremely stable and often keeps for several years without refrigeration. Slightly cooler storage, for example in the cellar, is definitely recommended. This benefits the aroma.

Of course, the preserving jars should be closed well and airtight. When stone pots are open, the surface should be covered with a cellophane cloth. To be on the safe side, this can be soaked in rum. Opened jars are best stored in the fridge and consumed quickly.

The special thing about plum jam is that it becomes even more aromatic and special in taste the longer it is stored. It is therefore advisable to store freshly canned mush for a few weeks. Of course, the plum jam can also be eaten directly.

Making chocolate yourself is made easy with the instructions for making chocolate at home. Everyone knows chocolate! But hardly anyone is aware of how easy it can be made with just a few ingredients. Best of all, chocolate making is easy to do at home. You can be making and eating delicious chocolate in just a few hours!

Ingredients for the chocolate

  • 200g cocoa butter
  • 2 tablespoons cocoa powder
  • 2 teaspoons agave syrup

Accessories for making the chocolate

  • silicone mold
  • Key
  • spoon

Recipe for making the chocolate

First, you put about 200g of cocoa butter in a bowl and start to stir it. Gradually add the cocoa powder and stir until you get a liquid consistency. Then you add about 2 teaspoons of agave syrup and stir everything until you get a liquid chocolate-like mass. Alternatively, you can use honey instead of thick juice.

Individual decoration of the chocolate

Now comes the part where you decide how your chocolate will taste afterward. In this step, you put the desired amount of your extra ingredients in the bowl and distribute the whole thing. Fruits such as raisins or cranberries are suitable as ingredients, but you can also add nuts or slivers of almonds to your chocolate and decorate it according to your own individual taste.

At this point, you can let your imagination run wild and add whatever ingredients you want later on in your chocolate. There are no limits, you can also create your own combinations, e.g. with pistachio nuts or salt. You decide how your chocolate will look and taste afterward!

When you’re done and your chocolate is fully mixed and runny, pour all of the liquid into a mold of your choice. Of course, you can use any mold you have in your kitchen for this. In order to be able to easily remove the chocolate from the mold later, we recommend using a silicone mold with the appropriate areas the size of a praline. So you can easily share your chocolate later with your friends or give it away.

Now your work is finished and you can put the silicone mold filled with liquid chocolate in your fridge. The cold that prevails there hardens the chocolate and you can eat it after just a few hours.

Enjoy the chocolate

Once the chocolate has hardened, we simply push it out of the silicone mold. Homemade chocolate makes a great gift because individual tastes can be accommodated by adding the ingredients during production. The chocolate must be kept in a cool place for longer storage!

Tips and instructions for making popcorn yourself at home. The best tricks and popcorn recipes for making popcorn yourself in a pot on the stovetop.

Popcorn is popular and delicious when a long evening of TV is imminent or a snack is missing for the party. And without much effort and fuss, this delicious treat can be prepared very quickly at home.

Tips for making popcorn yourself

Below are the best tips and tricks on how to quickly and inexpensively prepare popcorn that is tasty and fresh. Great cooking skills and complicated ingredients are not required for this. You need dried corn kernels, some cooking oil, and, depending on your taste, sweet or savory ingredients. No special machine or device is required other than a regular saucepan with a matching lid and a stovetop. And if you don’t have a cooking pot at hand, you can also prepare the popcorn in a pan with a lid.

How is popcorn actually made?

Popcorn is made from corn kernels. The corn kernels contain water and also some oil. If the corn kernels are now heated in the pot, these components change. From the liquid water and oil version in the grain, the components suddenly become gaseous. The corn husk breaks open due to the heat input. And with this small popping up, each individual kernel of corn automatically expands and the popcorn is ready.

In order to get a good result quickly, a pot temperature of around 180 degrees Celsius is required. Then the corn kernel shell tears open and water vapor escapes from the corn kernel. The corn starch gets out of the grain and offers a well-known popcorn shape.

Easy popcorn recipe for everyone

For the basic popcorn recipe, put some cooking oil in a saucepan. A small amount of cooking oil that wets the bottom of the pot is sufficient. Then put the corn kernels in the oil. Then you should definitely put a suitable lid on the pot. This is necessary so that the finished popcorn does not pop out of the pot when it pops up.

Then turn on the stove and heat the pot until a little over half the corn kernels have popped up. Most of the time, the grains pop up very quickly. For this reason, it is better to stay at the stove. After popping up, you should immediately turn off the heat supply. You must immediately remove the finished popcorn from the stovetop so that it does not burn in the hot pot.

Make sweet or savory popcorn yourself

Depending on your taste, the finished popcorn can now be seasoned. Mostly sweet variants with sugar are chosen. But hearty seasoning, for example with paprika, chili, tomato, or curry, is also possible and popular. It is important that the popcorn is still warm when it is seasoned. This way, the selected ingredients stick better to the popcorn.

A little tip for the slimline

The popcorn can be prepared very low in calories. If, for example, a coated pot is selected for the preparation, then no cooking oil needs to be added. The corn kernels pop up even without the addition of fat. However, the popcorn should also be seasoned heartily. Because all sweet variants with sugar or caramel contain a lot of calories.

Make chocolates yourself? Simple, tasty, with heart and soul. That’s how you spoil your loved ones. That’s how you spoil yourself. Clever chocolate recipes to imitate and try out.

In the following, you will learn everything that is important and useful for making chocolates. Why do they taste so good? How to make them yourself easily and simply. Which tips and tricks make the result even more satisfying and numerous tasty praline recipes.

Chocolates to indulge in

Making chocolates is already one of the supreme disciplines of hobby bakers and kitchen heroes. But it is also your pleasure. But it is not that difficult to want to make chocolates yourself. The nice thing about it is that pralines, in contrast to cookies, biscuits, cakes, and tarts, have a much longer shelf life and are edible. So you can let off steam in the kitchen for a whole weekend and always have small and romantic gifts for your loved ones and friends for the next few weeks. Have the courage to try. The tasty, delicious results come all by themselves. It is also a great idea for homemade gifts for Christmas.

Tools, materials, and basic equipment

If you want to make your pralines clean and tidy, you can’t avoid a praline grid and a praline fork. For the first attempts, a wire rack and fork will certainly suffice… but honestly? They are just stopgap measures that unnecessarily complicate work and make it less clean. With a praline fork and praline lattice, on the other hand, you can easily “ignite” any homemade praline. A pot for heating the couverture is also essential.

What’s inside?

If you talk about wanting to produce pralines, you are primarily talking about different fillings that are filled into hollow praline balls. At least these are the classic chocolates. This filling is called can ache and usually consists of lots of cream and couverture as the basic ingredients.

Then it depends on the respective taste. Because the ganache can be upgraded with any alcohol such as rum, whiskey, or Marc de Champagne, refined with special flavors such as pistachios, coconut flakes, coffee, chili, vanilla, or spiced up with fruit components made from raspberries or apricots. Depending on the flavor additive, the required amount of butter also varies. Because this determines the respective fat content of the praline.

Making chocolates – the mass makes the difference

In order for the praline production to be successful, you need a good base: the can ache. To ensure that this is correct, we have put together some important tips and tricks.

  • The mass hardens very quickly. We, therefore, recommend using an electric mixer to mix the individual ingredients. If you want to try it analogously with your own physical strength, you will quickly reach your limits. In addition, the result is not as creamy and smooth.
  • The color of the chocolate mass determines the intensity of the taste. The best indication of this is the dried chocolate on the edge. If it is very dark, the cocoa content is very high. The lighter the chocolate, the higher the milk content.
  • Sometimes the mass just doesn’t have the desired consistency. If you want to let your praline mass harden a bit, you can put the mass in the fridge. We recommend a minimum of 3 hours, but you can also stay overnight. Then whip the mass up again. This provides additional suppleness.

Shelf life of homemade chocolates

We often ask ourselves how long a praline can keep for so long. You can’t really say that with any certainty. First and foremost, the respective ingredients decide how long the praline can be enjoyed.

Keep in mind that most ganache contains cream. This limits the shelf life of the praline to a good two weeks. In order to guarantee this period, however, the praline must be stored at 15 to 18 degrees … preferably in the dark. In terms of taste, a reduction in the aromas can definitely be determined after two weeks.

Of course, it is also crucial that flawless ingredients are used and that work is carried out as hygienically as possible. The shelf life can also be extended in this way. Sterilization of the ingredients also increases shelf life. It is advisable to heat the cream just before its boiling point, instead of just heating it to 70°C, as many praline recipes recommend. But be careful: If you heat your cream to over 70°C, you lose taste … at least the flavor is changed. In return, you have less to worry about mold growth.

The alcohol content also determines the shelf life. The more alcohol the chocolates contain, the longer they will keep. Classic liqueur pralines can have a shelf life of up to 6 weeks. But here again: the taste diminishes over time. The best thing to do is to produce less and always ensure fresh supplies, then you don’t have to worry about shelf life … and you can try out many more new praline recipes.

Lots of useful tips for making pasta dough and making pasta yourself. With instructions on how to make your own pasta. Now conjure up your own pasta with your own homemade pasta dough.

Just make your own noodles

They are on everyone’s lips and almost everyone knows them: pasta. They are among the most popular side dishes and simply make connoisseurs happy. Noodles can be prepared quickly and are a taste experience in salty and sweet forms. We usually enjoy industrially produced pasta. Fresh pasta that tastes like it was made by mom or grandma is rare. Freshly made noodles are sold commercially as a delicacy. The price is correspondingly high. But making pasta yourself is not rocket science. With a little patience and practice, anyone can make their own delicious pasta dough.

The ingredients for the pasta dough

For a good pasta dough weighing approx. 550 g, the following ingredients should be ready.

  • 300gr wheat flour type 405
  • 200gr durum wheat semolina
  • 6 egg yolks
  • 1 egg
  • 2 teaspoons oil
  • 3 tablespoons of water
  • and a pinch of salt

This amount makes about four servings when cooked.

The tool for making pasta yourself:

For kitchen tools we need:

  • a cooking spoon
  • a large mixing bowl
  • a teaspoon
  • and a tablespoon

The steps of the DIY pasta

Place the flour and semolina in a mixing bowl. Make a small well in the middle of the mixture with your hands and pour in the yolks and the whole egg.

Now add the oil and salt. If you are not afraid of raw eggs in the dough and thus of salmonella poisoning, you can try the raw dough and possibly spice it up a little to taste. Since the noodles will later be cooked in saltwater, the seasoning should not be overdone. Finally, add the water to the dough. Muscle strength is required now. The dough must be kneaded for at least a quarter of an hour. The dough is good when it rolls smoothly into a ball and doesn’t crumble.

If despite all caution, it crumbles, a tablespoon of water and a few drops of cooking oil can quickly restore the elasticity of the dough.

When the dough is well wrapped in cling film and has been flattened with muscle power, it can be placed in the fridge and left to rest for about half an hour. The break should really be observed. If the dough is not really cool, it can become sticky and processing with a great result is not possible.

The processing of the pasta dough

After the dough has rested in the refrigerator and is now back on the work surface, further processing depends on which pasta is to be made.

Cannelloni: For cannelloni, the dough must be rolled out extremely thinly on a floured work surface. If you want to save flour, you can try rolling it out on baking paper or a silicone mat. Then cut the thin dough into squares and shape it into small rolls. There are various ideas for tasty fillings on the Internet.
Ribbon noodles: For ribbon noodles, roll out the dough wafer-thin and then cut into thin strips with a sharp knife. It is important: Dust the dough well with flour and not place the cut noodles on top of each other.
The dough should be wafer-thin because the eggs it contains give the dough a powerful lift. Even if the batter is so thin that we can almost see through it, it can still be too thick for certain pasta dishes.

No matter which pasta dish you choose, the basic pasta dough mentioned above is suitable for all pasta shapes.

The preparation of the noodles

Last but not least, tips for cooking pasta should be observed. So let the noodles cook in a pot of boiling water for about three to four minutes. Add a teaspoon of salt to the cooking water. Please no oil in the water. The oil in the cooking water closes the pores of the pasta. You can therefore no longer absorb sauces on the plate.

Working with salt dough is a lot of fun. Great decoration can be created at cheap prices. The salty dough has to be really easy to work with. We show how easy it is.

Children love the salt dough to play with and paint, as do many adults. It is important that this is produced in a healthy way and we would like to show you how this can be done.

The salt dough only needs four ingredients

You only need four ingredients to make the salt dough yourself. Children love this salty dough because they can finally muddle and do handicrafts. Wonderful works can be created with salt dough. Toys can be made, pendants, decorations, and even ashtrays if you have a little patience. Salt dough definitely encourages children’s spirit of discovery.

Basically, everyone has already tinkered with the dough, you just have to make sure that you make good salt dough. For the perfect salt dough, you only need 2 cups of wheat flour, preferably type 405, plus 1 cup of salt, 1 teaspoon of vegetable oil, and then another cup of water. Everything has to be mixed well and you can knead the dough perfectly and use it for yourself. Children also have a lot of fun here, many a child loves to knead the dough until it is perfectly smooth. If the dough is still a little sticky, add a little more flour.

Another salt dough recipe

Yet another recipe for making salt dough would be 1 cup flour type 405, 1 cup potato starch, 1 cup salt, 1 cup water, and 1 teaspoon vegetable oil. The whole thing is kneaded well and can be used immediately. You could also just use potato starch if you want the items to last a long time.

Important for the salt dough

Salt dough is best stored in airtight containers. You can always take out as much dough as you need. The dough can be kept fresh in the refrigerator for up to several weeks without drying out. So children could do a little tinkering every day. By the way, the salt dough doesn’t always have to go in the oven. It can also be air-dried. But this can take several days.

The oven is a bit faster there. But here, too, one should proceed with caution. It is best to set the oven to 50 degrees and let the finished works of art bake for an hour. The work then has to cool down and harden. Some people also set the oven to 120 degrees, but then the salt dough becomes darker, but also harder. Cracks can also be avoided in this way, which are annoying if you set the oven too hot.

Paint or pre-dye salt dough

If you want to let off steam creatively with the salty part, you can color the dough in advance or paint the finished works later. Children usually enjoy it more if they are allowed to paint the works of art later. If you want to color the dough, it is best to use food coloring or Easter egg coloring. Even cocoa can be used or beetroot. Curry and other spices also add color to the salt dough. After baking and cooling, the salt dough can be painted with watercolor, poster paint, or even acrylic paint.

Banana juice is sweet, delicious and healthy – and easy to make yourself. We’ll show you a simple recipe for the creamy top energy supplier made from bananas.

Banana juice: nutritional values ​​and vitamins

Bananas are basically very healthy and contain a number of valuable vitamins and minerals. However, they also contain a lot of fructose – which is why you should only drink banana juice in moderation.

100 milliliters of banana juice contain the following nutritional values ​​on average (source):
Calories: 60 calories
Carbohydrates: 14 g (of which sugars: 14 g)
Protein: 0.3g
Fat: 0.1g
Dietary fiber: 0.4 g
With 60 calories per 100 milliliters, banana juice is a high-energy drink. A larger portion of banana juice can also replace a snack between meals. However, banana juice is not suitable for quenching your thirst – water and unsweetened tea remain the best choice.

When it comes to vitamins, banana juice scores particularly well with vitamin B6, which has a positive effect on the immune system and metabolism. A banana covers almost a third of the daily requirement of vitamin B6. However, the vitamin can also be found in many other foods.

Folic acid, potassium, magnesium and manganese can also be found in banana juice. We have summarized more detailed information on the health effects of bananas in a separate article.

Make banana juice yourself: recipe instructions

You can quickly make banana juice yourself at home. However, since bananas are mostly imported from Latin America, the exotic fruit does not have a good ecological balance – and should therefore not be on your daily menu. Also make sure to buy bananas that are organic and fair trade. Because banana plantations are often criticized for dangerous pesticides that are regularly used in conventional cultivation.

For two glasses of banana juice you need the following ingredients:
2-3 ripe organic bananas
400 ml cold water
2 tbsp lemon juice
1 pinch of salt
optional: some honey, agave syrup or stevia to sweeten
Preparation:
In a blender or tall container, blend the ripe bananas with the water, lemon juice, and pinch of salt. Tip: Put the bananas in the fridge for an hour beforehand – this way your juice will be nice and chilled later.
Mix the ingredients to a homogeneous liquid.
According to your own taste, you can sweeten it with a little honey, for example, or refine the juice with vanilla.
Tip: Banana juice also tastes delicious when you combine it with other fruit juices, such as pineapple, currant, apple or cherry juice. You can also use banana juice to prepare delicious cocktails. It goes well with cocktails based on rum and cream, for example. A mixed drink made from wheat beer and banana juice is also popular among beer lovers.

Yogurt is delicious and healthy. There is a huge selection on the supermarket shelves. But making yogurt yourself is also very easy.

Just make your own yogurt

The advantage: the yogurt ingredients are free of artificial flavors and preservatives. But you can refine your homemade milk product with a wide variety of ingredients such as almonds, honey, or fruit according to your personal preferences. But there are many more yogurt recipes. We will tell you how the in-house yogurt production works. You will be amazed at how easy it is to prepare.

There are several ways to be able to make yogurt. For newbies, it’s probably easiest to use a store-bought probiotic dairy product to start with. Once complete, simply save some of the product to grow your own yogurt cultures in the future. But you can also use store-bought cultures. You can then make your own tzatziki with dehydrated yogurt.

Yogurt cultures

The following cultures are particularly suitable for yogurt production and can ensure a healthy intestinal flora:

  • Lactobacillus acidophilus
  • Bifidobacterium lactis
  • Streptococcus thermophilus

You also need milk, milk powder, and optionally inulin, which provides more creaminess. You don’t necessarily need a yogurt maker, which is often mentioned in recipes, to be able to make your own yogurt.

Yogurt production without a preparer

Ingredients:

  • 1 liter of milk
  • 150g natural yogurt or optionally a pinch of yogurt cultures
  • milk powder
  • optionally a pinch of inulin

Step 1:

The milk must first be boiled to kill germs. Then let the milk cool down to around 50 degrees.

Step 2:

Now you can stir the natural yogurt or the cultures into the milk. If you want to make a firm yogurt, use about four tablespoons of powdered milk. And to increase the creaminess, you can use prebiotic fiber inulin. Inulin is also a useful source of food for the good intestinal bacteria and this, in turn, leads to a healthy intestinal flora.

Step 3:

The finished milk product can now be filled into jars and then placed in the middle rack of the oven at 50 degrees for 30 minutes. It is important that you no longer move the glasses.

Step 4:

After 30 minutes you can switch off the oven. But the glasses are left in the oven overnight. The next day the jars are closed and can be put in the fridge. You should have used up the yogurt within 3 to 4 days.

Make lactose-free yogurt

To produce lactose-free yogurt, the yogurt ingredients hardly change. Simply use goat’s milk or soy milk instead of cow’s milk.

Yogurt smoothie recipe with raspberries

Ingredients:

  • 250 grams of raspberries
  • 300 grams of homemade yogurt
  • 1 packet of vanilla sugar
  • 40 grams of sugar

Step 1:

You can use either fresh or frozen raspberries. Fresh fruits should be washed first. If you are using frozen raspberries, allow the fruit to defrost a little.

Step 2:

Now puree the raspberries and then strain to get rid of the pits.
Half of the mark can now be filled into glasses.

Step 3:

The other half is stirred together with yogurt and sugar and then poured onto the raspberry pulp in the glass. You should make sure that both components do not mix with each other in order to maintain the two-color effect.

Yogurt Ginger Dressing

Ingredients:

  • 20 grams of ginger
  • 150 grams of yogurt
  • 2 tbsp lime juice
  • 1 tablespoon apricot spread
  • 1 pinch of salt
  • chili
  • cane sugar

Preparation

  1. Peel ginger and cut it into small cubes
  2. Mix all the ingredients well and you’re done.
  3. The dressing is wonderfully refreshing and goes well with leaf salads and raw vegetables.

Spices like lemon pepper give many dishes the right kick. In our instructions, we will show you which dishes are best refined with lemon pepper and how you can make it yourself at home.

Lemon pepper is a delicious spice mix that you can use to refine many dishes. You can buy this spice mixture ready-made in the supermarket. However, you should always make sure that only lemon zest and pepper are listed on the list of ingredients. Because many lemon peppers offered in the supermarket are actually more seasoned salts. The main ingredients are salt, sugar and sometimes also glutamate. The actual spice is only contained in small quantities.

Also make sure that it is definitely the right lemon pepper. Indonesian lemon pepper is a type of pepper related to Szechuan pepper and is a completely different spice.

Using Lemon Pepper: Application in the kitchen

The freshness of the lemon paired with the spiciness of the pepper goes particularly well with the following dishes:
Salads: If you love Mediterranean cuisine, you should definitely stir a pinch of lemon pepper into your next potato, tomato or carrot salad.
Grilled vegetables: Summer vegetables such as zucchini and eggplant taste particularly delicious if you marinate them with a little lemon pepper before grilling.
Fish dishes: A pinch of lemon pepper after cooking makes white fish really aromatic. Fish soup can also be tasted excellently with it.
Poultry: Chicken thighs marinated in lemon pepper taste great on the grill in the summer.
Your creativity knows no limits. If a dish is missing the icing on the cake, lemon pepper is usually the right choice. If you like baking Christmas cookies, you can even add a pinch of lemon pepper to your shortbread dough.

Make lemon pepper yourself – instructions

You can also easily make lemon pepper yourself:
Remove the outer zest of four unwaxed organic lemons with a lemon or parmesan grater. Peel off only the yellow layer on the outside. The white middle layer tastes bitter and gives the finished lemon salt an unpleasant taste.
Add exactly the same amount of coarsely ground black pepper (by volume) to the lemon zest. If you don’t have a pepper mill, you can coarsely grind the pepper by putting it in a freezer bag and crushing it with the rolling pin.
Dry your lemon salt for an hour in the oven or dehydrator at 50 °C (circulating air). You don’t have to preheat the oven for this.
If you want, you can also turn your lemon pepper into a seasoning salt. To do this, mix two teaspoons of coarse sea salt flakes into your finished spice mixture.