Tag

yourself:

Browsing

Summer, sun, sunshine – and ice cream! This vegan ice cream simply tastes like summer: fresh mint, crunchy chocolate, and creamy fine ice cream. We can’t get enough of this green avocado ice cream. And you don’t even need an ice cream maker. It’s so easy to make your own avocado ice cream.

Make your own avocado mint ice cream

You’ve certainly never eaten ice cream like this: fresh mint gives the creamy-green avocado ice cream a particularly refreshing note – and really helps to cool off on hot days. The crunchy pieces of chocolate give a certain crunch effect. And on top of that, it’s also vegan ice cream!

To make the avocado ice cream yourself, you only need a few ingredients: coconut milk, avocados, mint, chocolate, and possibly some agave syrup. Although avocados have a relatively high number of calories and a high-fat content, healthy polyunsaturated fatty acids predominate.

Mint and lemon provide vitamin C and at the same time provide a fresh kick. The whole thing is also done in no time at all: you only need 15 minutes until the ice is in the cooler – but then you have to wait. But anticipation is often the best joy!

We fell in love with the creamy avocado ice cream – just try it out and enjoy the fresh licking fun on hot days.

The recipe for the avocado mint ice cream with chocolate

For 6 servings

  • 1 can of coconut milk
  • 3 ripe avocados
  • 2 tbsp lemon juice
  • Agave syrup (optional)
  • fresh mint (or mint extract)
  • 100 g chocolate drop (or to taste)
  • Besides that
  • cling film

Preparation steps

  1. Open the coconut milk and scoop out the solid part at the top – don’t shake the can first – and pour it into a large bowl! Using a hand mixer, beat the solid coconut milk until fluffy, and then pour into a cake or casserole dish.
  2. Split the avocados, pit and scoop out the flesh, and place in a food processor. Blend together with the lemon juice, agave syrup, and mint leaves until smooth and creamy.
  3. Put the avocado mixture on the fluffy coconut cream, sprinkle the chocolate chips over it, and mix the mixture carefully but evenly.
  4. The surface of the mass should be relatively smooth. Now place cling film on top and press lightly so that there is no air between the film and the ice cream mass. Place the ice cream in the freezer for at least two hours.
  5. Let it thaw and enjoy.

Do you have carrots? Sure, we have – in the form of golden brown carrot cake waffles! Instead of cakes, cupcakes, and the like, we don’t serve the spring classic out of the oven, but out of a waffle iron. Together with the creamy frosting, this combination has an unbeatable taste and is ready in 30 minutes. EAT SMARTER has the simple recipe for making carrot cake waffles yourself!

Sweet carrot cake from the waffle iron

Carrot cake, carrot cake, or carrot cake: The sweet specialty is world-famous under many names and is served in just as many different forms. In addition to cakes, cupcakes, and muffins, the classic can also be prepared as a waffle – practical to take away and quick to make. With a large blob of frosting on top, the carrot cake waffles taste simply heavenly!

Thanks to the wholemeal spelled flour used and the complex carbohydrates and fiber it contains, the waffles fill you up for a long time and keep your blood sugar level constant. This carrot cake variant is a great alternative for breakfast, instead of cake in the afternoon or for Easter brunch.

Make carrot cake waffles yourself

The ingredients:

  • 200 g butter (room temperature)
  • 100 grams of sugar
  • 6 eggs (size M)
  • 300 g almonds (ground)
  • 80 g wholemeal spelled flour
  • 1 tbsp baking powder
  • 1 tsp cinnamon
  • 1 pinch of salt
  • 300 g carrots (grated)
  • 500 g low-fat quark
  • 150 g natural yogurt
  • 50 g powdered sugar

The preparation:

  1. Cut the butter into small pieces and, using a food processor (or hand mixer), cream together with the sugar in a large mixing bowl.
  2. Now mix all six eggs with the butter mixture one after the other.
  3. In another bowl, mix the ground almonds, wholemeal spelled flour, baking powder, cinnamon, and salt and mix thoroughly with the egg mixture.
  4. Now stir the grated carrots into the batter and let it swell for about ten minutes. Meanwhile, heat up the waffle iron.
  5. Now put the batter in portions in the waffle iron and bake for about five minutes until golden brown – allow to cool.
  6. In the meantime, prepare the frosting: mix the quark, yogurt, and icing sugar together in a bowl until you get a creamy mass, and serve with the carrot cake waffles.

Banana Bread or Cheesecake: Which is Better? Both together! Because we just couldn’t decide whether we should devote our DIY to banana bread or cheesecake, we simply combined the two delicious types of cake and the result was: super moist banana bread with a cheesecake topping.

Cake classics combined

Admittedly, this cake variation is not particularly low in calories. But hey: Sometimes you just have to treat yourself to a sweet treat – especially when it tastes as incredibly delicious as this banana bread with a cheesecake topping.

As the name “Banana bread” may already suggest, it is mainly ripe bananas that disappear in the dough. They are particularly sweet and give the cake an extra portion of juiciness. The yellow fruit also provides B vitamins, some vitamin C, lots of potassium, and a good portion of magnesium. Paired with the creamy cream cheese topping, it’s a dream come true!

Banana bread with cheesecake topping

The ingredients for the banana bread:

  • 3 ripe bananas
  • 4 tbsp canola oil
  • 1 egg (size M)
  • 100 g raw cane sugar
  • 1 vanilla pod (Mark)
  • 180 g wholemeal spelled flour
  • 1 tsp baking soda
  • 1 teaspoon Baking powder
  • 1 tsp cinnamon
  • 1 pinch of salt

Ingredients for the cheesecake topping:

  • 900 g cream cheese (double cream level)
  • 1 vanilla pod (Mark)
  • 50 g powdered sugar
  • 1 organic lemon (zest)

The preparation:

  1. Preheat the oven to 180 degrees top/bottom heat. Mash the bananas with a fork. Then add the oil, egg, pulp of a vanilla pod, and sugar and mix together.
  2. Now add flour, baking soda, baking powder, cinnamon, and salt to this banana mass and mix to form a dough.
  3. Pour the batter into a greased springform pan and bake until golden brown, about 30 minutes. Then let it cool down completely.
  4. For the cheesecake topping, mix the cream cheese together with the pulp of a vanilla pod, powdered sugar, and lemon zest until creamy, and place on the banana bread. Place in the fridge for at least three hours

High in protein and low in calories: These are our Hüttenkäsetaler! Oh yes, you read that right – cottage cheese can be grilled or fried and it tastes wonderful. Our Huttenkasetaler also gets its extra portion of flavor thanks to sun-ripened cherry tomatoes and fresh garden herbs. In a quick 15 minutes, they are ready to bite on the table. Let’s go: Here is the simple recipe for making Hüttenkäsetaler yourself.

Protein bomb cottage cheese

Whether savory or sweet: cottage cheese or granular cream cheese is a great accompaniment for anyone who loves cheese and wants to keep a slim figure. Because there are already 22 grams of protein in 100 grams of the calcium-rich milk product – cottage cheese is also low in fat and calories. This makes it a healthy filler that can be served more often.

For example as Hüttenkäsetaler! Together with fruity tomatoes, spicy chives, and a little flour, small thalers are formed, which gleam golden brown in around ten minutes on the grill or in the frying pan. A low-calorie treat that’s great as a side dish or as a low-carb dinner! Make Hüttenkäsetaler yourself: Here is a simple recipe.

Make cottage cheese dough yourself

The ingredients for 8 coins:

  • 1 bunch of chives
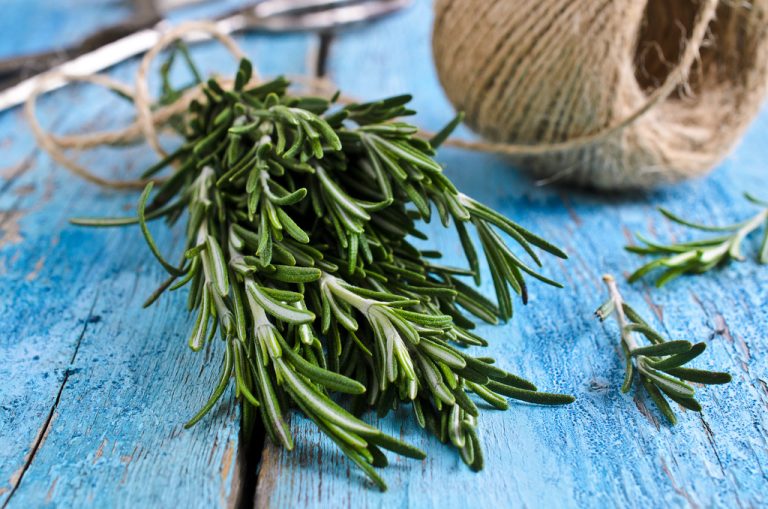
  • 4 sprigs of rosemary
  • 125 g cherry tomatoes
  • 60 grams of flour
  • 200 g cottage cheese (low-fat level)
  • Salt, pepper, and chili flakes to taste
  • 1 tbsp olive oil

The preparation:

  1. Wash and drain the chives, rosemary, and cherry tomatoes. Finely chop the herbs and finely dice the cherry tomatoes.
  2. Place the flour, cottage cheese, herbs, and tomatoes in a bowl and mix well. Season with salt, pepper, and chili flakes.
  3. Form the finished mass for the cottage cheese thalers into thalers with slightly moistened hands.
  4. Then either place the thalers on a grill-suitable, lightly oiled piece of paper or heat the oil in a pan and fry the cottage cheese thalers on both sides until golden brown. This takes about ten minutes.
  5. Sprinkle the finished Hüttenkäsetaler with fresh herbs and serve with the grilled food or enjoy as a high-protein meal on its own.

Brussels sprouts are in season and we just can’t get enough of them. So that it doesn’t get boring, we have come up with a Brussels sprouts pesto – perfect as a winter pasta dish, to give away and to keep. You can read here how healthy the homemade Brussels sprout pesto is and how easy the recipe is.

Pasta always works, pesto too. And Brussels sprouts pesto is the perfect way to celebrate winter. Brussels sprouts are a real vitamin bomb: just 100 grams cover the daily requirement of vitamin C with 155 milligrams. In addition, there are B vitamins, some potassium, zinc, vitamin K and fiber in the small balls.

Although it is slightly higher in calories than other types of cabbage because it contains relatively little water, it has almost 0 grams of fat. So figure-conscious people can also access it. In our do-it-yourself Brussels sprouts pesto, good olive oil with unsaturated fatty acids and protein-rich almonds are also used.

Ingredients for 2 glasses of Brussels sprouts pesto:

  • 300 grams of Brussels sprouts
  • 2 garlic cloves roasted without fat
  • 1 tbsp extra virgin olive oil
  • 100 g almonds (or other nuts)
  • 60 ml extra virgin olive oil
  • 25g basil
  • 1 tsp lemon juice
  • pepper from the grinder
  • Salt

Preparation steps:

  1. Wash Brussels sprouts, remove the outer leaves, and cut them into the stalk. Peel the garlic cloves. Place both on a baking sheet, and drizzle with olive oil, salt, and pepper. Bake at 200 degrees for 15 to 20 minutes.
  2. Roast the almonds in a pan. In a blender, puree the nuts, olive oil, basil leaves, lemon juice, and Brussels sprouts. If necessary, add a little water to make the consistency creamier. Season with salt and pepper.
  3. Pour into a jar, cover with a little olive oil and seal tightly. Keeps in the fridge for about a week or two.

The Brussels sprout pesto you can make yourself is an easy recipe that is perfect for winter. In any case, we wish you a good appetite!

Clever tips for making wine and instructions for making wine yourself. Become your own winemaker now and become a hobby winemaker.

The vines have also crept into private gardens for a long time, and so many people dream of not only harvesting the grapes in autumn but also of making their own real wine. It’s not about big business, but simply about enjoyment and of course the pride when you can serve the house wine to your guests.

But what do you need to make your own wine?

Not only grapes are suitable for making wine yourself, but strawberries, elderberries, plums, or blackberries can also be processed into a bottle of delicious wine. You also need sugar, yeast, and antigen. The last two ingredients are available at drugstores and are used to stimulate the fermentation process and prevent the fruit from gelling during production and leaving you with jam instead of wine. The last ingredient is caloumpyrosulfite, which is also available in drugstores.

The best way to benefit here with regard to application and dosage is from the advice of the local experts. But the right equipment is also important, which is usually already available in the household: a scale, a thermometer to check the fermentation temperature, a few bowls, and buckets, and a funnel. You also need a fermentation lock and a fermentation tube, as well as a filter cloth and a fermentation container.

Your own wine production can start

The fruit must be cleaned, pitted, and stoned before it is chopped up in the food processor or immersion blender. It is also important that all rotten spots have been removed, as these can lead to an unpleasant aftertaste. For about one liter of wine, you need two kilograms of fruit and add two and a half liters of water. The mixture is heated to fifty degrees and mixed with the anti-gel and left to rest for a day. This resting period is important for the fermentation process, even if you can hardly wait for your own wine.

For one liter of wine, you need two grams of yeast nutrient salt, half a gram of potassium pyrosulfite, and one and a half kilograms of sugar. Now the fermentation process continues, but this time a temperature of twelve to eighteen degrees is ideal. Finally, the house wine can be poured out of the fermentation vessel into bottles with a funnel and corked.

  • Accessories for wine making
  • A fermentation vessel made of plastic or glass
  • A cover for the fermentation vessel
  • A fermenter
  • A suction hose
  • A precisely tuned scale
  • A vinometer is used to measure the alcohol content of wine
  • sugar
  • citric or lactic acid
  • yeast nutrient salt
  • Pure, liquid yeast (not to be confused with the common baker’s yeast)
  • lime
  • potassium pyrosulfite

Whole wine-making sets are great for the first time, but they’re only worth buying if you plan on making wine more than once. The accessories, which you don’t have in the household anyway, are not cheap, but careful use is very important to get a tasty result.

Winemaking tips and tricks

There are a few points that you absolutely have to consider in order to be satisfied with your own wine afterward. This includes working very precisely and hygienically, starting with the preparation of the fruit. The ingredients should also not be weighed roughly, but really carefully.

There are two types of winemaking: Maceration, described above, which uses all the fruit in a pureed form. This process is easier and the wine also gets a great color. Juice fermentation uses only fruit juice, which requires a good press. No bitter substances or other flavor influences can form and the finished wine has lighter color. This type is not suitable for some types of fruit, such as bananas.

Variants for experienced hobby winemakers

Changing the type of fruit suddenly results in a completely different wine and enjoyment, so we encourage experimentation as the process itself remains the same. Have fun! In addition, note how you can make bottle corks fit and our tips for a perfect party, maybe even with your own wine.

Lots of useful tips for making pasta dough and making pasta yourself. With instructions on how to make your own pasta. Now conjure up your own pasta with your own homemade pasta dough.

Just make your own noodles

They are on everyone’s lips and almost everyone knows them: pasta. They are among the most popular side dishes and simply make connoisseurs happy. Noodles can be prepared quickly and are a taste experience in salty and sweet forms. We usually enjoy industrially produced pasta. Fresh pasta that tastes like it was made by mom or grandma is rare. Freshly made noodles are sold commercially as a delicacy. The price is correspondingly high. But making pasta yourself is not rocket science. With a little patience and practice, anyone can make their own delicious pasta dough.

The ingredients for the pasta dough

For a good pasta dough weighing approx. 550 g, the following ingredients should be ready.

  • 300gr wheat flour type 405
  • 200gr durum wheat semolina
  • 6 egg yolks
  • 1 egg
  • 2 teaspoons oil
  • 3 tablespoons of water
  • and a pinch of salt

This amount makes about four servings when cooked.

The tool for making pasta yourself:

For kitchen tools we need:

  • a cooking spoon
  • a large mixing bowl
  • a teaspoon
  • and a tablespoon

The steps of the DIY pasta

Place the flour and semolina in a mixing bowl. Make a small well in the middle of the mixture with your hands and pour in the yolks and the whole egg.

Now add the oil and salt. If you are not afraid of raw eggs in the dough and thus of salmonella poisoning, you can try the raw dough and possibly spice it up a little to taste. Since the noodles will later be cooked in salt water, the seasoning should not be overdone. Finally, add the water to the dough. Muscle strength is required now. The dough must be kneaded for at least a quarter of an hour. The dough is good when it rolls smoothly into a ball and doesn’t crumble.

If despite all caution, it crumbles, a tablespoon of water and a few drops of cooking oil can quickly restore the elasticity of the dough.

When the dough is well wrapped in cling film and has been flattened with muscle power, it can be placed in the fridge and left to rest for about half an hour. The break should really be observed. If the dough is not really cool, it can become sticky and processing with a great result is not possible.

The purchase of pasta machines and Co.

If you want to make your pasta dough, you don’t necessarily need an expensive pasta machine to roll out and cut the dough. However, it can be a great kitchen helper for the household if fresh pasta is made more often.

You can also make your own noodles with a simple, sharp knife. Anyone who is toying with the idea of ​​making their own pasta dough in the future and avoiding industrially manufactured products will definitely find what they are looking for in the large market of pasta machines.

By the way: You can also make pasta dough with other ingredients such as fresh vegetables, herbs, and cocoa. Vegetables such as carrots or beetroot and spinach color the pasta dough and make the pasta taste like the vegetables used. If you have a sweet tooth, you can try a type of pasta with cocoa in a sweet version.

Whether vegetables, cocoa, herbs, or simply plain. Homemade noodles just taste good. An attempt to make the pasta dough yourself will be rewarded with pure enjoyment. And if the pasta attempt doesn’t work right away, it will definitely work next time. Pasta that has “accidentally” also tastes delicious.

Useful tips for making ice cream and making simple ice cream recipes yourself. For your own ice cream making in summer or for a great dessert with homemade ice cream.

Cool ice cream in the summer is one of the best rewards after a long day at work or school. If there is no ice cream in their own freezer, families can now easily make their own ice cream. It can be made either with an ice cream machine or simply in the freezer.

What is an ice machine?

An ice machine is generally a device that produces an ice cream mass from a liquid. The ice cream machines all have a very similar structure. They usually consist of a large bowl into which the liquid is filled. There is a cooling liquid on the rim of the bowl. The bowl is chilled in the freezer for about 10 hours before making. The cooling liquid on the edge then continues to cool and freeze the ice mass.

A small motor with a dough hook ensures the movement of the mass and the even icing of the entire liquid. An ice machine can usually be purchased for 50 euros. However, it must be stored in the freezer for around ten hours before each use so that the walls of the key are permanently cooled.

What ingredients do you need to make ice cream?

There are countless recipes for making ice cream, but most of them are based on the same ingredients. These include milk or cream, sugar, fruit, or chocolate. The best flavors of ice cream can be made with these simple ingredients. The milk or cream provides the creamy consistency of the ice cream. Although cream naturally tastes better, milk has far less fat and fewer calories.

So if you want to make low-calorie ice cream, you should choose milk instead of cream. Sugar is also an integral part of ice cream. It makes the ice cream sweet and makes it taste better. Sugar is a natural flavor carrier and intensifies the taste of the ice cream. Although sugar increases the calories, of course, it should still be present in the ice cream. Most ice cream flavors contain fruit or chocolate (or both). The fruits are usually pureed or chopped.

Which fruits are suitable for making ice cream yourself?

The fruits, which can be easily pureed and chopped, are particularly suitable for making ice cream. Hard fruits like apples are not suitable for making ice cream yourself. So if you want to make your own ice cream, you should use fruits such as bananas, blueberries, raspberries, or strawberries. But exotic fruits such as mangoes or watermelons can also be used. Frozen fruit is also ideal for ice cream. These are already chilled and just need to be pureed.

Which chocolate when making ice cream?

Here the user has a free choice. You can use the chocolate you like best. If you add chocolate to the ice cream, you no longer need additional sugar because it is already contained in the chocolate.

What to look out for when making ice cream yourself?

Actually, all the ingredients are simply pureed together to create a creamy mass of milk/cream, sugar, and fruit/chocolate. This mass should then rest in the fridge for at least an hour to get a lower temperature. If you immediately put the warm mass in the ice cream machine, you will not get a satisfactory result. When using frozen fruit, this step is no longer necessary, the mass can be put into the machine immediately. Make some recipes for ice cream yourself

General fruit ice cream (for two people):

  • A cup of cream or 250 milliliters of milk
  • Two tablespoons of sugar
  • Approximately 250g grams of fruit (strawberries, bananas, blueberries…)

All ingredients are pureed together until a creamy mass is formed. This is chilled for about an hour and finally added to the ice cream maker. After about thirty minutes in the machine, the ice cream is ready.

Chocolate ice cream (for two people):

  • A cup of cream or 250 milliliters of milk
  • Half a bar of chocolate (about 50 grams)
  • Possibly nuts

The chocolate needs to be liquefied. To do this, liquefy the chocolate either in a water bath or in the microwave. This is then added to the cream or milk and mixed with the nuts. Be sure to refrigerate afterward as the chocolate will be hot. After cooling, simply put in the ice cream maker, after about 20 minutes the ice cream is ready.

It sounds too good to be true: losing weight without dieting can work. We show you which foods stimulate fat burning.

Lots of vitamins and minerals: grapefruit as a true super fruit

It is a real vitamin bomb: the grapefruit. The healthy fruit tastes bitter, but contains a particularly large amount of vitamin C, which promotes the development of connective tissue. The grapefruit owes its color to the dye lycopene, which also makes tomatoes red, for example.

The B vitamins contained in grapefruit, which are particularly important for the development of amino acids, i.e. protein building blocks, also boost the metabolism. The dietary fiber pectin leads to a feeling of satiety and also has a positive effect on blood sugar and cholesterol levels. However, most of the pectin is found in the skin and core of the fruit.

Furthermore, grapefruits also contain many minerals, including potassium, calcium, magnesium, iron and phosphate. Minerals are important for the body, but some of them have to be ingested through food.

Hot spices reduce cravings

Hot spices are also very healthy. The healing effect of the ginger root, for example, has been known in Asian medicine for centuries, according to NDR, and not only helps as a tea for colds. A study from New York proves that the root in water also helps with weight loss.
In food, hot spices such as ginger or chili lead to less cravings for salty, fatty and sweet foods.

The hot substance capsaicin in the chili pepper has an antioxidant and anti-inflammatory effect, as do the substances gingerol and shogaol contained in ginger. According to the Lucerne Health Center, the spiciness contained in chili increases

The vitamins and minerals contained in ginger in addition to the pungent substances, including vitamin C, magnesium, potassium, calcium and iron, are located directly under the peel.

Coffee: Germans’ favorite drink as a calorie burner

Coffee is the favorite drink of the Germans. Whether at work, at home or in a restaurant, on average everyone drinks 162 liters a year. The substances contained should even help with weight loss.

The caffeine in the beans stimulates the so-called thermogenes and, similar to the hot substances in ginger and chili, also boosts fat burning. According to the information platform, coffee should even relieve sore muscles after exercise. But be careful: Too much coffee can also have negative effects and harm the body.

Almonds as a power fruit

It has been known for a long time that nuts are said to help you lose weight. But in addition to walnuts, sweet almonds in particular are particularly good fat burners. Almonds are often counted among the nuts, but they are a plant species of the rose family. The core of the stone fruit is the almond, which botanists therefore count as a fruit.

The fruits contain many vitamins E and B, minerals such as calcium, magnesium, copper and zinc as well as valuable vegetable proteins and roughage. These ingredients and unsaturated fatty acids fill you up without the body absorbing many carbohydrates.

Buttermilk: Slimming through bacteria

The low-fat milk product, which is a by-product of butter production, gets its typically bitter taste from the addition of lactic acid bacteria. Buttermilk has less than 1% fat and is rich in minerals and vitamins.

With around 232 milligrams, just 500 milliliters cover more than 20 percent of the daily calcium requirement recommended by the German Society for Nutrition. This stimulates the breakdown of body fat and thus helps with weight loss. According to the Association for Independent Health Advice, calcium suppresses the production of the hormones calcitriol and parathormone in sufficient quantities, which means that the body stores less fat and fat loss increases.

Instructions and recipes for making muesli yourself. Easy as pie homemade muesli. With many delicious recipes for your personal muesli.

Breakfast should be the most important meal of the day. Especially for children, breakfast is the basis before an often long school day. Children should come to school fit and healthy. A healthy breakfast in the morning, with carbohydrates, vitamins, and nutrients that ensure a healthy start to the day, is all the more important. What could be more obvious than freshly preparing tasty muesli yourself?

The basic ingredients for a healthy muesli

Cereals, millet, quinoa, spelled, oats, or millet are the basis for every muesli. They are good suppliers of energy because they contain a lot of important roughage and thus ensure a long-lasting feeling of satiety. Their vitamin B content, as well as minerals, ensure a good immune system.

Nuts

Since nuts are very rich in healthy fats, minerals, and proteins, they are essential for nourishing our nerves. They should not be missing in any homemade muesli. It doesn’t matter whether walnuts, hazelnuts, cashews, or other types of nuts are used. You can freely choose from the range of nuts according to your mood.

Seeds and kernels

Seeds and kernels of all kinds provide important omega-3 fatty acids and thus protect the body from stress. Sunflower seeds, sesame, hemp seeds, chia seeds, and other seeds are suitable for the fresh muesli.

Spices

Spices give the muesli a special touch. Cinnamon and vanilla have an extremely mood-enhancing effect. Since they are able to regulate the blood sugar level, they are particularly valuable and healthy and therefore the perfect addition to our fresh, homemade muesli.

Dairy products

Dairy products such as yogurt, kefir, quark, milk, or cream cheese are excellent sources of protein and are essential for healthy intestinal flora. Use dairy products without sugar or added sugar to mix your muesli healthily. Avoid ready-made, store-bought muesli mixes, as sugar is often added to them.
If you suffer from lactose intolerance, replace the dairy products with plant-based products such as oat milk, soy milk, almond milk, rice milk, or similar.

Fruit

Fresh seasonal fruit, such as strawberries, blueberries, apricots, mangoes, apples, pears…etc. gives your muesli freshness and also provides you with important vitamins. Pay attention to good quality and use unsprayed fruit if possible, or fruit of organic quality for your homemade muesli.

Sweeten the muesli

To avoid refined sugar, choose natural variants such as honey, maple syrup, or coconut blossom sugar. Unlike refined sugar, these contain carbohydrates, minerals, and other nutrients.

Our muesli tip

Now that we have explained the basic ingredients of muesli to you in more detail, we would now like to present a recipe that will certainly get you off to a good start in the day. The ingredients can of course be exchanged or added to as desired; there is no limit to the imagination. Have fun trying!

Muesli Ingredients for 750g about 7-8 portions

  • 500g coarse oat flakes
  • 140g walnuts
  • 50g grated coconut
  • 60g chia seeds
  • 1 tsp coconut powder
  • 2½ tsp ground vanilla
  • 3 teaspoons cinnamon
  • 85 ml olive oil
  • 300 grams of honey