Tag

yourself:

Browsing

Rice flour is a gluten-free type of flour that you can use for cooking and baking. In this article you will find out what you should consider when using it and how you can make your own rice flour.

Rice flour: properties and uses

When making rice flour, machines grind raw rice grains into a fine flour. If polished rice is ground, you get a snow-white flour. Brown rice flour, on the other hand, is made from whole grain rice. Since the shell is preserved here, this flour is richer in minerals and vitamins.

Rice flour is often used as a binding agent in Asian dishes, especially for sauces and desserts

Rice flour is only suitable to a limited extent as a substitute for wheat flour. It is not suitable for fluffy pastries such as muffins, biscuit bases etc. Since the flour lacks gluten, the dough would not rise in the oven. However, you can use rice flour for flat pastries like flatbread.

If you want to bake gluten-free bread, it is advisable to combine rice flour with other gluten-free flours. So wheat flour cannot be replaced 1:1 with Asian flour. It is therefore best to consciously use gluten-free recipes when baking.

How healthy is rice flour?

According to the Federal Institute for Risk Assessment (BfR), rice and rice products contain relatively high levels of inorganic arsenic compounds. These are considered carcinogenic. The BfR therefore recommends consuming rice in moderation and alternating it with other types of grain as part of a balanced diet. Parents in particular should take this into account when feeding small children.

Also make sure to buy organic rice flour. So you can be sure that farmers did not use synthetic pesticides during cultivation.

How to make your own rice flour

You can easily make rice flour yourself. It is up to you which type of rice you want to use. Usually rice flour consists of long grain rice. A grain mill is best suited for the production. However, since rice is softer than wheat, the grinder should be able to grind very finely. Otherwise the grains will be too large and the flour will become crumbly.

If you don’t have a grain mill, you can also grind rice flour in a stand mixer. Be careful not to add too many grains of rice to the blender at once. Otherwise, less powerful devices in particular can quickly become clogged. Therefore, only add one to two cups of grains of rice to the blender at a time. Then, on high, grind the grains into a fine flour.

Alternatively, you can grind rice in the coffee grinder. Slowly add the rice to the mill, spoonful by spoonful, so that nothing gets clogged here either. Then put the flour in an airtight container (e.g. a mason jar) and store it in a dry and cool place.

This is how you make mayonnaise yourself quickly and easily. Homemade is the healthiest and definitely tastes the best. With instructions for preparing mayonnaise as well as recipes and tips for shelf life and storage.

It goes well with fries, on sandwiches and also in potato salad. They are available in simple, delicacy, and salad versions. We’re talking about mayonnaise. However, making it is not that easy. So that it still succeeds flawlessly, here are five tips on the basic ingredients and preparation, as well as great recipes.

The Origin of Mayonnaise

Mayonnaise is a must in German and international households. There are various theories as to where mayonnaise comes from. There is a widespread belief that the thick, creamy mass comes from the Balearic Islands and derives from the word Mahón, a port city. There it is said to have been created to celebrate the French victory. The resulting word was ‘Mayonnaise’. However, the French origin of ‘mailler’, which means ‘to hit’ in German, is more likely. Another origin says that mayonnaise descended from the Catalan aioli, which is prepared in a similar way. Aioli is mentioned in writing as early as 1024.

Natural ingredients are important

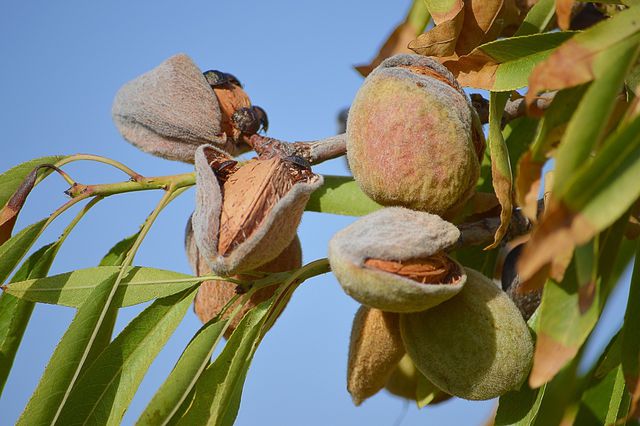
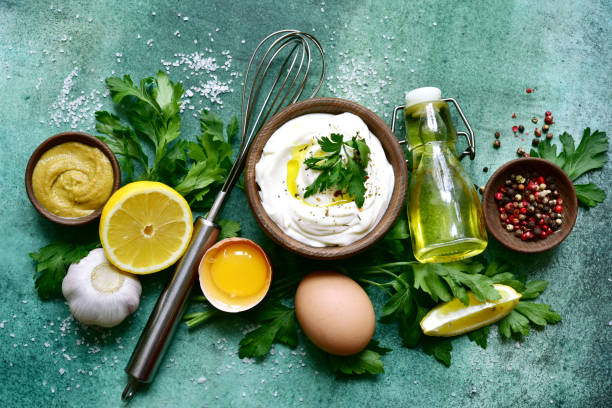
Actually, mayonnaise consists only of egg, oil, lemon juice, mustard, and spices. Fresh eggs are very important in homemade mayonnaise. Usually, only the yolk is used, but whole eggs can be used for your own production – if possible in organic quality and free-range. Mild and neutral vegetable oil such as rapeseed or sunflower oil can be used for the oil. If you want to intensify the taste, nut or olive oil is suitable. Good quality is also required here: It is better to buy the oil in glass bottles and with a low degree of acidity, which is usually shown as a number on the bottles. Here you will find olive oil tips for use as a home remedy.

Lemon juice is responsible for acidity. You can also get good lemon juice from a glass bottle or from real lemons, of course. For a homemade portion of mayonnaise, you need a fresh egg yolk or a whole egg, 200ml oil, ½ squeezed lemon, a teaspoon of Dijon mustard, and, if necessary, salt and pepper for seasoning. The ingredients should all be at about the same temperature. Here you will find instructions on how to make your own mustard.

The ideal preparation of mayo

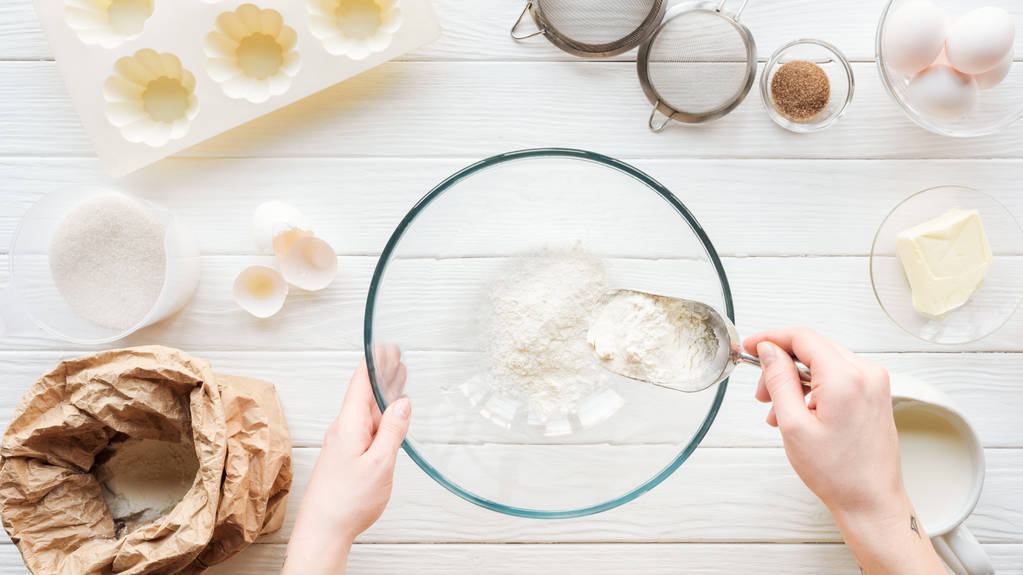
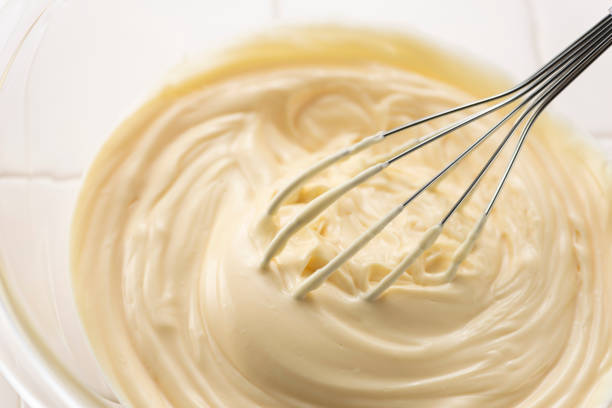
To make mayonnaise yourself, first put the egg yolk and mustard in a tall container. The oil must be added very slowly during preparation and preferably drop by drop. Actually, oil and water do not bind, but the lecithin in the yolk serves as an emulsifier. This allows the mass to be bound by vigorous stirring. Either the whisk by hand is suitable for mixing, whereby the muscles are properly trained, the stand mixer or food processor (food processor) or the hand blender.

When preparing with a whisk, the ingredients must be whipped very quickly until the mayonnaise succeeds. Typical mistakes made when preparing mayonnaise are stirring too slowly, adding the oil too much or too quickly, or ingredients at different temperatures. Incidentally, the egg yolk and mustard often turn authentic mayonnaise yellow. So you’re not doing anything wrong if you end up with yellow mayonnaise. After all, your mayo is homemade and not an industrial product. The industry tends to use more water and less egg, and whole eggs rather than separate yolks, which results in the white color. Mayo is delicious in any color. Our recipe idea: potato and tomato salad with cheese.

Manual work or rather devices?

If you decide to use the whisk and good old-fashioned handwork, you’ll need to add the oil slowly, pouring it constantly. Best in droplets. The mass is then vigorously beaten with a whisk in a mixing bowl until it is firm and creamy. It is important that you are very quick and do not take a break. This is in the arms! Trained cooks can conjure up the result in about three minutes, but untrained cooks can take much longer, depending on their arm strength. However, apart from a mixing bowl and whisk, no additional equipment is required for this.

It’s much easier in a blender: Put all the ingredients except for the oil in the blender and switch it on. Gradually add oil. Some have a food processor at home because it is also suitable for many other things such as kneading dough, chopping nuts, making pesto, grating cheese, and much more. The easiest way to make mayonnaise yourself is to use a hand blender. It is not expensive, handy and fast. Just as with the previous descriptions, the oil is added here gradually. Here you will find 12 clever kitchen helpers and gadgets for cooking.

Tasty ideas and mayo variants

There are many ideas for refining the mayonnaise. You can’t taste a pinch of sugar or half a teaspoon of honey, but they intensify the other flavors. With garlic, you conjure up a garlic mayo, while with chili you can create a chili mayo. Have you ever heard of wasabi mayo? You can do this by mixing in wasabi powder. With some yogurt in the mayonnaise, you add some freshness and lightness. Ideal for the summer or for nice salads on the grill. You can also experiment with different spices: either the Mediterranean with herbs or curry mayo. Mix salt, water, lime juice, Dijon mustard, cumin, and curry powder. Gradually add the oil. If you like, you can add some cayenne pepper or chili.

Curry mayo tastes a little spicy and deliciously exotic with crispy chicken and sweet potato fries. If you add some Dijon mustard and sambal oelek to the basic ingredients of water, salt, lemon juice, and canola oil, you get a great spiciness. This mayo tastes perfect with Asian dishes and also gives the tofu a special touch. You can also throw other ingredients into the blender during preparation or puree them with the hand blender. Soaked nuts, fresh or dried tomatoes, tofu, or even mango and apple to mackerel go well with this. Try tuna dip for parties and snacks.

Vegan variants without egg

The vegan version uses mayonnaise without eggs. This variant is therefore also good for everyone who has to watch their cholesterol and for people who do not tolerate or do not like eggs. Here you will find more foods and recipes as egg substitutes. The classic is vegan mayo with soy milk: Simply mix 130ml soy milk and 1-2 teaspoons table or apple cider vinegar with lemon juice and 200g vegetable oil with a hand blender until the mixture becomes thick and firm. Season to taste with mustard, salt, and pepper. Another variant is vegan mayo made from chickpea water, the so-called aquafaba. Simply buy a can of chickpeas and pour the water through a sieve into a bowl. Set the chickpeas aside for later dishes. Briefly heat the chickpea water on the stove for five minutes and allow it to cool thoroughly.

Then add lemon juice and a tablespoon of chickpeas. Add the mixture to the blender along with the Dijon mustard and blend well on high. Add the oil very slowly. Season with salt and pepper – done. Many vegans use untreated cashew nuts for their mayo because of the healthy, plant-based fat content. You should soak them in water for two hours, then drain the water and then put the soaked cashews in the blender. Then add white wine vinegar, mustard, oil, water, and lemon juice. You can also omit the oil, as cashews are already very greasy. You can season the whole thing with salt, pepper, and optionally turmeric.

Durability and storage

When warm or hot, mayonnaise is very short-lived due to the egg. It’s best not to eat them after they’ve been warm for a few hours. Homemade mayonnaise should also only be consumed in a cool place for up to three days. Finished mayonnaise in jars or tubes can be kept refrigerated for up to nine months. You can tell that mayonnaise is spoiled by its appearance and smell: rancid smell and very sour taste as well as slight lumps are signs of mayonnaise that is no longer edible. Here are tips for storing and preserving eggs.

Making a sprout glass yourself is not difficult and also much cheaper than buying one. You can easily make the sprout jar from an old pickle or jam jar.

Make sprout glass yourself: you should know that

Many online shops and supermarkets offer sprouting glasses. But why spend money on it when you can easily make the glass yourself? We will show you a method without plastic or special equipment.

You need this:

a glass
a felt-tip pen to mark holes
a small drill or a can prick
sandpaper or a file
sprout seeds of your choice
possibly a thick piece of cardboard as a holder
By the way: Many instructions use tulle or fly screen fabric for DIY seed jars. Our method is more sustainable for three reasons: firstly, tulle is often made of plastic, secondly, you can use the lid of the jar with our method, and thirdly, you don’t have to buy any new materials.

Make your own seed jar: Here’s how

The first thing you should do is sterilize the jar. For example, put it in boiling water for ten minutes.
On one side of the lid, mark out holes about ½ to 1 inch apart. You don’t have to work on the other side, as the sprout glass will be crooked later.
Then get your pick or a small drill. Poke or drill small holes in one half of the lid. The water later drains off this. Make sure that the holes are not too big, otherwise the sprouts can slip out of the sprouting jar.
Now use some sandpaper or a file to smooth out sharp edges on the holes.
Note: Readers have reported that the cut edges can rust at the holes. So sand them down very carefully. Alternatively, you could use a piece of plastic mosquito net or a piece of loosely woven cotton cloth that you can then wash out.

Fill the sprout glass and set it up

Thoroughly wash the sprout seeds and put them in the jar. If you have something you can use to set the jar up at a 45 degree angle, skip the following step.
Now build a holder for the sprout glass:
To do this, place the bottom of the glass on a thick piece of cardboard. Place it so that it is only halfway up the box. Now trace the outline of the floor with the felt-tip pen.
Cut out the resulting semicircle.
Now draw an elongated rectangle on the cardboard with the hole. The semicircle should form one of the short sides. You will later place the glass in this semicircular bulge.
Cut out the rectangle.
If you fold the resulting strip in the middle, you can use it as a support for the glass. This standing aid ensures that all water drains from the glass and that no mold forms.
Place the sprouting glass in a can or in the sink for the first few hours. This allows the water that is still clinging to the rungs after washing to drain off. Later it is sufficient to place a kitchen towel under the can.

Now place your homemade sprout glass in a bright and warm place. After just a few days, your sprouts should have grown enough for you to harvest them. You can use the glass over and over again.

We often wash our laundry with the usual chemical detergents. But most of them are not good for our environment. That’s why we’ve collected ideas for making your own laundry detergent. For environmentally friendly detergent alternatives.

If you no longer want to use chemical detergents, then the following alternatives to making your own detergent are just right for you. At the same time, you are doing something good for yourself and your environment. In addition, these are cheap and quick to make yourself.

Washing clothes with great detergent alternatives

Environmental awareness is growing steadily and with it the interest in alternatives to chemical detergents. A customer survey by the German Institute for Service and Quality also revealed that customers have high expectations of their detergent. Many consumers are dissatisfied with the environmental aspects of their detergent. That is why we have collected effective and environmentally friendly detergents that you can make yourself.

1) Detergent made from baking soda

A well-known household remedy is a baking soda. Because it can be used in many areas. So also for washing clothes. There are different possibilities of application. You can simply put the baking soda in the detergent drawer and start the wash cycle. Or put the powder directly into the laundry drum. Accordingly, it cleans your laundry and neutralizes bad odors. It also serves as a fabric softener. The miracle powder also softens the water and prevents calcification. Also, note our article on descaling washing machines and dishwashers.

2) Clean clothes with vinegar

You can also use the popular household remedy vinegar. Because you can use it to remove unpleasant odors. In addition, vinegar can remove limescale residue from your clothes. This makes it cuddly soft and you can do without a chemical fabric softener. The use of vinegar is particularly suitable for effectively washing and caring for bed linen. To do this, add half a cup to a full cup of vinegar to the fabric softener compartment.

3) Washing clothes with ivy

Slightly soiled clothes are excellent for washing with ivy. Because the saponin contained in ivy ensures radiant cleanliness. Consequently, you can collect dark ivy leaves on your next walk. You can then put the leaves in the washing machine. To do this, put about 10 leaves in a laundry bag or sock. Then put them in the laundry drum. This detergent alternative is particularly suitable for dark and colored laundry. Also, note our article on making ivy offshoots quickly and easily.

4) Soap nuts as an alternative detergent for allergy sufferers

The cleaning soap nuts of the soap tree come from Asia and have been used for cleaning in India for some time. They are therefore an effective, environmentally friendly alternative. You can use them to remove light dirt and grease from your clothing. At the same time, they are well tolerated. Therefore particularly popular with allergy sufferers and recommended for neurodermatitis diseases. They can also be used at all temperatures. Only in the case of very stubborn dirt should you use our other alternatives. The only drawback is their carbon footprint. Because the transport routes are long.

5) Washing clothes with chestnuts

The chestnuts growing here have a better CO2 balance. Because you can collect them in autumn. And use it to do laundry all year round. Chestnuts serve as an alternative to detergent because they contain soap-like substances, saponins. So gather the chestnuts and break up a handful of them with a hammer or nutcracker. Then put them in a jar. Then pour boiling water over them. And let the mixture work overnight. You can now wash your clothes with the resulting liquid suds. Also read our article on the most common mistakes when doing laundry.

6) Make liquid detergent yourself

DIY detergents are becoming more and more popular. The best-known recipe for making your own detergent is liquid detergent. For this, you need 4 tablespoons of washing soda or baking soda, a small handful of grated curd soap, water, and a few drops of essential oils. Then you first have to heat the water in the kettle or pot. Then mix the ingredients together while stirring constantly. After everything has cooled down, you can fill in the homemade detergent and add the essential oil. Also, note our tips for washing and caring for laundry.

7) Make washing powder yourself

If you prefer washing powder, you can also make your own. For this, you need baking soda and an effective pure washing soda. Depending on how much stock you want to prepare, take two equal parts (e.g. 150g baking soda and 150g washing soda) and 100g grated curd soap. Then mix the ingredients and add about 15 drops of essential oil. This will give your washing powder a fresh scent. If you like, you can also add 100g of dishwasher salt. Because that should ensure softer water. Then put the finished powder in an airtight container. For washing clothes, put 1-2 tablespoons in the detergent compartment.

Growing and eating sunflower greens as microgreens? This healthy alternative to enjoying the small seeds of the flower brings you a lot of valuable nutrients and vital substances at any time of the year.

Growing sunflower greens yourself: you need that

You can easily grow fresh sunflower greens yourself. However, you should take a look at them every day and give them a little nurturing. The nice thing is that you can grow the vitamin-rich mini greens in a bright place in your apartment at any time of the year and you don’t need a balcony or garden.

For your sunflower microgreen cultivation you need the following material:

For pre-germination: A germination jar and a dark cloth to cover. Possibly a bowl and colander for rinsing.
For growing: A shallow dish, ideally with drainage holes, and a dense dish or tray to stand on. You can also upcycle used plastic packaging from salads, fruit or vegetables.
The best way to get seed soil is from a garden center. Look for an organic seal and that the soil does not contain peat. As a result, the CO2 balance is better and you protect the moors.
Sunflower seeds: You can use both peeled and unpeeled seeds for sunflower greens. In both cases you should have at least a handful ready and pay attention to organic quality.

Sow and harvest: This is how you get fresh greenery from the windowsill

Whether spring, summer, autumn or winter – you can grow your sunflower greens all year round just like other healthy offspring. For this you do the following:

Soak the sunflower seeds in plenty of water in a saucepan or similar. Cores with shells need about 12 hours, without shells about 6-8 hours soaking time.
After this pre-swelling, which acts like an initial spark for the seeds, you pour off the water and rinse the seeds two or three times with fresh water.
Now fill the seed in your germination jar and let it germinate at room temperature. Because sunflowers germinate in the dark, it is better to protect the seeds from light and cover them with a cloth if necessary. It takes about two to three days for the first sprouts to appear.
Hygiene is important during these first three days: Rinse the germinating seed thoroughly with water every day. At the same time, the kernels receive sufficient moisture for further germination. If you use peeled sunflower seeds, you can now easily detach and skim off the loosening fine seed membrane.
If the white sprouts on the kernels have broken through the shell or are visible on the peeled kernels, you can plant the sprouts to grow. Fill the bowls with about two centimeters of soil and distribute the seed so that there is still some space between the individual plants. Then sprinkle some more soil over it.
Now all you have to do is practice the right feeling for the water supply: Just pour a little at the beginning. There should be no waterlogging, otherwise the seed can become moldy. Always add a little water in the following days.
Place the plant bowls with your “sunflower field” in a room-warm place that offers sufficient sunlight. After about eight to 12 days, the plantlets develop juicy, green cotyledons and begin to develop the next set of leaves.
Now it’s time for the harvest: most of the black shell caps have fallen off. If not, brush them off with your hand. Then cut off the fresh sunflower greens above the ground. You don’t actually have to wash it before you eat it. Unless there is obviously dust or dirt on it.

Germinate sunflower seeds – why?

Sunflower seeds are small packets of fuel. When they germinate, they develop additional qualities. You can harvest the sprouts, which grow into green seedlings, like cress and then process them further.

The tender little plants taste sweet and nutty and are even a little crunchy when they are freshly harvested.
This makes the fresh greens the perfect partner for soups, sandwiches, pan-fried vegetables and anything else that calls for an upbeat topping.
If you want to use a lot of the sunflower bambinis, you can use them to prepare a salad or mix a smoothie. In any case, you should make sure that you eat the sunflower seedlings fresh.
You can process sunflower green better in larger portions than some other microgreens (e.g. from radishes, broccoli, mint), which have a more intense taste and spiciness.
The main advantage: the young plants have a very high nutrient density. In other words, measured in terms of total weight, they contain more vitamins, minerals and trace elements than ordinary vegetables. In addition, there is fresh chlorophyll and antioxidant substances (e.g. flavonoids).

Lavender tea is a versatile and proven remedy. It has a calming effect on the nervous system and can help with various ailments. Here you can find out how to make lavender tea yourself and what you should consider when preparing it.

Lavender tea has an intense aroma and a delicate scent. In addition, lavender tea is a good way to benefit from the versatile healing properties of the plant. Even the ancient Romans used lavender as a medicinal plant and as a bath additive. And the colorful blossoms are still very much appreciated in monastery gardens to this day.

Lavender flowers are used to make lavender tea. You can find out how to make the tea yourself below. If you want to buy lavender tea, you should definitely use organic quality flowers. Öko-Test found increased residues of pesticides and other pollutants in conventional teas.

This is how lavender tea works

Lavender can not only enrich your garden, the medicinal plant also has a wide range of health effects. The valuable ingredients of the flower are responsible for this. These include, among others:

essential oils
tannins
bitter substances
flavonoids
saponins
Lavender has been extensively studied in both animal and human studies. A study from 2013 dealt extensively with the effects of lavender, especially on the nervous system. The following properties of lavender were proven:

antibacterial
antiviral
anti-inflammatory
calming
pain relieving
anxiolytic
mood-enhancing
antispasmodic
circulation-enhancing
You can use lavender tea for various ailments:

Insomnia: Lavender tea can calm and help you fall asleep better. The tea is even said to intensify sleep. The best way to do this is to drink a cup of lavender tea before bed. Even if you suffer from jet lag, you can use lavender tea.
Depressive moods and anxiety: Lavender can have a calming effect on our nervous system and relieves anxiety. In addition, it brightens your mood. It is best to drink two to three cups throughout the day.
Indigestion: Its calming effect also helps with indigestion and can relieve abdominal cramps. It is important that you only let the tea steep for a short time. The highly concentrated essential oils could also irritate your mucous membranes.
Menstrual cramps: Lavender tea can relieve abdominal cramps and has a physically and mentally calming effect.
Respiratory diseases: Lavender can relax the airways and helps against viruses and bacteria, especially in the case of coughs and diseases of the bronchi.
Blemishes and acne: You can use lavender tea as a bath additive for external use on blemishes and acne. To do this, boil a liter of lavender tea and add the tea to your bath.
Lavender tea is generally well tolerated and also suitable for pregnant and breastfeeding women. A 2015 study looked at the positive effects of lavender tea on new mothers. The participants felt less exhausted and depressed, and lavender tea had a positive effect on mother-child bonding.

In addition to tea, lavender is also often used as lavender oil for medicinal purposes. Here, the content of essential oils is significantly higher, so the effect is different.

Make your own lavender tea

Only the colorful blossoms are used for homemade lavender tea.

At best, lavender grows in your garden. You should make sure that it is real lavender “Lavandula angustifolia” so that you can benefit from the healing effect.

How to make lavender tea yourself:

Harvest lavender:

Depending on the weather conditions, lavender starts blooming between June and August. As soon as the first buds open, but not all have started blooming, you should harvest them.
The best time is midday on a sunny day. Then the dew evaporated.
Cut off the buds with their stalks, this will make drying them easier.
Dry lavender:

Tie the harvested buds together by their stems into bunches and hang them upside down.
Make sure the buds are not exposed to direct sunlight or heat while drying.
After a week or two, the lavender flowers are completely dry. Then you can easily rub them with your fingers.
Use a knife or sharp scissors to separate the buds from the stems and place in a jar.
Store the dried flowers in a dry and light-protected place.
Preparation of the tea:

For one cup (250 milliliters) of lavender tea you need about two teaspoons of dried lavender flowers.
Boil the water first and then let it cool down to about 80 degrees. The effective essential oils are very sensitive to heat and should therefore not be boiled.
Let the tea steep for 8-10 minutes before removing the flowers.
If the intense aroma of lavender tea doesn’t suit your taste, you can tone it down with a little milk or honey.
Lavender is also great for tea blends. To increase the effect, you can mix the tea with St. John’s wort or valerian. In terms of taste, lavender harmonizes particularly well with:

chamomile
licorice
Linden Blossoms
rose petals

Hardly any calories, low in fat and rich in vitamins when made correctly – homemade apple chips are a delicious snack for in between. We’ll tell you how you can make chips from apples yourself.

If you want to make apple chips yourself, you can use old apples, even if they have become a bit soft and shriveled. In addition, homemade apple chips are guaranteed free of sulfur dioxide or other preservatives compared to the supermarket version. In principle, you can use any variety, but Elstar and Boskop taste best (make sure they are organic!).

Air dry homemade apple chips

Ingredients:

apples of your choice

Directions:

Wash the apples, core them (an apple corer is helpful) and cut or slice them into slices about 2 to 3 millimeters thick.
Spread the apple rings individually on a baking sheet or rack. Alternatively, you can also hang up the apple rings with string to dry.
Set them outside in the warm sun to dry. But you can also let the apple rings dry in warm, dry places such as the attic or by the fireplace. With this method you do not need any additional energy.
Cover everything with fly screens, thin curtains or similar to protect the apple chip ships from flies and wasps.
After about two to three weeks, your apples will be dry.
The apple chips can be kept dry for several weeks in a well-closable container. Storage boxes made of glass or stainless steel are best.

Make apple chips in the oven

Ingredients:

apples of your choice

Directions:

Wash the apples, core them (an apple corer is helpful) and cut or slice them into slices about 2 to 3 millimeters thick.
Arrange the apple rings on baking sheets or racks. It makes sense if you borrow several baking trays or racks in order to use the energy of the oven optimally.
Put the apples in the oven at around 70 degrees for three to four hours to dry. Leave the oven door ajar with a wooden spoon. This allows the moisture to escape. It is best if you can use some of the residual heat from other dishes or cakes. This is how you save energy. Because this form of drying is very energy-intensive.
The homemade apple chips will keep for several weeks in an airtight container.

Dry apple chips in the dehydrator

If you make apple chips more often or also dry other fruit, it could be worth buying a dehydrator. The method is more effective than drying in the oven and more reliable than drying the apple chips in the air.

To make marzipan yourself, you only need two ingredients: almonds and sugar. With this recipe you can easily make your own marzipan.

What is marzipan made of?

Traditionally, marzipan consists of ground almonds, sugar and rose water. The proportions of the ingredients are decisive for the quality. According to the legal requirements, a maximum of 17% liquid, 35% sugar and 48% almonds may be used for the marzipan paste. However, manufacturers usually add more sugar for commercial marzipan. Only with very high-quality products, such as certain fine marzipan brands, is no additional sugar mixed in.

Make marzipan yourself: The basic recipe

For the homemade marzipan you need these ingredients:

200 g almond kernels with skin (alternatively walnuts)
150g powdered sugar
1 to 2 tablespoons of liquid (classic here is homemade rose water or from the pharmacy or health food store)
Preparation:

Boil the almonds in about a liter of water for a minute or two.
Pour the almonds into a colander.
Let them cool down a bit.
Peel them by squeezing them out of the skin with your fingers.
Crush the almonds in a good blender. Depending on the moisture content of the almonds, you will get a mealy to mushy mass.
Place the ground almonds in a bowl.
Sift in the powdered sugar.
Add a tablespoon of rose water.
Now knead all the ingredients by hand into a smooth dough. You may need to add some more liquid. (This also depends on whether you dried your almonds after cooking).
When the marzipan is ready, store it airtight in the fridge – e.g. in a screw-top jar.
Then the homemade marzipan is ready for further processing!

Depending on your taste, you can use other liquids instead of rose water. Orange liqueur or amaretto, for example, are suitable, but also a few drops of bitter almond oil. This makes the mass a bit bitter and more intense in taste.

Which almonds are best for marzipan?

Almonds belong to the rose family and probably originally come from Southeast Asia. Today the kernels are also cultivated in Pakistan, Iran or in the Mediterranean region. However, more than 80 percent of the almonds grown worldwide come from the USA, more precisely from California.

However, there has been a drought for several years. Almond cultivation plays its part: to harvest one kilo of almonds in California, about 10,000 liters of water are used. The high water requirements of the almond orchards are also critical in European growing areas.

So when you buy almonds, make sure they’re not from California. The long transport route halfway around the world also worsens the ecological balance. At best, buy almonds from Europe and from controlled organic cultivation.

Instead of almonds, you can also use regionally grown, organic walnuts for the marzipan. The process is the same and the taste is very similar to almond marzipan.

Now learn to sew yourself as a great leisure activity. We all love shopping for clothes. But the dresses and blouses available in stores are usually not unique. Therefore it is worth starting. Because with lots of ideas for sewing, sewing can also be fun for beginners.

Although there is a wide range of clothing choices, it can still happen at parties where two people wear the same outfit. Such a situation is uncomfortable for many. You ensure more individuality if you sew your outfit yourself. As a result, we have collected tips for you on how to learn to sew.

Does every household have a sewing machine?

It’s hard to believe that not even a hundred years ago, a sewing machine was part of the basic equipment in many households and that sewing was as common as working with a computer today. And yet, especially in the younger generations, there are not many who have mastered the craft. But that too is slowly changing. The value of craftsmanship is gradually being rediscovered.

Sewing made easy

Sewing is a great hobby for all ages. You can get inspiration for your dress patterns on the internet or let your creativity run free. Then start with test cuts and trimmings. Whether classic, short, long, modern, or rather playful and tricky, in the end, the first copies can be looked at well. Once you get the hang of the sewing machine, you’re good to go.

And with a little patience and practice, many beautiful and light dresses can be made. Because a lot of things can also be easily implemented by sewing beginners. First of all, get instructions and various patterns. And YouTube tutorials can also help you to design and sew your very own dream garment. In addition, a tailor’s dummy can be helpful for sewing yourself.

1) Different suppliers for patterns

Sewing patterns in particular are a great help for beginners. Once you’ve used them a few times, sewing yourself will be much easier. Patterns are paper templates that you can use to sew the individual parts of the clothing properly. You can purchase patterns or download them free of charge from the following providers. As a result, you can also use it to make great Christmas or Easter gifts yourself.

  • Diverse patterns at Stoffen.de.
  • Affordable sewing tutorials from Makerist.
  • Patterns of all kinds at Pattydoo.
  • Free sewing patterns on Buttinette’s blog.
  • Great ideas and patterns at Sewing Pattern Database.
  • Free sewing patterns and tutorials at CrazyPatterns.
  • Simple cuts and creative ideas of fabric and style.

2) Know fabrics and learn to sew

Since knowing about fabrics and their properties is also an advantage when learning to sew, you should be well informed beforehand. To help you make the right choice for your garment, we have put together an overview of the most important fabrics.

3) Take a sewing class for beginners

If there is no one in your immediate area who can teach you how to sew, there are beginner sewing courses available in many cities. These are usually affordable and you get to know like-minded people. Then you know the most important tricks for sewing. And patching small holes in clothes is no longer a problem. This can also be a good start for you if you don’t like learning with videos from the Internet.

4) Techniques for sewing

There are a variety of techniques you can use to sew. Be it types of stitches, methods of cleaning up fabric edges, or simply a correct method of threading a thread. For all this, there are different basics that you should look at. Certain basic knowledge is essential for sewing yourself. So here are the two most important techniques. Because with clothes you sew yourself, you can also emphasize you’re natural beauty and strengthen your self-confidence.

Sewing by hand

You can sew many things by hand. For this, you need a basic knowledge of techniques. A very common type of stitch is the mattress stitch or ladder stitch. Check out the video below for a comprehensive guide on how to use this method.

Conventional textile fresheners are usually expensive and often smell unpleasant. That’s why we’ve collected tips on how to make your own textile fresheners. This way you can quickly and easily get rid of bad smells from your textiles.

Since you can successfully counteract odors in textiles, curtains, curtains, or sofa covers with a homemade and inexpensive one, you don’t need expensive refreshers from the drugstore.

Fresh fragrance for your textiles

After a while, textiles such as curtains, curtains, or sofa covers can start to smell bad. You can then wash them or spray them with a fabric freshener. The second variant is quick and easy. This saves you a lot of time and ensures a pleasant smell. But purchased textile fresheners and fragrance sprays are usually expensive and you don’t always like the smell. That’s why we have tips on how to make your own textile freshener. As a result, you can easily neutralize odors in the home.

1) Make your own textile freshener with fabric softener

You can create your own fragrance mixture for textiles yourself quickly and inexpensively. All you need is a small old spray bottle and fabric softener. Then fill the spray bottle with 1-2 caps of fabric softener. Then add water and mix well. And your own fragrance spray is ready. Consequently, you can spray your couch, curtains, carpets, or other textiles with it and make them smell good. No residues have formed after prolonged testing. So it is a very easy way to make the textile freshener yourself. Also, note tips on making your own room fragrance and instructions on how to make your own fabric softener.

2) Homemade baking soda scent freshener

Dirt and bacteria often cause bad smells from the sofa or curtains. Then usually only one thing helps: wash hot. But not all textiles can be put in the washing machine. Therefore, a homemade fragrance freshener will help you to remove bad smells. Accordingly, you need 350 ml of boiled, lukewarm water, 1 tablespoon of the household remedy baking soda, and 40 ml of alcohol. In addition, essential oils can refine your textile freshener.