Tag

Dough

Browsing

High in protein and low in calories: These are our Hüttenkäsetaler! Oh yes, you read that right – cottage cheese can be grilled or fried and it tastes wonderful. Our Huttenkasetaler also gets its extra portion of flavor thanks to sun-ripened cherry tomatoes and fresh garden herbs. In a quick 15 minutes, they are ready to bite on the table. Let’s go: Here is the simple recipe for making Hüttenkäsetaler yourself.

Protein bomb cottage cheese

Whether savory or sweet: cottage cheese or granular cream cheese is a great accompaniment for anyone who loves cheese and wants to keep a slim figure. Because there are already 22 grams of protein in 100 grams of the calcium-rich milk product – cottage cheese is also low in fat and calories. This makes it a healthy filler that can be served more often.

For example as Hüttenkäsetaler! Together with fruity tomatoes, spicy chives, and a little flour, small thalers are formed, which gleam golden brown in around ten minutes on the grill or in the frying pan. A low-calorie treat that’s great as a side dish or as a low-carb dinner! Make Hüttenkäsetaler yourself: Here is a simple recipe.

Make cottage cheese dough yourself

The ingredients for 8 coins:

  • 1 bunch of chives
  • 4 sprigs of rosemary
  • 125 g cherry tomatoes
  • 60 grams of flour
  • 200 g cottage cheese (low-fat level)
  • Salt, pepper, and chili flakes to taste
  • 1 tbsp olive oil

The preparation:

  1. Wash and drain the chives, rosemary, and cherry tomatoes. Finely chop the herbs and finely dice the cherry tomatoes.
  2. Place the flour, cottage cheese, herbs, and tomatoes in a bowl and mix well. Season with salt, pepper, and chili flakes.
  3. Form the finished mass for the cottage cheese thalers into thalers with slightly moistened hands.
  4. Then either place the thalers on a grill-suitable, lightly oiled piece of paper or heat the oil in a pan and fry the cottage cheese thalers on both sides until golden brown. This takes about ten minutes.
  5. Sprinkle the finished Hüttenkäsetaler with fresh herbs and serve with the grilled food or enjoy as a high-protein meal on its own.

It’s Sunday, I didn’t go shopping, and the kids are screaming for pizza. No yeast and no quark in the house, but it is still possible to make a delicious pizza without yeast and quark.

Ingredients for 3 people

For 1 baking tray, you need 300g flour, 1 sachet of baking powder, approx. 75 ml olive or sunflower oil, 1 tsp salt, and some milk.

Preparation

Mix the flour, the packet of baking powder, the salt, and the oil, preferably with a hand mixer, until you get a crumbly mass, then keep adding a little milk until the dough binds. Sometimes it happens that the dough is a bit sticky, then you can add a little more oil.

Spread the dough out on a pre-greased baking sheet or parchment paper, spread with tomato sauce (mix the tomato passata with Italian herbs or pizza seasoning + a little salt), and top with the desired or existing ingredients. Then spread cheese over the ingredients, for a particularly good taste you can also spread some mozzarella.

Put the tray with the pizza in the preheated oven (200° top/bottom heat or 180° convection) and let it bake for about 30 minutes.

Useful additional knowledge

The baking powder makes the dough a little thicker and fluffier, but you can prevent this by using a little less baking powder.

Measure each type of flour (125 g wheat flour; 125 g spelled flour; 125 g whole wheat flour; 125 g rye flour) and sift into a bowl. Then add the dry yeast (1 pack) and stir with a spoon so that the dry yeast can mix with the flour.

Now add 1/4 liter of water and first knead with a hand mixer and dough hook. The dough is now a bit crumbly, once the whole dough has been kneaded, the dough is kneaded further with your hands and then a ball is formed. This ball now remains in the bowl and is covered and placed in a warm place (e.g. on the heater). Now the dough has to rise.

The dough can be processed further if a small indentation, which is created by pressing your finger lightly into the dough, goes back immediately. Now shape the dough as desired (loaf tin, oval, bun shape, etc.) and place it on a baking tray lined with baking paper or greaseproof paper and bake in the oven. The bread or rolls are baked at 200 degrees until they have reached the desired level of browning.
Enjoy your meal!

Instructions and tips for making the dough yourself. You can easily make your own putty yourself. In addition, the children have a lot of fun and enjoy making the dough themselves. Making the clay is ideal for a rainy afternoon. Because kneading is always a lot of fun for children.

Putty from cornstarch toothpaste

The easiest way to make playdough is to mix together cornstarch and toothpaste. If there is no cornstarch in the house, a normal white sauce binder will do. Simply mix the two ingredients together until dough is formed. Always knead the measurements.

Making the dough from flour

The variant with flour is somewhat reminiscent of salt dough but remains supple for much longer. You need the following ingredients to make the dough yourself:

  • 500g flour
  • 150g salt
  • 500ml boiling water
  • 2 tbsp citric acid
  • 4-6 tbsp cooking oil

Simply mix the flour and salt with the citric acid well. In addition, mix the hot water with the cooking oil. Now slowly mix both mixtures together and knead well. The putty is ready after it has cooled down. If you add a little more oil to the water, the dough will end up being smoother. The finished dough will keep for up to half a year if you pack it airtight.

Working with salt dough is a lot of fun. Great decoration can be created at cheap prices. The salty dough has to be really easy to work with. We show how easy it is.

Children love the salt dough to play with and paint, as do many adults. It is important that this is produced in a healthy way and we would like to show you how this can be done.

The salt dough only needs four ingredients

You only need four ingredients to make the salt dough yourself. Children love this salty dough because they can finally muddle and do handicrafts. Wonderful works can be created with salt dough. Toys can be made, pendants, decorations, and even ashtrays if you have a little patience. Salt dough definitely encourages children’s spirit of discovery. Basically, everyone has already tinkered with the dough, you just have to make sure that you make good salt dough.

For the perfect salt dough, you only need 2 cups of wheat flour, preferably type 405, plus 1 cup of salt, 1 teaspoon of vegetable oil, and then another cup of water. Everything has to be mixed well and you can knead the dough perfectly and use it for yourself. Children also have a lot of fun here, many a child loves to knead the dough until it is perfectly smooth. If the dough is still a little sticky, add a little more flour.

Another salt dough recipe

Yet another recipe for making salt dough would be 1 cup flour type 405, 1 cup potato starch, 1 cup salt, 1 cup water, and 1 teaspoon vegetable oil. The whole thing is kneaded well and can be used immediately. You could also just use potato starch if you want the items to last a long time.

Important for the salt dough

Salt dough is best stored in airtight containers. You can always take out as much dough as you need. The dough can be kept fresh in the refrigerator for up to several weeks without drying out. So children could do a little tinkering every day. By the way, the salt dough doesn’t always have to go in the oven. It can also be air-dried. But this can take several days. The oven is a bit faster there. But here, too, one should proceed with caution. It is best to set the oven to 50 degrees and let the finished works of art bake for an hour. The work then has to cool down and harden. Some people also set the oven to 120 degrees, but then the salt dough becomes darker, but also harder. Cracks can also be avoided in this way, which are annoying if you set the oven too hot.

Paint or pre-dye salt dough

If you want to let off steam creatively with the salty part, you can color the dough in advance or paint the finished works later. Children usually enjoy it more if they are allowed to paint the works of art later. If you want to color the dough, it is best to use food coloring or Easter egg coloring. Even cocoa can be used or beetroot. Curry and other spices also add color to the salt dough. After baking and cooling, the salt dough can be painted with watercolor, poster paint, or even acrylic paint.

This is how you make your own Christmas tree decorations from salt dough. Make simple decorations from salt dough and use them to decorate the tree at Christmas and Advent. How to make salt dough and make great ornaments for Christmas and other salt dough painting and decorating ideas.

The Christmas tree is often the focal point of the Advent season. It shines brightly in all colors and the balls glitter and sparkle everywhere. Unfortunately, most tree decorations are short-lived: something often breaks and you end up with a lot of plastic waste. We spend too much money on colorful Christmas decorations. Isn’t that cheaper and better for the environment? Salt dough is a cheap and easy alternative, and it’s even fun to make tree ornaments. We’ll show you how to easily make your own Christmas tree decorations from salt dough.

Just make salt dough

All you need is flour, water, and salt, i.e. ingredients that are usually in the kitchen cupboards anyway. It is best to use two cups of flour, one cup of water, and one cup of salt so that the ratio is 2-1-1. However, individual changes can be made during the kneading process so that the dough becomes kneadable accordingly. If your dough is too sticky, add some water. If the dough is too dry, add some water. Knead the dough into an even mass and then roll it out on a floured surface. Salt dough is not edible due to the high salt content! Those who prefer to bake something edible with their children are better off baking cookies with children.

Ideas for the salty dough

Substituting cornstarch for the flour will make the dough whiter and softer. If you want colorful dough, you can color it with food coloring. If you add about a tablespoon of oil, the dough will be even smoother and more malleable, so you don’t necessarily need cookie cutters and you can even try to form figures by hand.

On the other hand, if you add a tablespoon of wallpaper paste to your batter before you add water, the dough will become firmer. Consistency and shelf life can also be improved by replacing half the wheat flour with potato flour. You can find out more under Making salt dough yourself.

Make tree ornaments out of salt dough

If you still want to make ornaments for your Christmas tree, you can make them out of the salty dough. Because it’s fun and looks good. In the following video, you can watch instructions on how to make Christmas tree decorations from salt dough.

Make pendants out of the homemade dough

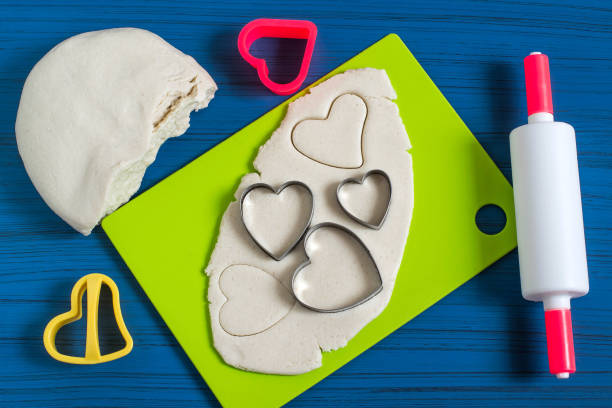
Just like normal cookies, salt dough figures are now created with cookie cutters. For example, stars, fir trees, gift packages, shooting stars, and everything else related to Christmas come into question. Use a straw to poke a hole in your cut-out salt dough cookies so you can hang them up later. After that, the dough has to dry at room temperature. You must not bake it directly, otherwise, it may bubble.

Either you dry your cookies in the air for a day and turn them every now and then, or you dry them in the oven at 50°C with circulating air and the oven door slightly open, which you can also hold open with a wooden spoon inserted between them so that air can escape. Only when your salt dough cookies are dry and light on both sides can you bake them.

Put the cookies in the oven for about 60 minutes at a top and bottom heat of about 130-140 degrees. Depending on how thick your cookies are, the temperature should be adjusted. You can then cool the various shapes and paint them as you wish and tinker with the salt dough. You can also give away the finished pendants. Here are more ideas for homemade Christmas gifts.

Decorate Christmas ornaments from salt dough

You can then cool the various shapes and paint them however you like. But the salty dough is sensitive to water, which is why you should avoid painting with watercolors and use water-free paints. Acrylic and poster paints are well suited, but also finger paints, clear varnish, and even nail varnish with good coverage. Gold and silver stars are particularly pretty and can still be decorated with glitter dust.

So if you don’t want to spend a lot of money on your Christmas tree decorations, but still don’t want to do without great and individual pieces of jewelry, you can make them out of salt dough for Christmas. You can find out more under make beautiful and cheap Christmas decorations yourself.

Working with salt dough is a lot of fun. Great decoration can be created at cheap prices. The salty dough has to be really easy to work with. We show how easy it is.

Children love the salt dough to play with and paint, as do many adults. It is important that this is produced in a healthy way and we would like to show you how this can be done.

The salt dough only needs four ingredients

You only need four ingredients to make the salt dough yourself. Children love this salty dough because they can finally muddle and do handicrafts. Wonderful works can be created with salt dough. Toys can be made, pendants, decorations, and even ashtrays if you have a little patience. Salt dough definitely encourages children’s spirit of discovery.

Basically, everyone has already tinkered with the dough, you just have to make sure that you make good salt dough. For the perfect salt dough, you only need 2 cups of wheat flour, preferably type 405, plus 1 cup of salt, 1 teaspoon of vegetable oil, and then another cup of water. Everything has to be mixed well and you can knead the dough perfectly and use it for yourself. Children also have a lot of fun here, many a child loves to knead the dough until it is perfectly smooth. If the dough is still a little sticky, add a little more flour.

Another salt dough recipe

Yet another recipe for making salt dough would be 1 cup flour type 405, 1 cup potato starch, 1 cup salt, 1 cup water, and 1 teaspoon vegetable oil. The whole thing is kneaded well and can be used immediately. You could also just use potato starch if you want the items to last a long time.

Important for the salt dough

Salt dough is best stored in airtight containers. You can always take out as much dough as you need. The dough can be kept fresh in the refrigerator for up to several weeks without drying out. So children could do a little tinkering every day. By the way, the salt dough doesn’t always have to go in the oven. It can also be air-dried. But this can take several days.

The oven is a bit faster there. But here, too, one should proceed with caution. It is best to set the oven to 50 degrees and let the finished works of art bake for an hour. The work then has to cool down and harden. Some people also set the oven to 120 degrees, but then the salt dough becomes darker, but also harder. Cracks can also be avoided in this way, which are annoying if you set the oven too hot.

Paint or pre-dye salt dough

If you want to let off steam creatively with the salty part, you can color the dough in advance or paint the finished works later. Children usually enjoy it more if they are allowed to paint the works of art later. If you want to color the dough, it is best to use food coloring or Easter egg coloring. Even cocoa can be used or beetroot. Curry and other spices also add color to the salt dough. After baking and cooling, the salt dough can be painted with watercolor, poster paint, or even acrylic paint.

Yeast dough is a classic that many people love. However, you absolutely have to let the yeast dough rise properly! For a fluffy yeast dough, both the pre-dough and the main dough or the topped sheet cake must rise in a warm environment. You can also use your oven for this.

The dough should be nice and fluffy but is often compact and firm. One reason for this is that the yeast dough cannot rest and “grow” long enough. In addition, the wrong temperature is often decisive. We’ll show you the right tips to make your dough rise safely!

Properly “feeding” the yeast for the yeast dough

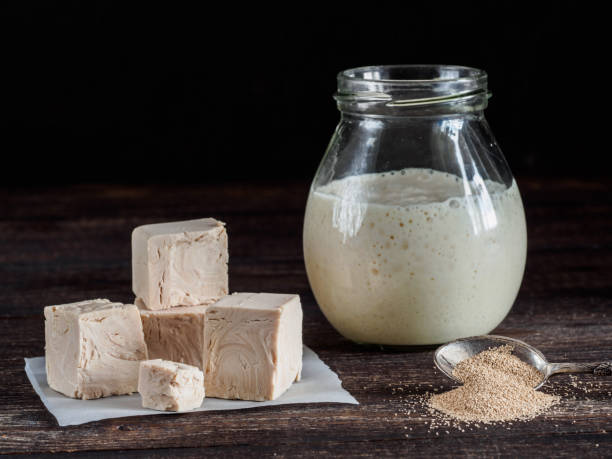
With fresh baking yeast, you must first make a pre-dough. This step is usually omitted with dry yeast. Whether you prefer to use fresh or dry yeast for your dough is up to you. A cube of fresh yeast (42g) corresponds to 2 sachets of dry yeast (each 7g). For the pre-dough, put the amount of flour required according to the recipe in a bowl and make a well in the middle.

In this well, mix the crumbled fresh yeast with a few tablespoons of water or milk and some flour from the edge of the well. The liquid used should always be lukewarm (30-35° Celsius), as the yeast can “work” better that way. Yeast consists of unicellular fungi that feed on sugars. Therefore, “feed” your yeast with a pinch of sugar to make the pre-dough succeed. Salt as an ingredient in a recipe should not be added to the pre-dough as it inhibits the action of the yeast.

The pre-dough forms bubbles in the warm oven

Yeast develops its fermenting effect best at temperatures of 32°C. In summer it is a good idea to leave the pre-dough covered in the sun. In cooler seasons you can simply use the oven as a helper by letting the pre-dough rest in the oven at 32°, covered with a damp cloth. The oven light that is on should produce approximately this temperature.

In addition, you can set this low temperature in a steam oven. Otherwise, any place with a constant temperature of 32°C without drafts would do, such as a sunny window sill or under the covers. If the yeast has bubbled after about 20 minutes and the volume of the pre-dough has increased significantly, you can take the bowl out of the oven again.

Knead the ingredients and let the yeast dough rise

Finally add the remaining ingredients such as fat, eggs, the remaining liquid, and salt to the dough and knead everything for at least 10 minutes. If possible, the ingredients should be taken out of the fridge one hour before baking so that they are hand-warm when preparing the dough and the yeast can do its job better. Now knead the dough well with your hands or the food processor for 10 minutes.

If it’s sticky, add a little more flour and knead again. Depending on the recipe, the yeast dough must now usually be covered for at least one hour in the 32 °C ovens or in another 32 °C warm and draught-free place. When the dough has doubled in volume, you can remove the bowl from the oven. Otherwise, you have to be patient and give the dough enough time.

Let the filled yeast dough rise a third time

After kneading again, shape, braid, and cover the dough until you hold the desired end product in your hands. For a fluffy yeast dough, it is once again important to cover the dough in the finished form with a damp cloth and let it rise with the topping for about 15 minutes, for example on a warm windowsill.

Finally, heat the oven to the desired baking temperature to bake the yeast dough, which will hopefully have risen nicely. Before baking, brush your yeast pastry with egg yolk, but milk is also suitable so that it does not dry out during baking. Finish baking your pastry and enjoy your fluffy yeast cake with a good breakfast or brunch with friends.

You can let the yeast dough rise and store in the fridge overnight. This reduces the effort for fresh rolls or yeast buns in the morning. Here we show you what you should consider.

Many recipes with yeast dough state: the ingredients should not come cold out of the refrigerator, the yeast should be dissolved in lukewarm liquid and the dough must rise in a warm place. These clues are there because yeast is a leavening agent and consists of yeast fungi. These yeasts die off when the yeast is processed too hot and do not become active when it is too cold.

But the last aspect is not entirely correct. Yeast fungi also work in the cold, but much more slowly. Some recipes take advantage of this and let yeast dough rise in the fridge rather than in the heat. This has many advantages that you can take advantage of when baking with yeast.

Leaving yeast dough in the fridge has advantages

If you let the yeast dough rise in the fridge, you benefit from a number of advantages:

You can prepare the yeast dough the night before, let it rise in the fridge overnight and use the risen dough straight away in the morning. So you can look forward to fresh, homemade cinnamon rolls, rolls and more for breakfast. Doing it yourself is particularly worthwhile for pastries, as you can do without many of the additives. You can find out more about this in the article: This is why many people can no longer tolerate bread.
If you have made more yeast dough than you can handle at once, you can store the rest in the fridge for up to a day and don’t have to throw it away. Alternatively, you can also freeze it. It lasts like this for several months.
In addition, you only need half the yeast for refrigerator yeast dough.
The refrigerator dough is prepared with cold liquid. This avoids the risk of your yeast dying from water that is too hot.
Yeast dough from the refrigerator is often looser later. Because he has enough time to rise. Pastries made from frozen and thawed yeast dough are in no way inferior to fresh yeast pastries. The taste does not change when stored in the cold.

Yeast dough in the fridge: you have to pay attention to this

You can let yeast dough rise in the fridge overnight and store it there for up to a day. Pay attention to the following:

Prepare the yeast dough with cold liquid so that it doesn’t puff up too much.
You don’t need a pre-dough and you shouldn’t let the yeast dough rise in a warm place first.
Immediately after kneading, dust the yeast dough all over with flour and put it in a reusable and sealable bag or tin. This should be large enough for the yeast dough to spread out.
Now put the yeast dough in the fridge and let it rise overnight. The ideal duration for this is 12 to 18 hours. You can use the dough first thing in the morning or keep it in the fridge. However, it should not be left in the fridge for more than 24 hours, otherwise it could ferment.

Tips for the yeast dough in the fridge

You can form the yeast dough into balls, snails or braids before you even leave it. If you have formed small balls or pastries, you can store them in a bag that you blow open after filling. This creates more space in it and the yeast pieces do not hit the bag and deform when they rise.
Alternatively, place the yeast pieces on a baking sheet lined with parchment paper or on a floured board. Pay attention to the distance between the individual pieces of dough. You then slide the baking sheet or board into a large bag, which you seal and put in the fridge.
The bag or tin should always be closed tightly so that the dough does not dry out.
After rising: The yeast dough has risen well in the fridge overnight. If you want to bake it now, shape it as you like (if you haven’t already done so) and let the shaped pieces of dough rise again at room temperature for 20 minutes. This makes the pastry particularly fluffy.

Freezing yeast dough: What you have to consider

If you don’t want to use your yeast dough immediately after rising, you can store it longer. To do this, you put it in the freezer. There it stays at minus 18 degrees Celsius for up to six months. You can store yeast dough in the freezer as follows:

Shape the dough into a ball or patty before freezing. Then flour the dough.
Place the dough in freezer bowls or freezer bags and place in the freezer.
If you want to bake the dough later, let it thaw thoroughly beforehand.
After thawing, you can process it like conventional yeast dough. So he has to rise first. Give the yeast dough enough time to do this. Defrosted yeast dough takes about twice as long to rise as fresh dough.
Once the dough has risen, you can process it like conventional dough.

Freezing pizza dough is useful if you have misjudged the quantity or want to build up a small supply. We’ll explain how to freeze.

Freeze pizza dough in portions

Ideally, you freeze the pizza dough before it has risen – this way the pizza doesn’t get soggy. If you’ve made a lot of pizza dough, you should freeze the dough in the portions you need for one pizza at a time.

When freezing, it is important to pack the dough airtight. This works with cling film or freezer bags, but for the sake of the environment and your health you should avoid plastic. A good plastic-free alternative is a beeswax wrap.

You can freeze pizza dough particularly well in a cake tin: Roll out each portion of dough into a circle and place them in a round cake tin. Always put a layer of baking paper between the flatbreads (you can use the baking paper later).

Then you pack the whole thing airtight, for example in wax paper. The advantage of this method: You can take individual pizza bases straight out of the fridge. They thaw faster thanks to their flat shape and you don’t have to roll them out after freezing.

thawing and shelf life

Well packaged, the pizza dough can be stored in the freezer for up to three months. That’s enough to create a small supply.

You should defrost the dough slowly, ideally over a few hours or overnight in the refrigerator. This allows the pizza dough to rise again. If it has to be quick, you can save yourself the hassle, the pizza will be a bit crispy.