Tag

for

Browsing

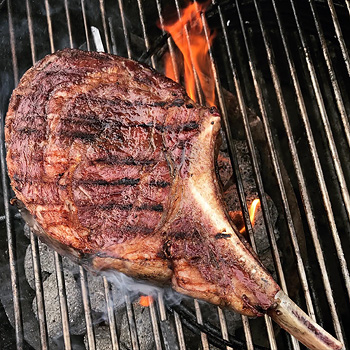
It is not the first time that beginners manage to cook a steak on the grill with high quality and tasty. The first failed attempt is not a reason for frustration, but a great opportunity to analyze your mistakes to take into account and correct them in the future. Below we will share useful tips and tricks from experienced chefs on how to cook a deliciously and unmistakably grilled steak perfectly.

  1. Preheating the grill. The first rule to remember once and for all. For the planned dish to turn out equally tasty from time to time, it is necessary to take care of heating the grill in advance. Set the temperature to maximum and preheat the barbecue for 10-15 minutes before starting the cooking process.
  2. Continuous flame control. Drops of fat dripping off the steak during frying can trigger flames. A strong fire can dry out the meat, and in this case, you do not need to use water at all. It is enough to reduce the heat to a minimum or completely extinguish the burners. Wait a couple of minutes and continue the cooking process.
  3. There must always be an adequate supply of fuel. It doesn’t matter if you cook on a charcoal or gas grill, to avoid unforeseen situations during the cooking process, always have enough fuel to roast the meat.
  4. Temperature control. As you know, when preparing various dishes over an open or indirect fire, it is important to adhere to the existing recommendations for temperature conditions. For example, there are certain rules for roasting poultry and pork. In the case of thick pieces of meat or baking whole poultry, it is rational to choose medium temperature conditions. In the case of thin steaks, the fire can be more intense and the roasting time may be limited.
  5. Experiment and master new culinary techniques. To enhance the usual taste of meat, it can be fried on both sides over high heat. This technique will allow you to get an appetizing golden-brown crust. So that the meat is not overdried, it is better to continue frying until fully cooked over medium or low heat. It is rational to use and not direct heat until the dish is fully cooked. Slow simmering allows the taste of the dish to unfold as much as possible, without overdrying the meat fibers and completely preserving their juiciness.
  6. Experiment with flavors. To revive the usual taste of the dish, we recommend using different variations of sauces, combining them individually each time. For example, a pinch of sugar will give the meat a more intense flavor and a delicious crust. Remember also that you need to grease the steak with sauce 5-10 minutes before cooking. If the meat has been pre-marinated for several hours, it should be cooked at minimum temperatures, gradually increasing the heat. Thus, the finished dish will turn out to be evenly fried, without a specific, burnt aftertaste.
  7. Stay alert while preparing food. For your dish to turn out perfectly fried, without burnt edges, you need to monitor not only the temperature and intensity of the fire but also the state of the steak frying. Especially, this rule is relevant when frying chops, thin pieces of meat, burgers over high heat.
  8. Cleanliness is the key to health. Interaction with any food, including meat, requires certain hygiene rules. The work area must be kept as clean as the grill itself. Pay special attention to the cleanliness of hands and cutlery. It is better to check the degree of roasting of meat not with improvised means, but with a special, disinfected temperature probe.
  9. It is also important not to forget about the cleanliness of the grill. As with any kitchen equipment, the grill must be kept clean. After cooking, until the particles of fat and food are completely dry, they must be removed. All types of dirt can be easily removed by intensive heating of the grill. After firing, the ash can be easily removed with a sponge or barbecue brush. Timely removal of dirt will allow you to always prepare delicious food, without any foreign odors. Do not forget about the timely maintenance of your grill. Monitor the serviceability of burners, temperature controllers. We also recommend purchasing professional grill cleaning tools. With their help, it will become much easier and more convenient to monitor the health of the equipment.
  10. Organize proper storage of your grill. To make your grill, gas, or charcoal, serve you for many years, get a special cover for it. It will protect the metal from moisture, dust, and mechanical damage.

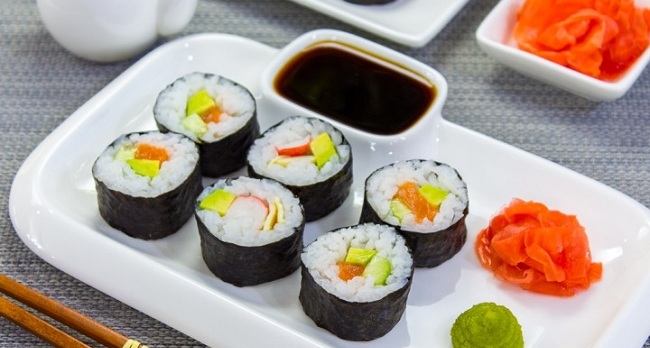
In fact, sushi is very simple: rice, fish, and various additives like cucumber or avocado. However, in order for your sushi to turn out really cool and not worse than in a restaurant, we advise you to adhere to a few rules.

  1. The knife is the main participant in the preparation of sushi after you. Therefore, he must be at his best. That is, it must be very sharp. Therefore, do not be too lazy to sharpen it before starting your culinary experiments. Choose knives with wooden handles: when wet, they won’t slip in your hands. Such knives in Japan are called “bento” and are used to make sushi.
  2. All ingredients must be exceptionally fresh or, as they say in the markets, the freshest. Otherwise, you risk not only tasteless rolls, but also your own health: we think we don’t need to say that stale fish is dangerous. In addition, whatever fish you choose – fresh, smoked or dried – it is important to cut it correctly. Do not cut tender fish fillets as they will lose their presentation. Here we go back to rule number one: the sharp knife.
  3. Fig. It is very important to prepare it properly. Sushi is made from warm round-grain rice prepared using a special technology. 460 g of rice requires 750 g of water. Rice must be washed and dried for an hour, then placed in a saucepan with a tight lid, pour in water and cook over minimum heat for 5 minutes after boiling. Then it needs to be steamed for 12-15 minutes on low heat, remove the pan from heat, remove the lid and cover with a towel for 15 minutes. Then gradually add vinegar dressing to the rice and let it dry.
  4. Mat. That is, the rug with which the rolls are rolled. It should be made of bamboo so you can press the sushi rice properly. Many beginners use a plastic bag for these purposes, but it does a poor job: rice will quickly fall apart.
  5. Acetic water. When forming sushi by hand, use vinegar water. It is convenient to wet your hands in this solution during cooking and rinse them after working with rice. To make vinegar water, mix two tablespoons of apple cider vinegar with a glass of water.
  6. Proportions. Do not coarsely chop the sushi ingredients; this can impair the appearance and taste of the dish.
  7. Nori. Supermarkets sell sliced nori sheets, which are convenient only for making traditional sushi. If you bought these algae by mistake, don’t throw them away. Lay the sheets tightly together and crush a few boiled rice at the joints. This technique will help you easily glue nori and use them to prepare any kind of sushi.
  8. Wasabi. Do not get carried away by it. An excessive amount of this sauce will not let you enjoy the taste of the dish, because its sharpness dulls the taste buds.
  9. Eat immediately. Sushi should be eaten immediately, because this dish, prepared from fresh products, deteriorates very quickly. The maximum shelf life of sushi is six hours, provided that special boxes are used.

These are very important tips for making delicious pastries!

  1. Keep a bowl of ice water nearby. When you work with oily dough, it can melt due to your warm hands, making the job much more difficult. To avoid this, keep a bowl of very cold water nearby and dip your hands into it as needed.
  2. Use butter and eggs at the right temperature. If a recipe calls for your eggs and butter to be at room temperature or cold, take it seriously. This is how you will achieve the best result.
  3. Warm eggs quickly. The easiest way to bring your eggs to room temperature quickly is to put them in a bowl of warm water. However, you can overheat them this way. The best way is to break the eggs into a stainless steel bowl, put it in warm water and control the heating process with your finger for 1-2 minutes.
  4. Heat the oil quickly. To heat up the oil faster, place it between layers of polyethylene and hit it hard with a rolling pin. Continue rolling the butter in this way until it is about one and a half centimeters thick. Let the oil rest for 5 minutes, turn over, wait another 5 minutes and then use to cook.
  5. Foam the butter and sugar as needed. If the recipe states that you need to beat the butter and sugar, then just mixing them is not enough. Foam both ingredients to blow air into the oil. This is especially important for pastries. For cookies, on the other hand, butter and sugar should only be whipped if the recipe requires it. Otherwise, the baked goods will settle in the oven.
  6. Do not whisk flour. Foaming flour is not recommended – just mix it with the rest of the ingredients with a mixer until smooth. Otherwise, the baked goods will be too hard.
  7. Don’t worry about the lumps in your cupcakes. Any lumps that are present in the muffin batter will disappear during baking.
  8. Bake muffins on parchment paper. The baking paper will keep the cake from burning or escaping from the mold.
  9. Use parchment paper for the pies. Regardless of the recipe, always line the bottom of the tin with baking paper. This will make it easier for you to get the finished cake out of the mold.
  10. Fill empty muffin molds with water. If you are making muffins and you do not have enough dough for all the notches in the mold, fill the empty holes with a little water. This will save the shape from deformation.

With these tips, you will have the most delicious sushi ever!

  1. Moisten the fish with a damp cloth to make it easier to remove the scales. Holding the fish head firmly, scrape off the scales with a knife or grater in the direction from the tail to the head.
  2. Do the same for the other side of the fish. When cutting fish, always hold it by the head or tail. Place the fish belly towards you with the head on the left side. Peel back the fin with a knife and cut deeply into the flesh at the edges of the gill covers towards the pelvic fin until you cut the spine. Separate the head, then remove the insides.
  3. Then rinse the fish thoroughly in salted water, especially you gutted abdominal cavity. Dry the fish with a cloth. Place the fish obliquely on a cutting board with the tail facing you so that the belly is facing to the right. Cut from the pelvic fin to the tail. Flip those fish. Along the back of the carcass, cut the flesh to the ribs from right to left.
  4. Flip the fish to the other side along the axis. Use the edge of a knife to cut through the flesh at the edges of the bones that form the rib cage. Separate the body from the carcass. Flip the fish bones down and separate the flesh from the spine from the tail to the head.
  5. Flip the fish axially to the other side. Separate the flesh from the spine at the base of the tail. Free the body. Remove the remaining rib bones from the fillet.
  6. Place the body on a cutting board, skin side down, with the tail piece to your left. Make an incision at the base of the tail, grab the skin with your left hand, insert a knife between the skin and the flesh and use a sawing motion to separate the skin from the flesh.
  7. Use tongs to remove the remaining bones in the meat.
  8. If the body is too long, cut it in half along the line of the spine.

Most people associate barbecue with a warm summer breeze, with green tree branches hanging over the grill and sunlight that accompanies the party almost until its end. But the Big Green Egg grill shouldn’t get dusty in the garage in winter, because this is not seasonal sports equipment, it is suitable for use at any time of the year.

In winter, cooking is even more pleasant: insects do not get bored, gathering at the lamps; the drinks are not heated, and the guests are even more delighted to welcome your little culinary masterpieces.

  • Place the grill in the least windy corner of the yard, as it is the icy wind that penetrates the blower and cools the heat;
  • The day before your planned BBQ party, bring the charcoal into your home to warm it up and dry, making it easier to fire.
  • It is only necessary to store coal in paper bags, as condensation can form on the walls of the plastic packaging due to temperature differences. The resulting water droplets will be absorbed by the coal, from which its quality will only suffer.
  • Close the charcoal bag tightly. Many people store grill charcoal in their garage, which has a ton of chemical odors such as gasoline, paint, or furniture varnish. If this smelling air gets to the coal, then you risk getting a steak for lunch with the smell of gasoline, engine oil, etc.
  • Equip yourself with tools: buy Big Green Egg tongs for meat and vegetables, and a metal spatula for fish. Under no circumstances pierce the grilled food with a fork, as you will only damage them and lose juice, turn juicy tidbits into dry and sinewy. The fork is only useful for slicing the finished dish.
  • Don’t tackle complicated recipes in winter. Bad weather can quickly ruin plans, be prepared for this. Cook simply and with passion.
  • If you want something like that, then it’s time to get a set of spices from the cabinet and make a fragrant sauce. With the Big Green Egg Pickle Syringe, you can make your steak or poultry even more juicy and tender.

These tips will definitely come in handy 🙂

  1. To make sushi, the rice should be small and round. However, in order not to be mistaken in your choice, I advise you to purchase rice specially made for sushi. The first step is to rinse the rice several times in order to wash the rice powder. After that, it is very important that all the water is glass, so leave the rice in a colander for half an hour. Then you need to fill the rice with water, one to one. Bring rice to a boil, cook for 1 minute, cover and cook over low heat for 15-20 minutes. Remove the rice from heat and let stand for another 10 minutes without opening the lid.
  2. Put the rice in a wide bowl and pour the rice vinegar over it evenly (use 1 tablespoon of vinegar for 1 cup of rice). Then quickly stir the rice with a wooden spatula. If you stir slowly and smoothly, the rice turns into porridge. Then the rice needs to be cooled. If you can’t find sushi vinegar, you can make it yourself. 1/3 cup table vinegar, 2 tbsp tablespoons of sugar and 1 teaspoon of salt, stir until the grains dissolve in the liquid.
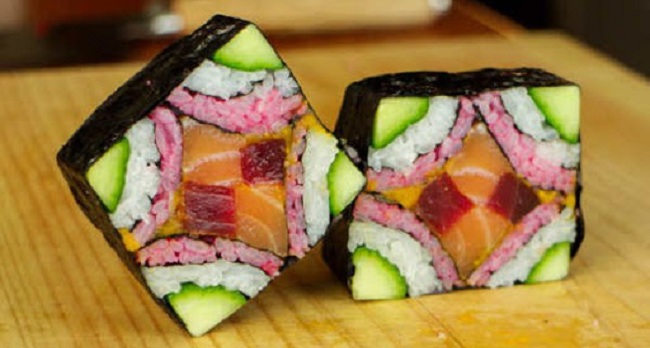
  3. Polished white rice can be dyed in a variety of colors to add contrast to the finished meal and give it a festive look. If you use red plum vinegar instead of apple cider vinegar to make the vinegar mixture, the rice will turn pink. If you add one teaspoon of turmeric to the water before boiling the rice, the rice will turn out bright yellow. If you mix two tablespoons of ground seaweed into ready-made sushi rice, it will turn soft green.
  4. And now, the sushi rice is ready. Now you need to decide what kind of sushi you want to make. There are several types of sushi: Nigiri is a type of sushi that is sculpted by hand. Blind rice is served on lettuce leaves with a slice of raw fish on top of the rice. Futomaki are large rolls that are prepared with several fillings (usually five). Temaki are nori rolled into buns filled with rice with any of the fillings. Uramaki is sushi with rice on the outside.

Here are some tips you will find helpful:

  1. Don’t forget to buy sushi fish or other seafood specially made for sushi if you are going to eat it raw. Otherwise, you run the risk of contracting parasitic and bacterial diseases. Handle convenience foods with care, carefully preserving raw ingredients while waiting to be cooked.
  2. Avoid cross contamination! Never let your raw ingredients touch anything other than the cooking and serving utensils from which you will be eating sushi. It is better to choose a regular seafood supplier with a good image.
  3. Don’t overload the rice with nigiri sushi or maki seasoning. Sushi rice needs air.
  4. Some side dishes (herbs) can be grown on the window or in the household. First of all, Daikon and Shiso (railings). They can be purchased in stores. Daikon keeps well in refrigerated place. Shiso is recommended to be planted in small containers as it grows quickly.

Making sushi is a very exciting process. It takes very little time, and the pleasure of homemade sushi is much more, because they are made with your own hands.

  1. Fish and shellfish with crustaceans used to make sushi must first of all be fresh, since in most cases they are eaten raw. Knowing the freshness of whole fish, chunks of fish, shellfish with crustaceans and other seafood will allow you to choose the freshest and therefore most delicious fish in the fish market or the best preserved frozen fish in a large store if possible.
  2. It is especially important that the whole fish is fresh, that is, not gutted with all the insides. When examining such a fish, make sure that the scales are not damaged and shiny, the flesh is elastic, the eyes are black and transparent, not bloody, the belly is hard, the gills are bright red. And of course, the absence of any fishy smell! Dull eyes and dirty gray gills clearly indicate that such fish must be boiled.
  3. When buying fish cuts, make sure the flesh is firm and shiny and the blood on the cuts is bright red. Since the meat loses its flavor and becomes crumbly when you wash the pieces of fish, it is best to buy the whole fish and cut it at home.
  4. Having bought fish, you should cut it up as soon as possible, and then store it in the cold. If you are going to cook the fish soon, place it in the refrigerator, wrapped in a pre-damp cloth. If the cut fish will be in the refrigerator for more than half a day, put it in a plastic bag. Opened fish dries up in the refrigerator.
  5. The taste of frozen fish depends on how deeply it is thawed. Fish will thaw best if placed in the refrigerator overnight, where it will thaw gradually. But if you are in a hurry, thaw the fish in salted water: put freshwater fish in a solution with 1/2 teaspoon of salt per 4 cups of water; for sea fish, take 1 tablespoon of salt in 4 glasses of water. This will avoid the loss of many of the flavors. But you can’t let the frozen fish thaw completely. As soon as it can be cut with a knife, then it is ready for further processing.

A recipe to make a juicy beef steak at home, almost like in a restaurant. Beautiful, tasty, with stripes, and most importantly healthy! Like the previous steak recipe in a regular pan, this recipe is real salvation from hunger. When you need to quickly cook a piece of meat, there is no better way than to fry a beefsteak. It will take 20 minutes in total to cook. But you can take your time.

  1. Beef meat.
    This is essentially the only ingredient. Everything is correct. Nothing else is needed. For a good steak, we just need one good piece of beef. The beef should be fresh, the fresher the better. Calf meat is ideal. Great – meat streaked with fat. Just don’t confuse fat with ligaments. It will be tough in these places and the piece will also lead when frying since the ligaments are strongly compressed during heating and frying. It is best for meat that it is one piece of one muscle.
  1. Do we need to beat the meat?
    I will answer the question with a question. What for? A piece of meat of 1.5 – 2 centimeters, chosen as we have already decided, does not require any additional processing. In his pan, so her, grill!
  2. Is it possible to fry frozen meat?
    In the last recipe, I allowed the meat to be roasted from the freezer. Taking into account the fact that we are now using the grill, it is still better to let the meat thaw. This will allow less water to melt, which in frozen form is familiar to us as ice. In a flat frying pan, heating frozen meat slightly improves the frying process in terms of reducing sticking and boiling the top layer and frying it at the same time. On the grill pan, we get soup with a piece of meat. Therefore, it is better to let the meat move a little so that the top layer defrosts.
    But ideally, fry chilled or defrosted meat. Then even if there is still ice between the fibers inside, the toasted outer layer inhibits moisture inside the piece.
    Answer: you can, but wisely.
  3. Spices and salt
    The steak does not require salting when frying. This is definitely unnecessary. Serve a cooked piece of grilled meat with coarse salt on top, or add some salt as you eat, and you will be good. The meat has its own wonderful taste, slightly salty. If the steak is not deep-fried, medium, or generally “with blood” – then the tastes will be different and very pleasant and without salt. But experiment, add coarse salt and pepper to the table.
    There are tips to salt before frying, marinate, and more. My advice is not to salt, do not spoil the taste of pure meat. The undersalt is always on the table, and at hand. Give yourself the freedom to choose whether or not to salt!
  4. Frying pan. The best frying pan is a cast iron grill pan. A thick bottom gives some thermal inertia. Naturally, fry only after good heating of the cast-iron pan, not before.
  5. With or without oil. According to the technology of its maintenance, the cast iron frying pan is always oiled. Taking into account the fact that we are grilling in a pan, the meat falls on the grooved protrusions. You don’t need to use oil at all. If this confuses you, lightly grease the pan with olive oil using a brush or a piece of cheesecloth. But I repeat – a cast-iron grill pan allows you to fry without oil.
  1. Temperature or frying mode
    It’s hard to say about the temperature. I roast on gas on the most powerful burner. I set it to almost maximum to warm up the cast iron. Then I decrease it by more than half (when the cast iron handle of the grill pan gets hot). And I fry the meat in this mode. In a hot cast-iron frying pan, you don’t have to think about such trifles as how many degrees Celsius the temperature costs when frying meat.
  2. How often to turn over
    Everything is simple here. As soon as a piece of meat hits the hot skillet, I timed 2 or 3 minutes for each side. Depending on the degree of roast and the thickness of the meat. Meat up to 2 centimeters requires 2 minutes on each side. Thicker is more. Fry deeper – 3 minutes for meat up to 2 cm thick. It’s simple. Turn over – once. Fried 2-3 minutes on one side, turned it over and another 2-3 minutes on the other and that’s it. Meat on a plate!
  3. When and how to serve. Preferably while it is still warm. Why is there a cold steak? Fried a steak, on a plate of it, knives, forks. A bunch of greens. Drinks and everything. Let’s not sit with a stopwatch.

These tips are very important when baking! With them it will be the most delicious!

  1. Use a brush to grease the mold with oil. If your metal mold has a lot of cracks, apply the softened butter with a cooking brush.
  2. Reduce the temperature for dark dishes. Dark dishes absorb more energy and transfer heat faster. Therefore, if you are baking pastries in a dark dish, set the oven temperature slightly lower than the recipe indicates.
  3. Use toothpicks to check the dough. It is better to check the readiness of the dough not with metal sticks, but with toothpicks. The metal will slip and tell you little about the baked goods. In contrast, the tree will show the actual state of the test.
  4. Chill the cake with the top down. If you want the top of the pie to be flat, after baking, turn it upside down and chill. There will be less unevenness on the surface of the cake.
  5. Cool the cake properly. Chill the cake on a stand to allow air to circulate from below. Don’t do this in the fridge – just leave the baked goods on the counter. To speed up the process, bring it near an open window or fan.
  6. Use the frosting as glue. If you are making a piece with icing, place some of it on a platter and then start assembling the cake. When cooled, the baked goods will stick to the dish and will not move.
  7. Cover the cake with the icing before freezing. Before freezing and icing the cake, lightly glaze all baking surfaces. It will protect the cakes from the negative effects of cold. After 15 minutes in the refrigerator, you can take out the cake and cover it with a thick layer of icing.
  8. Use a cold knife for warm desserts and a warm knife for cold ones. Use a cold knife to cut evenly warm desserts (you can put it in the freezer for a few minutes). Conversely, for cold desserts, heat the knife by dipping it under running hot water and then wiping it dry.
  9. Do not put baked goods in plastic until they have cooled down. Never put warm cookies in a plastic container or wrap an uncooled cake in plastic. Otherwise, condensation will start and your baked goods will get wet and spoil.
  10. Defrost baked goods without film or packaging. If you defrost baked goods in a wrapper or a closed container, condensation will form on the surface. Therefore, always remove the packaging.
  11. One final tip: cook with love is the best ingredient for any dessert. Successful culinary feats!