Tag

frying

Browsing

For a flavorful side dish, you can sauté broccoli. We will show you how to do this and how you can use the vegetables afterwards.

You probably know broccoli as an ingredient for soups, casseroles or as a vegetable side dish. Broccoli is pre-cooked for many dishes, but that’s not the only way to prepare the vegetable. The broccoli remains particularly crisp and al dente when roasted. At the end of this post you will find many ideas on how to vary and use fried broccoli.

Since you can also eat broccoli raw, you don’t have to worry about it not cooking through properly. If you fancy trying raw broccoli, check out our related post. There you will find out what speaks for and against eating broccoli raw.

We recommend that you buy broccoli regionally and seasonally and pay attention to organic quality. The organic seals from Demeter, Bioland or Naturland stand for sustainable agriculture without chemical-synthetic pesticides. With seasonal vegetables from the region, you can also avoid long transport routes. Broccoli is in season in Germany from June to October. Are you interested in when you can get other types of fruit and vegetables from your region? Our seasonal calendar gives you a comprehensive overview.

Alternatively, you can cultivate and harvest broccoli in your own garden. More about this here: Planting broccoli: How to sow, cultivate and harvest broccoli.

Roast broccoli: Here’s how

Ingredients:

1broccoli
1 tbsp oil

Directions:

Divide the broccoli into individual florets that are as small as possible. Put them in a sieve and wash them thoroughly with water. Drain the broccoli briefly before frying.
Heat the oil in a pan. Sauté the broccoli in it for 5 to 8 minutes, turning it regularly to keep it from burning.

You can also use the stalk of broccoli. To do this, peel it and remove woody parts if necessary. Then, thinly slice or grate the stalk. Then you can fry it together with the remaining broccoli.

Fry broccoli: This is how you can use it afterward

You can serve and combine fried broccoli in many different ways:

as a simple vegetable side dish with salt and pepper
with garlic, nutmeg, ginger or chili
with herbs like parsley or thyme
drizzled with lemon juice
drizzled with olive or sesame oil
with roasted sunflower seeds or sesame
as an accompaniment to rice and pasta dishes
hearty with fried onions and smoked tofu
with yoghurt sauce (also vegan possible)
as part of casseroles, soups, stir-fries or salads

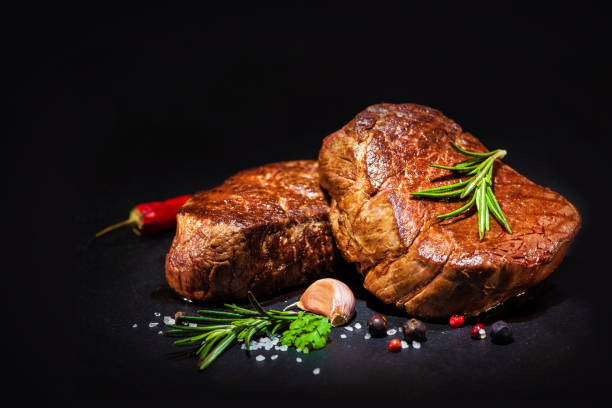
Instructions and tips for properly frying a steak. Frying the perfect steak is a mystery to many chefs. With our practical instructions and numerous tips, every steak is just right, just the way the guest wants it.

Fry the steak properly

If you want to sear a steak properly, there are a few things to keep in mind. You should not only pay attention to the right temperature and frying time. The quality of the meat and the pan can also be important for a successful result. Individual wishes and tastes should also be taken into account. Because not everyone likes their steak “well done”. Thus, the preparation of a steak seems like a big challenge to some. But don’t worry, with the following tips you will succeed in frying the steak:

1) Know the most common types of steak


Finding the right meat for a steak is not always easy. With beef steaks, a distinction is made between the different parts of the animal. The most common types of steak are rib-eye steak, fillet steak, rump steak, T-bone steak, porterhouse steak, rump steak, sirloin steak, flank steak, and boiled beef. The difference lies in the fat and bone content and the size of the meat piece. In addition, a fillet steak, for example, is far more tender than a T-bone steak, which has more roast beef than a fillet.

2) Buy the right meat

For a real gourmet steak, it is advisable to choose a flank steak, rump steak, or fillet steak. In any case, the meat should be tender and juicy. Depending on your taste, you should cut the steaks at least 2 cm and at most 4 cm thick. It is advisable to buy the meat fresh from the butcher or at the meat counter in the supermarket. Because ready-packaged steaks are not necessarily cheaper, they are far behind freshly cut meat in terms of quality. Also, note how you can identify and preserve fresh fish.

3) Fry the steak properly in the pan

A cast-iron grill or frying pan, which ideally can be used on a gas stove, works best. Of course, ceramic hobs and induction cookers are also suitable for frying. In the summer season, a charcoal grill is recommended, because it can generate enough heat and is also really fun. Also, read delicious menu ideas for grilling. Meanwhile, cast aluminum pans are more suitable for low frying temperatures, as coatings may otherwise come off. This is not a problem but takes longer.

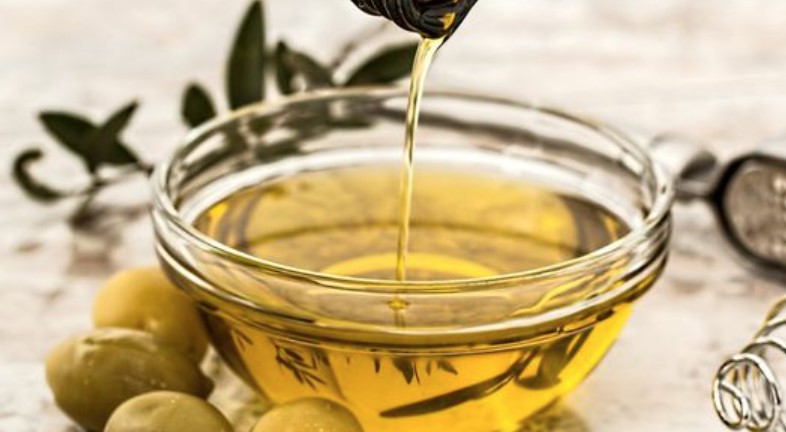
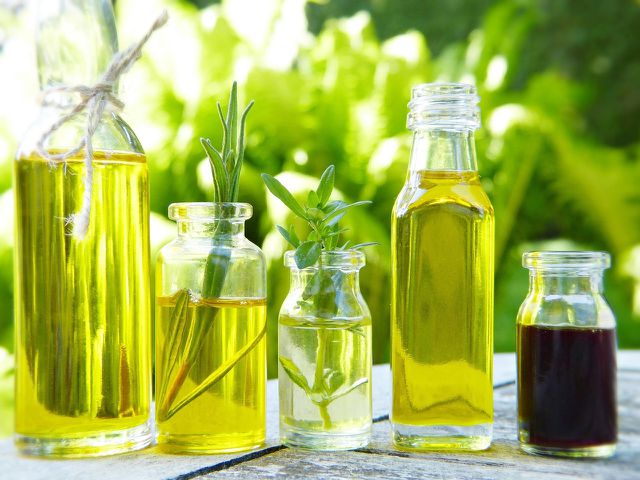
4) Which fat to use for frying?

Butter, peanut oil, or rapeseed oil are particularly suitable as fat. Because these have a high smoke point, which is not the case with olive oil or butter, for example. At high temperatures, bitter substances can be released here. And you should avoid that when frying your steak properly. In addition, you can freeze and thaw meat well, so that leftovers do not have to be thrown away.

5) Tips on preparing to fry steak

The steak should always be at room temperature before frying. To do this, take the meat out of the fridge early enough. Half an hour before cooking is usually sufficient. If the steak is to be pulled into the oven, the oven must first be switched on at a maximum of 160 degrees circulating air or top and bottom heat. Cooking the steak in the oven at lower temperatures will make it more tender. However, it takes longer accordingly. Read also how you can then remove the oven smell.

There are two ways to prepare meat. Either the fat is added to the pan or it is massaged into the meat beforehand. In the latter process, you should let the meat rest for 10 minutes after massaging it. The pan must be heated to a high temperature before frying. If you put a drop of water in the pan, it must immediately evaporate. Then you know that the right temperature has been reached.

6) What cooking levels are there?

Cooking is an important issue when frying a steak properly. Depending on your taste and preference, you can choose between different cooking levels. And depending on the degree of doneness, a different core temperature is required. It is advisable to place the steak in the preheated oven after searing. Depending on the thickness of the meat and how well done you want it to be, the cooking time in the oven can range from 5 minutes to an hour if you prefer the slow cooking method. It is important to know that a steak becomes more tender the longer it is cooked at low temperatures.

7) The perfect cooking point and the perfect cooking time

You should always ask guests in advance how they want their steak. And then pay attention to the respective core temperatures during preparation. Then you need to sear the steak for a minute on each side. This creates a delicious crust and the meat’s own juices remain in the steak. So it doesn’t get dry.

You can use the finger test to determine the doneness. Because you can estimate the degree of doneness on the heel of your hand. If you hold your hand loosely and press on the heel of your hand, it feels like a steak that has been “rare” cooked. “Medium” corresponds to the firmness of the heel when you hold your thumb and middle finger together. A steak feels “well done” like the heel of a hand when the thumb and ring finger are held together. A little helper in the kitchen is useful for the cooking time in the oven – a roasting thermometer.

You can prepare fennel in many ways – whether fried, boiled or raw. It is suitable for much more than just a cup of tea. We’ll show you how to use this healthy and versatile vegetable.

To prepare fresh fennel, it is best to buy it during the season from June to October. You can recognize it by its typical shape, which is reminiscent of a human heart with its white bulb and green stems. Ideally, buy fennel from the region and in organic quality. In this way you can be sure that the fennel has not traveled long distances and was grown without chemical-synthetic pesticides.

Tip: The fennel is fresh when it has no brown spots and the green fennel is neither wilted nor dried out.

Fennel is rich in healthy nutrients

You can prepare and eat both the white and the green part as well as the seeds of the fennel. They all taste like anise because of the essential oils. In addition, fennel contains many other healthy ingredients, including magnesium, potassium, iron and vitamin A and vitamin C.

How to prepare the different parts of the fennel:

The white of the fennel can be eaten raw, boiled, roasted or baked in the oven. It goes well with many types of vegetables and fish.
You can use the fennel greens to season fennel dishes.
You can use fennel seeds to flavor baked goods or Mediterranean sauces. You can also use them to make a healthy fennel tea.
To prepare fennel, you must first wash it thoroughly, as there is often sand in the gaps. Then separate the green and cut out the stalk. You can do this by halving or quartering the tuber.

Eat fennel raw

Raw fennel tastes delicious as a fennel salad and can be combined with many types of vegetables. We recommend that you cut it into fine strips due to its strong flavor. An interesting combination is, for example, raw fennel with oranges and olives. For four people you need:

2 juicy oranges
1 small fennel bulb (about 150 g)
2 small white onions
1 tsp chopped rosemary
1 tsp white wine vinegar
4 tablespoons good olive oil
salt and pepper
a handful of olives
How to prepare the salad:

Peel the oranges and remove the white skin.
Cut the oranges into 0.5 cm thick slices and remove the stone. Arrange the slices on a platter. Catch the orange juice.
Clean the fennel bulb and remove the hard outer parts.
Set the fennel greens aside.
Cut the fennel heart into small cubes or fine strips.
Cut the onions into very fine rings.
Whisk together the reserved orange juice with the vinegar and olive oil, add the rosemary.
Season everything with salt and pepper.
Chop the fennel greens and spread them over the orange slices. Top with the onion rings and fennel and drizzle with the dressing.
Put the olives on the salad.

Cooking fennel – what to watch out for?

You can cook a fennel bulb whole or cut in half. Depending on the size, the fennel needs ten to 20 minutes to cook. You get a nice aroma if you add lemon juice to the cooking water. You can then season the fennel as you like, drizzle with olive oil or bake in the oven.

Frying fennel in the pan

The roasted aromas that develop when roasting go very well with the taste of the fennel. Here is an easy fried fennel recipe. For two servings you need:

1 fennel bulb with greens (about 500 g),
2 tbsp olive oil
a bit of margarine
a squeeze of lemon juice
a pinch of sugar
salt and pepper
How to prepare the fennel:

Clean the fennel and cut off the green.
Halve the fennel lengthways, cut out the stalk and cut the fennel into strips.
Heat the olive oil in a pan. Fry the fennel in it over high heat for about four minutes.
Add a pinch of sugar.
Add the margarine and some water and let the fennel simmer over medium heat for a few minutes until cooked.
Season the fennel with lemon juice, salt and pepper and sprinkle with the chopped fennel greens.

Cooking fennel in the oven

Fennel also tastes very good from the oven. Here are some suggestions on how to cook it in the oven:

Mix chopped fennel with other vegetables, place on a baking sheet, drizzle with olive oil and season. Then bake the veggies in the oven for about 30 to 40 minutes until tender and lightly browned.
Cook the halved fennel bulbs until done and then bake them in the oven for about 20 to 25 minutes. You can use (vegan) cheese of your choice for the gratin and add (plant-based) cream, spices and other vegetables if you like.

Frying oil must be heat-stable and should have a neutral taste – not only rapeseed and sunflower oil are suitable for this. We will show you suitable alternatives and also what you should definitely pay attention to when heating oil in a pan.

Frying Oil: Refined or Cold Pressed Oil?

Olive oil, rapeseed oil, sunflower oil – the selection of oils is large. The latter two oils are currently in short supply due to panic buying and shortages. However, various frying oils are suitable for frying.

But which oil is good as frying oil? We give you an overview of heat-stable vegetable oils with a high smoke point. The heat stability of vegetable oils mostly depends on how they were made:

Refined oils: For example rapeseed oil and sunflower oil, they are good for frying.
Cold-pressed and native oils: These oils generally have a lower smoke point and are only conditionally suitable as frying oil. At least “gentle steaming and frying is possible,” writes Stiftung Warentest on rapeseed oil. According to consumer advice centers, olive oil is also suitable at low temperatures. Details in the article “Heat olive oil”.

These refined vegetable oils are suitable as frying oil:

  • olive oil
  • rapeseed oil
  • sunflower oil
  • peanut oil
  • safflower oil
  • sesame oil
  • soybean oil

But be careful: Refined oils can withstand high temperatures, but they are problematic. So-called trans fatty acids are formed during refining, which could be associated with the promotion of arteriosclerosis, diabetes, and cardiovascular diseases. In addition, refined oils contain almost no valuable ingredients, according to Oko-Test. That’s why you should only use refined oils in moderation.

Frying Oil Alternative: High-oleic oils for frying in a pan

A healthier alternative to refined oils are so-called high-oleic oils. This is usually a mixture of sunflower, rapeseed, and safflower oil. The plants are cultivated in such a way that the oils have a particularly high oleic acid content and can therefore naturally withstand temperatures of up to 210 degrees Celsius.

They are still cold-pressed and do not need to be refined. This means that no harmful trans fatty acids are produced and all healthy ingredients are retained. You can find high-oleic oils in health food stores and well-stocked grocery stores, for example.

Caution: These oils are not suitable for frying

However, we advise against using some types of oil if you want to fry something:

  • Linseed oil,
  • walnut oil,
  • pumpkin seed oil,
  • palm fat (unsustainable),
  • Coconut fat (unsustainable).

In the case of oils and fats, this is mainly due to the high proportion of polyunsaturated fatty acids. While these are healthy, they ensure that the oil has a low smoke point. These oils are therefore sensitive to heat and quickly form smoke. This is problematic because the valuable unsaturated fatty acids are destroyed in smoking cooking oils and harmful substances are formed. They can possibly promote the development of cancer cells. These substances include, for example, benzene and formaldehyde. You can read more about this topic here: Cooking oils and their smoke point.

Which frying oil is really sustainable?

From our point of view, rapeseed, safflower and sunflower oil are particularly recommended as frying oils. You can easily get these from German cultivation. Coconut, peanut, sesame or soybean oil, on the other hand, are often imported from distant countries and therefore have a poorer CO2 balance.

When buying, also look for organic frying oil if possible. In this way you support ecological agriculture that works without chemical-synthetic pesticides.

Conclusion: You should keep this in mind when frying

To avoid potentially harmful substances from frying, you should observe the following tips:

  • Use high-oleic oils or refined oils with organic plants from German cultivation.
  • Refined oils should only be used in moderation.
  • Cold-pressed olive and rapeseed oil are also suitable for gentle frying at low temperatures.
  • If you want to prepare dressings or dips for which you do not heat the oil, it is best to use high-quality cold-pressed vegetable oils (such as flaxseed, walnut, hemp, or canola oil). These not only ensure a delicious taste but also provide valuable nutrients and healthy fatty acids.

Get it out of your head that frying steaks are a special art that only men are born with. In fact, this is a clear scheme, completely obeying the female logic, which you just need to adhere to. And avoid mistakes that beginners often make. There are not so many fatal ones to count, the fingers of one hand are enough. So, bend your fingers.

  • The biggest nonsense is to beat a steak. This meat is meant to be fried as it is. By hammering it with a hammer, you lose all the juiciness and flavor, turning the steak into something incomprehensibly flabby.
  • Let the steak warm – after taking it out of the refrigerator, do not put it directly in the pan. Fibers of meat that are too cold will shrink during frying, condemning even the best piece of meat to stiffness. It is enough to hold the steak at room temperature for at least 20 minutes so that the meat does not experience shock when it comes into contact with the pan.
  • Remove excess moisture from the surface of the steak – otherwise, the meat will not be fried, but stewed in its own juice. To avoid this, simply wipe the steak dry with a paper towel.
  • Place the steak in a well-preheated skillet. Grease it with oil, put it on fire and wait 3-4 minutes, that’s enough. Inexperienced cooks shouldn’t heat the pan “to smoke”, as the pros often advise, why do we need a burnt crust of meat?
  • Finally, a bad idea is to start turning the meat with a fork. By piercing a piece, you release the juice from it, even though frying from all sides aims to seal all the juices inside the crust. So either get yourself some culinary tongs or get the hang of using a spatula masterly. But turning the meat with tongs, of course, is more convenient.

We have prepared 7 tips for you to help you cook delicious pizza in a pan.

  1. If you don’t have an oven, you can cook pizza on the stovetop in a skillet. There are pans with thermal glass lids; they are most convenient for baking pizza.
  2. Roll out the dough in a small layer, spread it on a preheated pan, greased with a large amount of vegetable oil, and immediately put the filling on it. Cover with a lid and reduce the heat to a minimum so that the dough is baked evenly.
  3. In a frying pan, pizza is cooked much faster than in an oven: the baking time is 15 minutes. The plain dough can be kept on the fire for 10 minutes, as it roasts faster than yeast dough. We remind you: its thickness should not be too large.
  4. Its readiness is checked with a match, piercing it in the thickest place. If the match is dry, the pizza is ready. In an open pan, the dough is baked in 2 steps, so the baking time is slightly increased (the pancake should be allowed to cool slightly before putting the filling). Thus, pizza preparation takes 20-25 minutes.
  5. Since the dough is baked pretty quickly, the raw filling simply won’t keep up with it. All of it must be prepared in advance – fried, stewed, or boiled.
  6. Its thickness must also be monitored so that it does not spread, as the juice or syrup will be absorbed into the dough and it will remain damp and tasteless. In addition, the liquid can seep through the layer of dough and burn the pizza. The best filling option, in this case, is when the bottom layer is meat or fish, dry boiled vegetables, and on top – slightly softer or raw foods. Then they will saturate the lower layers, but nothing will leak to the bottom of the pan.
  7. When baking pizza in a frying pan, do not top with mayonnaise or the like (to prevent the main layers from burning).

It doesn’t matter whether the cooking oil is running low in the supermarket, you don’t have any more at home or you simply want to do without oil: With the help of a few tips, frying can be done without any oil at all.

This is how you succeed in frying without oil

If you don’t have any oil at home, you can’t find any in the supermarket or you just want to do without it, the question arises: How do you fry without oil? There are different possibilities. With some methods, however, you have to reckon with the disadvantage that the aroma can change slightly because the fat is no longer used as a flavor carrier.

So that nothing burns, it is first of all important to use the right pan. Coated pans are usually made in such a way that the food in them does not burn over low to medium heat; even if you don’t use oil.

Alternatively, you can also use mineral water for frying. It is important that you choose water with as much carbonation as possible and replace the oil in a ratio of 1:1. Proceed as if you were using oil: Before you put the food to be fried in the pan, heat the water slightly. Once the water has evaporated, you can add another small sip.

More methods of frying without oil

Another way to fry without oil, but without skipping the fat, is to use butter or margarine. To avoid burning the butter or margarine, you should only heat it over a low heat. In order to also pay attention to environmental aspects, it is advisable to use a plant-based margarine with plant material from regional cultivation. In comparison, butter has a very energy-intensive production process behind it and comes off worse in the ecological balance.

To fry at higher temperatures without oil, you can use parchment paper. It makes sense to cut the baking paper to the size of the pan and only then fry the vegetables or something similar in it. However, since the baking paper can only be used a few times before it crumbles, it is more sustainable from an ecological point of view to use permanent roasting foils. These can be washed off and can be an ideal replacement for a pan coating.

It is up to you which method you use. You can also try different methods and then decide which one works best for you.

Frying fried eggs is quick and easy. Nevertheless, there are some tricks for the perfect fried egg. We’ll tell you here how to season it and fry it properly.

Fried eggs are popular for breakfast, lunch and dinner for a reason: It only takes a few minutes to fry a fried egg, it tastes delicious and is healthy. You can also put it on bread, but it goes just as well with fried potatoes and spinach. In order for your egg to be perfect, you not only need the right technique, but also the right ingredients.

Suitable oil and the right pan for fried eggs

The most important ingredient for a fried egg is of course the egg. Use fresh organic eggs. When eggs are older, the yolk will melt in the pan. You should also enjoy eggs that you have been storing for a long time that are well cooked. However, fried eggs taste particularly good when the yolk is still slightly runny.
It is best to use a cast-iron pan for frying. If properly cared for, the egg white won’t stick to it. You can also make the egg in a coated pan, but they are very expensive to produce, difficult to recycle and harmful to health if used improperly. Stainless steel pans have not proven themselves for fried eggs.
Both heatable, tasteless oils and butter are suitable as fat. If you’re frying your egg at high heat, you should use a high-heat frying oil.

This is how you fry the fried egg

Heat a little butter or oil in a pan. If you use butter, don’t overheat it: be careful not to brown it.
Crack the egg on the edge of the pan and slide it in.
Let the egg set over medium heat. It should not really sizzle, but be gently fried. After a few minutes, the egg white is already firm.
Remove the egg from the pan when you like the brownness of the white and the consistency of the yolk. You can put the lid on the pan again shortly before the end of the frying time and let the egg yolk thicken.
Season the egg with a little salt and, if you like, pepper and fresh herbs.
Tip: With the classic fried egg, either only the butter or only the egg white is salted. The yolk forms small lumps when it comes into contact with salt.

Also: You can get creative when seasoning your fried egg: Try fried eggs with curry, nutmeg, paprika or finely chopped chives.

variation tips

Of course, everyone has their own idea of ​​the perfect fried egg: maybe you prefer it well-done or still nice and soft and untanned? Here are a few tips on how to customize the fried egg to suit your taste:

If you don’t want the egg whites to brown, you can crack the egg directly into the greased but still cold pan. Heat slowly until the egg white starts to set. When the egg white is no longer transparent, you can put the lid on the pan for about a minute. This will thicken the yolk a bit.
If you prefer your egg cooked through, you can try the “Sunny-side down” variant. To do this, fry the egg as described above up to and including step 3. Then turn it over again for about a minute. This is how the yolk hardens.
Your fried egg will be particularly low in calories if you prepare it without any fat. Simply fry the egg in 1-2 tablespoons of boiling mineral water.
If you want to make a lot of fried eggs at once, you can also cook them in the oven. To do this, break the eggs into ovenproof molds and then add the spices. Now place the molds in the oven at 175 degrees top/bottom heat for 5 to 10 minutes. The fried eggs are cooked particularly gently in the oven.

To fry Pak Choi, you only have to pay attention to a few points. We’ll show you how to prepare the delicious Asian cabbage in a pan or wok.

Pak Choi, or Bok Choy or Pak Choy, is related to Chinese cabbage and is particularly popular in Asian cuisine. The vegetable looks similar to the local chard, but has its own taste with a mustard note. In this article you will find out how to fry pak choi deliciously.

Frying Pak Choi: Preparation

Basically, it is very easy to prepare Pak Choi in a pan or wok. Before you can start roasting, you must first prepare the cabbage:
Cut off the base of the stalk so that the leaves come loose one by one. If necessary, remove wilted leaves.
Wash each leaf thoroughly with water. To dry them off afterwards, you can shake them off or use a salad spinner.
Separate the leaves from the stems by either plucking them off or cutting them off with a knife. Keep the leaves separate from the stems, as you don’t want to add them to the pan at the same time afterwards.
Cut the stems and leaves into bite-sized pieces. Since the thicker stems in particular need a little longer in the pan, you can cut them a little finer.

Frying Pak Choi: This is how it’s done with a pan or wok

After you have washed and cut the pak choi, you can fry the cabbage. In Asian cuisine, the wok is usually used for this. In this you can serve Pak Choi particularly crispy. If you don’t have a wok, you can also fry the cabbage in a normal pan.

In Asian cuisine, pak choi usually goes into the wok with many other ingredients – for example other vegetables and diced tofu. But you can also serve Pak Choi separately with a side dish. The only important thing is to fry the stems first, as they take longer to cook.

How to fry pak choi:
Heat some oil in a pan or wok. In principle, you can use any oil that is suitable for frying. The Pak Choi is particularly tasty with sesame oil.
Then first put the chopped stalks into the pan and fry them for about three minutes.
Then add the leaves and fry them for about one, maximum two minutes.
Take the pan off the stove and season the fried pak choi with salt, pepper and some soy sauce.
Variations: Of course, you can also season Pak Choi creatively. Depending on your taste, some chilli paste, lemon juice, roasted sesame or peanuts are suitable.

Frying tofu doesn’t have to be difficult: With a few extra steps during the preparation, you can create crispy, golden-brown tofu cubes with lots of flavor in the pan or in the wok.

Sometimes tofu doesn’t want to get crispy enough in the pan or doesn’t absorb enough flavor. With a few simple tricks during the preparation, you will no longer have this problem in the future and your fried tofu will be nice and crispy.

Frying tofu: How to prepare it

So that tofu also tastes good when fried, you should first prepare it:

Press the tofu dry: the less moisture it contains, the crispier the tofu can be fried. Before you continue to use it, it is therefore important to first remove the liquid from it. You can simply place the tofu block between several layers of cotton towels and weigh it down with a thick book or another object. Then leave it there for about ten to fifteen minutes. The weight forces most of the liquid out.
Marinating the tofu: Because tofu doesn’t have a strong taste of its own, you can season it in a variety of ways. If you marinate the tofu for a few hours before cooking, it will absorb the flavors best. You can prepare the marinade according to your taste, for example with soy sauce, ginger, garlic or chili.
Toss the tofu in cornstarch: when it is marinated, you can fry the tofu. Cut it into oblong slices or cubes. Before the tofu pieces go into the pan, it is best to turn them in some cornstarch. You can use potato, wheat or corn starch for this. The starch draws out the remaining liquid from the tofu before it is fried, making it even crispier.

This is how you can fry tofu crispy

The right pan: To fry tofu, it is best to use a high-quality cast iron pan or a non-stick pan. This will prevent the pieces of tofu from sticking to the bottom of the pan. Of course, you can also prepare the tofu in the wok, especially for Asian recipes.
The right temperature: To make it as crispy as possible, you should sear the tofu. To do this, set your stove to high, heat some oil in a pan and add the tofu. A few minutes is enough for it to turn golden brown and crispy. Don’t forget to turn the tofu regularly while frying so that it can brown evenly and doesn’t stick or burn.
The right oil: You can be generous with the oil if you want to fry tofu crispy. Note, however, that not all cooking oils are suitable for frying at high heat: Olive oil, for example, is ruled out here because it has a comparatively low smoke point. Instead, use unflavored sunflower oil to fry your tofu — or, if you like, sesame oil or coconut oil. They also give the tofu an interesting flavor.
Once you have finished frying the tofu, you can use it, for example, for vegetable pans, as a soup ingredient or as a special addition to salads. Or you simply eat it with a delicious dip.