Tag

grill

Browsing

Crocodile Skewers: A Unique and Exotic Dish

Crocodile skewers are a unique and exotic dish that is sure to impress your guests. This dish is a great conversation starter and a perfect way to try something different. Crocodile meat is lean, tender, and has a slightly sweet taste that is similar to chicken or pork. It is also a sustainable protein source that is available in many regions around the world.

Crocodile meat is a popular ingredient in many cuisines, including Australian, African, and Asian. It is often used in stews, soups, and curries, but grilling the meat on skewers is a great way to highlight its unique flavor and texture. Crocodile skewers are perfect for outdoor barbecues, dinner parties, or any occasion where you want to serve something special and unexpected.

Marinating and Preparing Crocodile Meat for Grilling

Before grilling your crocodile skewers, it is important to marinate the meat to enhance its flavor and tenderize it. You can use a variety of marinades, depending on your taste preferences. A simple marinade made with olive oil, lemon juice, garlic, and herbs is a good option. You can also use soy sauce, honey, ginger, and other ingredients to create a more complex flavor profile.

To prepare the crocodile meat, cut it into bite-sized chunks and remove any excess fat or tough membranes. Thread the meat onto skewers, leaving some space between each piece to ensure even cooking. Brush the skewers with the marinade and let them sit for at least 30 minutes before grilling.

Grilling Tips and Serving Suggestions for Crocodile Skewers

When grilling crocodile skewers, it is important to cook the meat over high heat for a short amount of time to avoid overcooking. The meat should be slightly charred on the outside and cooked through on the inside. You can also baste the skewers with additional marinade during cooking to keep the meat moist and flavorful.

Crocodile skewers can be served with a variety of side dishes, such as grilled vegetables, rice, or salad. You can also serve them with a dipping sauce, such as sweet chili sauce or aioli, to add extra flavor. Crocodile meat is a healthy protein source that is low in fat and high in protein, making it a great addition to any balanced diet.

Introduction: How to Prepare Moreton Bay Bugs with Garlic Butter

Moreton Bay bugs are sweet and delicate crustaceans that are commonly found in the waters of Australia. These bugs have a distinct flavor that is enhanced when they are cooked with garlic butter. Preparing Moreton Bay bugs with garlic butter is a simple and delicious way to enjoy this seafood delicacy.

To prepare Moreton Bay bugs with garlic butter, you will need to start by cleaning and preparing the bugs. Next, you will need to decide on a cooking method. Grilling and barbecuing are both excellent options for cooking Moreton Bay bugs. Once the bugs are cooked, they can be served with a delicious garlic butter sauce that complements their natural sweetness.

Grilling vs. Barbecuing: The Best Cooking Method for Moreton Bay Bugs

When it comes to cooking Moreton Bay bugs, you have two main options – grilling or barbecuing. Both methods are excellent choices, but they do have some differences.

Grilling is a quick and easy way to cook Moreton Bay bugs. To grill the bugs, simply brush them with olive oil and season with salt and pepper before placing them on a preheated grill. Cook for 5-7 minutes on each side until they are cooked through.

Barbecuing is a great option if you want to infuse your Moreton Bay bugs with a smoky flavor. To barbecue the bugs, you will need to place them on a skewer and cook over a charcoal fire. This method takes a bit longer than grilling, but the end result is well worth the extra time.

The Perfect Accompaniment: How to Make Delicious Garlic Butter for Moreton Bay Bugs

Garlic butter is the perfect accompaniment for Moreton Bay bugs. To make garlic butter, you will need to start by melting butter in a pan over medium heat. Add minced garlic and cook for 1-2 minutes until fragrant. Remove from heat and stir in freshly chopped parsley, salt, and pepper.

Once the Moreton Bay bugs are cooked, they can be served with a dollop of garlic butter on top. If you want to take the dish to the next level, you can also serve the bugs with a side of crusty bread to soak up the delicious garlic butter sauce.

In conclusion, Moreton Bay bugs with garlic butter are a delicious seafood dish that is easy to prepare, and perfect for any occasion. Whether you choose to grill or barbecue the bugs, they are sure to be a hit with your family and friends. So, why not give this recipe a try and discover the delicious flavors of Moreton Bay bugs with garlic butter for yourself?

Balmain Bugs: A Delicious Seafood Option

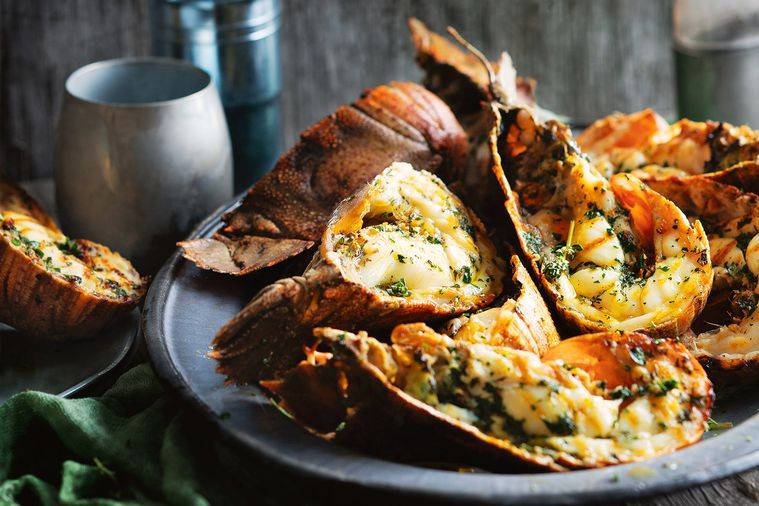
Balmain Bugs, also known as slipper lobsters, are a type of seafood that are highly sought after for their sweet, delicate flavor. These crustaceans are found along the coasts of Australia and New Zealand, and are often served in fine dining restaurants as a gourmet dish. Balmain Bugs are a versatile seafood option that can be cooked in a variety of ways, from steaming to grilling, making them perfect for any occasion.

One of the great things about Balmain Bugs is that they are relatively easy to prepare, and can be cooked in a variety of ways. They are often served with melted herb butter, which adds a delicious depth of flavor to the dish. Balmain Bugs can be found in many seafood markets throughout Australia and New Zealand, making it easy to find a fresh and delicious seafood option for your next meal.

How to Prepare Balmain Bugs with Herb Butter

To prepare Balmain Bugs with herb butter, you will need to start by cleaning the bugs thoroughly. Rinse them under cold water, and remove any debris or dirt that may be on the shells. Next, you can either steam or grill the Balmain Bugs, depending on your preference. Once they are cooked, you can melt some butter in a saucepan and add your choice of herbs, such as parsley, thyme, or chives. Pour the melted herb butter over the Balmain Bugs and serve immediately.

Tips for Perfectly Steaming or Grilling Balmain Bugs

When steaming Balmain Bugs, it is important to use a steamer basket or a large pot with a steaming rack. Place the bugs in the basket or on the rack, and cover with a lid. Steam for approximately 5-6 minutes, or until the flesh is opaque and cooked through.

If you prefer to grill your Balmain Bugs, you can do so by preheating your grill to medium-high heat. Brush the bugs with a little oil and season with salt and pepper. Grill for approximately 3-4 minutes per side, or until the flesh is opaque and cooked through.

In conclusion, Balmain Bugs with herb butter is a delicious seafood dish that is perfect for any occasion. Whether you choose to steam or grill your bugs, be sure to follow these tips for perfectly cooked and flavorful Balmain Bugs.

Introduction: Grilling Prawns on the Barbie

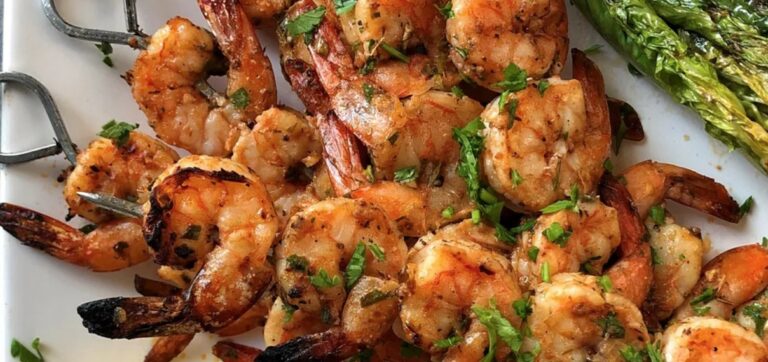
Grilling prawns on the barbie is a popular and delicious way to enjoy seafood during the summer months. This Australian favorite involves skewering marinated prawns and grilling them on the barbecue until they are cooked to perfection and slightly charred. The end result is a mouth-watering dish that is bursting with flavor and perfect for sharing with friends and family.

Preparing and Marinating the Prawns

To prepare the prawns, first ensure that they are cleaned and deveined properly. Then, create a marinade by combining olive oil, fresh lemon juice, garlic, salt, and pepper. Mix well and add the prawns to the mixture, making sure that each one is coated evenly.

Allow the prawns to marinate in the fridge for at least 30 minutes, or up to two hours. This will infuse them with flavor and help to tenderize the meat, ensuring a juicy and delicious end result.

Grilling the Prawns to Perfection

When it comes to grilling the prawns, it is important to ensure that the barbecue is hot and that the prawns are evenly spaced on the skewers. Grill for approximately 2-3 minutes per side, or until the prawns are pink and slightly charred.

Be careful not to overcook the prawns, as they can become tough and rubbery. Once cooked to perfection, remove them from the grill and serve with a fresh salad or your favorite dipping sauce.

In conclusion, grilling prawns on the barbie is a simple yet delicious way to enjoy seafood during the summer months. With a little preparation and the right technique, you can create a dish that is bursting with flavor and perfect for sharing with friends and family. So fire up the barbecue, grab a cold drink, and enjoy this Australian classic!

Introduction to Sydney Rock Oysters Kilpatrick

Sydney Rock Oysters Kilpatrick is a delicious dish that combines the natural, briny flavor of Sydney Rock Oysters with the rich and savory flavors of Worcestershire sauce and bacon. This dish is perfect for seafood lovers who crave a dish that is both hearty and delicious.

Sydney Rock Oysters are a type of oyster that is native to the waters around Sydney, Australia. These oysters are known for their unique flavor profile, which is both salty and sweet. When paired with the right ingredients, such as Worcestershire sauce and bacon, Sydney Rock Oysters become the perfect dish for any seafood lover.

Ingredients for the Perfect Kilpatrick Sauce

To make the perfect Kilpatrick sauce for Sydney Rock Oysters, you will need the following ingredients:

  • Worcestershire sauce: This sauce is the key ingredient in Kilpatrick sauce, providing a rich and savory flavor that complements the natural taste of the oysters.
  • Bacon: The bacon adds a smoky and salty flavor to the dish and adds a crispy texture to the oysters.
  • Butter: The butter is used to cook the bacon and provides a rich and creamy flavor to the sauce.
  • Lemon juice: The lemon juice adds a tangy and acidic flavor to the dish, which helps to cut through the richness of the sauce.

Steps to Grill the Perfect Sydney Rock Oysters Kilpatrick

To grill the perfect Sydney Rock Oysters Kilpatrick, follow these simple steps:

  1. Preheat your grill to medium-high heat.
  2. In a small saucepan, melt the butter over medium heat. Add the bacon and cook until crispy.
  3. Add the Worcestershire sauce to the bacon and butter mixture and stir to combine.
  4. Place the oysters on the grill and cook for 2-3 minutes, until the edges begin to curl.
  5. Spoon the Kilpatrick sauce over the oysters and continue to cook for an additional 2-3 minutes, until the bacon is crispy and the sauce is bubbling.
  6. Remove the oysters from the grill and sprinkle with lemon juice before serving.

In conclusion, Sydney Rock Oysters Kilpatrick is a delicious and hearty dish that is perfect for seafood lovers. With the right ingredients and cooking techniques, you can create a dish that is both savory and satisfying. So why not give it a try and impress your family and friends with this delicious seafood dish?

Would you like to fire up the grill again? Whether it’s delicious sauces, side dishes, meat, fish, desserts, or vegetarian dishes, we’ve put together the best grilling recipes for you. We wish you a good appetite!

Barbecue marinade

Do you like having a choice? With these four grill marinades, you can add variety to your grilled dishes. How about a garden herb marinade, a smoked paprika marinade, or a honey mustard marinade? The fruity lemongrass and ginger marinade makes the barbecue perfect.

Marinated king prawns with garlic dip

Do you like to enjoy grilled fish or seafood, but don’t want to make too much effort? Then conjure up the delicious marinated king prawns with garlic dip!

Grilled focaccia

Haven’t you tried grilled focaccia yet? Then you should make up for it quickly: Because this crispy flatbread with rosemary tastes wonderfully aromatic and is the ideal accompaniment to grilling.

Mexican corn on the cob

Corn on the cob is one of the classic barbecue side dishes – and rightly so: Because the yellow vegetable not only tastes great with meat and fish but is also easy to prepare. Here the Mexican corn cobs are refined with coriander, chili, and lime.

Herb butter with fresh herbs

This classic among grilled dishes simply cannot be missed. Because it is not only prepared in no time at all but also makes a barbecue evening perfect. Whipped cream, dill, parsley, basil, lemon peel, salt, pepper, and garlic – that’s all you need for this herb butter with fresh herbs!

Grilled melon with cheese

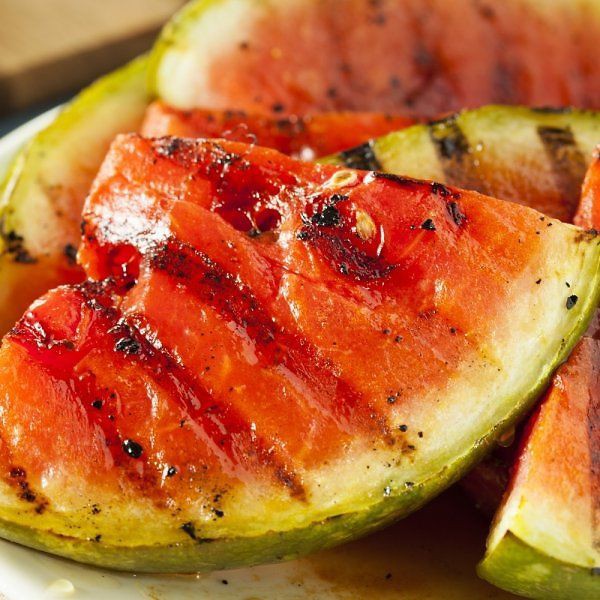
Of course, a real barbecue evening also includes a delicious grilled dessert. How about this sweet grilled watermelon with cheese? It couldn’t be more spring-like!

Marinated veal skewers

The marinade with onion, garlic, ginger, yogurt, honey, lime juice, curry powder, cayenne pepper, and salt makes these tender, marinated veal skewers a very special treat. Tip: Try a fruity Indian mango chutney with it.

Grilled potato and bacon skewers

Potatoes and bacon are particularly flavorful thanks to onions and spring onions, and lemon juice gives the potato and bacon skewers from the grill a pleasantly fresh aroma. Salt and pepper are enough for a spicy finish.

Grilled romaine lettuce with mint dressing

These grilled romaine lettuce hearts with mint dressing are not only a real treat for vegetarians, everyone else is guaranteed to love the aromatic leafy greens too! Best of all, the delicious vegetable dish is wonderfully easy to prepare.

Grilled halloumi and zucchini with berry salsa

Grilled halloumi and zucchini with berry salsa are a real highlight at barbecues. Our variant tastes particularly fruity thanks to the salsa with fresh blueberries, blackberries, and currants. If you want, you can also use the green version instead of the yellow zucchini.

Spicy tomato ketchup

Everyone knows the red sauce from the bottle, but have you ever made spicy tomato ketchup yourself? If not, you should definitely make up for it: This way you can not only save a lot of sugar but also gain flavor.

Grilled fruit skewers with sauce

“Simple, but delicious!” – that’s probably the motto of these grilled fruit skewers with sauce. Sweet pineapple slices, strawberries, papaya, and mango are grilled and refined with honey, lemon juice, passion fruit, mint, yogurt, and coconut cream, done!

Have fun grilling and bon appetit!

Ind and weather leave rust on the grill grate and stains on the whole grill. Not very appetizing and above all unhygienic.

In an hour the guests will be at the door and you have just discovered that your grill has suffered over the winter. Rusty spots and stains everywhere. Unhygienic and unaesthetic! Of course, you don’t want to expect that from any guest. There are a few simple tricks to avoid embarrassment and raised eyebrows without having to rush to get a new grill.

Also, note the tips on charcoal and types of charcoal and the clever tips for grilling vegetables.

Remove rust stains on grillage with aluminum foil

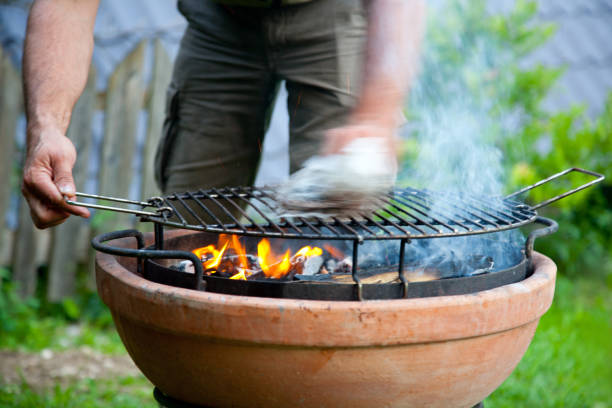
To remove the rusty spots, there is a quick and easy housewife tip. Wrap the grill grate tightly in household aluminum foil. Make sure that the foil is firmly pressed together at the edges. It is also important that aluminum foil encloses the grill grate airtight. Hang the packed grill grate over the glowing charcoal for about ten minutes as if you wanted to grill normally. Then simply set it aside to cool. After the grate has cooled, you can remove the aluminum foil. The rust spots are gone. Now just wipe again and the guests can stand in front of the door.

Clean the grill grate with newspaper

The easiest way to get any grill clean again without any effort: Cover the grill grate with wet newspaper immediately after it has cooled down. The encrustations can be easily removed after soaking with a sponge and washing-up liquid. You can also put the grill grate on the meadow or in the grass overnight. This allows the wet grass to soak overnight and the morning dew to soak. Moisture softens the hard incrustations. The next morning you can simply remove it with a newspaper

Cleaning the grill grate with ashes

When grilling with charcoal, the ash can be used to clean up. Simply rub the grill grate with a damp old cloth and the ashes from the grill. A mash of ash will write off the grill crusts. Then rinse the grill grate with water. As a side effect, you can use the ash mixture in the garden as fertilizer. Ash is a natural fertilizer.

Prevent rust stains on the grill

To protect the cleaned grill grate from stains, it is best to grease it with cooking oil before each use. This protects the rust but is also suitable for consumption at the same time. Be careful not to use too much oil so that none of it drips into the fire later. You should also make sure that the grate is always dried well after cleaning with water.

Let the grill shine with coffee grounds

To clean the body of the grill, remove the grate. Sprinkle your old coffee grounds (e.g. from breakfast) on the grill. This tip works best when the grill is still slightly warm, but a cold grill also comes out clean. However, you should not use this tip immediately after the fire has been extinguished. Wipe vigorously. The grill is cleaned quickly, gently, and above all without toxic chemicals. Stains and burnt-on grill residue are sanded off by the coffee powder. The result is amazing!

Summertime is barbecue time – but many people make fundamental mistakes. Anyone who puts the wrong food on the grill or uses inappropriate utensils is harmful to their health. You shouldn’t grill this.

1. Marinated grilled food directly on the grid

One of the biggest health risks when barbecuing: when fat from the food drips onto the embers, so-called “polycyclic aromatic hydrocarbons” (PAHs) can form. The substances rise through the smoke, and anyone standing near the grill can inhale them. According to the Federal Institute for Risk Assessment, PAHs have a carcinogenic effect.

This means that marinated vegetables, meat or cheese in particular should not be placed directly on the grill to prevent the marinade from dripping off. Use a grill tray instead – ideally a reusable tray. Single-use products only create unnecessary waste.

By the way: If it still happens that liquid drips down and smoke develops, you should put the food aside until the smoke subsides.

2. Acidic or salty foods on aluminum

If you use an aluminum grill tray, however, you have to be careful again: If aluminum comes into contact with acids or salts, a chemical reaction will take place. Aluminum ions dissolve and can migrate to the food.

Healthy people usually excrete the aluminum through their kidneys – but it can also happen that the light metal accumulates in their bodies.

To avoid this, acidic and salty foods in particular should not come into contact with aluminum. So when grilling, don’t put cheese, salted or marinated meats, and vegetables in an aluminum tray or wrap them in aluminum foil. According to the Federal Institute for Risk Assessment, the same applies to tomatoes. Instead, use a stainless steel grill pan or vegetable leaves.

3. The wrong fat

Would you like to grill corn on the cob? Make sure you don’t butter it until after – butter doesn’t belong on the grill. It has a high content of unsaturated fatty acids, which cannot tolerate the high grilling temperatures. The result: butter on the cob – or any other food to be grilled – oxidizes and forms heavy smoke. The same goes for margarine and corn oil.

4. Cured and smoked meats

It doesn’t matter whether it’s directly on the grill or in a bowl: What doesn’t belong on the grill at all is cured or smoked meat. These include, for example, Viennese sausages, ham, bockwurst, meat sausage and bacon. These meat products are made using nitrite curing salt – a mixture of table salt and potassium or sodium nitrite.

5. Cheap meat

Apart from the health hazard, there is another point to consider when barbecuing: cheap meat should also be taboo. Steak, grilled sausages or meat skewers for a few euros are produced under extremely questionable conditions. The animals live in a confined space, stand in their faeces and never see sunlight in their lives. They have no opportunities to occupy themselves – the animals often injure each other. Crates, piglet castration without anesthetic and tail docking are still common in industrial mass operations.

Bring freshness to your grill: grilled watermelon tastes wonderfully fruity and is refreshing on hot summer days. You can find out how to grill watermelon here.

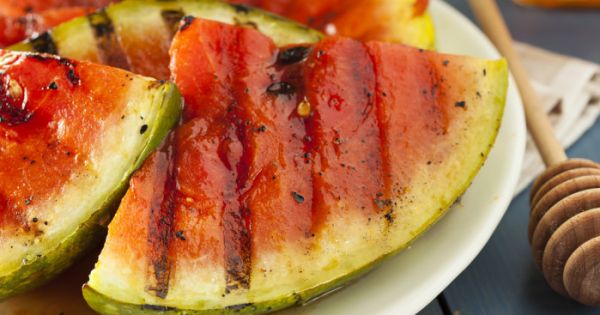
Watermelon is the quintessential summer fruit and grilling is the quintessential summer activity. So why not combine these two things? Grilled watermelon is refreshing and super easy to make.

Grilling watermelon: You need these ingredients

What you need to be able to grill watermelon:

1 watermelon
3 tbsp oil, for example olive oil
a pinch of salt
We recommend that you use organic ingredients. In this way you can be sure that the food is free of chemical-synthetic pesticides, which supports species protection and soil protection. When shopping, look out for the organic seals from Demeter, Naturland and Bioland – these each follow stricter criteria than the EU organic seal.

Grilling a watermelon: It’s that easy

Slice the watermelon. Note our tricks for slicing melon. If you want, you can cut off the peel right away. You can also leave them on and only remove them when you eat. Don’t throw away the rind: This is how you can use the rind of the watermelon.
Place the slices on the grill for about 3 to 4 minutes per side. Don’t leave the melon on the grill for too long or it will become mushy. You can place the watermelon directly on the grill or use a grill container. You can find out how to do this sustainably in our article on grilling without aluminum foil.
Remove the watermelon from the grill, drizzle the grilled slices with some oil and sprinkle with a little salt.

Tips for refining your grilled watermelon:

If you like it sweeter, you can rub or sprinkle sugar on both sides of the watermelon before grilling. The sugar caramelizes with the heat.
If you want, you can also crumble feta (there is also vegan feta) or herder’s cheese and sprinkle it over the watermelon after grilling.
Fresh lemon or lime juice is also recommended. Drizzle a few drops over the grilled watermelon.
Chop up herbs like basil or lemon balm and serve with the melon.
Chopped nuts or seeds such as almonds or pistachios, sesame or sunflower seeds give the fruit a bite and a nutty note.
If you cut the grilled watermelon into smaller pieces and add the above ingredients and mix everything together, you will have a delicious watermelon salad.
If you serve the watermelon with ice after grilling, such as homemade vanilla ice cream, you get a summery dessert.
Test a savory version and season the watermelon with salt and pepper after grilling.

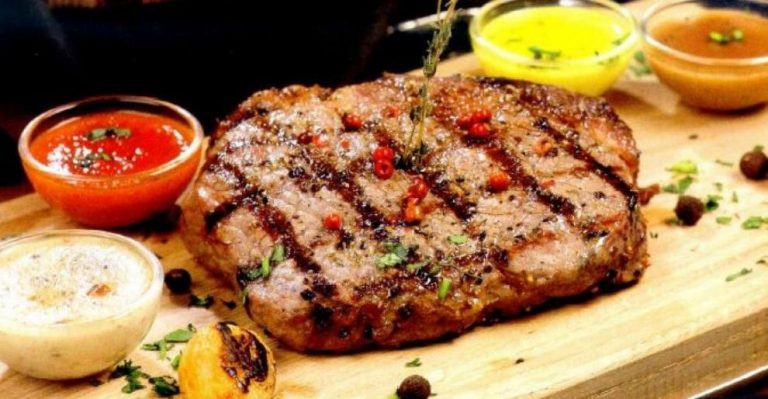
Grilling season has come, and now, after a long winter period, when everything was cooked in four walls, you can refresh your memory of all the subtleties of grilling meat. To do this, we turned to a person who not only loves meat but loves it very much: Chef Tim Love, one of the hosts of the Restaurant Startup show on CNBC, a Texan resident, owner of 10 popular restaurants, and a master of grilling meat. The Love chef shared his secrets of cooking meat and told his own steak recipe.

  1. In the supermarket, choose the most tender meat.

“The most tender meat is a long beef sirloin”, – jokes Love. This refers to meat from the narrow end of the tenderloin. This filet mignon is the most tender meat and the most expensive. If your store’s price tag is too high, check out the second option (New York chop tenderloin), the third (rib steak), or even the fourth option (short sirloin tenderloin) of the most tender meats, as advised by butcher Chris Heyword of Lobel’s Prime Meats in New York City. If you have a group of people, the flank pulp is also a good low-cost choice.

  1. Don’t underestimate the most inexpensive cuts of meat.

Love and Heyword find flank meat is most often underestimated when choosing meat to grill. “This tenderloin is very thin so it cooks very quickly and is also quite flavorful,” says Love and gives a secret recommendation. “The outside flank is softer than the inside neckline, but these clippings are not always labeled, so you should ask the butcher a question. “

  1. Ask for tenderloin sirloin or bavette.

According to Love, the steak with fries, which is very popular in Argentina and France, is served with bavette, but in American restaurants, it is practically not ordered, so it is quite inexpensive. “It is very aromatic and has a very good texture. It looks like brisket but fries like a steak, ”he says. This meat is hard to find in supermarkets, but if you see it, take it! You will not be disappointed.

  1. Do not grill meat that you usually stew or fry in a pan.

“Ribs, brisket, shank, or rump are not suitable for grilling, as are any” working muscle “tenderloins, says Love. There is a little fat in this place, so this meat takes longer to cook. “If you cook this meat, you have to try hard to chew it,” says Love. This meat is best cooked in the oven or smoked.

  1. Look for meat that has as many streaks of fat as possible.

When choosing a steak, take a close look at the intramuscular fat, that is, the fat streaks. If fatty streaks run through the entire piece of meat, then this is a clear sign that the meat is very fragrant. If you like a juicy and soft steak, look for meat with as many of these veins as possible.

  1. Choose dark red meat.

“I always choose the darkest red meat I can find. The lighter the meat, the longer it lasts and the more it oxidizes, ”says Love.

  1. Trust your intuition.

“Don’t be afraid to tell a butcher or supermarket clerk, ‘I want that piece over there, fifth from the top,’” recommends Love. When you find what you are looking for, choose the very best from what you see.

  1. Use peanut butter instead of olive oil.

Love rubs steaks with peanut butter instead of olive oil because it has a higher smoke threshold. This means that if you grill meat at a high temperature (“the way it should be” according to Love), the oil will not burn and there will be no bitter taste. Love also loves the scent of peanut butter, but if you are not an avid peanut butter fan, go for grape seed oil, which has a neutral odor and a high smoke point.

  1. Add spices before frying.

Love always salt and pepper the steak before frying. This creates an excellent crunchy crust with a beautiful texture. “If you add salt and pepper to a steak during the frying process, then this effect will no longer be there,” says Love. Moreover, salt the steak twice as much as you think is necessary, and add spices with your hand high to distribute more evenly over the steak. “Plus, you’ll look great,” says the chief.

  1. Turn meat only once.

“The more you turn the meat, the drier it gets. But if you want well-done meat, turn as much as necessary, ”experts say.

  1. Close the cover.

This is one of the biggest secrets. Even though this secret is very simple, most people who grill do not close the lid. “You want to take full advantage of the grilling and smoke aroma! So close the lid. This will change the flavor of the meat you are cooking and also keep it hot, which is very important, ”says the master.

  1. Use a thermometer.

“The best way to determine the degree of cooking of meat is to use a thermometer,” says Love. Here’s a quick guide: Meat with blood at 130 ° F, lightly cooked at 135 ° F, medium-cooked at 145 ° F, well-done at 150 ° F, and fully cooked at 160 ° F. “Don’t worry, if you constantly have to pierce the meat with a knife, all the juice will not come out. This is a myth, ”says the chief.

  1. Remove the meat from the grill early, let it rest, and then quickly fry the meat again on both sides.

“As soon as the meat touches the grill grate, it begins to shrink, the top layer begins to stretch.” says the cook. If you want the steak to be tender, Love recommends that the meat rest, “relax”, not on the grill. Meat can cool down when it is allowed to rest, so Love has one trick he uses to ensure that meat is always served at the ideal temperature:

Firstly, he cooks the meat in such a way that it is slightly undercooked. Then he turns the steak over, removes it from the grill, and lets it rest for 15 minutes. The meat will juice up a bit, but Love says it’s okay: “All the juices won’t come out of the steak.”

Then he puts the steak back on the grill (with the side up where the steak was removed from the grill) and grills the meat for another three or four minutes to bring the temperature up to the desired temperature. “This way the steak will be hot when you serve it, and the steak will be as deeply cooked as necessary when you put it on the plate,” says the master.

  1. Add some lemon juice.

After the steak is removed from the grill, Love squeezes a lemon onto the steak to add some acidity and flavor and release some fat. For even better results, use a slightly grilled lemon. Just cut the lemon and place it on the grill, cut side down. This will make the lemon softer and squeeze easier.

  1. Drink some wine.

Another important Love secret: a bottle of chilled rosé or white wine. Not for meat, but for a cook. After all, as Love says, “You need to entertain yourself a little.”