Tag

Home

Browsing

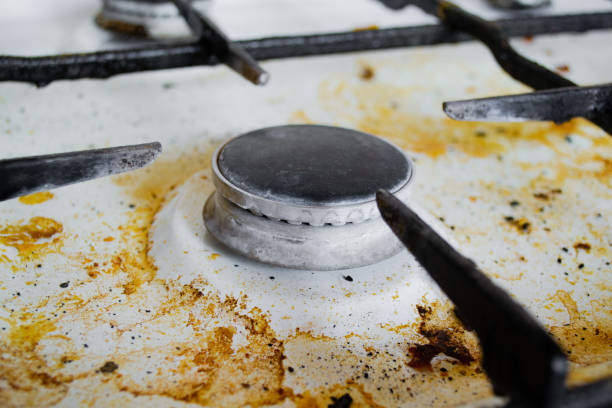
Home remedies and tips for removing fat in the kitchen. Quickly and easily remove grease deposits from kitchen cupboards or kitchen furniture. Because even in the best kitchens, from time to time a film of grease can build up on the cupboards.

How to remove fat in the kitchen? The disgusting grease in the kitchen can be removed easily and in an environmentally friendly way with various home remedies. We show you the most effective home remedies for removing a greasy film in the kitchen. Because if you don’t get rid of the grease regularly, it will be difficult to remove later.

Home remedies for fat deposits in the kitchen

Various home remedies are suitable for cleaning and removing grease. These are especially good because they contain no chemicals. This allows you to gently clean your kitchen and remove the dirt layer of dust and grease with ease. You can also find most home remedies in your own kitchen. One more reason to use the following tools to remove kitchen grease.

1) Remove fat with baking soda

Everyone knows the problem with the greasy film in the kitchen. The use of effective baking powder is suitable for removing stubborn fat from the surfaces. Simply take some baking powder, about 2-3 teaspoons. Then sprinkle it onto a slightly damp sponge or rag. You can then use it to wipe down the cabinets and cabinet surfaces. Consequently, the dirt film is thus bound in the form of crumbs. And then you can easily remove the fat. Then wipe again with water.

2) Vinegar to remove fat

The miracle cure vinegar is often used. Vinegar is a useful home remedy. So it’s no wonder that it can also help you to get rid of the unwelcome layer of fat in the kitchen. Simply mix a little vinegar with the same amount of detergent. Then apply this mixture to the affected area and let it work for a moment. Then you can simply wipe the areas with water. You should be able to remove the fat with ease. Also, read how to remove stains from the mattress with vinegar.

3) Vegetable oil against fat deposits

You can also use vegetable oil to remove fat deposits in the kitchen. For example, use sunflower oil or use effective olive oil. Put a few drops on a sponge or rag. Then rub the greasy surfaces with it. This is how you dissolve the fat film. To remove the grease completely, you should then wipe it off with a little washing-up liquid and water. This method is great for removing greasy fingerprints.

4) Remove grease stains with gall soap

If you haven’t cleaned your kitchen of grease deposits for a long time, then you should start doing it quickly. Because the longer you wait, the more difficult it is to clean greasy surfaces. Gall soap is a cheap and environmentally friendly miracle product for removing grease in the kitchen. Accordingly, moisten the grease stain with water. Then rub the area properly with gall soap and let it take effect for a few minutes. Finally, you need to rinse the affected area with water. Also, note our tips for removing grease stains on wooden furniture and wood.

5) Remove the grease from the dishwasher tab

You can also use a dishwasher tab to help fight grease. This is also a clever way of removing kitchen grease. To do this, you have to put the tab in a spray bottle filled with water. Then you wait until it has completely dissolved. When the tab has dissolved, you can spray the greasy surfaces and cabinets with it. Leave it on for about 15 minutes. You can then wipe everything off with clear water and the greasy film should be removed. Also, read how you can cleverly remove grease stains and oil stains.

Prevent fat deposits

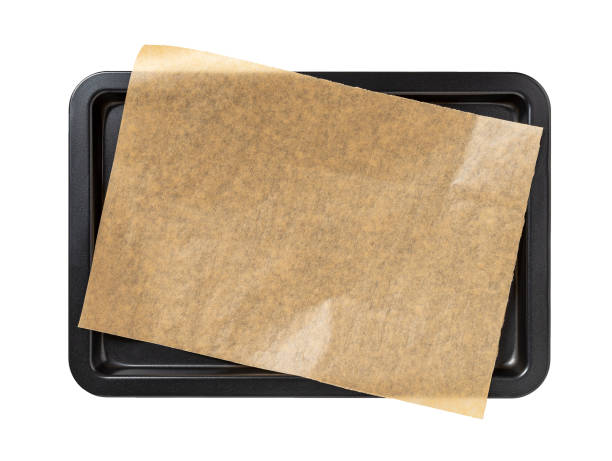
Grease deposits in the kitchen are a tiresome topic. And in the kitchen, greasy surfaces and cupboards are quickly covered with a film of grease. To avoid stubborn grease, you should clean your kitchen regularly. You should also clean and clean the ceramic hob immediately after cooking. Fat deposits don’t even stand a chance and you save time. Because once the fat has dried it is difficult to remove. You should also always line baking sheets with parchment paper. You can also equip your cupboards with newspapers. You should make sure that the paper lies tightly on the surface. Otherwise, it collects underneath.

Fat-dissolving products from the Internet

You can also use online degreasing household products to remove stubborn grease deposits in the kitchen. We have selected products for you, including environmentally friendly orange oil cleaners.

Tips and home remedies for removing red wine stains from fabric, carpets, sofas, or jeans. This is how you get the dark red stains removed quickly and easily without having to resort to expensive special agents.

A red wine stain on clothing is, in some cases, a medium-sized disaster. The red wine stains can be easily and safely removed with simple means. In this article, we will explain how you can get rid of red wine stains, which home remedies will help you, and what you should consider.

The best home remedies for removing red wine stains

You sit comfortably with the family and drink a glass of red wine and – bang – it happened: A sometimes only very small red wine stain is probably still spreading on white trousers or a white top. You can use a variety of home remedies to remove red wine stains. We present the four most effective means here with brief instructions for quick and effective help.

1) Soak stained textiles in mineral water

To remove a fresh red wine stain on clothing or other fabric fibers, soaking the affected garment in mineral water can help. You can either use mineral water from the bottle or from the sparkling water maker. The carbon dioxide bubbles it contains can loosen the red wine pigments from the fabric.

Then all you have to do is rinse the garment again with clear water and then dab it with a piece of kitchen roll. You should proceed cautiously if there are still red wine residues in the fibers. If you take a more resolute approach, you can work the remaining residues even deeper into the fibers in the worst case. You can also use this method to remove stubborn fruit stains.

2) Remove fresh red wine stains with baby powder

You can also powder baby powder onto the fresh stain, let it soak in, and simply wipe it off. The red wine is thus pulled out of the textile. This also works, for example, on sofas or carpets that you cannot easily soak and wash.

It is important that you then immediately rinse the stain with water or dab it off. If residue from the stain is still visible, rub the stain with salt for a few hours. You should then wash the textiles as normal. In addition, read how you can remove spinach stains and which home remedies help against grass stains.

3) Get rid of old red wine stains with lemons and salt

You only noticed the stain later and it has already dried up? Then first drip a few drops of lemon juice onto the red wine stain and then sprinkle it with salt. The salt pulls the red wine out of the tissue. Once dry, brush or vacuum off the salt and wash the garment normally. You can also easily remove tea stains with lemon juice and get rid of chocolate stains with flour and salt.

4) Remove red wine stains with window cleaner

Another variation is to remove the red wine stain with colorless window cleaner. To do this, soak the garment or stain it. You can repeat this until the window cleaner pulls all of the red paint out of the affected garment. You should then rinse the textile thoroughly with clear water. Also, note tips for removing deodorant stains from clothing.

After the easy removal with these home remedies, you can hopefully enjoy the red wine again without having to worry about possible stains. And if something goes wrong again, you now know how you can help yourself. With these tips, you can make the red wine glasses really shine for the next good drop.

Cleaning the baking tray with home remedies does not necessarily have to involve a lot of work. Food leftovers and burnt-in grease stains are not uncommon and can interfere with baking. After baking, dirt often appears that needs to be removed. Kitchen cleaning tips will make cleaning easier for you.

With the help of the baking tray, you can not only heat up pizza, but you can also conjure up delicious dishes. After baking, however, soiling occurs that must be removed quickly. Our tips will tell you how you can clean your baking sheet with various home remedies and water.

1) Clean sheet with soda and hot water

For example, the first variant is to use soda in combination with hot water. Soda actually means sodium carbonate. As mentioned above, hot water is used more often, only the tools vary. In this case, soda is taken to the rescue. Soda becomes strong lye when combined with hot water. The strong lye can be used to combat incrustations. However, soda should be used, which contains a larger amount of sodium. Mix 2-3 teaspoons with hot water, spray the lye on the crusts, after a few hours remove everything and rinse with clean water.

2) Cleaning the baking sheet with salt

Our second tip for cleaning is salt, by the way, salt can even be used to remove rust from pans and baking trays. Rinsing is particularly easy if half a pack of commercial salt is used. After opening the package, the salt is spread on the crusty sheet. It is important that all affected areas are covered. The baking tray is then pushed back into the oven. The temperature should be set to around 50 degrees so that the salt can loosen the incrustations. After about 30 to 60 minutes, the tray can be removed again. The salt should then have a brownish tone. Now the baking tray can be easily cleaned. Both salt and crusts come off easily.

3) Use of dishwasher tabs

Another helpful trick is to use dishwasher tabs. Alternatively, you can also use a denture cleaner tab. First, cover the dirty sheet with hot water and a tab. The tab will start to dissolve. For more foam or more stubborn stains, we recommend additional tabs. After about an hour of exposure, the sponge is used. With it, you can now loosen the incrustations more easily. From time to time it can happen that certain areas are still crusted. For this purpose, part of the hot residual water is poured out. in addition, now use a new tab to rub lightly over the remaining incrustations until everything is clean.

4) Baking soda against dirty sheet metal

There is also the option of cleaning with baking soda. Baking powder has proven to be a good household remedy for cleaning baking trays. Here, too, hot water is first poured onto the baking sheet. Then you pour in a pack of baking soda and let the mixture work. You can then wipe the sheet metal with a sponge. For more stubborn dirt, instead of one pack, put three to four packs in a bowl together with water and some vinegar and mix everything to form a paste. The paste works best on the dirt all night so that you can simply rinse it off with water the next day.

5) Baking soda as a deterrent

Furthermore, baking soda is a way to clean a baking sheet with home remedies. Baking soda is actually sodium bicarbonate. Put 50g of baking soda on the baking sheet with some sparkling water and put it in the oven at 100 degrees Celsius. After 20 minutes the water will have evaporated and you can remove the tray to cool. You can use a sponge to remove the baking soda and dirt from the pan. In addition, another advantage develops from the use of baking soda in the oven. The oven can also be cleaned with evaporating water. Baking soda has a basic effect and can dissolve incrustations. You can buy it at the supermarket or pharmacy.

Butter can convince with useful information and tips as a home remedy. With the right application, it can do much more than just baking and cooking. You can find out here how butter can help around the house.

Butter as a home remedy for cleaning or washing? It sounds unusual that butter can do so much more. But we’ve collected tips and ideas on how you can also use butter.

Butter – the all-rounder

The term comes from the ancient Greeks and actually means only cow’s milk quark. Because it is made from the milk of cows. In the past, milk was left to stand for two days for this purpose. Then the cream that settled on top was skimmed off and worked until the butter was formed. Today, on the other hand, production is done by machine. Then she goes to the supermarket. And in this country, it is very popular. And we use them for baking, cooking and as a spread. But she can do much more! In addition, they come in many varieties. Because this can also be made from sheep’s milk or goat’s milk. It can also be obtained from buffalo or donkey milk. But the most well-known form is that made from cow’s milk. In addition, note the helpful information on margarine and its use.

Use of butter in the home

Butter, like margarine, is spreadable fat. This refines the taste of bread and rolls. Refrigeration will minimize spreadability. It refines many a meal. In addition, it is often used as frying fat. However, butter should be consumed in moderation as the fat is high in calories. But don’t worry, a study shows no negative health effects from eating butter.

1) Remove grass stains with butter

When you discover a grass stain on your clothes, it’s annoying. But then reaching for the butter will help you! To do this, spread a little of this over the affected area. Then you leave it on for a while. You can then wash the stain with lukewarm water. Of course, you can also wash the garment in the washing machine. Other alternatives for removing grass stains are also possible.

2) Remove oil stains

Got an oil stain on your clothes? Then you can remove the oil stain with the popular spread fat. Because butter has a fat-dissolving effect due to the butyric acid it contains. Again, you apply it to the stain. Then wash your clothes with warm water. But beware, margarine cannot be used as an alternative!

3) Keep onions fresher longer with butter

Do you often only use half an onion for cooking? Then the other half often goes into the fridge. But once you cut it, it starts to dry. This makes further use of the onion unlikely. If you want to slow down this process, smear the center of the onion with some butter. You can then cover them with cling film. Now it can be put in the fridge and stays fresh longer.

4) Treat squeaky cabinets

Annoying noises when opening the cupboards? Who does not know it! If your cupboards are squeaking, you can stop it with the popular spreadable grease. To do this, lubricate the affected cabinet hinges with this. After that, the problem should be solved. Other aids such as oil, wax, or Vaseline can also help. You can treat jammed drawers in a similar way.

5) cleaning of wooden surfaces

The spread of fat can do more. But as a cleaning agent for wooden surfaces? Yes, you heard me right. This is because it is suitable for cleaning wooden surfaces. Instead of using expensive chemical products, try butter. If you discover a stain from wet glasses on your wooden table, this will help you quickly and easily. To do this, spread a little on the spot. After allowing it to take effect, wipe it off with a cloth. Now the butter has restored the lost moisture.

6) Remove stubborn resin

Your children come back from playing in nature and have really sticky hands? If you’re dealing with sticky tree sap, you can use butter here as well. For this, you lubricate your hands with this beforehand. You can then easily remove the resin.

7) Relieve a dry cough

Sounds very unusual, but should help. If you want to get rid of your dry cough, you need tools. If you don’t have any medicines from the pharmacy at hand, they can be the savior in need. To do this, smear your chest with some butter before you go to sleep. Then cover yourself up and relax. You can also make an envelope out of butter. My grandma always did it like this. Spread this on a cloth and place it on your chest.

8) Buttermilk

Likewise, the buttermilk obtained as a by-product can work wonders. Because buttermilk helps to create natural beauty. In addition, it can be very effective as a home remedy for sunburn treatment.

Clever tips and natural home remedies to combat and permanently remove a stinking musty odor in the basement. We have collected the best tricks against moisture, bad smell, and mold for you.

Who doesn’t know this typical musty scent that a vaulted cellar likes to leave behind? Moisture, construction defects, lack of ventilation, mold – the smell can have many causes. You should get to the bottom of them and then use our tips to eliminate the problems.

Combating the causes to remove mold odor

Basements are the storage rooms in everyday life, but ultimately every second basement owner struggles with a musty smell. With these old house recipes and housewife tips, you can quickly get the problem under control. Depending on the extent and cause, different remedies help particularly well.

1) Vinegar against mildew odor

One of the main causes of damp basement walls and the rather musty smell is excessive humidity. A proven and successful household remedy helps against the smell: commercially available vinegar. You certainly have this at home. Handling is also easy.

Just put a glass or two of vinegar in a room. You will soon notice a change: the commercially available vinegar has the advantage that the musty smell is absorbed and removed after just a few days. Then you should ventilate the room properly so that the vinegar smell disappears again.

2) Salt against moisture

It is optimal if you use vinegar together with another household remedy: salt. It absorbs moisture and thus fights the cause of the musty odor. Three to four bowls filled with salt already help. Once the salt has become soaked with moisture, it must be replaced.

3) Cat litter against moisture

Cat litter also serves this purpose. Three to four larger containers are ideal for larger rooms. They easily replace electronic devices. The success is visible within a few days and ultimately even saves money. Once the litter has become soaked with moisture, you should replace it. As a rule, however, this is not necessary for normal room size.

4) Coffee against the musty smell

The acknowledged favorite drink of the Germans and probably the best-known pick-me-up has one outstanding property: coffee is an odor killer that quickly achieves the desired effect. So you can take it down to the basement after your morning treat and counteract the bad smell.

Place four to five teaspoons of coffee powder on a plate, place it directly in the room and the brown powder will do the rest. The air is cleaned after one or two days. Expensive chemicals and air fresheners, which usually only cover up the smell, are not necessary. The musty smell is gone.

5) Dehumidifier

If the actual problem has not yet been resolved, rough tools will help. For example, dehumidifiers literally suck up the moisture in a room. They also agree on larger vaults. There are many offers here. Depending on requirements, machines can also be borrowed from the local hardware store for larger issues.

Mold: A health threat

The musty smell can also be an indication of mold. Mold spores find a perfect breeding ground in damp rooms. The mold should definitely be removed. Affected furniture that is stored in the basement should be disposed of as soon as possible or dried thoroughly, for example in the sun.

An effective mold eliminator is an alcohol. The alcohol removes the water from the mold spores, as well as from the human body, and thus destroys the mold quickly and reliably. It is an ideal household remedy against mold caused by moisture.

You can also use vinegar as a home remedy instead if you have mold. You can read about the best way to do this and what other home remedies are effective against mold in the linked article. Sometimes, however, only professional mold remediation can help as a last resort. With the mold, you also remove the musty smell in the basement at the same time.

Avoid musty smell

If you ventilate regularly and ensure even air circulation, you won’t have any problems with mold and odors of the worst kind in the end. The following rules should be observed, especially for basement rooms: In summer, always air at night or in the early hours of the morning. If there is no window, it is essential to ensure regular air circulation by means of open doors.

Planting garlic is not difficult at all – even if it is not native to us. If you follow a few simple basic rules, you can do it at home too.

If you don’t have a green thumb, you’ve made the right choice with garlic. It is one of the leek plants that are usually very easy to care for. In addition, it is winter hardy and only needs sufficient sun and moisture to be able to grow optimally.

To plant garlic yourself, all you need is a fresh clove of garlic. With a little patience, you can soon be harvesting your own garlic.

Planting garlic: the right time

As with all herbs and spices, when you plant the seeds or bulbs is crucial:
Ideally, you should plant garlic in the fall so that it can sprout in the spring.
While you can start in the spring, the garlic plants will often become smaller and slower to grow.
The right soil is just as important as the timing:
Only when the garlic plant gets enough nutrients can it form roots and sprout.
A loose soil, such as humus or special herbal soil, which contains a particularly large number of nutrients, is best suited.
However, fertilizer is not necessary.

Plant garlic on the balcony

You can simply plant garlic in a small pot or box on the balcony:
To prevent waterlogging, the bottom layer in the pot should consist of small stones or compost. This allows the water to drain away and no mold develops.
Choose a sunny spot on your balcony close to the wall of the house and plant the garlic cloves in the soil as described above.
The same applies here: water only occasionally and let the soil dry out a bit.

Planting garlic in the garden

The easiest way to plant garlic is in a small bed:
First loosen the soil.
Then stick the garlic cloves, point up, about 1.5 to 2 inches (4 to 5 centimeters) into the soil.
Attention: Do not plant the individual cloves too close together so that the plants have enough space later. A distance of 10 to 15 centimeters is sufficient.
At the end you have to close the holes again and water something.
You should observe these care tips:
Make sure the soil doesn’t get too wet.
You should also loosen the soil from time to time.
Even if frost and cold can hardly harm the garlic plant, you should still protect it from heavy rain: Cover the bed with a tarpaulin in winter.
Important: Do not water too much, otherwise the garlic can rot!

Harvest garlic you planted yourself

In summer you can harvest your garlic. You can even use the stalks in the kitchen: They are ideal for seasoning all kinds of dishes, and you can use the stalks like spring onions.

Hop tea is not beer, but rather a tried and tested remedy. Hops have a calming effect and have a positive effect on our sleep.

Hops belong to the hemp family. Long before the plant was used to brew beer, it was valued as a medicinal plant.

Hops are now cultivated throughout Europe and in parts of Asia and America. The plant sprouts anew every year and climbs up to twelve meters. Hops are dioecious. This means there are male and female flowers. For hop tea you only use the female flowers.

This is how hop tea works

The most important active ingredients in hop tea include:
Bitter substances: humulone and lupulone
flavonoids
tannins
essential oils
The bitter substances in particular are said to have a calming and sleep-inducing effect. In the meantime, the effect of hops and its ingredients has also been extensively scientifically investigated:
The positive effect of hops on the human psyche was proven in a pilot study. Test persons who consumed dried hop extract daily for four weeks reported reduced anxiety, depression and a lower stress level compared to the placebo group.
In an animal experiment with quail, it was shown that hops regulate the day-night rhythm and improve sleep at night. The birds should have a comparable sleeping rhythm as we humans. However, it is unclear to what extent the data can be transferred to humans.
In addition to the calming effect, hops also have antibacterial and antioxidant effects, according to a 2019 study. The authors of the study conclude that hops extract could help against acne. Because of the same properties, hops are also often used in folk medicine for digestive problems and other complaints such as loss of appetite. However, research is still needed here.

Hop tea and other hop products

The main uses of hop tea include:
nervous restlessness
sleep disorders
anxiety states

In addition to hop tea, there are other ways in which you can benefit from the effects of the medicinal plant:
In the pharmacy you can get capsules or tinctures made from hops. Hop essential oil is used in aromatherapy.
Hops are also suitable for a soothing bath for mind and body. To do this, boil a liter of water, pour it over 20 grams of hop blossoms and mix it into your bath water.
Another option for better sleep is a scented pillow filled with hop blossoms. You can just put that next to your pillow.

How to prepare hop tea

For the soothing tea you use the female flowers of the hops. You can recognize them by growing cone-shaped, spike-like bud sites, while male flowers hang more loosely. You can easily prepare hop tea yourself:
Pour 250 milliliters of boiling water over 2-3 teaspoons of dried female hop flowers.
Let the tea steep for five to ten minutes.
Then remove the plant parts.
You can have three cups a day. To help you sleep better, you should drink the tea about half an hour before you go to bed.

To increase the calming effects of hops, you can combine them with valerian or St. John’s wort. Lavender and chamomile are also good.