Tag

juicy

Browsing

Introduction: The Unique Flavor of Crocodile Meat

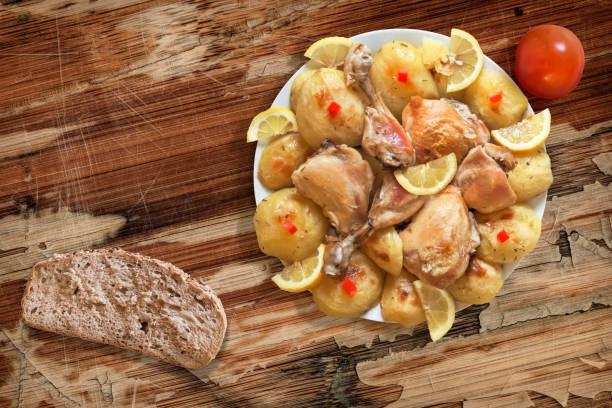
Crocodile meat is a unique delicacy that is becoming increasingly popular among foodies. It has a tender texture and a distinct flavor that is similar to chicken, but with a slightly gamey taste. Crocodile meat is also low in fat and high in protein, making it a healthy alternative to beef or pork.

One of the best ways to enjoy crocodile meat is by making a juicy crocodile burger patty. Not only is it delicious, but it is also a great way to introduce this exotic meat to those who may be hesitant to try it. With the right recipe and toppings, you can create a mouth-watering dish that will have everyone asking for seconds.

Recipe: How to Make a Juicy Crocodile Burger Patty

To make a juicy crocodile burger patty, start by purchasing high-quality crocodile meat from a reputable supplier. You can use either ground crocodile meat or finely chopped crocodile meat for your patty.

In a mixing bowl, combine the crocodile meat with bread crumbs, minced garlic, chopped onions, salt, pepper, and your favorite seasonings. Mix well and form into patties. Heat a skillet over medium-high heat and cook the patties for 4-5 minutes on each side or until cooked through.

Make sure to handle the crocodile meat with care and follow proper food safety guidelines. The internal temperature of the meat should reach 160°F to ensure it is safe for consumption.

Serving Suggestions: Toppings and Condiments for the Perfect Crocodile Burger

The toppings and condiments you choose for your crocodile burger can make all the difference in its flavor. Try adding sliced avocado, caramelized onions, bacon, or a fried egg on top of your patty. You can also use a variety of sauces, such as BBQ sauce, aioli, or spicy mayo to enhance the taste of your burger.

Don’t forget to choose the right type of bun, too. A soft brioche bun or a sturdy sourdough bun will hold up well against the juiciness of the crocodile patty and all the toppings.

In conclusion, a crocodile burger is a unique and delicious way to enjoy this exotic meat. By following the right recipe and using your favorite toppings and condiments, you can create a mouth-watering dish that will have everyone talking. Give it a try and add some adventure to your next meal!

Introduction: Emu Burger Recipe

If you’re looking for a unique and flavorful twist on a classic burger, then look no further than the emu burger! Emu meat is lean, high in protein, and has a rich, beef-like flavor that pairs perfectly with a variety of toppings. With a little bit of preparation, you can create a delicious emu burger patty that will impress your family and friends.

Ingredients and Preparation Steps

To make emu burger patties, you will need:

  • 1 pound ground emu meat
  • 1 tablespoon Worcestershire sauce
  • 1 tablespoon Dijon mustard
  • 1 teaspoon garlic powder
  • 1 teaspoon salt
  • 1/2 teaspoon black pepper

To prepare the emu burgers, follow these steps:

  1. In a large mixing bowl, combine the ground emu meat with Worcestershire sauce, Dijon mustard, garlic powder, salt, and black pepper. Mix well with your hands until all the ingredients are evenly distributed throughout the meat.
  2. Form the meat mixture into 4 to 6 equal-sized patties, depending on how large you want your burgers.
  3. Heat a grill or skillet over medium-high heat and lightly grease with cooking spray or oil.
  4. Cook the emu burgers for 4 to 5 minutes per side, or until the internal temperature reaches 160°F. The burgers should be browned and slightly crispy on the outside, but still juicy and tender on the inside.

Serving Suggestions for Juicy Emu Burgers

Once your emu burger patties are cooked to perfection, it’s time to assemble your burgers! Here are some tasty topping suggestions to try:

  • Grilled onions and mushrooms
  • Avocado or guacamole
  • Crispy bacon
  • Cheddar, Swiss, or blue cheese
  • Lettuce, tomato, and pickles
  • BBQ sauce or aioli

To serve, place your cooked emu burger on a toasted bun and add your favorite toppings. You can also serve with sweet potato fries or a side salad for a complete meal. Enjoy your juicy, flavorful emu burger!

Cooking meat and then keeping it warm until it is served has long been considered the best option for a tasty and juicy fillet in gastronomy. However, a new study refutes this assumption: According to the latest findings, the meat is actually rather dry and tough after this method of preparation. The magic word for preparing tender and juicy pork is sous-vide cooking – i.e. under a vacuum.

The study

Researchers at the Max Planck Institute for Polymer Research in Mainz are now investigating the changes in the protein structure of meat when it is vacuum cooked – also known as sous vide. The study tested the effects of cooking time and different cooking temperatures on the water content and protein structure of the meat. These are the first research results with a time span of ten minutes to 48 hours and a temperature variance of 45 °C to 74 °C.

The result

The loss of meat juice increases with increasing temperature and cooking time. The evaluation of the study shows that the meat loses a large part of its water content above 60 °C. This makes it dry, tough, and hard – not the best result for meat lovers. Only precise control of the cooking temperature makes it possible to circumvent these properties.

The best way to do this is with sous-vide cooking: the food to be processed is placed in a plastic bag and packed airtight. The food is then cooked in a water bath at the exact temperature specified.

It’s going to be tender and juicy

Cooking meat sous vide changes its protein structure in a controlled manner. This keeps the meat tender and juicy. For the best pork tenderloin on a medium-sized cut, cook it sous vide for 20 minutes at 55ºC.

A feast not only for the taste buds. Because even the olfactory nerves get their money’s worth with this delicious chicken.

Ingredients for 4 persons

  • 1 chicken
  • Salt pepper
  • 4 unwaxed lemons
  • 2 small sprigs of rosemary
  • 3/8 – ½ liter hot chicken broth
  • wooden skewers and kitchen twine

Preparation

  1. Wash the chicken inside and out and pat dry with paper towels. Then season the chicken generously inside and out with salt and pepper.
  2. Wash the lemons in hot water and dry them. Roughly chop 2 lemons. Wash the rosemary and pluck off the needles. Then push the lemon pieces and the rosemary into the abdominal cavity.
  3. To close, press the opening together and insert wooden skewers. Tie the skewers crosswise with kitchen twine and knot.
  4. Thread a long piece of kitchen twine from both sides over the wings to the breast tip and cross underneath. Then wrap the thread around the club ends and tie them tightly together so they don’t stick out and burn.
  5. Roast the chicken on the drip tray in the preheated oven for approx. 1 ½ hour. After 30 minutes, pour in the broth. Peel the zest from 1 lemon and cut into strips.
  6. About 10 minutes before the end of the roasting time, drizzle the chicken with the lemon juice, sprinkle with the lemon strips and arrange the lemon wedges. Cut up the chicken. Season the roast to taste and serve extra. Roasted potatoes or bread go very well with this. Good Appetite

Useful additional knowledge

Like all poultry, the chicken should always be well-done. It is, therefore, best to do a cooking test at the end of the roasting time. Use a wooden skewer to pierce between the breast and the leg. If clear liquid comes out of the puncture site, the chicken is done. If it’s still pink, it needs to continue cooking.

Lye burgers are a tasty change from classic burgers. We’ll show you how to make the vegan burger buns and vegan patties at home.

Pretzel rolls are ideal as burger buns. You only need a few ingredients for the soft rolls and you can easily prepare them vegan. It is up to you which patty you use for the pretzel burger. Below you will find recipe suggestions for matching burger patties.

Tip: If you are in a hurry, you can also use ready-made burger patties made from seitan or tofu for the pretzel burger. It is best to pay attention to an organic seal, because this way you support ecological agriculture and protect yourself and the environment from chemical-synthetic pesticides. You can find out more about this here: Beyond Meat, EnerBio and The Vegetarian Butcher: Veggie Burgers in Test.

Lye Burger: Recipe for vegan lye rolls

The following recipe makes eight small burger buns.

Ingredients:

0.5 cubes of yeast
1 tsp sugar
220 ml water (lukewarm)
400 g flour (e.g. spelled flour type 630)
1 tsp salt
30 vegan butter / vegan margarine
3 tablespoons baking soda
sesame for sprinkling

Directions:

Dissolve the yeast along with the sugar in a few tablespoons of the lukewarm water. Add the yeast mixture to the flour and add the remaining water, salt and the softened vegan butter or vegan margarine.

Knead for a few minutes until you have a smooth and no longer sticky dough – the longer you knead, the better. This can be done with the dough hook of a food processor or a hand mixer, but you can also do it with your hands.

Form the dough into a ball and let it rise, covered, in a warm place for about 45 minutes until it has doubled in size. Then portion the dough into eight equal parts (for small pretzel burgers) and form them into balls. Let the dough pieces rise again for about 20 minutes.
In the meantime, preheat the oven to 190°C top/bottom heat and bring one to two liters of water to the boil in a large saucepan. Stir in 3 tablespoons of baking soda and drop each ball of dough into the boiling water for 30 seconds.

Allow the dough pieces to drain briefly and place them on a baking sheet lined with baking paper or a well-greased baking sheet. Cut into the pretzel buns with a sharp knife and immediately sprinkle with sesame seeds or coarse sea salt. If the buns are already too dry, you can brush the dough pieces with some plant-based milk as a milk substitute.
Bake the buns for the pretzel burger for about 20 minutes or until golden brown and then let them cool on a wire rack. Tip: You can easily freeze leftover pretzel buns.

Vegan burger patties recipe

In the pretzel burger in the photos, we used our patty recipe for vegan burgers with kidney beans. The recipe makes about eight small patties.

This is how you put the lye burger together

The pretzel burger tastes particularly delicious with pickles, a slice of vegan cheese and fresh or homemade caramelized onions. Depending on the season, you can garnish the burger with fresh lettuce and tomato slices. A vegan dip as a sauce or simply ketchup and/or vegan mayo should not be missing.

Tip: A homemade tartar sauce, which you can easily prepare vegan, also goes very well with it. If you prepare the patties from tofu or seitan, sweet mustard also tastes very good.

Zucchini bread is juicy and aromatic and adds variety to your diet. We’ll show you how to make the healthy bread yourself at home.

Zucchini bread is a tasty change from traditional bread recipes. With just a few ingredients you can make a juicy bread that you can serve with snacks, soups or as a snack in between.

Incidentally, you can get zucchini from German cultivation between June and October. For all other ingredients, too, we recommend using regional products wherever possible. This saves long transport routes and thus CO2 emissions.

When buying the ingredients, also pay attention to organic quality. In this way you support sustainable agriculture that does not use chemical-synthetic pesticides.

Zucchini Bread: This is how you make it yourself

Ingredients:

0.5 package(s) dry yeast (for 500g flour)
1 tsp sugar
40 ml lukewarm water
200 g flour
200 gzucchini
150 g almonds, ground
20 gflaxseed (crushed)
1 tbsp olive oil
1 pinch(s) of salt
2 teaspoons bread spice
1 tbsp flour for the mold

Directions:

Mix the dry yeast with the sugar, the water and half of the flour. Mix everything together until there are no more lumps in the batter. Now let the mixture rise in a warm place for 15 minutes.
Meanwhile: Wash the zucchini. Cut off the two ends and grate them roughly with a kitchen grater. Squeeze them lightly with your hands and drain off the excess liquid.
Now mix the remaining flour, the almonds, flaxseed, and the olive oil into the dough. Knead the dough thoroughly.
Now mix the dough with the grated zucchini, the bread spice, and a pinch of salt. If the dough is too wet or too dry, add a little more flour or water.

Let the dough rise again in a warm place for 20 minutes.
Sprinkle a loaf tin (length 26 cm) with some flour so that the bread can be removed more easily later. Bake the bread with top/bottom heat for 40 minutes at 180 degrees Celsius.
Tip: To ensure that the zucchini bread lasts as long as possible, you should follow a few tips when storing it. You can find out more about this here: Storing bread – you should pay attention to this.

Serve zucchini bread: This goes well with it

Zucchini bread tastes especially good fresh out of the oven with a little margarine or butter. And the bread is also a good side dish for soups and dips:

  • You can serve zucchini bread with zucchini soup, butternut squash soup, pea soup, or wild garlic soup, for example.
  • On warm days, the bread is suitable as an accompaniment to a cold gazpacho.
  • You can make vegetable dips from fresh vegetables and herbs such as beetroot, wild garlic, or tomatoes and serve them with the bread.
  • The bread tastes particularly delicious with a light salad.

If you can’t finish the zucchini bread, freeze the bread. This way you avoid food waste and always have some homemade bread in the freezer.

For many, steak is chicken, pork, lamb, fried in a pan or charcoal. However, we need just beef – juicy, with a rich taste. Everything else is an attempt to replace marbled meat.

By the way, how do you get it? To do this, the bulls are fed their fill for 4-6 months. How long the animal will have a feast for the whole world depends on the category that is later assigned to the carcasses. For example, prime is a real benchmark from which great steaks are made. The most popular product is chosen, followed by select. Most restaurateurs use choice – this is the best option: it is moderately greasy, moderately tender.

  1. For cooking, you need to take only fresh meat. It should be chilled. Leave it to lie down just before grilling to warm it up to room temperature.
  2. We remind you: the dish in question can only be made from beef. Other options (lamb, pork, chicken, fish) can also be grilled, but this does not make them a steak.
  3. The ideal thickness for portions is 2.5 to 4 cm.
  4. If you have uncut marbled meat, it doesn’t matter. It must be cut strictly across the fibers.
  5. Tender pieces are prepared from the back muscles – the least loaded.

Mastering the art of making juicy and mouth-watering steaks is easy. The main thing is to strictly follow several rules and remember the difficulties that both beginners and regulars of the kitchen may encounter.

  1. The steak should only be prepared with fresh, chilled meat. The meat is usually brought to room temperature before frying. If the steak has been frozen, leave it in the refrigerator overnight. Wipe the meat dry before starting the cooking process.
  2. The width of the meat is also very important. Ideally, this is a piece of 2.5 to 4 centimeters.
    If you cut the meat yourself and at home, then it is worth remembering one simple rule: cut it strictly across the fibers.
  3. For steak, use a heavy skillet or grill pan. They make it easier for you to control the temperature and the frying process in general.
  4. It is important to preheat the pan correctly. It should be very hot, but not smoke. Otherwise, the meat will burn on the outside before it can cook on the inside. The steak should sizzle as it touches the surface of the pan.
  5. It is better to start frying meat at high temperatures, and then switch to lower ones. This will ensure even roasting and prevent the meat from losing its flavor and color.
    Typically, cook a medium-rare steak for 4 minutes on each side. Meat with the blood takes 1-3 minutes.
  6. Fully fried steak is fried for 3 minutes on each side over high heat and then cooked until fully cooked for 6-8 minutes. However, you should still carefully monitor the meat, because the cooking time can vary depending on several factors.
  7. The steak can be flipped frequently. This will ensure even frying, and the edges of the steak will not dry with this technique. If you decide to turn it over rarely, only 2-4 times during the cooking process, then the final result will be a beautiful lattice pattern. However, only if you are grilling the steak.
  8. You can check the readiness of the steak with your fingers. To do this, lightly press down on the steak with your fingertip. The bloody steak is soft and pliable to the touch; well done – hard; medium roast is a cross between the two previous options.
  9. After the meat is ready, you need to remove it with special cooking tongs and leave for 10-15 minutes.
  10. If you are afraid that the steak will cool, then use food foil. You should not neglect this rule, because this is the only way to get a really juicy, mouth-watering, and delicious dinner.
  11. The steak is best served on warm plates. Knives must be sharply sharpened.

It is important to choose steaks so that it is not a shame to lose the roast. I recommend choosing either rib eye or strip-layer – this is a thick and thin edge. They are juicy, soft, and even if you cannot “catch the roast”, it will not spoil them at all, the meat will remain tasty.

  1. You need to wait until the pan is as hot as possible over high heat. But make sure that it does not start to “burn” and smoke. How do I check if the pan is ready? The easiest way is to drip it with water: if the water starts to “jump” over the entire surface, then the pan is ready.
  2. My life hack: do not salt or pepper raw meat, because at this stage it will not affect its taste and condition in any way. As soon as the pan is ready, layout the steak and begin to fry.
  3. Each part of the carcass is fried in a completely different way, so now we are talking exclusively about striploin. Considering our thickness is from 2.5 to 3 centimeters: rare – 35-40 degrees, medium-rare 45-50, medium – 50-55 degrees. Finally, the medium-well roast is over 60 degrees inside your steak. How long to fry on each side?
  4. There are no exact rules. I like turning the meat over every 1.5-2 minutes more, thereby manually distributing the heat evenly inside the steak. And if you like a fried crust, you can achieve it at the end by holding the steak on each side for a little longer.
  5. The rest of the steak is the same fairy tale as about the “marbling” of meat. Both the first and second is a good marketing ploy, which is now customary to talk about. Once the steak is done, I usually chop, breaking the fiber structure of the meat, and then add salt or whatever spices I like.

Someone thinks that a steak is too expensive, and a simple stew is more economical, someone thinks that a good steak cannot be cooked at home. But in reality, meat lovers will pay much more for a restaurant steak than for a homemade one. Although they could easily cook the same in their own kitchen.

  1. Which meat to choose from? Of course, only high-quality, fresh chilled meat should be chosen for the steak. And certainly beef. We cook steak at home, that is, in a pan. For these purposes, ribeye is suitable, it has a large amount of thin fat layers, so it will turn out better in a pan than all other steaks.
  2. Preparation. It is best to fry warm meat, at room temperature. This is easy to arrange if you are not in a hurry – 2 hours before cooking, remove the meat from the refrigerator, close it with something so that it does not get weather – the path heats up. But if you come home from work and you need to fry the meat now? Then it can be wrapped in cling film, but only tightly enough and in several layers. And put in warm (about 50 ° C) water. For half an hour. The meat will heat up while you wash your hands and ask the children if they have done their homework. Second point. Do not cook moist meat. Dry it with a paper towel before cooking. Otherwise, the meat may develop an unpleasant odor.
  3. Thickness. It all depends on personal taste and the degree of roast that you prefer. If you like lightly roasted meat, then you can cut the steaks about 4 cm thick. If the roasting is supposed to be more serious, then you can make the steaks thinner, about 3 cm thick. But it must be borne in mind that you did not get thinly sliced meat will not be juicy, so less than 2.5 cm thick is no longer a steak.
  4. Salt and spices. It is often not recommended to salt the meat until the end of its cooking. Because of salt, the meat loses its juiciness. But this point of view also has a downside. After the meat has been fried, you cannot salt it so that the seasonings are evenly distributed over the piece. And that’s a big loss for the steak. Therefore, it is best to rub the meat with salt and spices and leave to lie down for 5-7 minutes. This will help the seasoning spread evenly. And the meat, by the way, will be fried more evenly. For meat, sea salt and freshly ground black pepper are ideal. Perhaps nothing else is required.
  5. Fat for frying. Steaks are usually fried in a dry skillet. But you can grease a piece of meat with a drop of odorless oil before frying. This will give it a shine, help in crust formation, and prevent the meat from drying out. The second option: drip a little olive (refined) oil and a few drops of lemon juice on the meat. The aroma will be extraordinary.
  6. Scent. The oil can give the meat a great flavor. For example, you can add it in the middle of frying, when a firm crust has formed on the meat. A slice of butter mixed with minced garlic will make the steak simply unforgettable. Attention: after you put the oil in the pan, you do not need to fry for a long time so that the oil and garlic do not start burning.
  7. Temperature. First, we heat the frying pan on the fire. Very much. If you carry your hand over it at a distance of 15 cm, then strong heat should be felt. With such a strong heat, the meat will immediately grab a crust and may even char a little. Just a little bit, just to give off a nice roasted flavor. After the steak is in the skillet and you have formed a crust, you can lower the temperature. Medium fire will be just right.
  8. Be sure to turn over. The more often you turn the meat, the juicier it becomes. That is, you cannot fry the meat on one side, then on the other and it will calm down. First, you need to form a crust. To do this, fry the meat for a minute over high heat, pressing the meat to the pan with a spatula. Then you can reduce the heat a little and fry the meat for 6-8 minutes, turning it over every minute. If you want a steak with blood, almost soggy inside, then turn it over even more often. That is, first form a crust, and then twirl the steak in a pan every half a minute. It will turn out juicy and hardly fried. The frying time should be shortened slightly. But remember that it depends on the thickness of the meat too.
  9. Finally, when the steak is fried, let it rest for 5 minutes. And only then garnish with mustard, vegetables, or something else.