Tag

Oven

Browsing

Pizza Margherita, salami or Hawaii? This decision is often not easy. But how about a sweet version for a change: Thanks to Dr. Oetker will soon be able to do this because from April the “Dolce al Cioccolato” – a chocolate pizza – will be in the freezers of the supermarkets!

Dolce al Cioccolato – the sweet seduction

Preheat the oven to 200 degrees, and slide in the chocolate pizza for eight to ten minutes – the sweet dessert is ready! On the thin “pizza crust” of the Dolce al Cioccolato, chocolate sauce, delicate shavings of milk chocolate, chocolate droplets and pieces of white chocolate combine to create a heavenly dessert for those with a sweet tooth.

The sweet sin can be divided into several pieces, served either pure or with ice cream and fruit and is an unusual change on the dessert or cake plate, as the company Dr. Oetker explained in his press release.

The chocolate side of pizza

The Dolce al Cioccolato presents itself optically from its chocolate side with every single one of its total of 300 grams, but the chocolate pizza should not be served too often to calorie-conscious people: With 320 kilocalories per 100 grams, this chocolate bomb is not exactly a lightweight.

Curious connoisseurs will definitely not want to miss out on the chocolate cake alternative from the frozen pizza ranks and will try them out together with family or friends.

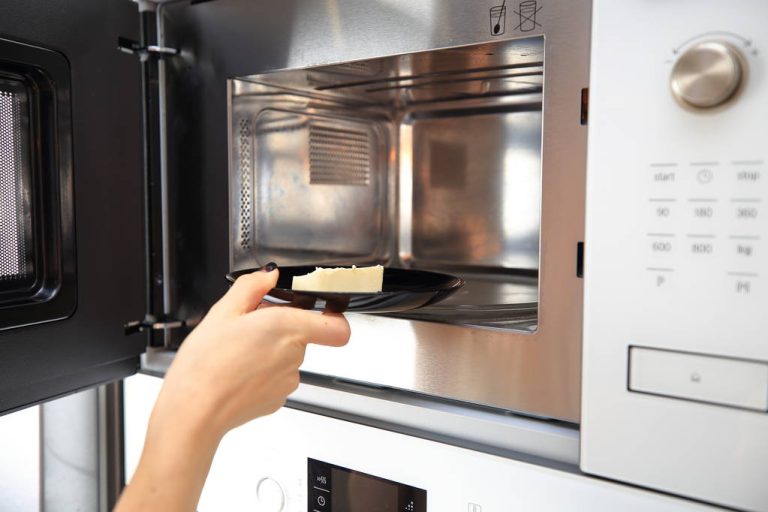
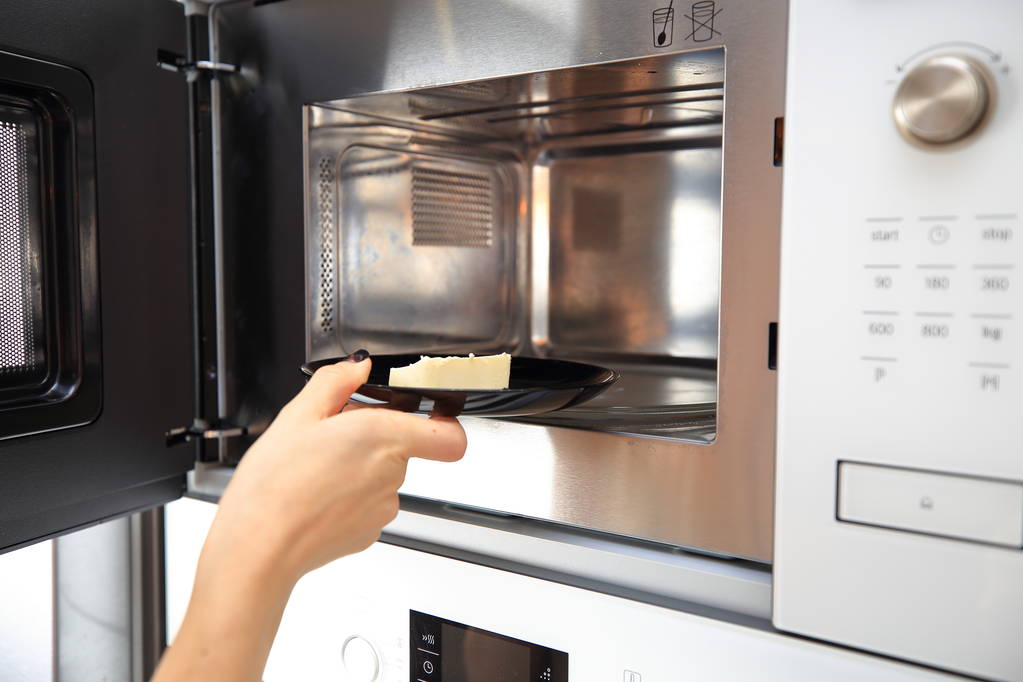
If something needs to be heated up, the microwave often comes in handy. But not all materials and foods are suitable for this.

These materials are not suitable for the microwave

A microwave can be found in most households. Food can be heated easily, quickly and conveniently with this. But some materials and foods do not belong in the microwave.

The following must be observed with the material:
Make sure you only use microwaveable (plastic) dishes; otherwise the material may become deformed or plastic parts may end up in the food.
Paper or cardboard is also unsuitable due to the coating.
If you have a dish in a Styrofoam container, you should take it out of the packaging. Otherwise toxic substances can be passed on.
You should also not heat eggs in the microwave, as they can burst in it.
For soups, make sure they are covered to avoid splashing.
Aluminum foil can melt and should be removed first.
Fine china, for example with a gold or silver rim, should not be placed in the microwave.
Food that can burst is also a problem. Hot peppers and chili, in particular, can develop fumes that can spread outside the microwave.
You should also not put crockery made of metal or melamine resin or unglazed stoneware in the microwave.

Be careful with these foods

Furthermore, these foods are not microwaveable:
In the case of raw meat and raw fish, salmonella, for example, may survive. The following applies here: it is better to fry or grill thoroughly.
(Cooking) oil and (frying) fat harbors the risk of igniting. The fires cannot be extinguished with water.
Perishable foods such as egg dishes, potatoes and pasta should be fried in the pan if possible.
You can make pizza in the microwave, but it gets crispier in the oven.
Coffee can become bitter.
When water in tall, smooth vessels is removed from the microwave, it can form a bubble of water vapor that escapes explosively; the boiling liquid that can be carried away can lead to scalding.
High-proof alcohol can also ignite – or, in the case of vodka, for example, explode.
In general, the microwave is not suitable for even heating. Therefore, if in doubt, you should fry your food to avoid germs and health problems.

Very few households can do without an oven. After all, various delicacies can be prepared in it, from bread to cakes to juicy roasts. If you want to buy a new oven, you should pay attention to important purchase criteria.

Buying an oven – what is important?

There are many good reasons for buying a new oven. When buying, a low price and good quality are usually decisive. However, the quality, in particular, depends on many other factors. And the absolute price makes little sense as the only basis for decision-making because a good price-performance ratio is crucial. Since a large number of oven models unsettles many people who are willing to buy, we have summarized the most important criteria for buying an oven. If you make your purchase decision based on these criteria, you can benefit from your new household appliance.

1) Energy efficiency and price

In view of rising electricity prices and in view of the increasing importance of environmental protection, you should pay more attention to the energy efficiency of your new oven. Because the energy efficiency class tells you how efficient the electrical device is and how much electricity it uses. The EU uses the Ecodesign Directive to specify how much energy household appliances can consume.

2) Note the construction of the new oven

First, you have to decide whether the oven should be inconspicuously integrated into a kitchen unit or whether it should be set up separately. Depending on this, a freestanding or built-in model is required. If you decide on a built-in oven, you can install it both in the lower area of ​​the kitchen unit and at working height. So that you can avoid back pain, higher integration is advisable. Among other things, this makes it easier to insert and remove heavy baked goods. If there is no space in your kitchen for installation, a free-standing version can be the solution, as you can flexibly place these ovens anywhere.

3) Pay attention to the range of functions when buying an oven

Another key criterion when purchasing an oven is the range of functions. Therefore, think in advance about which dishes you mainly prepare and make sure that your new practical kitchen helper meets the requirements. Because modern ovens with numerous setting options make cooking and baking so much easier. For example, do you need the special pizza level or would a convection grill make more sense for your project?

The spectrum extends far beyond circulating air and top and bottom heat. Several heating elements are used in current electric ovens. While the warm air is evenly distributed inside the oven by a fan in the case of circulating air, heating rods installed at the top and bottom of the appliance ensure sufficient heat for top and bottom heating. Modern ovens convince with a variety of heating methods and supplement the standard equipment with functions such as steam cooking, microwave, grill, or defrosting.

4) Timers and timers make sense

So that you no longer need a separate egg timer in the future, ovens with a timer function are advantageous. As a result, after the set time has elapsed, the oven will alert you with acoustic signals that the food you are cooking or baking is ready. In addition, a timer with automatic switch-off guarantees that nothing burns. Because the oven is switched off automatically as soon as the specified period of time has expired. So these functions are very important when buying an oven.

5) Telescopic rails for the new oven

In order to avoid burning your hands on bars and trays and to enable oven containers to be placed and removed conveniently, we recommend ovens with telescopic rails. You can then pull out the contents of the oven and remove them easily. If burns still occur, follow our first aid tips for burns.

6) Use clever door systems

Likewise, fully retractable oven doors are a relatively new and useful development. Because you can slide the doors directly under the device into a space provided for this purpose. Then you have direct access to the inside of the oven and the door is no longer in the way, so you don’t burn yourself on the hot door. Another alternative is oven doors that can be opened from the side. In addition, note valuable tips for buying a washing machine.

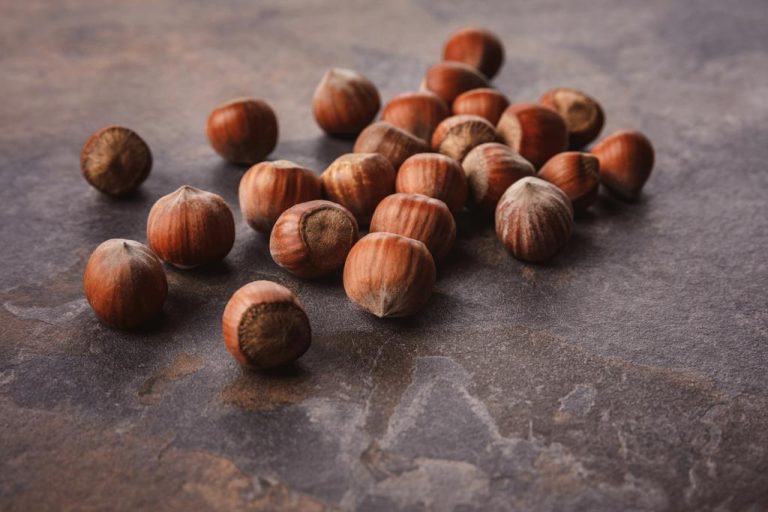
We’ll show you how to easily roast hazelnuts in the pan and in the oven. This is how the nuts unfold their full flavor – and become a delicious snack.

Hazelnuts are in season from September to December. They are a healthy supplier of energy, contain many B vitamins and unsaturated fatty acids. They also contain important trace elements such as iron, zinc and calcium.

This also applies to roasted hazelnuts: when you heat them, the healthy ingredients are only slightly changed and are not completely lost.

Roasted hazelnuts can be found in many autumn and Christmas recipes – from cookies to chocolate to liqueur or hazelnut butter. You can buy them pre-roasted at the supermarket. However, we recommend that you simply roast the delicious nuts yourself – this way you save on plastic packaging and sometimes also CO2, which is emitted on long transport routes.

Maybe you have a hazelnut bush in your garden or you can buy hazelnuts in an organic shop or get them from a farm near you. It is best to use a jute bag to transport them.

How to roast hazelnuts in the pan

To roast hazelnuts at home, you can use a simple frying pan. Proceed as follows:
Crack the shells of the hazelnuts, for example with a nutcracker.
Put the hazelnuts in a pan without fat. Portion them so that they are not on top of each other.
Place the pan on the stove over medium-high heat.
Roast the hazelnuts for about 7 to 10 minutes. Stir regularly so that nothing burns.
Take the hazelnuts out of the pan.
Tip: If you want, you can now easily skin the nuts by wrapping them in a cloth. If you rub the nuts together in the cloth, the skin will almost come off by itself.

If you don’t want to use the nuts right away, you should let them cool down and put them in a sealable container. Store them in a dark, cool place. This keeps the roasted hazelnuts for several months.

Roasting hazelnuts in the oven: this is how it works

Alternatively, you can roast the hazelnuts in the oven.
Crack the hazelnuts.
Spread the hazelnuts on a baking sheet. Again, they should not be on top of each other.
Place the hazelnuts in the oven at 180 degrees top/bottom heat for eight to twelve minutes. (Tip: If you want to save energy, don’t preheat the oven. Put the nuts in the oven right away and just let them toast a few minutes longer.)
Check regularly to see if the nuts are ready – this will prevent them from burning. They should be brown in color and smell nutty.
Remove the hazelnuts from the oven and then from the baking sheet. Let them cool down and then put them in a sealable container.

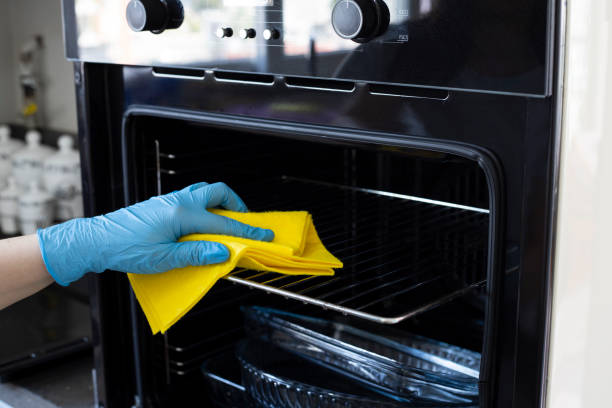
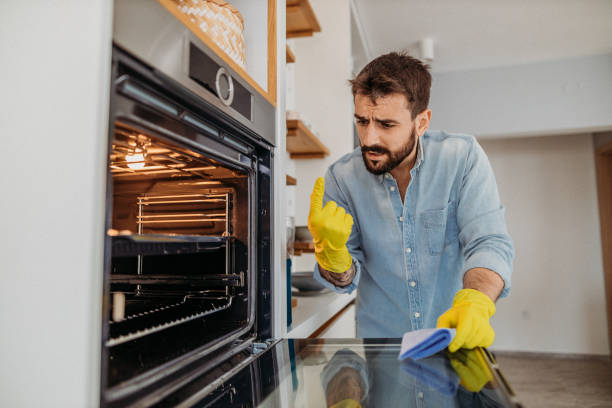
A clean oven not only ensures more hygiene but can also significantly increase performance. A dirty oven is not able to show its full heating capacity. Cleaning the oven is, therefore, a very sensitive matter, which can also save electricity.

Cleaning the oven is not only important for hygiene but can also help to save electricity. For this reason, it makes sense to thoroughly clean the oven once every 2 to 3 months. It’s worth taking a little time to clean the oven, as you can loosen even the most stubborn dirt so that bacteria and germs don’t stand a chance.

You need this to clean the oven

Cleaning the kitchen also includes the proper cleaning of the oven. In order to be able to clean the oven, you can consult a whole handful of tools. The best way to do this is with oven spray. This cleaner has been specially developed to make oven cleaning quick and effective.

The spray can even loosen stubborn dirt and encrustations, which prevents bacteria from accumulating any further. This enables significantly better hygiene. It is advisable to clean the oven regularly. How often you have to clean the oven naturally depends primarily on how it is used. However, it is recommended to clean the oven at least once every 3 months.

1) Clean the preparation in the oven

As everywhere, preparation is half the battle. In order to be able to effectively remove dirt from the oven, you should first remove all the trays. This is the only way you can really reach every part of the oven if you want to clean the oven. It is recommended that you clean the sheets at the same time at this point. In addition, note important criteria for buying an oven, because ovens with a self-cleaning function help you with your work.

2) The application of the oven spray

Before you can use the oven spray, you have to shake it well first. Next, you can easily distribute this to the areas in the oven that need to be cleaned. It is important that you distribute the oven spray evenly. This is the only way it can develop its full power. In the case of heavily soiled ovens, it makes sense to apply the layer a little thicker. Next, let the spray sit for a few minutes.

There are products that only work effectively at a certain temperature. For this reason, it may be necessary to heat the oven to around 50 degrees. However, this depends on the spray used. Therefore, one must study the application instructions carefully before use. Over time, the cleaner should discolor slightly. Here you have to pay attention to a slight brown coloration. If this is the case, you can be sure that the oven cleaner works. In addition, the oven can also be cleaned with household products such as baking powder. Home remedies help to remove bad smells in the oven.

3) Remove Oven Spray

If you have given the oven cleaner enough time to take effect when cleaning the oven, you must free the oven from the foam again. A rag or damp cloth is best for this. It is important that you really remove the foam from all places in the oven, as this should under no circumstances come into contact with food. In addition, unpleasant odors can occur the next time the oven is heated up if all the residue of the oven cleaner has not been removed. It is advisable to rinse the rag several times with water during wiping.

4) The conclusion

Finally, you take another look into the oven to check whether all the dirt has really been removed. If there are still impurities, you can easily repeat the cleaning process several times if you want to effectively clean the oven. If the oven is clean, you can push all the racks and baking trays back in and the oven shines in new splendor.

Important tips for cleaning the oven

  • The exposure time of the oven cleaner must be taken into account. It is therefore advisable to take some time to clean the oven. As a rule, you should plan for about an hour.
  • The more regularly you clean the oven, the less dirt there is. It is therefore advisable to clean the oven once every few months, as this way it keeps the amount of work to a minimum.
  • The oven cleaner can be used not only for the oven itself but also directly for the inserts and trays. It is advisable to clean them at the same time.
  • Thoroughly rinsing the oven after cleaning is important so that the food does not come into contact with the cleaner and unpleasant odors can be prevented.

Reheating pizza is actually quite simple. We’ll show you how to prepare a fresh and delicious meal from the “leftovers” from the day before.

Are you also a fan of cold pizza that you bought the day before? According to chemist Maureen Cooper of Sterling University in Scotland, the cold pizza still tastes good because the tomato sauce keeps the cheese from seeping through to the pizza crust and making it mushy.

Nevertheless, not everyone is enthusiastic about the taste of a cold pizza. With our methods you can get the taste pretty close to that of the day before. And at the same time you are doing something against food waste.

Reheat and spice up pizza

To make your pizza taste a little more “like new”, you can add herbs, vegetables or fresh cheese before or after heating it up:

Herbs and salad: Fresh basil, rocket, thyme or rosemary spice up any pizza. However, be careful not to put basil or arugula in the oven or pan, or they will lose their strong flavor and burn. With the other two herbs this is fine.
Pickled and dried foods: You can halve or cut olives, chili peppers or dried tomatoes into small pieces and spread them on the pizza. You can even put them in the oven, as they develop their flavor well when warm.
Fresh: Garlic and onions give your pizza a very special freshness. If you would like to add some vegetables, for example peppers or mushrooms are suitable.
Mediterranean cheeses: You can even enhance the cheese flavor of your pizza with feta, mozzarella or parmesan. Together with the herbs, olives or tomatoes mentioned above, your pizza will have a particularly Mediterranean flair. All types of cheese can be reheated or put on top afterwards, depending on whether you prefer a melted or fresher taste. Vegan cheese is also suitable.
Extravagant: Many people will have their hair stand on end at this recommendation, but for some, pineapple gives the pizza a very special, exotic sweetness. Canned fruit or vegetables are ready prepared from the tin or rather from the jar and can be processed immediately. Corn or beetroot are also recommended.

Warm up pizza the right way: in the pan or in the oven

Note: If you reheat the pizza in the microwave, it will get pretty mushy.

Reheat pizza in pan:
Heat your pan to medium-high without adding oil.
Add the pizza and cook until the dough is no longer “wobbly”.
Now turn the heat down, add half a teaspoon of water to the bottom of the pan and place a pan lid on top.
After a minute or two, when the cheese melts, your pizza should be ready.
Reheat pizza in the oven:
Place your pizza on a baking sheet. Instead of baking paper, use a more sustainable baking paper substitute.
Preheat the oven to 250 degrees.
Spray the pizza lightly with water and drizzle some olive oil on top so it tastes fresher and crunchier at the end.
Bake them for about five minutes.

Sun-dried tomatoes are a great reminder of summer. We’ll show you three methods you can use to dry tomatoes yourself and make them durable.

If you want to dry tomatoes, you first need the right tomatoes: they should be fully ripe, as that is when they have the most flavor. It is best if you use tomatoes from your own garden. But local organic tomatoes, which are available on the market in summer, are also well suited. Regardless of which method you choose to use to dry the tomatoes, here’s how to prepare them:

Wash the tomatoes and cut out rotten spots and spots.
Skinning the tomatoes is sometimes recommended for drying with a dehydrator.
Chop the tomatoes depending on their size: With small cocktail tomatoes, halving them is enough. Larger tomatoes, on the other hand, should be cut into slices that are about half an inch thick.
Remove the juice and seeds from inside the tomato. This allows them to dry faster and you therefore need less energy and time. You can do without it with firm tomatoes that contain little juice.
You can now use the oven, a dehydrator or – under favorable conditions – the sun to dry. All methods have their advantages and disadvantages.

1. Dry tomatoes in the sun

Drying the tomatoes in the sun is the original method, which is still practiced in Italy, for example. Unfortunately, there are rarely enough hours of sunshine in this country. But if there are several consistently sunny days in a row in summer, you can try it. That is how it goes:

Place the prepared tomatoes, cut-side down, on a wire rack (such as a grill grate) or suitable trellis. Season with a little salt and other spices if you like.
Cover them with a close-meshed net to protect them from birds and pests. For example, you can use cheesecloth.
Place the grate well off the ground in a sunny and airy spot.
The drying process takes about three days. Meanwhile, you should turn the tomatoes several times. When it rains and also overnight, it is best to put the tomatoes inside.
You can recognize the finished tomatoes by the fact that they look shriveled and leathery. The drier the tomatoes end up, the longer they will keep.

Advantages:

You don’t need any energy to dry the tomatoes in the sun, so this is the best option from an ecological point of view.
Due to the slow drying at a comparatively low temperature, a particularly large number of healthy nutrients are retained.
Disadvantages:

In this country, the weather is usually not suitable for drying tomatoes in the sun.
Drying in the sun takes the longest.
Tomatoes, despite protection, can be attacked by pests.

2. Dry the tomatoes in the dehydrator

If you generally like drying fruits and vegetables, it might be worth getting a dehydrator. How to dry tomatoes with a dehydrator:

Brush the sieves with some oil to prevent the tomatoes from sticking to the dehydrator.
Place the tomatoes about an inch apart on the sieves and season with a little salt.
Dry the tomatoes. This can take different amounts of time from device to device. Some dehydrators have a temperature controller and a timer for this. It is most nutritious if you dry the tomatoes at less than 50 degrees.
After about ten hours the tomatoes are ready. You can tell by the fact that they take on a rubbery consistency.
Advantages:

You don’t need to turn the tomatoes as they dry.
Many dehydrators can dry the tomatoes at low temperatures and thus protect the nutrients.
Disadvantages:

Dehydrators cost money. Depending on the quality, you pay 30 to 400 euros.
Although most dehydrators use less electricity than the oven when drying, the electricity consumption is not low here either. There are, of course, economical and less economical devices.

3. Dry tomatoes in the oven

If the weather is not suitable for drying in the sun, you can also dry the tomatoes in the oven. How it works:

Preheat the oven to 90 degrees.
Place the chopped tomatoes about an inch apart on a greased baking sheet. Season with a little salt and any other spices you like.
Dry the tomatoes in the oven for about 6 hours, turning them several times. To allow the moisture to escape from the oven, you should stick a cooking spoon in the oven door.
Advantages:

Drying in the oven is independent of the weather.
You don’t need any special tools.
Disadvantages:

At 90 degrees, many nutrients are already destroyed. You can also dry the tomatoes at lower temperatures, but then the drying time will be correspondingly longer. Many ovens also become very inaccurate at low temperatures.
Since the oven has to heat up for several hours and heat constantly escapes through the open door, energy consumption is highest here.

Our conclusion

It’s best for the environment if you air dry the tomatoes. This variant is also nutrient-friendly, but the weather is rarely suitable for it and this method is certainly the most complex otherwise.

If you don’t want to rely on the weather, a low-power dehydrator is probably your best alternative. To make the purchase worthwhile, however, you should consider whether you will use it from time to time. A dehydrator is a device that can also be easily loaned out to the family or neighborhood. it could be worth buying and using together.

On the other hand, if you only want to dry your annual tomato harvest once, you can also use the oven. In order to at least limit the energy consumption here, you should juice the tomatoes well before drying. Finally, in all cases, we recommend that you take tomatoes that have been harvested in the region during the summer and that do not come from a heated greenhouse.

Now remove the oven smell with home remedies. Who does not know it? The oven is used frequently but rarely cleaned. But after a while, bad smells develop. Then you should effectively neutralize the oven smell.

So that the oven smells good again, you can neutralize the smelly oven smell. Here you can do without chemical cleaning agents and drive unpleasant smells out of the oven by using household remedies such as baking soda, lemon, and Co.

Why does my oven stink?

There are many reasons for unpleasant smells in the oven. A first look into the oven usually helps. Because then you can often see that food leftovers have collected and are responsible for the stench. Even if you recently cooked a fish in the oven, this can cause a bad smell. Likewise, sponge residue or other cleaning material could have gotten stuck on the heating rods during the last cleaning. Then they burn and it stinks. Therefore, you should always clarify the cause. A flashlight will help you with this. Also, note our tips for cleaning the oven.

New oven stinks

Even a new oven can stink if it has not been sufficiently seasoned. Because in the production and manufacture of such devices, substances are used that cause unpleasant odors. Therefore, you should burn it in the oven before use. You will usually find instructions for this in the oven packaging after buying a new oven.

Home remedies to remove oven smell

While you can neutralize bad odors in a new oven by properly baking it in, you can use household remedies to remove the smell from an old oven. We have collected the most important home remedies for you. Also, note our tips for neutralizing odors in the apartment.

1) Neutralize oven odor with lemon

Strong-smelling food odors can linger in the oven for a long time. But with the home remedy lemon juice, you can quickly clean your old oven and provide a fresh scent. To do this, put some lemon juice in a glass of water. Then put this in the oven for a few minutes and heat it to 120 degrees. The steam dissolves grease stains and neutralizes unpleasant odors.

2) Use of baking soda against oven stink

It works just as well with the use of baking soda. Because baking soda also neutralizes odors. You can also use a paste made from 2 tablespoons of baking soda, 1 tablespoon of salt, and 2 tablespoons of water to remove burnt-on residue and clean your oven. So you kill two birds with one stone.

3) Baking soda removes a bad smell from the oven

To get rid of unpleasant smells from the oven, use baking powder, the most popular household remedy that is readily available. Because that can also eliminate stench and is a great cleaning agent. To do this, mix baking soda with water to form a paste. Then use it to clean your oven. Then wipe everything well with a damp cloth.

4) Vinegar for odor neutralization

You can also use vinegar as an oven smell home remedy. To do this, wipe out your stinky oven with the household remedy vinegar. However, many people find the smell of vinegar unpleasant. Therefore, you can also mix it with lemon juice. Afterward, it smells fresh in the oven.

5) Eliminate orange peels to stink

In addition to the usual home remedies for removing odors from the oven, you can banish the stench with orange peels. To do this, place the orange peels on a baking sheet and put them in the oven. Then warm them up briefly. They then spread a pleasant scent in the oven. In addition, note our tips for getting rid of musty smells in the closet and removing the smell of vomit.

Cook chestnuts however you like: Roast them in the oven, cook them in a pot or eat them raw. Depending on the method of preparation, you have to prepare the chestnuts differently. We show you how to prepare chestnuts.

Cook chestnuts correctly: Roast them in the oven

Chestnuts from the oven taste particularly delicious. Because here the edible chestnuts keep their typical taste. Roasted chestnuts from the oven are particularly good for snacking. How to prepare chestnuts in the oven:

First cut off the pointed brush of the chestnuts with scissors.
Use a sharp knife to slit a cross into the skin of the chestnuts. This is important so that the chestnuts do not burst open from the heat. Depending on the size of the sweet chestnut, the cross cut should be about one and a half centimeters long.
Now you can put the chestnuts in the oven at 175 degrees and circulating air.
Place a bowl of tap water next to the chestnuts so that the chestnuts don’t dry out while roasting.
Cut the chestnuts correctly: It doesn’t matter whether you make the cross on the flat side or on the lower end. It is only important that the shell is really severed and the cut is big enough. It doesn’t matter at all if you cut the flesh in the process.

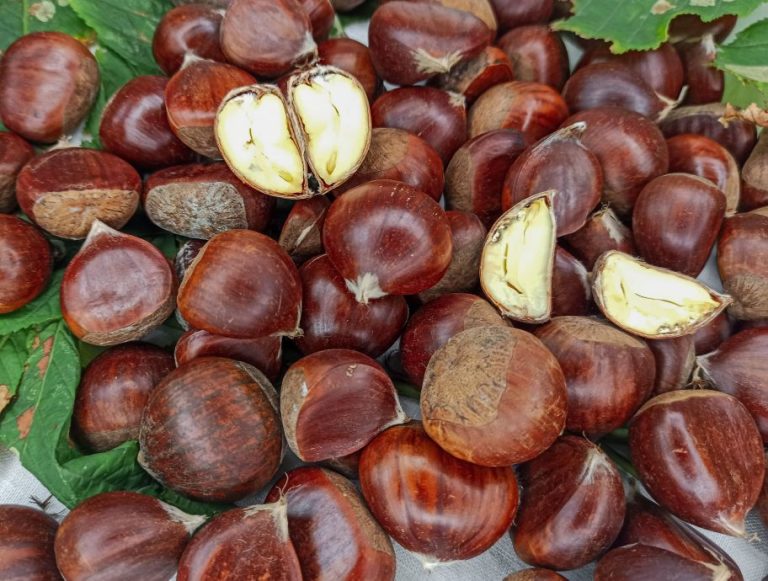
Tip: You don’t have to preheat the oven to prepare the chestnuts. After about 20 minutes, check if the chestnuts are ready. You can tell by the fact that the indentations have clearly opened up and the shell is a bit darker (see picture). Then you can take them out of the oven and remove the shells. If your oven only heats up slowly to 175 degrees, the chestnuts can take up to 30 minutes in the oven.

Cook the chestnuts in the pot

You can also prepare chestnuts as a side dish. Because chestnuts contain a lot of starch and thus replace potatoes. The dish is particularly useful if you have your own tree in the garden – because bought chestnuts are quite expensive. How to prepare chestnuts in a pot:

First, slit the chestnuts crosswise. The incision should be about one and a half centimeters long and reach down to the flesh of the fruit.
Then boil the chestnuts in lightly salted water for about 20 minutes.
The chestnuts are done when the skin has split open at the indentations.
Then you can let them cool down a bit and remove the shell.

Alternatively: prepare chestnuts raw or fry them in a pan

You can also eat chestnuts raw. The taste is very reminiscent of walnuts. You have to remove the peel with a sharp knife beforehand, then the light-colored flesh is already in front of you.

Alternatively, you can roast chestnuts in a cast-iron pan with a lid. To do this, you have to slit open the chestnuts, otherwise they will burst. Keep the following in mind when preparing the chestnuts like this:

Don’t use oil, instead put the chestnuts directly into the hot pan.
Roast the chestnuts at low temperature until the shell opens.
To prevent the chestnuts from burning, you should keep tossing them in the pan.

How healthy are chestnuts really?

Chestnuts are available from the end of September/beginning of October. They are a real power food: chestnuts contain a lot of high-quality protein and much less fat than nuts. In addition, they are rich in potassium, calcium, iron, magnesium, as well as vitamin E, vitamin C and almost all B vitamins as well as beta carotene.

If you buy chestnuts at the market in autumn or at the Christmas market in winter, they are usually very expensive. But chestnuts also grow in many parks and deciduous forests. Although they are much rarer than the normal chestnuts (which are poisonous, by the way), once you have found a few trees, you can harvest many chestnuts there every year. Because there are up to three chestnuts in each shell. Walking carefully through parks and forests can therefore be worthwhile.

Beetroot is particularly tasty when you prepare it in the oven. We present a method how you can easily cook beets in the oven.

You can not only boil, roast or eat beetroot raw, you can also cook it in the oven. This cooking method softens the tuber’s earthy flavor and brings out its natural sweetness. Beetroot should also convince those who were previously skeptical about its intense aroma.

Beetroot is not only a versatile vegetable, but also a source of valuable micronutrients such as phytochemicals, iron, vitamin C and B vitamins. Just 200 grams cover around 50 percent of your daily folic acid requirement.

You can get the healthy tuber either fresh from the field or from storage almost all year round. The main harvest season lasts from October to March. Fresh beetroot can therefore provide you with important nutrients, especially in the winter months. If possible, make sure that you buy organic beetroot. In this way you support agriculture that does not use chemical-synthetic pesticides and thus protects the soil and the environment.

We’ll show you a way to cook beets into a delicious dish in the oven. This oven-roasted vegetable tastes great as a side dish or as part of delicious and nutritious Buddha bowls.

Cooking beetroot in the oven: As an aromatic oven vegetable

Idea: If you end up wanting to make a soup, puree or spread from the beetroot, you can save time and energy by first cutting the beetroot into very small pieces and then cooking them in the oven.

Ingredients:

500 g small beetroot
3 cloves garlic
2 tablespoons olive or frying oil
2 tbsp white wine vinegar
1 tablespoon molasses or other liquid sweetener
Salt and pepper to taste
3 sprigs of rosemary

Directions:

Wash and scrub the beets thoroughly and cut off the core. Then halve the tubers. You don’t have to peel them. Peel the garlic and press the cloves with the flat side of a knife until they pop open slightly.
Place the beets and garlic in a casserole dish. Mix the oil with the vinegar, liquid sweetener, salt and pepper. Pour the marinade over the vegetables and mix well. Place the rosemary sprigs on the beets.
Roast the beets in the oven at 200°C (top/bottom heat) for about 40 to 60 minutes until the tubers are soft. Turn the vegetables every 20 minutes.

Here’s how to use oven-cooked beets

You can process beetroot from the oven in many ways:

You can also cut the beetroot into thin slices and use them to cover a tarte flambée.
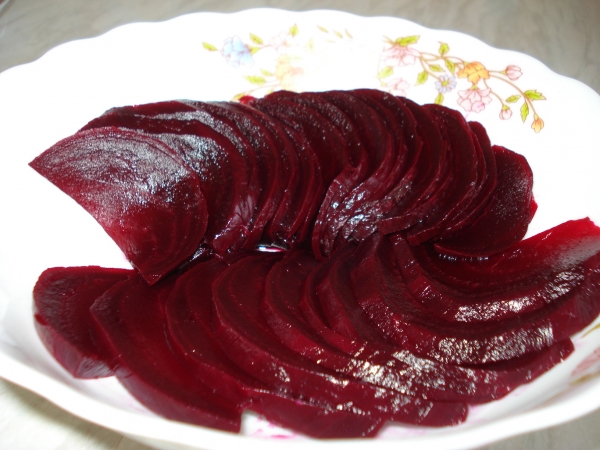
Instead of raw beetroot, you can also use oven-cooked tubers for a beetroot carpaccio.
If you fancy a special cake, you can use the beetroot in a chocolate cake. You won’t be able to taste the tuber, but it ensures that the cake is nice and moist.
The spiced beetroot tastes good in Buddha bowls, a millet bowl, in salads, for example a pearl barley salad, or together with a dip.