Tag

own

Browsing

Halloween is on October 31st! We give tips on how to carve creepy-beautiful pumpkin faces.

A hollowed-out pumpkin provides an eerily flickering light on the windowsill or in the house entrance in autumn. Children especially love to carve their own scary faces. With guidance, even small children can carve their own Halloween pumpkin.

How to carve a great pumpkin light

Children often find it disgusting to pick out the seeds; help them out by cutting a zigzag top into the squash and scooping out the seeds with a sturdy tablespoon or special tool.

If the pumpkin has a pronounced stem, you can integrate it into the work of art as a (witch) nose – in the evening and at night, when the shadow of the nose dances in the candlelight, this gives a creepy effect.

How to carve individual faces

If you want to carve individual faces, it is best to draw your desired motif on a firm sheet of construction paper, cut it out with a butter knife and transfer it to the pumpkin.

Nice effects can also be achieved if you move away from the classic face and towards more striking motifs such as stars, which adorn the entire pumpkin (you can even mothball the Christmas baking molds as stencils). The result is a small work of art that you can still look at after Halloween.

Tip for carving the pumpkin yourself

Special pumpkin carving kits with a small saw help hollow out the pumpkin. These can be bought here.

Why do we celebrate Halloween?

The story is almost as spooky as Halloween costumes: In Ireland, a drunkard and con artist named Jack sold his soul to the devil on the eve of All Saints’ Day. Despite all his crimes, Jack was never to go to Hell through this deal.

But when Jack died, he was not admitted to heaven either; he was homeless and wandering in the dark. The devil threw him a piece of glowing coal as a light, which Jack stuck in a hollow turnip.

Ever since Jack’s homeless soul has come to earth every year on the eve of All Saints’ Day. To protect themselves, people hollow out a gourd and put a light inside.

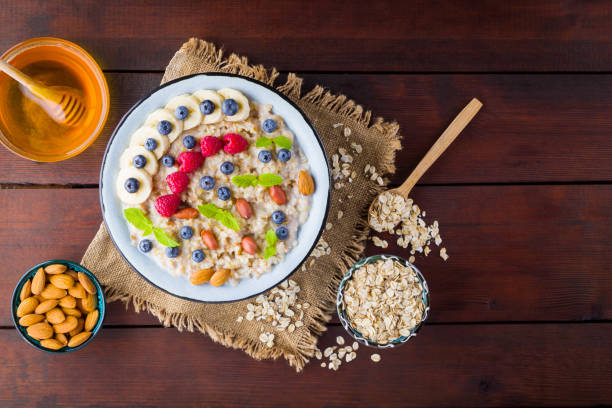
A glass of freshly squeezed orange juice, bread rolls fresh from the oven, and grainy muesli – this is how the day can start more often! Especially on the weekends, breakfast is enjoyed extensively and is something very special for many. The muesli variant in the form of a pizza provides a special kick in the morning: It is not only visually stunning but also provides the body with important nutrients. Here you can find all information about making your own breakfast pizza!

That’s the breakfast pizza

While the oat flakes usually swim in milk in the morning or dip in creamy yogurt, they form the nutritious base of breakfast pizza. The firm oatmeal base is spread with a portion of yogurt – either pureed with your favorite fruit or of course pure. There are no limits to your imagination when making your own breakfast pizza: Anything that tastes good can be used as a topping on the morning pizza, e.g. B. chopped nuts, fruits, seeds, or bee pollen.

That’s why the breakfast pizza is healthy

Oatmeal provides a lot of energy, and valuable fiber and keeps you full for a long time. They also score points with a high proportion of unsaturated fatty acids and magnesium, which e.g. boosts fat burning. The creamy yogurt provides calcium, which is good for teeth and bones. In addition, oat flakes and yogurt together form a great supplier of protein, because their combination increases the biological value.

Breakfast pizza: the recipe

To make your own breakfast pizza for four people you need:

  • 200 grams of rolled oats
  • 2 tbsp ground flaxseed
  • 300 g apple pulp
  • 200 grams of fruit
  • 200 grams of yogurt
  • 1 tbsp chia seeds

The preparation

  1. Preheat the oven to 175° degrees. Finely grind the rolled oats in a blender. Mix the ground flaxseed with six tablespoons of water and let it swell briefly. Thoroughly mix the oatmeal with the apple pulp and the flaxseed-water mixture with your hands.
  2. Place the finished dough on a baking tray lined with baking paper and shape it into a circle. Then place in the preheated oven and bake on the middle shelf for 20 minutes until golden brown. Then let it cool down.
  3. Wash your favorite fruit, deseed if necessary and chop. Pure half of the fruit together with the yogurt.
  4. Spread the fruit yogurt on the oatmeal base and garnish it with the remaining fruit and the chia seeds.

Autumn is here and brings the leaves on the trees to shine in the brightest colors. Many autumn fruits and vegetables are also ready for harvest and appear colorful on trees, bushes, and in the fields. In order to be able to enjoy the delicious yield for a long time, canning is particularly suitable. That’s why here’s the latest do-it-yourself: make your own autumn jam!

Canning fruits and vegetables are super complicated and take forever? No way: Exactly the opposite is the case! Making fall jam yourself doesn’t take much longer than an hour and the effort is richly rewarded. The aromatic and colorful contents of the preserving jars drive away from the winter blues and sweeten the day. And best of all: Everyone can cook and enjoy their very own favorite autumn jam!

Sea Buckthorn Jam

The ingredients

For eight glasses of 250 ml each

  • 1 kg sea buckthorn berries
  • 100 ml orange juice
  • 500 g preserving sugar 2:1

The preparation

  1. Wash the sea buckthorn berries and cover with a little water in a pot and bring to a boil until the berries burst.
  2. Now pass through a sieve and weigh out the fruit pulp. Bring the preserving sugar and the orange juice to a boil in a saucepan and simmer for about four minutes.
  3. Now carry out the gelling test and fill it into the jam jars. Seal airtight and turn the lid upside down and leave to cool.

Pumpkin Lemon Jam

The ingredients

For eight glasses of 250 ml each

  • 1.2 kg Hokkaido pumpkin pulp
  • 1 kg preserving sugar 2:1
  • 3 unwaxed lemons
  • 600 ml orange juice
  • ginger to taste
  • 2 tsp vanilla sugar

The preparation

  1. Cut the flesh into small cubes, mix with the preserving sugar in a large saucepan and leave to stand for about 1 hour.
  2. Meanwhile, grate the zest from two lemons and squeeze the juice. Cut the third lemon into thin slices.
  3. Rinse the jars with hot water and drain them on a tea towel.
  4. Bring the pumpkin cubes to a boil with the lemon zest, juice, slices, and orange juice. Cook the mixture until the squash is soft and has set.
  5. Fill the jam into the screw-top jars, seal immediately and place on top of the cap. Do this until all the jam is filled. After about 5 minutes, the glasses can be turned upside down again.

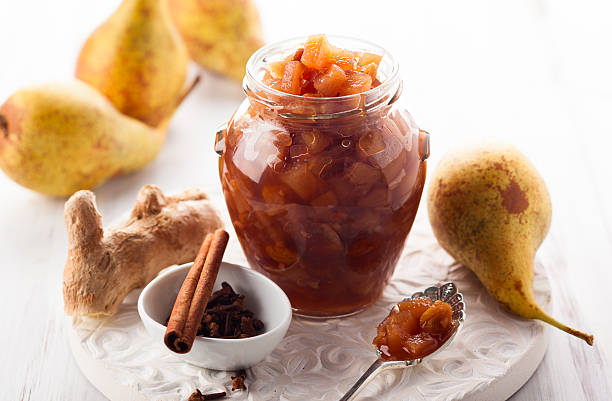
Pear and ginger jam with cinnamon

The ingredients

For eight glasses of 250 ml each

  • 1.2 kg of pears
  • 4 tbsp lemon juice
  • 40 g ginger root
  • 1 kg preserving sugar 2:1
  • 2 sticks of cinnamon

The preparation

  1. Peel the pears, quarter, core, cut into small pieces and mix with the lemon juice. Then coarsely puree everything with a hand blender. Peel the ginger, cut it into small cubes and add it to the pear sauce.
  2. Weigh the pear puree and add the appropriate amount of preserving sugar and cinnamon sticks. Bring everything to a boil while stirring and let it simmer for about four minutes. Fish out the cinnamon sticks and fill the hot jam into the glasses.
  3. Immediately close the jars carefully, place them on the lids and leave to cool for about 15 minutes, then turn upside down and leave to cool.

What goes better with a Sunday afternoon than delicious warm waffles! The wonderfully sweet smell when baking attracts many a sweet tooth and increases the anticipation. But it’s not just simple waffles with different toppings that are served: now the waffle sandwich is conquering the kitchen tables!

That’s the waffle sandwich

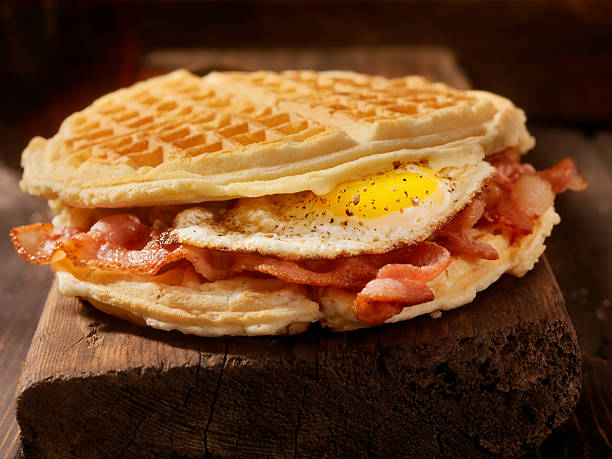
Whether sweet or savory, square or savory: the waffle sandwich has something for every taste. Piled up between two waffles there is an extremely fine filling in the middle – and the homemade version is smarter too! Because only the baker alone decides which ingredients go into his basic dough.

The basic recipe

As a basis for the waffle sandwich, you can try out your own favorite recipe as well as new variants. The nut waffles made from wholemeal flour are ideal for the hearty among waffle fans. This variant scores with a lot of B vitamins and fiber that fill you up for a long time. Chocoholics get their money’s worth with sweet chocolate waffles, which provide a good portion of protein thanks to yogurt, milk, and quark. Of course, the basic recipe for delicious waffles is also pure enjoyment!

Once the Belgian or heart-shaped waffles are baked, it’s time to stack and fill them. EAT SMARTER presents the best variations!

Waffle sandwich for cuties

With apples

Ingredients:

  • 125 g apples (or another favorite fruit)
  • 150 grams of cream cheese
  • 2 tbsp honey
  • 2 tbsp tender oatmeal

Preparation:

  1. Wash, core, and finely dice the apple.
  2. Mix the pulp together with cream cheese, honey, and rolled oats.
  3. Spread the filling on the individual waffle pieces and stack them on top of each other.

With ice cream

Ingredients:

  • favorite ice cream

Preparation:

  1. Fill 1 scoop of ice cream between two warm waffles and enjoy! As an extra topping with hot cherries, the whole thing tastes twice as good.

Hearty waffle sandwich

With olive cream

Ingredients:

  • 25 g pitted olives
  • 2 sun-dried tomatoes
  • 90 g edible quark
  • 1 tbsp pesto
  • pepper

Preparation:

  1. Chop the olives and tomatoes.
  2. Mix the vegetables with the quark and the pesto.
  3. Season with pepper and fill the waffle sandwich.

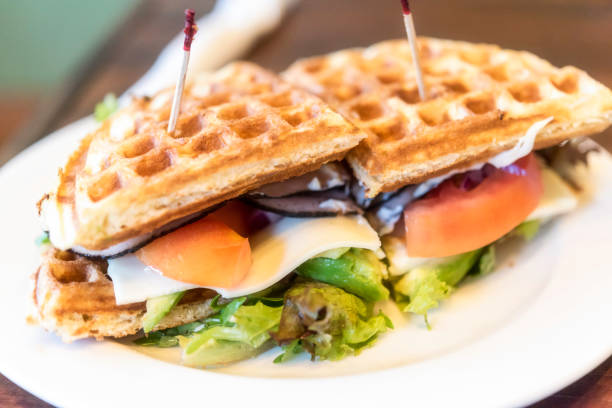
With tomatoes and herbs

Ingredients:

  • 2 tomatoes
  • 4 lettuce leaves
  • 4 tablespoons yogurt
  • 1-2 garlic cloves (pressed)
  • 2 tbsp chopped basil
  • 2 tbsp chopped parsley

Preparation:

  1. Wash the tomatoes and lettuce leaves. Cut out the stalks of the tomatoes and dice the flesh.
  2. Mix the yogurt together with the pressed garlic and herbs.
  3. Now spread the herb dip on the waffles, then place the lettuce and tomatoes on top. If you like it even spicier, you can add a slice of bacon to your waffle sandwich.

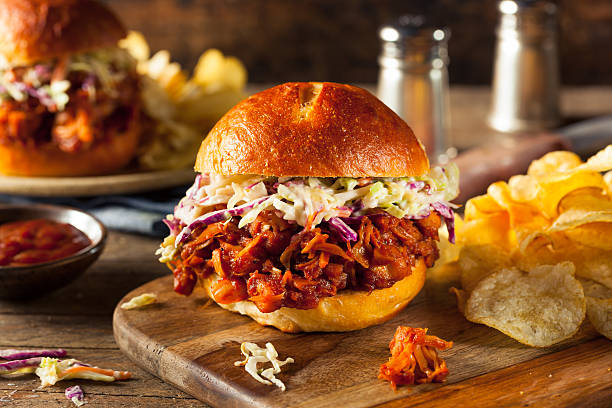
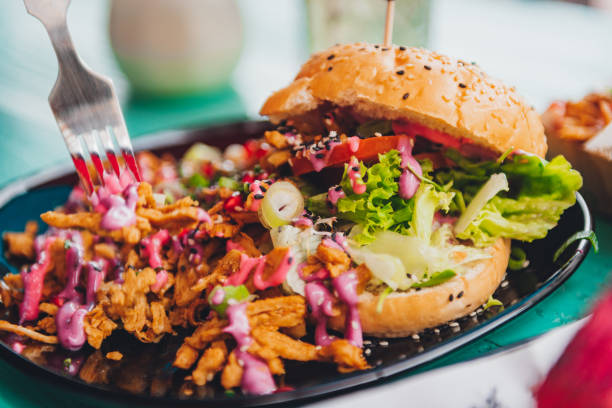
The jackfruit is an insider tip for vegetarians and vegans because its pulp can be used unripe like chicken or pork! So it’s no wonder that the latest food trend takes advantage of this meaty quality. Making your own vegan pulled pork burgers from jackfruit is currently a hit with foodies! Here is the recipe for it.

That’s how healthy the “vegetable meat” is jackfruit

The unripe jackfruit, which can be up to one meter long and weigh up to ten kilograms, has a consistency that is very similar to that of chicken breast fillet, which is why they are a great meat substitute. Ripe fruits taste similar to a mixture of pineapple and banana – but the taste of the kernels is more reminiscent of chestnuts.

Jackfruit is particularly rich in nutritious starches, which explains why they play an important role in countries of origin such as Southeast Asia or Brazil as a staple food and as a substitute for rice. With 27 milligrams per 100 grams, tropical fruits contain a high proportion of calcium, which is particularly important for healthy bones and teeth.

The seeds of the jackfruit are also small power packs because they are full of vitamins from the B group, magnesium, iron, and sulfur.

The vegan pulled pork burger recipe

The ingredients:

For the fruity barbecue sauce:

  • 2 juice oranges
  • 1 pineapple (approx. 125 g pulp)
  • 2 small onions
  • 1 tbsp canola oil
  • 200ml ketchup
  • 4 tablespoons maple syrup
  • 2 tablespoons Worcestershire sauce
  • 2 dried chili peppers

For the burger:

  • 1 can of jackfruit pieces (from the Asian store, about 560 grams)
  • 2 shallots
  • 1 clove of garlic
  • 3 tbsp canola oil
  • 2 burger buns
  • 4 lettuce leaves
  • 2 radicchio leaves
  • 1 tomato

The preparation:

  1. For the barbecue sauce, halve and squeeze the oranges. Measure out 100 milliliters of juice. Peel the pineapple and dice the flesh into small pieces. Peel and finely chop the onions.
  2. Heat the oil in a pan, add the onions and sauté while stirring. Drain the fat from the pan, leaving about 1/2 teaspoon.
  3. Add the pineapple, ketchup, maple syrup, orange juice, Worcestershire sauce, and chilies to the onions in the pan. Bring everything to a boil and simmer over medium heat for about five minutes.
  4. Hang a colander over a bowl. Pour in the sauce, press through the sieve with a ladle, and leave to cool.
  5. Now for the burger, rinse the jackfruit pieces under running water and drain.
  6. Peel shallots and garlic clove. Cut the shallots into narrow strips and finely chop the garlic.
  7. Heat the oil in a pan, and add the onion and sauté over medium heat. Then add the garlic and jackfruit pieces and sauté for about six minutes.
  8. Add the barbecue sauce to the pan and continue to simmer over low heat for another 15 minutes.
  9. In the meantime, toast the burger buns, and wash and drain the two lettuce leaves. Cut the radicchio into fine strips and the tomato into fine slices.
  10. Divide the jackfruit into fine fibers, place the lettuce leaves, tomato, pulled jackfruit, and radicchio on the bun halves, and fold them together – bon appetit!

Acai bowls are real competition for chia pudding and porridge. No wonder: the superfood breakfast is refreshing, healthy, and prepared in no time. We explain what is behind the power breakfast and how you can easily make an acai bowl yourself.

Breakfast as a lifestyle

Previously? You just had breakfast and lunch and in the evening there were sandwiches on the table. Things are very different today: food is celebrated and staged like never before. Thanks to social networks and image platforms such as Facebook and Instagram, nutrition has become a lifestyle issue.

And that also means: Before you start enjoying, you first take a picture and share your favorite dish with the virtual world via hashtags. Whether #healthybreakfast, delicious #burger, or #coffeetogo – especially on Instagram you can find endless culinary inspiration via the diamond symbol. Acai bowls are particularly popular at the moment: These are smoothies to eat with a spoon, vegan and low carb at the same time – and you can also make your own acai bowls.

With the largely biodegradable muesli bowl from Zuperzozial, you are not only trendy in terms of color but also ecologically. The bowl is made from bamboo fibers and corn, making it reusable and durable. After the meal, you can simply put the bowl in the dishwasher and thus save the rinsing time.

Vitamins to eat

Images with the hashtag #acaibowl have been shared countless times. No wonder, because superfoods are literally on everyone’s lips at the moment – and the colorful breakfast bowls are full of healthy nutrients. The base is a puree of frozen berries and bananas, almond milk, and some sweetness in the form of agave syrup.

The fruity mass gets its strong purple color from acai powder. This is made from the berries of the same name, which, along with goji berries, chia seeds, and a few others, are among the most popular superfoods. After harvesting, the skin of the acai berries (the inside of which consists almost entirely of pips and seeds) is mashed, freeze-dried, and then ground.

There are also ready-made fruit purees made from the super berries – although they are still quite difficult to get in Germany. The powder, on the other hand, can now be found in many organic supermarkets, health food stores, or online shops. Anything that tastes good is allowed as a topping for a healthy breakfast.

The topping does it!

When making the Acai Bowl yourself, fresh fruits such as strawberries, blueberries, or mango provide additional vitamins, nuts are rich in valuable fats, and ingredients such as oatmeal, puffed amaranth, or chia seeds keep you full for a long time. Coconut chips, cocoa nibs or dried goji berries, and exotic fruits serve as healthy eye-catchers for a special taste experience. The possible variations are almost endless.

But don’t worry: Even if you eat with your eyes, arranging the toppings inaccurate vertical stripes or in a star shape in the homemade Acai Bowl is of course not a must. You can also simply add all the ingredients to the bowl and mix them with the acai cream. Because we think: social media trends or not – the main thing is still that it tastes good.

It’s the little things in life that spice up a moment. It’s the same with eating. So at the next barbecue party, you can show off your homemade barbecue butter. EAT SMARTER shows how to prepare four delicious butter variants quickly and with few ingredients.

Whether fish, meat, or vegetables – when grilling, the side dishes, marinades, and sauces are what count most. But it usually tastes best when you make it yourself. Plus, you know exactly what’s in it. So, why not make your own barbecue butter? Try these four quick and easy grilled butter recipes.

About the presentation:

Presentation is also the freestyle in sport. You can serve the butter in a small bowl or on a plate, cut it out with biscuit molds or shape it into a roll and cut it into thalers.

How to roll:

  1. Place the butter mixture on a large piece of cling film.
  2. Now place the foil over it and use your hand to push the butter mixture inwards from the outer edge. Hold the foil tight!
  3. Now shape as you like and finally twist the open ends.
  4. Now the butter roll goes back into the fridge to set.

Lime Basil Grilled Butter

Ingredients:

  • 1/2 bunch basil
  • 1 lime
  • 125 grams of butter (room temperature)
  • salt and pepper

That’s how it’s done:

  1. Wash the basil, pluck off the leaves and cut them into small pieces.
  2. Wash the lime with hot water, dry it and grate the zest (about 1 teaspoon).
  3. Cut the lime open and squeeze out about 2 tablespoons of the juice.
  4. Combine the butter with the basil, lime zest, and juice, then season with salt and pepper to taste.
  5. Now let the butter harden in the fridge.

Smart tip: This butter variant is easier to make in the blender as it allows the lime juice to mix better.

Cinnamon Honey BBQ Butter

Ingredients:

  • 125 grams of butter (room temperature)
  • 1 teaspoon of cinnamon
  • 2 tablespoons of honey
  • Salt

That’s how it’s done:

  1. Mix butter with cinnamon and honey.
  2. Season to taste with salt. Alternatively, vanilla pulp also tastes good.
  3. Put the butter in the fridge.

Chili BBQ Butter

Ingredients:

  • 125 grams of butter (room temperature)
  • 1 fresh chili pepper
  • Salt pepper

That’s how it’s done:

  1. Wash the chili pepper and cut it into small pieces.
  2. Mix with butter. Then season with salt and pepper to taste.
  3. Alternatively, you can put all the ingredients in the blender and puree.
  4. Then let the butter harden in the fridge.

Radish Chive Walnut Grilled Butter

Ingredients:

  • 2/3 bunch of chives
  • 125 grams of butter (room temperature)
  • Handful of walnuts
  • 5 large radishes
  • Salt pepper

That’s how it’s done:

  1. Wash and finely chop the chives.
  2. Wash radishes and cut them into small pieces.
  3. Roughly chop the walnuts.
  4. Mix butter with chives, radishes, and walnuts.
  5. Season with salt and pepper.
  6. Off to the fridge with it.

Rolls are in!

And now just put it on bread, meat, and vegetables and enjoy. Enjoy your meal!

Sweet potatoes and cinnamon rolls don’t go together at first glance? Wrong thought! Because the autumnal vegetables make the sweet cinnamon rolls particularly juicy and fluffy. We’ll show you how to make these special sweet potato cinnamon rolls yourself.

The best cinnamon rolls!

Who doesn’t love this cinnamon-sweet treat?! But yeast dough treats in particular are not that easy to make. Sometimes the dough does not rise or is too dry. However, with the addition of mashed sweet potatoes in this cinnamon roll cake, that problem isn’t there.

For the puree, the sweet potato simply has to be boiled and then pureed. It couldn’t be easier! With good organic spelled flour, the sweet treat becomes even healthier.

Sweet potatoes are so healthy

Sweet potatoes contain a lot of beta-carotene. This can be converted into vitamin A in the body and has a cell-protecting effect and strengthens our immune system. In addition, the vegetable provides more fat-soluble vitamin E than any other low-fat vegetable. 100 grams of sweet potatoes already cover a third of the daily requirement. Vitamin E protects cells and prevents fatty acids and other fat-soluble vitamins in our bodies from aging too quickly.

There is also plenty of potassium in the sweet potatoes, which regulates the fluid balance in the body: it flushes out excess water and can lower high blood pressure.

This healthy tuber can be on the menu more often. The first thing you should do is make these deliciously fluffy sweet potato cinnamon rolls yourself!

The recipe for the sweet potato cinnamon rolls

Ingredients for 14 cinnamon rolls

For the dough:

  • 160 ml milk
  • 115g butter
  • 1 egg (L)
  • 1 sweet potato
  • 390 g spelled flour
  • 70 grams of brown sugar
  • ¼ yeast cube
  • ½ tsp salt

For the filling:

  • 50 grams of brown sugar
  • 2 tsp cinnamon
  • ½ tsp salt
  • 2 tbsp butter

For the glaze:

  • 115 g cream cheese
  • 50 grams of brown sugar
  • 1 pinch of cinnamon
  • 1 pinch of salt
  • 3 tbsp milk

Preparation:

  1. Peel the sweet potato and let it cook. Then puree to a pulp.
  2. Bring the milk to a simmer, do not let it boil over. Remove from the heat and add the butter until melted.
  3. Pour the mixture into a small bowl and let cool slightly. Then add the egg, yeast, and sweet potato puree.
    In a large bowl, mix together the flour, sugar, and salt.
  4. In a food processor or with a wooden spoon, mix the dough thoroughly until elastic. Place in a buttered bowl, cover, and let rise in a warm place for 1 to 2 hours.
  5. When the dough is ready, prepare the filling: mix the sugar, cinnamon, and salt. Melt the butter over low heat.
  6. Grease a springform pan and dust the worktop with flour. The dough should now have doubled in size.
  7. Roll out the yeast dough into a rectangle (about 25 x 30 cm). Spread the melted butter evenly on top and sprinkle the cinnamon-sugar mixture on top. Now roll up the dough and pinch the ends together. Cut into 14 rolls and place in the springform pan, spiral side up. Cover with cling film and let rise for another 60 to 90 minutes.
  8. Preheat the oven to 180 degrees and bake the sweet potato cinnamon rolls until golden, about 20 to 25 minutes. Take out and let cool down a bit.
  9. For the glaze, mix together the cream cheese, sugar, and salt. Gradually mix with a spoonful of milk until the desired consistency is reached. Loosen the springform and sprinkle the cinnamon roll cake with the glaze. Enjoy!

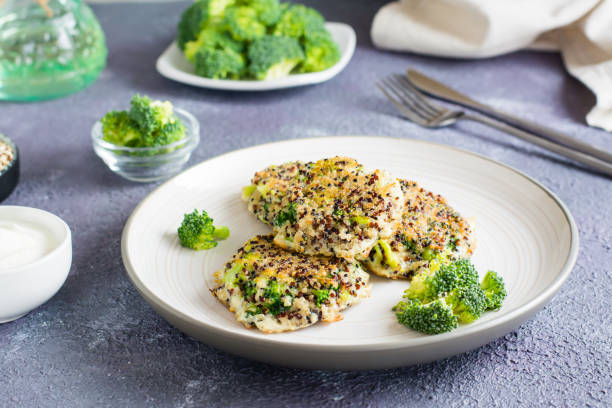
Fluffy, high in protein, filling – these attributes describe the quinoa pancakes perfectly! Instead of commercially available flour, protein-rich quinoa and almond flour form the basis for low-carb breakfast happiness. Topped with Greek yogurt, nuts, and berries, these pancakes are a real protein bomb and won’t leave those annoying cravings in the first place. Make quinoa pancakes yourself: We will tell you the quick recipe in this article.

Served golden brown in 20 minutes

Still, have quinoa from last night? Great! Simply process the rest into fluffy low-carb quinoa pancakes the next morning. Together with low-carb almond flour, Greek yogurt, and other favorite toppings, you can bake a wholesome breakfast in no time.

If you like it more chocolaty, you can also prepare the quinoa pancakes with de-oiled cocoa powder – there’s nothing wrong with a dollop of maple syrup on the cakes either. A meal that will delight not only fitness fans!

Quinoa pancakes are so healthy

Homemade quinoa pancakes not only bring variety to the plate but also lots of protein. And that is known to keep you full for a long time, preventing food cravings and boosting fat loss at the same time.

To round off the perfect breakfast, the homemade quinoa pancakes are topped with the sweetest berries of the season and crunchy walnuts. This provides secondary plant substances, valuable omega-3 fatty acids as well as vitamins and minerals. Make quinoa pancakes yourself: preheat your pan and look forward to a large and healthy portion of breakfast happiness!

Make your own quinoa pancakes

The ingredients:

  • 200 g quinoa (cooked)
  • 100 g almond flour
  • 1 tbsp baking powder
  • 1 pinch of salt
  • 3 egg whites
  • 100 g Greek yogurt
  • 1 vanilla pod (Mark)
  • 125 grams of blueberries
  • Coconut oil for frying

The preparation:

  1. For the low-carb quinoa pancakes, mix the quinoa, almond flour, baking powder, and salt together in a large bowl.
  2. In another bowl, cream together the egg white and yogurt. Then add to the quinoa mixture and fold in the pulp of a vanilla pod and the blueberries.
  3. Heat some coconut oil in a pan and add two tablespoons of quinoa batter to the pan for frying. Turn after about three minutes and cook on the other side until golden brown.
  4. Enjoy the low-carb quinoa pancakes together with Greek yogurt and berries.

Breakfast Muffins: A healthy and hearty breakfast doesn’t always have to consist of muesli or a sandwich: from now on we’ll be nibbling on these breakfast muffins with blueberries! Made with wholemeal flour and the sweetness of fruit, the little cakes are on the table in less than 30 minutes. They can either be eaten straight away or – if there are any leftovers – easily eaten on the go. Here’s the recipe for making breakfast muffins yourself!

Sweet muffin love in the morning

When the alarm clock rings early in the morning during the week, there is often not enough time left to prepare breakfast – at best, it should also be healthy. The solution: make nutritious breakfast muffins yourself! You can finish baking them in the evening and either eat them at home the next day or take them to work.

The highlight: The breakfast muffins consist of the main ingredients wholemeal spelled flour, eggs, and banana – you won’t find white flour or refined sugar in them! This combination of ingredients provides complex carbohydrates and high-quality protein, which keeps blood sugar levels constant over a long period of time, provides energy, keeps you full for a long time, and prevents food cravings in the first place.

Banana and blueberries provide a pleasant sweetness so that even those with a sweet tooth will love the little cakes! And best of all: A muffin provides only 107 kilocalories – also fiber, B vitamins, magnesium, iron, and phytochemicals. The perfect mix to start the day off right! The recipe for making breakfast muffins yourself follows here.

Make your own breakfast muffins

The ingredients:

  • 175 g wholemeal spelled flour
  • 1 tsp baking powder (heaped)
  • ½ tsp salt
  • 150 ml almond milk
  • 2 tbsp coconut oil (melted)
  • 2 eggs (beaten)
  • 1 banana
  • 125 grams of blueberries
  • Jam or powdered sugar to taste

The preparation:

  1. Preheat the oven to 190°C top and bottom heat. Mix flour, baking powder, and salt together in a bowl.
  2. Mix together almond milk, melted coconut oil, and beaten eggs. Add everything to the flour mixture and mix it into a dough using a hand mixer.
  3. Mash the banana with a fork and fold it into the batter along with the blueberries.
  4. Line the twelve cavities of a muffin tin with muffin cases and fill in the batter. Finish baking the breakfast muffins on the middle shelf for about 25 minutes.