Tag

Pan

Browsing

Classic pasta with sugo and parmesan makes every connoisseur’s heart beat faster – but our mouths really water when the much-loved pasta comes out of the pan. No wonder fried pasta is one of the most popular Asian dishes!

It is all the more surprising that both Italian and German cuisine has so far only known pasta from the pan as typical use of leftover cooked pasta. High time to change that! Because with pasta plus fresh ingredients according to your taste, you can conjure up wonderfully light, all-around delicious dishes.

Pan pasta: This is how it is guaranteed to succeed

Of course, pasta is always the basis for the pan: leftovers are welcome, but you can also pre-cook the pasta for this purpose.

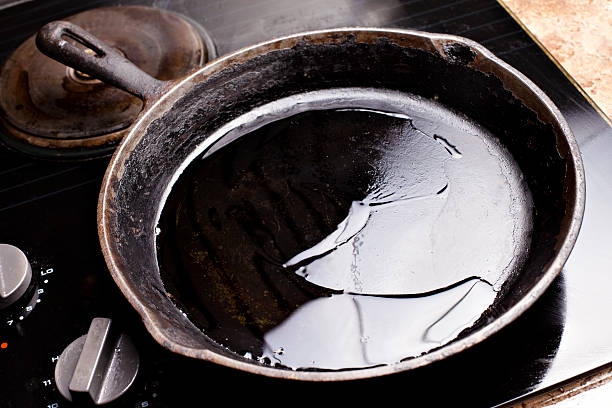
Important: In order for them to be nice and crispy and not mushy, the pasta should be “al dente”, i.e. still have a bite to it, and drain very well! Don’t put too much in the pan at once and turn the pan pasta frequently while frying. As a rule, you first take the finished fried pasta out of the pan, then cook the remaining ingredients and mix the pasta back in to heat it up just before serving.

Incidentally, almost all types of pasta made from durum wheat semolina are particularly suitable as pan pasta, whether whole grain or not. They shouldn’t be too thin – like e.g. soup noodles or vermicelli. Medium size and a rather short shape are ideal: penne, farfalle, conchiglie (mussel pasta), fusilli, or rigatoni, for example, are particularly easy to fry, as are filled tortellini, ravioli, or Cappellini. However, you should also pre-cook the latter for a short time!

Pan pasta: often different, always delicious

Even simpler and downright ingenious: noodles that were specially developed for frying in the pan. Isn’t there? there is! Brand new in the refrigerated section, for example, are three ingenious types of “pan pasta”. The special thing about it: the casing made of delicious dough stays in shape when frying and becomes super crispy. As an irresistible contrast, the creamy filling with fine pieces provides an extra culinary surprise.

And again and again, because the previously “only” three varieties of the pan pasta, which was specially designed for frying, can be combined with almost anything that tastes good – and depending on the ingredients used, it gets a new twist every time. Meat and fish fans will get their money’s worth as well as die-hard veggies. Because whether filled with dried tomatoes and grilled aubergines, with creamed spinach and cheese, or with ricotta and mushrooms: the cappelletti for pan pasta go just as well with fresh vegetables as with meat, poultry, or fish.

Pan pasta: perfect for those in a hurry

Do you like to eat really well, but have little time to cook and wash up? Then pan pasta is the perfect solution for you! You don’t need more than one pan to prepare it – and it’s also extra fast.

For example, you only have to plan a full 10 minutes if you want to serve delicious pans of pasta in tomato cream – even though you prepare the sauce yourself! The pan-fried pasta with creamed spinach and parmesan is also ideal for connoisseurs in a hurry at around 12 minutes.

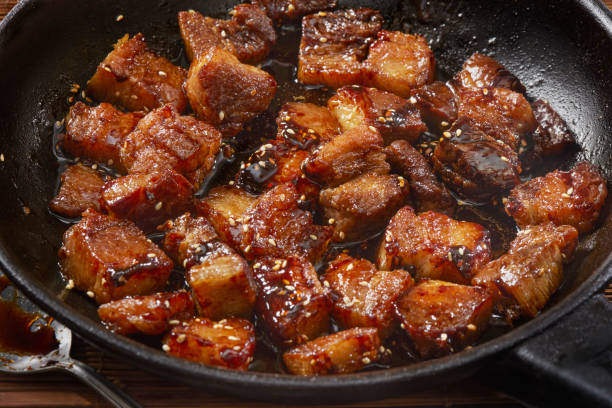
The colorful pan-fried pasta Caprese with tomatoes, mozzarella, and basil does not take much longer, namely 15 minutes. The sliced ​​​​tender chicken fillet, aromatic tomatoes, and crispy pasta spread enchanting aromas of “Bella Italia” with a turbo-speed preparation time of just 17 minutes. And even a hearty classic like the pan-fried pasta with hearty bacon and vegetables is ready in just under 20 minutes.

Almost record-breaking: The pan pasta with olives and rocket brings real Italian flair to the table after incredible 7 minutes. You can hardly cook market-fresh, healthy, and tasty food faster!

In Mexico, they are colorful and in imaginative shapes in the display of the bakeries: pan dulce – sweet rolls. Of course, what looks so appealing does not remain hidden for long: foodies have long since developed a taste for the sugar-sweet pastries and are busy baking the Mexican specialty.

That’s behind Pan Dulce

Pan Dulce is baked and enjoyed by Mexican families, especially around Christmas time. The Spanish word “pan dulce” means sweet buns – and that’s exactly what you taste when you bite into the pastry. The small pieces of dough are baked with a fine layer of sugar, which is often brightened up with bright food coloring.

Mexicans usually eat their pan dulce for breakfast – in combination with hot cocoa or coffee. But the colorful pastries are also popular at night.

The sweet variants

Pan Dulce is not only available in a wide variety of colors, but also in a wide variety of shapes! These include, for example, conchas – Spanish for mussels. These sweet, sugar-crusted buns are served in the shape of mussels by decorating their tops with the appropriate designs.

Polvorones are also particularly popular. This rather flat and wide variant of the pan dulce is often served at weddings and nibbled there. Of course, they also shine in the brightest colors.

The Pan Dulce recipe

For those who would like to try pan dulce at home, here is the recipe for about twelve small buns.

Ingredients:

For the dough:

  • 100 grams of sugar
  • 4 eggs
  • 1 pinch of salt
  • 200 ml lukewarm water
  • 1 tsp dry yeast
  • 500g flour

For the icing:

  • 50 g vegetable fat
  • 100 g powdered sugar
  • 100 grams of sugar
  • 100 grams of flour
  • 3 tsp vanilla sugar
  • Food coloring to taste

Preparation:

  1. Beat the sugar, eggs, and salt until creamy.
  2. Stir in the water and dry yeast and beat until creamy.
  3. Gradually add the flour to the mixture and stir to form a dough.
  4. Cover and let the finished pan dulce dough rise in a warm place for about an hour.
  5. Now divide the dough into about twelve rolls of the same size, shape them nicely and place them on a baking tray lined with baking paper. Leave again for an hour.
  6. Meanwhile, prepare the sugar crust. Mix the vegetable fat, icing sugar, sugar, flour, and vanilla sugar together.
  7. If you like, you can now mix the topping with the food coloring. To do this, divide the sugar mass into the number in which you want to use the different food colors. With liquid food coloring, you should start with one or two drops.
  8. Divide the colored sugar crusts into twelve parts and form into small balls.
  9. Now put the topping on the warm dough of the twelve-pan dulce and gently press flat until the surface is covered.
  10. Imaginative patterns can now be modeled on the sugar crust with a sharp knife.
  11. Now bake the twelve pan dulce at 180 °C for about 15 minutes. Make sure to let it cool down before eating!

We’ll show you how to easily roast hazelnuts in the pan and in the oven. This is how the nuts unfold their full flavor – and become a delicious snack.

Hazelnuts are in season from September to December. They are a healthy supplier of energy, contain many B vitamins and unsaturated fatty acids. They also contain important trace elements such as iron, zinc and calcium.

This also applies to roasted hazelnuts: when you heat them, the healthy ingredients are only slightly changed and are not completely lost.

Roasted hazelnuts can be found in many autumn and Christmas recipes – from cookies to chocolate to liqueur or hazelnut butter. You can buy them pre-roasted at the supermarket. However, we recommend that you simply roast the delicious nuts yourself – this way you save on plastic packaging and sometimes also CO2, which is emitted on long transport routes.

Maybe you have a hazelnut bush in your garden or you can buy hazelnuts in an organic shop or get them from a farm near you. It is best to use a jute bag to transport them.

How to roast hazelnuts in the pan

To roast hazelnuts at home, you can use a simple frying pan. Proceed as follows:
Crack the shells of the hazelnuts, for example with a nutcracker.
Put the hazelnuts in a pan without fat. Portion them so that they are not on top of each other.
Place the pan on the stove over medium-high heat.
Roast the hazelnuts for about 7 to 10 minutes. Stir regularly so that nothing burns.
Take the hazelnuts out of the pan.
Tip: If you want, you can now easily skin the nuts by wrapping them in a cloth. If you rub the nuts together in the cloth, the skin will almost come off by itself.

If you don’t want to use the nuts right away, you should let them cool down and put them in a sealable container. Store them in a dark, cool place. This keeps the roasted hazelnuts for several months.

Roasting hazelnuts in the oven: this is how it works

Alternatively, you can roast the hazelnuts in the oven.
Crack the hazelnuts.
Spread the hazelnuts on a baking sheet. Again, they should not be on top of each other.
Place the hazelnuts in the oven at 180 degrees top/bottom heat for eight to twelve minutes. (Tip: If you want to save energy, don’t preheat the oven. Put the nuts in the oven right away and just let them toast a few minutes longer.)
Check regularly to see if the nuts are ready – this will prevent them from burning. They should be brown in color and smell nutty.
Remove the hazelnuts from the oven and then from the baking sheet. Let them cool down and then put them in a sealable container.

Instructions and tips for choosing the right baking pan for cakes. The cake is still one of the most popular delicacies: There are plenty of delicious recipes for the most diverse types of cake. What many people forget, however, is that it’s not just the recipe that counts, but also the right baking pan.

Choose the baking dish according to the recipe

When baking, it’s not just about the right recipe, but also the right cake pan. This is determined by the baking mold and there are many different ones: silicone baking molds and sheet metal molds made of various metals, with and without a special coating.

There are also ordinary standard forms, as well as very complex motif baking forms. And in a wide variety of sizes. Not only the material is fundamentally different, but actually also the later cake form. Therefore, think about which cake recipe is used to find the right shape. For an affordable canned fruit cake, you can use a baking sheet or round springform pan. These molds are also ideal for grandma’s simple plum apple cake. While other cakes cry out for more unusual shapes.

Know-how of the right baking pan

But which form of buck is the right one for the individual? Every baker and every hobby baker has its own preferences and requirements. This applies to the taste of the cake, but clearly also to the texture of the baking pan.

For example, I prefer silicone baking pans, but my sister-in-law has always sworn by metal baking pans with a high-quality enamel coating. So far we have tried both variants – always with good and less good results. In order to be able to make an individual choice, you should take a closer look at the properties, advantages, and disadvantages of each type of baking pan.

Silicone or metal? With or without coating?

As mentioned, my favorite is the silicone baking pan. Molds made of silicone are very flexible and heat-resistant and there is no need for annoying greasing beforehand and then attaching cardboard afterward. After baking, the finished cake can almost always be removed from the mold easily and without much effort – and above all without unsightly crumbling. In addition, silicone can be used not only in the oven but also in the refrigerator. Today, however, this also applies to many sheet metal shapes.

Metal baking molds, on the other hand, are a lot more robust than silicone baking molds. They wear out slower and last a lot longer than a silicone cake pan. Here, however, the quality of the individual mold is very important – the lifespan of the baking mold can therefore vary greatly. But that doesn’t have to mean that a cheap baking pan has to be a bad one. When buying, simply check the workmanship, the impression of the material, and possible seams or transitions. With the right care, you can conjure up delicious cakes and tarts even with a cheap baking pan and you will enjoy them for a long time.

By the way, if the dough sticks to the mold despite everything, it often helps to simply put the still lukewarm mold in the fridge or on the cool balcony for a few minutes. In my experience, a wet towel wrapped around the mold only helps to a limited extent and only with a metal mold.

Which baking pan and which cake go together?

Finally, the question arises as to which baking pan is the right one for which cake. Here, too, there are numerous variants, motifs, and types of sheet metal. My children love playful shapes for their birthday cakes, but these are really only suitable for very simple and dry types of cake: for example marble, chocolate, or sand cakes. Unfortunately, sensitive and rather sticky types of dough quickly stick to the “details” of a motif mold – even if it is very well greased or made of high-quality silicone.

The commercially available standard forms are somewhat less complicated: springform tins, baking trays, and loaf tins. Incidentally, cool and fresh fruit tarts are best baked in springform pans, warm fruit cakes on a baking tray or also in a springform pan, and sand or bundt cakes in a Gugelhupf or loaf pan.

Tips for removing rust from the baking sheet or from the rusty pan. With natural home remedies, you can remove the rust without any chemicals and save cleverly. There are also tricks to avoid rust.

After a while, it can happen that rust spreads in the baking tray or in your favorite pan. But throwing it away is not an option. Instead, you can easily remove the rust with simple home remedies and help your baking tray and pan to shine again.

How is rust formed?

Rust is formed by the reaction of iron and oxygen in combination with water. Thus, rust is corrosion caused by the chemical process of oxidation. Steel or iron objects, in particular, can be affected by this slow destruction. Therefore, the question often arises as to how these objects can be rust-free. In the following, we will show you how to remove the rust from your baking sheet and pans.

1) Remove the grate from the baking sheet

The baking tray is often affected by rust and dirt. Cleaning the baking sheet is usually an unpleasant task. But simple home remedies for cleaning the baking sheet will help you to eliminate the problem. In the following, we will show you how you can remove the rust from your baking sheet quickly and effectively.

Tomato juice against rust

A little-known home remedy for rust is tomato juice. Similar to the vinegar, you need to spread the tomato juice on the baking sheet. Or put some of the juice on an old sponge and use it to rub away the rust stains. Here, too, it may be necessary to let the tomato juice take effect. So you can easily remove the stubborn rust.

Clean the baking sheet with salt and oil

Using salt as a home remedy is popular. And not just when cooking! You can also use it to remove the rust from your baking sheet. To do this, rub the tin with salt. Then rub in an oil-soaked cloth or old bacon and leave to take effect. Then clean and polish again with a new, damp cloth. If you have a lot of rust spots or patches of rust, you should repeat the process several times.

Remove vinegar and oil to rust

To remove rust, the use of all-rounder vinegar has also proven itself. This makes removing the grate from the baking tray child’s play. To do this, mix vinegar and oil in a ratio of 1 to 1. Then rub the baking sheet with it and let it work in briefly if necessary. Finally, grate the mixture, removing the rust as you go.

Cola as a home remedy for rust

Just as often one reads on the internet about removing baking tray rust with cola as a home remedy. And indeed it works because the cola contains phosphoric acid. Consequently, you can dampen a sponge with coke and then rub the affected areas with it. Or put the cola on your baking sheet and let it soak in. Finally, you can easily remove the rust. Also, read how to clean clogged pipes with coke.

2) Remove rust from the pan

You can remove rust with simple means. Whether from the cast iron pans, frying pans, or other kitchen accessories. It’s a tedious task, but there’s no way around it. And with the right tricks for cleaning the pans, it’s a lot easier.

Use baking powder and baking soda

For thorough rust removal in frying pans, use the home remedy baking soda or the miracle cure baking powder. To do this, mix 2-3 packets of baking powder or baking soda with two tablespoons of vinegar to a paste. Then spread this on the pan surface and let it work for a few minutes or overnight. Finally, rinse the grate with hot water. Or use a brush to scrub. The brush should not be a steel or metal brush. In the case of very stubborn rust, you can also use dishwashing detergent. Can also be used on the baking tray.

Soak in vinegar

Not only can you use vinegar to clean coated pans, but you can also remove rust. If you have a rusty steel pan, you can soak it in vinegar and then gently brush it with a steel sponge. You can see how well this method works in the video below. You should then sear the pan. Also, note our tips for removing rust from cutlery and crockery.

Potato and salt method

If you want to remove the rust from your pan, put a good amount of salt in the pan. Then cut a large potato in half. Now you can rub the salt in the pan with the cut potato side. You can rub vigorously in circular movements. As a result, you should be able to remove the rust from the pan. Several repetitions may be necessary. Also, note our other tips for using potatoes.

Remove citric acid to rust

You can also treat your rusty pan with effective lemon juice and lukewarm water. In the case of heavy rust, you should let the pan soak in this mixture. After the exposure time, you can rinse the pan with hot water and, if necessary, rub it down properly with a sponge. If your pan has only a few rust spots, it is sufficient to apply the mixture with a sponge and rub off the rust spots. Citric acid is also suitable for removing rust stains from clothing.

The coating of a pan is very delicate and should not be damaged. Therefore, gentle and gentle cleaning methods should be used to clean coated pans. We have an overview of the best means.

Use a coated pan or not?

At first, the question arises as to why you need a coated pan at all? Now the use of coated pans is for searing at low and medium temperatures. Also, little or no fat is used here. This is usually the case with sensitive dishes such as eggs or the like. Meanwhile, you can use uncoated pans if you want to sear your ingredients. You can use high temperatures for this. You should also note that there are different coatings. This is particularly important for passionate cooks.

Advantages and disadvantages of a coating

The advantage of the coating of the pans is that it enables gentle preparation. Since the pans require little or no fat, you can cook low in calories. Another benefit is that the pans will last a very long time if handled properly. In addition, they burn less quickly because a lot of fat is not used when frying. This makes them easier to clean. But here is a disadvantage. Because the pans should not be heated to high temperatures and should be cleaned properly. Otherwise, the coating could be damaged. Then it can lose its beneficial effect. In addition, the coatings are suspected of releasing toxic benzene if damaged.

Tricks for cleaning the coated pan

To ensure that your coated pan lasts a long time and is not harmful to your health, you should know how to clean it. Simple home remedies are usually sufficient. As a result, you can protect the environment in the household and do without chemical cleaners.

1) Rinse clean with hot water

The easiest way to clean your coated pan is to rinse it with hot water immediately after use. Then leftover food can be removed quickly and the dirt is gone. In this way, you can also easily clean pans with a ceramic coating.

2) Use baking soda for cleaning

Stains from the art coating of a pan are harder to remove. But then put an eighth of a liter of water with 3 tablespoons of the household remedy baking powder in the pan. Then bring it to a boil and rinse well. If you don’t have baking powder, you can use baking soda, and cleaning nonstick pans will be child’s play.

3) Clean coated pan with vinegar

The household remedy vinegar also helps you effectively with cleaning. To do this, add water and vinegar to the pan in a ratio of 3 to 1. Then let it boil and simmer on low for a few minutes until the dirt dissolves. Then rinse with clear water. If necessary, you can clean it with a soft cloth.

4) Clean the pan with salt

Salt as a household remedy can also clean the coated pan. To do this, you have to distribute the salt evenly in the pan and heat it carefully until it turns brown. This process ensures that the dirt in the pan can be easily removed. Also, read how to clean your work clothes with salt.

5) Use detergent and sponge for cleaning

You can also use the classic soft sponge and mild washing-up liquid to clean coated pans. After pre-rinsing with hot water, you can add some washing-up liquid to the pan. If the food residue is already dried, you can let it soak for a few minutes. Otherwise, you can wipe everything away directly with a soft sponge. In addition, note tips for removing rust from the pan.

6) Avoid the following cleaning methods

While the methods mentioned clean your pan gently and undamaged, there are cleaning methods that can damage the coating. You should therefore urgently avoid the following methods and means:

Avoid using a steel sponge when cleaning. Because this is too hard and scratches the coating.
Cleaning in the dishwasher is forbidden if you want to keep your coated pan for a long time.
Avoid strong chemical cleaning agents. Because these can damage the coating or stick to the pan.

With a vegan potato and vegetable stir-fry, there is a delicious dish on the table at any time of the year. Depending on the season, you can add other local vegetables to the potatoes. Here you will find the recipe and inspiration for every season.

This autumnal and wintery potato and vegetable pan is quick to prepare. It does not contain any animal products – instead, legumes provide a portion of vegetable protein. If you don’t have chickpeas on hand, you can also use sweet lupins, kidney beans, kidney beans or lentils.

If possible, make sure to buy the ingredients for the potato and vegetable pan in organic quality. This is particularly important for potatoes, since conventional agriculture relies heavily on toxic chemicals in potato cultivation. By opting for organic ingredients instead, you can support more sustainable agriculture that does not use synthetic chemical pesticides that can harm the environment, animals and people. Seals such as Bioland, Naturland or Demeter offer you orientation when shopping.

Recipe for the potato and vegetable pan

Ingredients:

500 g potatoes
3carrots
250 g Brussels sprouts
3onions
2 clove(s) garlic
2 sprigs of thyme
2 tablespoons frying oil
150g jarred chickpeas
2 tablespoons vegan cream cheese or almond butter
salt and pepper

Directions:

Wash the potatoes and carrots that are as small as possible and rub them thoroughly with a kitchen towel if necessary. Wash the Brussels sprouts as well, removing any dry or brown leaves.
Halve the potatoes, thinly slice the carrots and halve the Brussels sprouts.
Peel the onion and the garlic cloves. Quarter the onions and finely chop the garlic.
Wash the thyme and shake dry. Pluck the leaves from the branch and roughly chop them.
Bring salted water to a boil in a saucepan. Cook the potatoes in it for about ten minutes and then drain them.
Heat the oil in a pan. Sauté the onions and garlic in it until translucent. Then add the remaining vegetables and the pre-cooked potatoes. Fry everything for about five minutes.
Now add the thyme leaves and the drained chickpeas. Sauté everything for another three minutes.
Finally stir in the vegan cream cheese or almond butter and season the potato and vegetable pan with salt and pepper.

This is how you prepare the potato and vegetable pan seasonally and regionally

You can get regional potatoes all year round. Potatoes from local cultivation are available as stock from November to May, and fresh from the field from June to October.

Together with other seasonal vegetables, you can use them to prepare a delicious vegan potato and vegetable pan that is suitable for every season:

Combine the potatoes with asparagus and kohlrabi in spring, for example.
In summer you can use peppers, tomatoes and zucchini for a Mediterranean potato and vegetable pan.
When autumn comes, mushrooms and squash go well with potatoes.
Winter is when root and tuber vegetables like beets, parsnips and parsley root are in season.

Cooking delicious, juicy steaks at home is a snap. It is necessary to learn and clearly follow certain rules. They will help to avoid the difficulties faced by both beginners and experienced chefs.

  1. Cooking a steak is allowed only from fresh, refrigerated products. If the meat has been previously frozen, it should be allowed to thaw overnight.
  2. Before you start creating culinary masterpieces, the meat is heated at room temperature for several hours. Subsequently, it will be much easier to control the uniformity and degree of roasting.
  3. The meat should not be wet, so it is wiped dry with paper towels before cooking.
  4. The width of the meat is of no small importance. The ideal piece of steak is 2.5 to 4 centimeters in size.
  5. When cutting meat yourself, you need to move the knife across the fibers.
  6. Do not place more than 2 pieces of steak in the skillet, as the more there is on the surface, the lower the frying temperature will be, and this will lead to excessive juicing.
  7. Do not be afraid to season the meat well, because exactly “that” restaurant taste is achieved precisely due to the abundance of used seasonings.
  8. The frying process is best done in a heavy pan. This will make it easier to control the process. If it is not a cast-iron product, it is better to warm it up well, but avoid the appearance of smoke, otherwise, the steak will burn before it is cooked inside.
  9. Begin to fry the meat on a high and then at a moderate temperature. This approach ensures uniform roasting, rich taste, and color of the dish. The protein on the surface of the meat curls up and prevents the loss of juice.
  10. A good cook knows how long to fry a beef steak! According to cooking rules, a medium-rare steak takes 4 minutes on each side. With blood, it will fry from 1 to 3, for medium roasting it takes about 3 minutes each, and 6-8 minutes from each side – for a full one.
  11. Do not use forks when turning the steak. This can lead to loss of fluid, so it is best to use special cooking tools.
  12. If in doubt about the readiness of the meat, you can control the process with your fingers. The softer and more pliable it is when touched, the more blood is inside. Be careful not to burn yourself.
  13. Serving meat is desirable on warm plates. In this case, the knives must be sharp.

We have prepared 7 tips for you to help you cook delicious pizza in a pan.

  1. If you don’t have an oven, you can cook pizza on the stovetop in a skillet. There are pans with thermal glass lids; they are most convenient for baking pizza.
  2. Roll out the dough in a small layer, spread it on a preheated pan, greased with a large amount of vegetable oil, and immediately put the filling on it. Cover with a lid and reduce the heat to a minimum so that the dough is baked evenly.
  3. In a frying pan, pizza is cooked much faster than in an oven: the baking time is 15 minutes. The plain dough can be kept on the fire for 10 minutes, as it roasts faster than yeast dough. We remind you: its thickness should not be too large.
  4. Its readiness is checked with a match, piercing it in the thickest place. If the match is dry, the pizza is ready. In an open pan, the dough is baked in 2 steps, so the baking time is slightly increased (the pancake should be allowed to cool slightly before putting the filling). Thus, pizza preparation takes 20-25 minutes.
  5. Since the dough is baked pretty quickly, the raw filling simply won’t keep up with it. All of it must be prepared in advance – fried, stewed, or boiled.
  6. Its thickness must also be monitored so that it does not spread, as the juice or syrup will be absorbed into the dough and it will remain damp and tasteless. In addition, the liquid can seep through the layer of dough and burn the pizza. The best filling option, in this case, is when the bottom layer is meat or fish, dry boiled vegetables, and on top – slightly softer or raw foods. Then they will saturate the lower layers, but nothing will leak to the bottom of the pan.
  7. When baking pizza in a frying pan, do not top with mayonnaise or the like (to prevent the main layers from burning).