Tag

steaks

Browsing

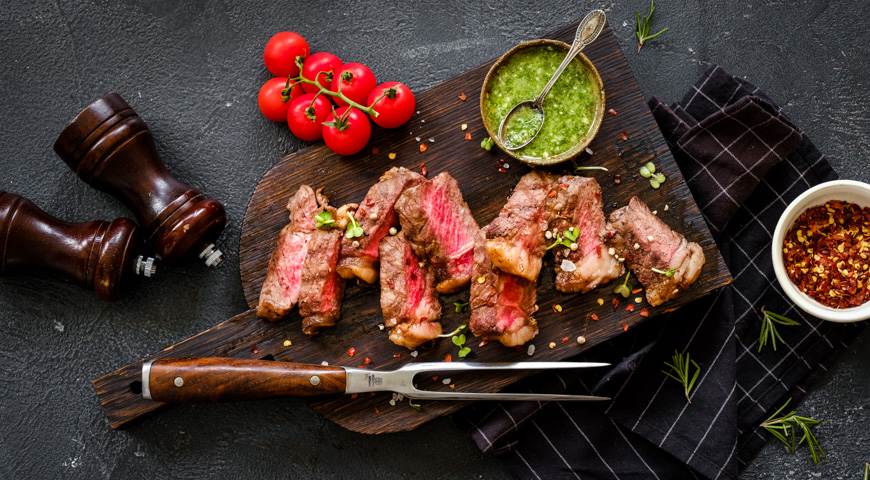
When buying meat for a steak, some do not risk taking cuts on the bone. Some consider the bone to be overweight, while others do not know how to grill steaks on the bone. Today we will dispel all doubts and tell you about the benefits of steaks on the bone and the intricacies of their preparation so that your dish will be delicious from the first try.

  • Tip # 1: choose the right meat. For steaks, it is better to buy marbled beef. It has a large number of small layers of fat, which give the meat a special softness. Moreover, such beef undergoes a dry or wet fermentation process, due to which the steaks on the bone are fried quite quickly. The meat acquires a richer taste and aroma.
  • Tip # 2: Choose the right thickness for your steaks. This is a very important point, because if the piece is thin, then the meat will dry out during frying, and the bone may be raw. Therefore, buy a cut with a thickness of at least 4-4.5 cm. And if it has a side layer of fat, do not cut it off, it will give juiciness.
  • Tip # 3: Grill it right. To cook meat properly, you need to create two heating zones. In the direct heat zone, a crust is applied, and in the indirect heat zone, the steak is brought to readiness. But for steaks on the bone, cooking begins in the cold zone. The meat is heated on it and then transferred to the direct heating zone for frying.
  • Tip # 4: Consider the characteristics of the bone steaks. For example, there are two types of meat in Tibon steak: striploin and tenderloin with a smooth, fine-grained structure. Place the Tibon steak on the grill so that the Striploin is in a hotter area than the tenderloin. Cook until low to medium cooking.
  • Tip # 5: Use a meat thermometer. It is especially needed for frying bone steaks. Unlike boneless steaks, meat on the bone takes a little longer to cook. First, the bone picks up the temperature on itself and then gives it back. For this reason, it can be difficult to determine the degree of roasting by eye, and the thermometer makes it possible to control the entire process. To measure the temperature correctly, place the thermometer in the pulp near the bone.
  • Tip # 6: Measure the doneness. Grill the boneless steaks until lightly cooked at 53-54 ° C, or medium at 57-58 ° C. Such roasting will preserve the juiciness of the meat. But, if you are cooking a large cut with good marbling, grill it to an internal temperature of 60-63 degrees to melt the fat as much as possible.

If you search on the Internet, you find an illogical, albeit explainable, pattern: there are so many recipes that you cannot cook in a lifetime, and you will not find sensible information on how to choose the right products for this recipe during the day with fire. Meat is a special product that requires the right approach, and therefore, in no way considering myself an expert, I will still give a few tips that I follow myself.

First tip – the market, not the store

Meat is not yogurt or biscuits in a standard package that you can take from the supermarket shelf without looking. If you want to buy good meat, it is best to go to the market, where it is easier to choose and the quality is often higher. Another reason not to buy meat in stores is various dishonest tricks, which are sometimes used to make the meat look more appetizing and weigh more. Not that the market doesn’t do this, but at least you can look the seller in the eye.

Second tip – a personal butcher

Those of us who have not embarked on the path of vegetarianism eat meat more or less regularly. The best thing to do in this situation is to get “your own” butcher who will know you by sight, offer the best cuts, give valuable advice, and order meat for you if it is not available now. Choose a butcher who is humanly pleasant to you and sells decent goods – and do not forget to exchange at least a couple of words with him with every purchase. The rest is a matter of patience and personal contact.

Tip three – learn color

The butcher is a butcher, but it doesn’t hurt to figure out the meat yourself. The color of the meat is one of the main signs of its freshness: good beef should be confidently red, pork should be pinkish, veal is similar to pork but pinker, lamb is similar to beef, but of a darker and more intense shade.

Tip four – inspect the surface

A thin pale pink or pale red crust from drying meat is quite normal, but there should be no extraneous shades or spots on the meat. There should be no mucus either: if you put your hand on fresh meat, it will remain almost dry.

Fifth tip – sniff

As with fish, the smell is another good guide when determining the quality of a product. We are predators, and the barely perceptible fresh smell of good meat is pleasant for us. For example, beef should smell so that you want to immediately make a Tatar steak or carpaccio out of it. A distinct unpleasant smell suggests that this meat is no longer the first and not even the second freshness; in no case should you buy it. An old, proven way to sniff a piece of meat “from the inside” is to pierce it with a heated knife.

Sixth tip – study fat

Fat, even if you intend to cut it and throw it away, can tell a lot by its appearance. Firstly, it must be white (or cream in the case of lamb), secondly, it must have the correct consistency (beef must crumble, mutton, on the contrary, must be dense enough), and thirdly, it must not have an unpleasant or rancid odor. Well, if you want to buy not only fresh but also high-quality meat – pay attention to its “marbling”: on a cut of really good meat, you can see that fat is dispersed over its entire surface.

Seventh tip – elasticity test

The same as with fish: fresh meat, when pressed, bounces, and the hole you left with your finger is immediately smoothed out.

Eighth tip – buy frozen

When buying frozen meat, pay attention to the sound that it makes when tapping, and even cut, a bright color that appears if you put your finger on it. Defrost meat gently, the longer the better (for example, in the refrigerator), and if it has been properly frozen, then, cooked, it will be almost indistinguishable from chilled.

Tip nine – cunning cuts

When buying this or that cut, it is good to know where in the animal carcass it is and how many bones it contains. With this knowledge, you will not overpay for bones and will be able to correctly calculate the number of servings.

Tip ten – end and means

Often people, having bought a good piece of meat, spoil it beyond recognition when cooking – and there will already be no one to blame but themselves. When choosing meat, have a clear idea of ​​what you want to cook, and feel free to share this with the butcher. Frying, stewing, baking, boiling to obtain broth, jelly, or boiled meat – all these and many other types of preparation involve the use of different cuts. Of course, no one will forbid you to buy beef fillet and cook broth from it – but then you will overpay the money, and ruin the meat, and the broth will turn out so-so.

Most steaks are grilled very quickly – literally in minutes. It is important to use this time correctly, but it is equally important to consider that the dish begins to cook even before it reaches the wire rack. Therefore, everything in order. Here’s how a Weber chef advises making your steaks taste even better.

  1. SALT THE STEAKS ON TIME
    You may have heard the warning not to salt meat long before grilling because salt can draw out juices. It indeed draws out moisture, but within 20-30 minutes, this is good, because the salt begins to dissolve in a small amount of moisture. When the steak hits the hot grill, the sugars and proteins of the meat juice combine with salt and other seasonings to create that very aromatic crust. But if the meat loses a lot of moisture, it will affect the taste and aroma for the worse.
  2. LET THE REFRIGERATOR MEAT STAND
    What kind of steak do we want when we grill it? Juicy and crispy, perfect toasted, right? But if you put the cold steak on the wire rack, it will take longer than usual to cook to the desired degree, and the meat inside can become overcooked and become gray and dry. Let the steaks sit at room temperature for 20-30 minutes before grilling – then the core will cook faster and the steaks will remain juicy.
  3. ROY MEAT – IT IMPROVES THE TASTE
    It is a good habit for barbecue masters to fry steaks at high temperatures, such as the Weber Sear Grate GBS grill. Pros understand that roasting gives hundreds of flavors and aromas to the surface of the steak, so let the meat sizzle indirect heat until the surface turns dark brown. Don’t let anyone convince you that roasting “traps the juices inside.” This is just a myth. But she really makes the steaks tastier.
  4. MOVE THICK STEAKS TO INDIRECT HEAT
    Most steaks cook excellently indirect, high heat, and only need to be moved when there is a burst of flame. However, some steaks can be so thick that if left on direct heat they will burn on the outside faster than they will cook on the inside to the desired degree. Therefore, if your steaks are thicker than 2.5 cm, then use the indirect method. After you have cooked both sides well in direct high heat, move the steaks to the indirect heat zone and finish cooking there.
  5. GET THE MOMENT OF READY
    Since steaks are fried over high heat, they quickly lose moisture. This is the price we pay for delicious meat. Perhaps the most important step in cooking a steak is to remove it from the heat before the meat loses too much moisture. As a rule, in just 1-2 minutes, the degree of doneness changes from medium-rare to medium, or from medium to medium-well. To get into this window, you need to be careful. Don’t go too far while your steaks are grilling. And remember that it is better to take them off undercooked and then return to the grill than overcooking.