Tag

this

Browsing

Almost every household has a washing machine, but delicate items of clothing are often unsuitable for this. What now? Do you go to the dry cleaners or do you prefer to wash by hand?

What temperature for handwashing?

Hand washing is not as complicated as you might think at first glance. And you don’t need a tumble dryer to get your favorite pieces back in shape. It doesn’t matter whether it’s your favorite jacket or an evening dress, the first thing you should do with all items of clothing is the label beforehand washing them. Because even if you don’t put your clothes in the machine, temperature specifications may have to be observed. These help you to ensure that your best piece does not shrink and that you do not bring your favorite classics out of shape by washing them incorrectly. You can easily determine the temperature with a bathtub thermometer.

The right detergent for sensitive clothing

It is best to use a washbowl or a corresponding basin, where you fill in enough water at the required temperature. Then add the detergent according to the recommended dosage. But be careful: you have to make sure that the detergent is suitable. A mild detergent is the best choice for many sensitive items of clothing. On the other hand, if the item is made of wool, you should use a wool detergent. If you need to remove stains first, you can treat them with cold water or a suitable stain remover. Please also note our tips for removing make-up stains with the effective gall soap.

Hand wash instructions

Once you have found the right temperature and detergent for your hand wash, you can begin. To do this, choose a bucket suitable for the laundry or wash larger items by hand in the bathtub. You should proceed as follows so that everything works perfectly:
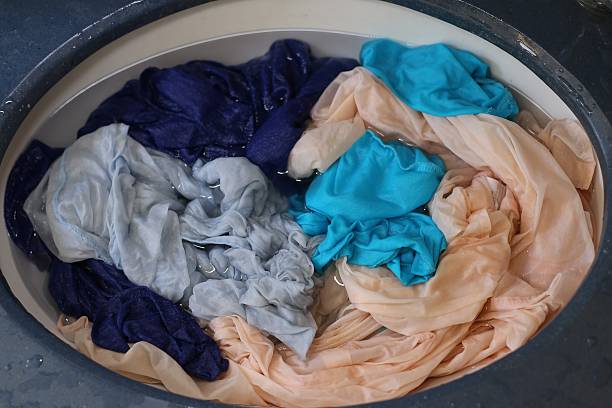
Step 1: Soak

You now put the garment completely into the soapy water and move it back and forth a little. Be careful not to twirl, rub, or scrub, as this will distort the delicate fabric fibers. Now wait about 30 minutes and let your clothes soak. If stains are still visible afterward, add more warm water and extend the time. Here, too, make sure that you do not exceed the maximum temperature on the washing label.

Step 2: Rinse

The next step is to drain the soapy water or empty the tub. Now fill it with cold, fresh water and gently squeeze out the garment inside. Repeat this process until no more foam comes out of the fabric. The water must remain completely clear before the next step, as soap residue can cause discoloration.

Step 3: Express

After the cold water runs clear, empty the tub again and squeeze the liquid out of the fabric. Please make sure that you do not rub, twirl or even wring, as this will damage the fabric. Spread a dry towel on the floor and place your garment on it. Now you can carefully pull it back into shape. Now roll up the towel along with your clothing to draw even more moisture out of the fabric. And you’re done with the hand wash. In addition, read our guide to removing stubborn stains with lawn bleach.

Hand wash to dry properly

After you have largely removed the excess water with the towel, you can start drying the clothes. Layout a wide, dry towel on the drying rack or a table and spread out the washed clothes on it. Now you let it dry until there is no more liquid in the tissue. Make sure to turn every 2-4 hours so the garment dries evenly.

Preparing green tea takes a lot of learning: you have to pay attention to a few things when it comes to the infusion and the temperature so that the green tea doesn’t become bitter and the desired effect occurs.

Green tea is said to have many positive effects on the metabolism, fat burning and the immune system. Since it contains caffeine, it also wakes you up and is better tolerated than coffee.

If you want to prepare green tea in the traditional Japanese way, there are a lot of things to consider: the type of tea, the brewing time, the water quality, the temperature and the amount of tea. The teapot can also affect the taste.

Preparing green tea: that’s what matters

The water temperature and brewing time are particularly important when preparing green tea. If it brews too long, it becomes bitter. If it is too short, it hardly tastes good. If the water is too hot, good ingredients such as antioxidants or tanning agents are dissolved. If the water is too cold, these substances are not bound in the water and your tea has no effect.

For a good green tea you have to pay attention to the following:

Use low lime water
Brewing time: Depends on the type of tea, but no longer than three minutes
Water temperature: depending on the type of tea between 60 and 90 degrees Celsius
Amount of tea: 1 -2 teaspoons loose tea or 1 tea bag (approx. 10 g)
Amount of water: depending on the type of tea, one cup to one pot
In most cases, the packaging states how much tea needs to be brewed, for how long and at what degrees.

If you confuse a porcini mushroom with other mushrooms, this is not a problem as there are no poisonous doubles. In this article you will find out which other mushrooms you could confuse the porcini mushroom with.

One of the most popular edible mushrooms is the porcini mushroom, also known as the porcini mushroom. The porcini mushroom belongs to the thick boletus family and lives in root symbiosis with trees. The name spruce boletus, which is common in some places, indicates that the boletus is often found under spruce trees.

There are no poisonous doubles for the porcini mushroom, but it can happen that you confuse it with the common gall boletus and thick-stemmed specimens of the chestnut boletus.

Characteristics of the boletus

The dark brown hat of the porcini can reach a diameter of up to 25 centimeters. The robust, bulbous stem is an average of ten centimeters long and reaches a diameter of two to eight centimeters at the base. In the transition to the cap, the handle is significantly narrower. On the underside of the cap you can see whitish tubes on young porcini mushrooms, which take on a yellow-green color with age.

The porcini has light, firm flesh and tastes pleasantly nutty. Porcini mushrooms do not have a special smell. In older specimens, the pores under the cap are often infested with vermin. Therefore, you should pay attention to this before preparing it in the kitchen and detach the spongy tubes from the cap. The pores hardly change color when pressure is applied.

Boletus mistake: common gall boletus

The common bile boletus belongs to the thick boletus family and is therefore related to the porcini mushroom. Hence the similarities. The common bile boletus is also called bitterling and is not considered an edible mushroom due to its extremely bitter taste. This means that the common bile boletus is not poisonous but inedible.

The most important characteristic, in order not to confuse the common bile boletus with the porcini mushroom, is the color of the pores. The bile boletus has whitish tubes under the brown cap that turn pink with age. The stalk of the bile boletus is slightly darker and veined like a net. The odor of the gallbladder is unpleasant. The flesh has an extremely bitter taste. Therefore, the bile boletus is not popular in the kitchen at all, since a single fungus can spoil the whole dish.

Chestnut boletus vs. porcini

The chestnut boletus also belongs to the thick boletus family and is related to the porcini mushroom. In the vernacular, the chestnut boletus is also called “Marone” because the dark brown hat in the moss looks similar to chestnuts.

The cap of the young chestnut boletus has a hemispherical shape and later becomes irregularly curved. The diameter is up to fifteen centimeters. The whitish tubes, which turn olive yellow when old, are striking and turn blue when pressure is applied. The light flesh also turns blue when you cut the mushroom. This has also earned it the name “blue mushroom”. The stalk, which is shaped like a cylinder, is brownish in color and lighter than the cap and is significantly slimmer than that of the porcini mushroom. The chestnut boletus smells pleasantly slightly sour and is a popular, tasty edible mushroom.

If the pressure point on the tubes and the cutting point on the stem turn blue, it is not a porcini mushroom but a chestnut boletus. You can rule out the additional confusion of the chestnut boletus with the bile boletus by the taste test. Since the chestnut boletus is a tasty edible mushroom, you can harvest it as soon as you have ruled out confusing it with the gall boletus.

Chicle is a sustainable raw material that some companies use to make petroleum-free chewing gum. Here you can find out what exactly is behind the substance and how recommendable it really is.

What is chicle?

Chicle is a rubbery substance derived from the milky sap of tropical trees. For the most part, manufacturers use the sap of the pulp apple tree. But the balata tree and other members of the so-called Manilkara tree family also provide the required liquid.

To get the milk from a tree, you carve a canal in the bark and siphon off the liquid. The trees are usually not damaged by this harvesting method. Even the ancient Aztecs are said to have obtained chicle and used it as chewing gum.

This is how chicle is used

Chicle is now the basis of some alternative chewing gums. In contrast to conventional products, these are therefore biodegradable. Because conventional chewing gum is based on gum made from petroleum. The production of oil brings with it major ecological problems: Among other things, it promotes social grievances and political conflicts and destroys forest areas.

In addition, petroleum-based rubber is not biodegradable. So the chewing gum sticks to roads and forest paths for a long time. Chewing gum made from chicle is said to solve this problem.

But chicle also has an ecological disadvantage: the pulp apple tree and other Manilkara species mostly come from the tropical regions of Central America. The milky juice therefore has to travel long distances to Germany and has a correspondingly poor eco-balance.

Chicle chewing gum: These products exist

Despite their questionable eco-balance, it can be assumed that chicle chewing gum is generally a more sustainable alternative to products containing petroleum. The most well-known chicle products that you can find in German drugstores as well as organic and supermarkets are:

True Gum: The Danish company produces fully biodegradable chewing gum in Denmark. The chewing gums are sugar-free and vegan-certified.
Forest Gum: This Cologne start-up also produces biodegradable, sugar-free and vegan chicle chewing gum. According to its own statements, the company relies on direct trade and pays attention to fair working conditions.
Chicza: This company’s chewing gums are one of the few chicle products to be certified organic. Overall, Chicza products have been awarded five different organic seals. This also includes the Swedish Krav seal, which stands for fair working conditions in addition to ecological criteria. Like Forest Gum, Chicza practices direct trading. The Chicza chewing gums contain sugar syrup.

The sowing of a coffee plant is possible all year round. Cultivation works best with fresh seeds, which ideally can be taken from the ripe coffee berries. After they have been separated from their somewhat harder shell and the silver skin that encloses them, they can then be planted about a centimeter deep in the ground. It makes sense to plant each bean in its own pot. Head cuttings can be obtained from a coffee bush and planted directly in soil. A sufficiently warm location is important in both cases. If the plant is large enough and has adequate root development, it can be transplanted into a larger pot.

Now a mixture of soil and substrate is good for you, as constant moisture should be guaranteed. Further repotting is usually required at most every two to three years. Soft rainwater is best for watering. A slightly acidic soil, which favors growth, can be achieved by occasionally adding lemon juice. Tropical and subtropical plants such as the coffee plant from Ethiopia should also be sprayed with water every day if possible, as this allows them to absorb moisture through their leaves. Warm summer rains are good care for the shrub, which otherwise cannot tolerate outdoor temperatures. In the colder months, you should water your Coffea less, but keep the humidity as high as possible.

The coffee plant likes temperatures between 20 and 25 degrees, making it the ideal houseplant. In winter, it also tolerates slightly cooler temperatures of around 12 to 15 degrees. A significantly colder environment or drafts should be avoided. It does well in a light location, not exposed to direct or blazing sun or cramped by other plants. You can prune your coffee plant irregularly if a bushier growth is desired.

It can take a few years for the plant to flower for the first time. A brush can be used to help pollinate the flowers so that pollination occurs evenly. But then coffee cherries, the fruits of the coffee plant, also grow. The green berries turn red within 8 to 12 months and can finally be harvested. If you do not want to roast the coffee beans obtained in this way or if the yield is too low, you can of course use them as new seeds and thus increase your local plantation.

Naked oats are closely related to the conventional oat grain, but are considered even healthier. Here you can find out what characterizes this type of grain and how you use it.

Naked oats and regular oats: That’s the difference

Naked oats belong to the genus of oats. This is a special breeding of the type of grain in which the grain is only loosely surrounded by a very fine husk. Unlike conventional oats, the indigestible grain husk falls off completely during threshing. Hulled grain varieties such as oats or spelt, on the other hand, have to be dehusked before further processing, which can easily damage the grain. Naked oat grains (and thus the seedling) remain intact after threshing, which is why they are particularly good for germinating. Naked oats are therefore also known as sprout grains.

Despite its special properties, naked oats are rarely cultivated because the grain is more susceptible to diseases and the yields are significantly lower compared to other varieties. Cultivation areas are mainly in Central Europe, where naked oats also grow wild, as in Portugal and Greece.

Superfood Naked Oats: The Nutritional Values

Naked oats basically contain the same nutrients as classic oats, but there are larger amounts of some valuable ingredients in the grain. A study published in 2016 by the Latvian Grain Research Institute found that naked oats contain more protein, unsaturated fatty acids, fiber and beta-glucans than regular oats. According to the study, the content of vitamin E is also higher in naked oats. The carbohydrate content, on the other hand, is lower than that of classic oatmeal.

Beta-glucans have numerous health-promoting properties. According to the Society for Nutritional Therapy and Prevention e.V., they regulate blood sugar levels and keep you full for longer. In addition, according to Harvard Public Health School T.H. Chan helps to build up the intestinal flora and prevent indigestion. Dietary fibers are important for a functioning gastrointestinal system and, according to the DGE, probably prevent certain lifestyle diseases. They also keep cholesterol levels low.

At around seven grams per 100 grams, the fat content of naked oats is also slightly higher than that of normal oats and is significantly higher in comparison to other types of grain. Unsaturated fatty acids are very healthy and are needed by the body.

Davert gives the following nutritional values ​​for 100 grams of organic oatmeal:

Calories: 332 kcal
Carbohydrates 55.7g
Protein: 10.7g
Fat: 7.1g
Fiber: 9.7 g
Tip: It is best to always buy organic oatmeal, as this protects you from chemical-synthetic pesticides and supports ecological agriculture.

How is naked oat used?

Naked oats are used in a similar way to regular oats. It is most commonly found in the form of oatmeal, which can be eaten raw or cooked. Alternatively, you can also buy the grain whole and process it further, for example to make fresh grain porridge. You can also serve the whole grains cooked as a healthy side dish: let the grains soak in twice the amount of water for a few hours and then cook the oats in the soaking water until they are done. That takes about three quarters of an hour. Like classic oats, naked oats are also gluten-free, but can be contaminated with gluten during harvesting or processing – look out for the word “gluten-free” if you have celiac disease. The grain is therefore only suitable for baking to a limited extent, as the binding gluten protein is missing.

You can also enjoy naked oats in the form of sprouts. The sprouted grains taste good, for example, as a topping for muesli and yoghurt or in salads. If you want to grow oat sprouts yourself, you should definitely use naked oats, as the grain remains intact after harvest and is still viable. Sprouted oat grains contain more vitamins and minerals and are even healthier than rolled oats, according to Harvard Medical School. One of the reasons for this is that they contain little phytic acid. Phytic acid binds the minerals and prevents the body from absorbing them.

Grow your own oat sprouts: this is how you do it

First, you’ll need a sprouting jar (a jar with a strainer lid that allows air to get in and the water to drain off easily). You can find tips on how to make a sprouting jar yourself in our guide.
Add about 2 tablespoons of whole oats to the jar. Also check that the grains of naked oats are undamaged, otherwise they will not germinate. Half a cup of grains yields about a cup of sprouts.
Fill the glass with cold water, swirl and pour off the water.
After the grains are rinsed, add about three times the amount of cold water (in relation to the grains). Let the naked oats soak in a warm place for about 5 hours. A temperature of 18 to 20 degrees Celsius is ideal.
After the soaking time, discard the water and rinse the sprouts again with fresh water.
Place the sprouting jar upside down in the drainer and leave it in a bright place for about two days. You should avoid direct sunlight. Rinse the kernels with fresh water at least twice a day during the germination period.
The sprouts are ready to eat after around two to three days. Rinse again with cold water beforehand. The sprouts will keep in the fridge for about two days.

Palmito is a tropical and healthy delicacy. In this guide you will find out exactly what is behind the exotic palm hearts and how healthy and sustainable they really are.

Palmito (also known as hearts of palm) is the edible pith found at the top of the palm tree. This so-called vegetation cone forms the base for the palm fronds. The heart of a mature palm can weigh up to two kilograms. The taste of Palmito is reminiscent of a mixture of asparagus and artichokes.

Palm hearts can be harvested from different types of palm trees, e.g. from Assai, Peach or Babassú palms. All palm trees require a tropical climate and grow primarily on the banks of rivers. In 2019, Ecuador was the largest palmito producer. They were followed by Costa Rica, Peru, Bolivia and Guyana.

Palmito: General characteristics of the hearts of palms

Harvesters have to chop down the palm trees to obtain Palmito. They then remove the leaf sheaths that surround the heart. A sustainable harvest is not possible with most palm varieties. The vegetation cone usually does not grow back and the palm trees cannot continue to live. There are only exceptions for special species, such as the peach palm. Here some hearts can be harvested without damaging the palm tree. It is usually not clear to customers which palm species the Palmito comes from.

Palm trees are often not grown separately and controlled for Palmito. Instead, the hearts are obtained, for example, from dead palm trees after a jungle clearing. On the Atlantic coast of Brazil, people often illegally enter forests and harvest palm hearts.

Nutrients and Uses of Palmito

Palmito is a low-calorie and very low-fat vegetable: It contains just 28 kilocalories per 100 grams. 100 grams of palm hearts contain:

2.5g protein
4.6g carbohydrates
2.4g fiber
0.6g fat
Palmito is also rich in iron: just 200 grams of Palmito cover one to two thirds of your daily needs. Other micronutrients are magnesium, manganese, zinc, vitamin C and folic acid.

You can use Palmito raw or cooked in the kitchen. They have an aromatic, nutty taste and are suitable, for example, as an ingredient for salads, soups and wok dishes. You can also simply serve them raw with a light vinaigrette as a starter. Since they are slightly sweet, you can also use them pureed for cakes and desserts.

How sustainable are hearts of palm?

In Europe you can almost exclusively buy canned palmito in well-stocked grocery stores. As a rule, no more detailed information can be found about the growing conditions. It is also extremely difficult to get organic or FairTrade quality palm hearts. Even in online shops there is hardly any choice. Due to the lack of seals and transparency regarding social and ecological aspects in cultivation and trade, you should only use palm hearts in moderation, if at all. Because there is definitely criticism:

The environmental protection organization WWF is trying to introduce palmito in Argentina as an alternative to soy monocultures. To this end, the organization works with various small farmers. In Ecuador, however, the organization World Rainforest Movement criticizes that cultivation has led to a loss of biodiversity and more soil erosion and water pollution.
Another disadvantage is Palmito’s poor eco-balance: since they are imported from Central and South America, Palmito have to travel long distances to Germany. This causes a lot of CO2 emissions.

If you want to store cucumbers, you should consider a few things. In this article you will learn what you need to know to keep cucumbers fresh for a long time.

Cucumbers consist of 97 percent water and are therefore relatively sensitive. If you store them incorrectly, they are prone to staining and mildew. In this article you will get many tips on how to store cucumbers properly.

Since the micronutrients are concentrated in and under the skin, you should eat cucumbers unpeeled. Therefore, use cucumbers of organic quality: they are free of chemical-synthetic pesticides.

In Germany, cucumbers are in season between June and September. During this time they are available from regional cultivation. Regional products have shorter transport routes and therefore have a smaller CO2 footprint. You can get unpackaged organic cucumbers at farmer’s markets, from direct sellers in your area or in organic boxes. You can find more information about the season of different vegetables in the Utopia Seasonal Calendar.

Storing cucumbers: You should pay attention to this

It is best to buy cucumbers unpackaged. The plastic wrap is meant to protect the cucumber. However, sometimes the cucumber starts to mold faster due to the condensation under the foil because it is packed airtight. However, opinions differ on this. You can also read online that cucumbers wrapped in plastic wrap last longer. From the point of view of environmental protection, however, unpackaged cucumbers are preferable to those sealed in plastic. More about this here: What is more sustainable: organic or unpackaged?

How to store cucumbers correctly:

Store the cucumber in a dark and cool place in the pantry or basement. Cucumbers do well at temperatures between ten and 13 degrees Celsius. Properly stored cucumbers can be kept for up to three weeks.
If you don’t have a pantry or basement, store the cucumber in the crisper of your refrigerator. This is better than storing the cucumber at room temperature. Cucumbers only last four to five days in the fridge.
Stored at room temperature, you should use cucumbers within a day or two.
Avoid storing cucumbers near apples or tomatoes. The cucumbers ripen faster due to the escaping ethylene.
Because of the high water content, you should not freeze cucumbers. The cold destroys the cell structure and the cucumber becomes mushy.

Storing Cucumbers: Store chopped cucumbers

Once you cut the cucumber, you should use it as soon as possible.

Place the sliced cucumber in a sealable container. You can also store small leftover cucumbers in a jar.
Store the container in the refrigerator and use the cucumber within a day or two.
Before the next meal, remove the dried part of the cucumber and wash it thoroughly again.

If you want to store eggplants, you should consider a few things. In this article you will find out how to recognize fresh aubergines and at what temperature you should store them.

Although aubergines are warm-loving vegetables, they can only be stored for a limited time at room temperature. We explain how to store aubergines correctly and what you should pay attention to.

Aubergines belong to the nightshade family and originally come from India. Also known as eggplant, this vegetable is very common in Mediterranean cuisine. Aubergines come in many different colors and shapes, with the dark purple version being the most well-known in this country.

If possible, use organic aubergines for cooking: They are free of chemical-synthetic pesticides and come from more sustainable agriculture. If you get the aubergines from regional cultivation, you also avoid long, energy-intensive transport routes.

Aubergines are in season in Germany between August and October. You can get unpackaged organic aubergines at farmers’ markets, directly from farmers or in organic boxes.

Storing aubergines: You should pay attention to this

When you buy eggplants, you should pay attention to the quality and degree of ripeness. A ripe eggplant has a shiny skin and is firm. If you press gently, it gives slightly. If the aubergine doesn’t yield to pressure, it’s unripe and tasteless. On the other hand, if it is too soft, it will soon spoil. Aubergines taste best when you prepare them fresh. However, you should not eat eggplants raw.

How to store aubergines correctly:

Store eggplants in a dark, cool place in the pantry or basement. Temperatures between ten and 13 degrees Celsius are well suited. Properly stored aubergines stay fresh for around three to four days.
The fridge is actually too cold for aubergines. If you don’t have a pantry or basement, you can still store the eggplants in the crisper of the refrigerator, which is better than storing them at room temperature. It is best to wrap the eggplants in paper to absorb excess moisture. Alternatively, you can place them loosely in the crisper in your fridge. Aubergines stored in the refrigerator quickly become stained and soft. You should process them within a day or two.
Eggplants stored at room temperature are best prepared on the same day or the next day at the latest.
Don’t store eggplants near apples or tomatoes. The escaping ethylene allows the aubergines to ripen more quickly.

Store sliced aubergines

You can store cut aubergines in the fridge until the next day before they spoil.

Place the sliced eggplant in a sealable container.
Keep the container in the fridge and use the leftover eggplant quickly.
Then remove the dried part of the eggplant and wash the fruit thoroughly again.
Aubergine slices turn brown in the air within a short time. It is therefore better to overcook them immediately and not to keep them raw. You can store cooked aubergine dishes in the refrigerator for two to three days.

Store eggplants in the freezer

To store eggplants for a particularly long time, you should freeze them. Eggplants can be frozen for up to nine months.

Wash the eggplants thoroughly.
Cut the vegetables into cubes.
Blanch the eggplant pieces for three minutes.
Immediately cool the vegetables in ice water.
Drain the aubergine pieces well in a hair strainer. Alternatively, you can pat them dry with a tea towel.
Place the blanched cubes in a freezer container. You can also freeze aubergines in jars.
Label the freezer container so you can remember what’s inside later.
Also write the date. This will help you keep track of your freezer.
Frozen aubergines are particularly good for soups, sauces and spreads.

If you dry rose hips, you can also enjoy the delicious vitamin bombs out of season. We will show you some methods and also tell you what is important when collecting rose hips.

Collecting rosehips: That’s what matters

Before you can dry rosehips, you must first collect them; The fresh fruit is usually not available for purchase. You can harvest rose hips from October. At this point, the small fruits are ripe enough and you can dry them easily. They will not lose quality in the coming weeks either. However, from December they can begin to ferment.

You can collect rose hips either in your garden or in nature. To be on the safe side, you should wear gloves when harvesting. You may remember school pranks and the itch a crushed rosehip leaves on your skin. With gloves you are on the safe side. Also, to avoid stains, don’t wear your best clothes.

Depending on where you collect the rose hips, you can also make sure to pick closer to the top of the bush. The lower berries are significantly more dirt and exposed to the odd dog. Never pick all the rosehips from a bush, as they are an important food source for birds in winter.

You should wash the collected rose hips thoroughly. If you like, you can cut the berries lengthways and scrape out the seeds. But that is not absolutely necessary: ​​rosehip seeds also provide many vitamins as well as valuable omega-3 and omega-6 fatty acids.

Drying rose hips: In the oven or in the dehydrator

You can dry rose hips either in the oven or in the dehydrator. This is the best way to go about it:

Place the washed rose hips on a baking sheet lined with parchment paper or on a rack in the dehydrator. Make sure that the berries are not too close together: otherwise they will only give off the moisture to each other and it cannot escape properly. If you plan to dry a large batch of rose hips, it’s better to use multiple trays.
Set the oven or dehydrator to 40 degrees Celsius. If you’re drying the rose hips in the oven, you should also place a wooden spoon between the oven door and the oven. This will remove the moisture from the oven.
Once in the oven or dehydrator, the rose hips take about eight to twelve hours to dry, depending on their size. This time is reduced if you have already air-dried them a little beforehand.
The following applies to this method: the hotter, the faster. However, if you set the devices to more than 40 degrees Celsius, the rose hips lose valuable vitamins during drying.

Unfortunately, the energy consumption is very high due to the long time in the oven or in the vending machine. It is more sustainable to dry the fruit in the sun or on a heater. So you don’t use any additional electricity when drying. This method is also gentler on the rose hips, which means you retain more vitamins.

Drying rose hips: In the sun or on a heater

If you dry rosehips in the sun, you should choose a sheltered place – otherwise birds may snatch the fruit. You can place a fine sieve or discarded curtain over the hips to protect them, or place a fruit bonnet over them.

If you store rose hips on the heater, you have a lot less to worry about. During the autumn rosehip season, your heating is probably on anyway – and birds won’t get in your way in the apartment either. If you have pets, you should still be careful and maybe choose a high-level heater for drying. While rose hips are not harmful to dogs and cats, you want some of the fruit yourself. A nice side effect of this method is the fruity scent that develops when the rose hips dry.

Rose hips dry without an oven: Further information

If you want to air dry rose hips, it is best to place them on some newspaper or a kitchen towel on an oven rack. In this way, warm air also reaches the berries from below. With the heating method, it is sufficient if you dry the rose hips on newspaper or a cloth. The same applies here: it is better to leave a little more space between the fruits so that the moisture can really escape. Also, if the fruit touches, mold can form in those places.

The rose hips need several days to dry both on the heater and in the sun. You should turn them regularly so that they dry evenly on all sides. If in doubt, it is better to dry the rose hips a little longer. This reduces the risk of them still being damp on the inside and mold forming later.

After drying, it is best to store the rose hips in an airtight container. Store the jar in a cool, dark place, for example in a storage room or in the basement. The dried rose hips will keep for several months.

Use of dried rose hips

You can enjoy dried rose hips, for example, as a tea, as a topping for muesli or as a small snack in between. You can also make rosehip powder yourself from the dried fruit. In addition, dried rose hips are suitable as a special ingredient for smoothies or sauces. They add a great fruity component to savory dishes in particular.

In small amounts, dried rose hips are also suitable as an addition to dog food and provide your four-legged friend with important vitamins. And of course you can also simply use dried rose hips to decorate autumn or winter arrangements, Advent wreaths and the like.