Tag

with

Browsing

A tender chicken breast fillet with a Mediterranean filling, all coated in crispy ham. A wonderful mix of creamy cream cheese, low-fat meat, and fresh herbs!

Friends or parents come to visit. Do you want to be able to prepare something delicious and sit comfortably at the table instead of having to disappear into the kitchen all the time for the dish? Then try this savory stuffed and wrapped chicken breast fillet. Then you can be a relaxed hostess!

Ingredients for 4 persons

– 600g chicken breast fillet
– 200g cream cheese
– a handful of fresh basil
– Pesto Verde from the jar
– a layer of raw ham (e.g. Black Forest)
– 3 large tomatoes
– 1-2 balls of mozzarella
– Salt
– Pepper

Preparation

  1. Wash the meat, pat dry and divide or third the breast fillets – depending on the desired size. Also, make a slit on one side of each piece to create a pocket for the filling. Rub on all sides with salt and pepper.
  2. Finely chop the basil, and mix with salt, pepper, and cream cheese to form a creamy mass.
  3. Use a knife to spread a thin layer of pesto Verde into each pocket. Then distribute the cream cheese mixture into the pockets and wrap the raw ham around the breast fillet pieces. (Perhaps fix the edges of the pockets with a toothpick).
  4. Set up a pan with some olive oil and sear the filled chicken pockets in it so that the ham becomes crispy. Then remove the meat from the pan and place it in a casserole dish.
  5. Finely dice the tomatoes, finely dice the mozzarella and distribute both mixed over the chicken breast fillets. Drizzle some with olive oil. If desired, set aside and continue cooking in the oven at a later time.
  6. Cover the casserole dish with aluminum foil and place it in the oven at 200 degrees – on the middle shelf.
  7. Cook for about 15-20 minutes, then remove the aluminum foil for a few minutes and let the cheese brown a little. Serve and enjoy!

Useful additional knowledge

If you want more tomato flavor, you can replace the pesto Verde with pesto Rosso. Or simply put 1-2 pickled dried tomatoes in each bag. Zucchini and tomato rice is a good side dishes. Cook the rice, add the fried zucchini cubes, and season with a little tomato paste, olive oil, salt, and pepper.

Tapas are becoming increasingly popular in Germany. We already know many of these different dishes and surely everyone is already familiar with the tortilla. But here, too, there are several variants. A very popular one is the tuna tortilla. It is juicy, delicious, and easy to prepare.

Ingredients for 1 medium tortilla (serves 3)

– 5 eggs
– 1 can of tuna in its own juice
– 100g of Gouda cheese
– olive oil

Preparation

We put the eggs in a bowl with a little salt and pepper and whisk them together. Then we add the previously drained tuna and mix it well. After that, we put the previously diced Gouda cheese. We mix this whole mass so that the tuna tortilla stays nice and juicy afterward and has an even taste and consistency. Now we take a medium-sized pan and heat it over medium-high heat. The pan should not get too hot, otherwise, there is a risk that the tortilla will burn too quickly on the outside and the inside will not be cooked through. We now add the mass and stir it briefly in the pan. Then we smooth the surface of the mass, turn the heat down a bit, and put a lid on the pan for about two minutes.

This allows the heat to penetrate through the mass and bind it into one piece. We take the lid off again and carefully loosen the edge with a knife or a spoon. Then we shake the pan a bit so that the mass completely detaches itself from the bottom. If this is the case, with the help of a plate we can turn the tortilla. To do this, we place the plate the other way around on top of the tortilla and turn the entire pan. Now the tortilla should be on the plate, from where it is lowered back into the pan. After about two minutes from this side, the tortilla is ready to serve.

The tuna tortilla tastes best warm and freshly prepared. And now, “Que aproveche”

Useful additional knowledge

To actually use this tortilla as a tappa, I recommend cutting it in a square so that you get many large cubes. For example, you could offer this dish to many people with toothpicks or Spanish banderillas.

Clean the shower with a potato? What does the strange household tip bring?

Why would you clean your shower with a potato?

If the potato is already a useful helper here, it can do even more in the shower. If you have a shower with walls or doors made of glass, treat them with a potato to give them a natural impregnation. This ensures that water and dirt roll off the surface and do not stick to it.

Of course, this impregnation doesn’t last forever, but you save yourself having to grab a wiper and towel every time you shower. Another advantage: The potato is an absolutely environmentally friendly and inexpensive household item that you can use at any time without hesitation.

You don’t even need very fresh potatoes for this, but you can also use specimens that are already germinating a bit. This is irrelevant for the cleaning process itself. This way you can also use sprouted potatoes for yourself at the same time and don’t have to throw them in the trash.

Clean the shower with the potato: That’s how it’s done!

So that you can clean your shower in an environmentally friendly and quick way with a potato in the future, you only have to do a few simple steps:
First, clean your shower of all previous limescale stains and water residue. Make sure the shower is completely clean.
Use a raw potato for the subsequent impregnation. It’s best to peel them so you don’t get dirt on your hands or the walls of the glass.
Now cut your potato in half and rub all the glass walls and the doors of the shower stall with the cut inside. Rinse again with water. This will remove any remaining streaks from the remains of the potato and the shower cubicle will not smell of the tuber afterwards.
The next time you take a shower you will notice how the natural lotus effect kicks in and the water rolls off. The sap of the tuber acts as a kind of impregnation agent and makes it difficult for the dirt to stick. Repeat the process after a few showers so that the impregnation is renewed.
This simple method can save you a lot of time and nerves in the future. You are also doing something for the environment at the same time and you can leave expensive bathroom cleaners on the shelf without hesitation. Tip: You can also soak heavily soiled clothes with unsalted potato water. This makes it even easier for dirt to be removed during the subsequent wash cycle.

You wouldn’t want to be without this basic gluten-free bread recipe on your daily menu: Now you can make your own fresh, crispy white bread, dark bread, mixed bread, sunflower bread, rolls, and other delicious baked goods at any time. The recipe is enough for 2 loaves of bread (24 servings)

Are you constantly on the lookout for new, unusual yet light recipes for a healthy diet? Recipes that are easy to replicate, recipes that don’t require overly unusual ingredients? Then you should definitely try this recipe for gluten-free bread so that you always have homemade, crusty bread and other baked goods fresh on the table.

Ingredients for gluten-free bread

  • 50-60 g fresh yeast (alternatively 2 P dry yeast)
  • 1 tablespoon of sugar
  • 1 cup (150-200 ml) non-fat milk (or whole milk if desired)
  • 100 grams of butter
  • 2 eggs
  • 500g boiled, mashed potatoes
  • salt (to taste)
  • 650 g potato starch
  • 2 loaf tins (about 25 cm x 10 cm x 8 cm)
  • Some butter or fat for brushing the mold

Preparation of gluten-free bread (basic recipe)

In a large bowl, mix the yeast and sugar until liquified. Now add milk, butter, eggs, mashed potatoes, and salt and mix well. Then gradually add the potato starch and mix well until the mixture is smooth and sticks to your hands. Now cover the bowl with plastic wrap (or plastic film) and let the dough rest for about 30 minutes.

The mass is then divided into two equal parts and each is placed in a buttered (or fat) loaf tin and smoothed out with a wet spatula. Let the dough rise in the mold for another 30 minutes. The slices of bread are baked in a preheated oven at about 200° C for about 30 minutes until golden brown. Leave to cool on a wire rack so the bread stays crispy.

Information and tips

Gluten-free bread brings a healthy change to your diet, not only for those suffering from celiac disease or sprue but also for athletes, and athletes and as a daily, tasty treat. Rice flour, corn flour, starch, buckwheat flour, soy, quinoa, and tapioca are gluten-free, whole wheat, barley, oats, and rye contain gluten. You can get gluten-free baking ferment in organic shops or health food stores; Sourdough works too.

Of course, this stomach-friendly bread can also be processed with mixed flour to make multigrain bread or with rye flour to make dark breakfast bread. Fresh rolls and other baked goods can also be produced very well with this basic mixture. Vary it with sprinkled sunflower seeds, pumpkin seeds, sesame, or linseed; add whole or chopped nuts to the batter.

Here’s a special insider tip: brush your bread with a little oil 10 minutes before the end of baking, it will then become uniquely crispy.

The raspberry mascarpone cream is a fresh, summery dessert. It is quick to prepare and the interplay of sweetness and acidity results in a refined taste.

Ingredients for 4 to 6 people

– 250g mascarpone
– 75g plain yoghurt
– 2 egg yolks
– 400g raspberries, frozen or fresh
– 50g of sugar
– 2 tbsp flaked almonds
– Juice of 1/2 – 1 lemon
– Zest of a lemon
– 200g of amaretti

Preparation

  1. If using frozen raspberries, thaw and puree the raspberries with 1 tbsp lemon juice.
  2. Beat the yolks with the sugar until creamy.
  3. Then add the mascarpone and yoghurt to the egg-sugar mixture and stir the ingredients until they form an even mass.
  4. Fold the pureed raspberries into the mascarpone mixture along with the lemon zest.
  5. Season the cream with the remaining lemon juice.
  6. Place the amaretti in a freezer bag and roughly mash with a meat mallet.
  7. Fill the Amarettini crumbs into dessert bowls and then spread the raspberry mascarpone mixture on top.
  8. Place the dessert in the fridge for at least 5 hours or overnight to set.
  9. Roast the flaked almonds in a pan without fat until golden brown.
  10. Finally, sprinkle the toasted slivered almonds on top.

Useful additional knowledge

The recipe is very variable and can easily be modified.

  • If desired, chopped lemon balm can be sprinkled on top. The lemon balm with its fresh note goes well with the raspberry cream and also sets a visual accent.
  • This dessert can also be prepared the day before. Just keep it in the fridge overnight and cover it with foil.
  • To make the dessert more figure-friendly, you can use more yoghurt and less mascarpone.
  • Instead of amaretti, you can also use ladyfingers, cantuccini or butter biscuits, for example.
  • Use lime instead of lemon.
  • Vary the selection of berries and use a berry mix, strawberries, blueberries, skinned apricots or blackberries instead of raspberries. By using frozen fruits, you can also enjoy the summery flair in winter.
  • If you want to go really quickly: stir in the raspberry sauce you bought instead of the pureed raspberries.

Ingredients for 2 people

  • 1/2 liter of milk
  • 50 g soft wheat semolina
  • sugar
  • Cinnamon
  • 1 tbsp butter
  • 1 pinch of salt

Preparation of semolina porridge with cinnamon and sugar

  1. Pour the milk into a saucepan, reserving about 1/2 cup.
  2. Bring the milk to a boil in a saucepan with a pinch of salt. Then stir in the semolina and pour over the rest of the milk when everything is cooked. Now stir constantly on a medium flame for about 2 to 3 minutes until the semolina porridge has a nice creamy consistency.
  3. Now just serve with simple sugar and cinnamon mixture and refine with melted butter.

Useful additional knowledge

  • The cream is also suitable as a refinement.
  • You can refine your sugar and cinnamon mixture as you like with seasonal spices or according to your taste. Vanilla is very good for giving things a fresh touch.
  • It is better to use a stainless steel pot, as the semolina porridge does not burn as quickly. It also helps to prevent the pot from burning if you rub the bottom of the pot with a little butter.

Small amounts of this aromatic tomato soup are ideal as a starter or served with a baguette as a warming soup after a cold winter walk. It has also proven itself on birthdays when brunch is offered. The tomato soup at her husband’s card night is just as popular. The soup can be used on different occasions and is always a pleasure. Try it.

Ingredients tomato soup

  • 4 large tomatoes
  • 2 peppers
  • 1 clove of garlic
  • 1 onion
  • 300ml vegetable broth
  • 2 tbsp. tomato paste
  • Salt
  • pepper

Ingredients for pickled sheep cheese

– 200g feta cheese
– olive oil
– hot peppers
– fresh thyme (also possible in dried form)
– fresh rosemary (also possible in dried form)
– 2-3 cloves of garlic

Preparation of the tomato soup

Tomatoes and peppers are washed and diced. Peel the onion and garlic, cut into smaller pieces and sauté briefly in a pan with a little fat.

Place the vegetables in a saucepan with the remaining ingredients and allow to cook thoroughly. First at the highest level, when the soup is boiling, reduce the heat supply, otherwise, there is a risk that the ingredients will burn.

Once the ingredients are cooked, they are strained with a strainer and allowed to boil again. If the soup is too thick, you can add a little more vegetable broth.

Preparation of sheep’s cheese

Cut the sheep’s cheese into cubes and place it in a plastic container with a sealable lid. Add the olive oil until the feta cheese is completely covered. Add the thyme, and rosemary (fresh) in large portions and the peppers in one piece. Alternatively, thyme and rosemary can also be used in dried form. Peel the garlic cloves, cut through once and add. It is best to leave it in the refrigerator for several hours with the lid closed.

Pour the tomato soup into plates and add the feta cheese.

Useful additional knowledge tomato soup

The sheep’s cheese can also be put in the day before so that it is properly steeped. It is quite durable over a longer period of time. The soup takes little work and after the ingredients have been chopped up, it cooks all by itself, so to speak. However, one should not forget the longer cooking time when planning.

Anyone who likes tomato soup will be delighted. The paprika, onion, and garlic make the soup really hearty. The addition of sheep’s cheese gives it something the Mediterranean.
Prepared in just a few steps, with a delicious result. A slightly different tomato soup, hearty and hearty, aromatic and delicious.

This is a recipe for those in a hurry. Baking each pancake individually takes far too long. If you pour the dough onto the tray, you can conjure up a delicious meal on the table in no time.

Ingredients for 4 persons

  • 250 grams of mushrooms
  • 1 bunch of spring onions
  • 400 g chicken fillet
  • 4 eggs, salt
  • 200ml milk
  • 100g + 1 tbsp flour
  • 2 tablespoons sparkling mineral water
  • Oil for the tin
  • 1 tbsp clarified butter
  • pepper, 1 tsp vegetable broth
  • 200 grams of whipped cream
  • a few squeezes of lemon juice
  • baking paper

Preparation of pancakes with chicken ragout

  1. Preheat oven. Immediately slide in a baking tray lined with parchment paper and heat. Wash, trim and halve the mushrooms. Clean and wash the spring onions and cut them into rings. Wash the meat, pat dry, and dice.
  2. Beat the eggs with 1 teaspoon of salt. Add the milk while continuing to whip. Stir 100 g of flour and the mineral water into the mixture. Take the baking tray out of the oven, place the baking paper on top, and brush immediately with oil. Pour the batter evenly over it. Bake in the hot oven at the same temperature for 10-12 minutes.
  3. Meanwhile, heat the clarified butter in a large pan. Fry the prepared meat in it for about 5 minutes. Season with salt and pepper. Take out of the pan.
  4. Fry the mushrooms in hot oil until golden brown, stirring frequently. Add the spring onions and fry briefly. Dust with 1 tablespoon of flour and sauté briefly. Stir in ¼ liter of water, broth, and cream. Bring to the boil and simmer for 2-3 minutes. Season with salt, pepper, and lemon juice. Heat meat in it.
  5. Take the tray out of the oven. Pull the pancakes down with the baking paper, cut them into wide strips and serve with the ragout. Good Appetite.

Useful additional knowledge

Timely preheating of the oven saves valuable minutes. If you have leftover pancakes, but the ragout has been eaten up bare, then simply cut the rest into small strips and put them in hot broth. As an insert they are unbeatable.

Recipe info

  • Oven settings: electric stove 200 degrees
  • 175 degrees circulating air
  • Gas level 3
  • Time required: approx. 30 minutes
  • Difficulty level: very easy
  • Costs: approx. 1.60 euros per portion
  • Calories: approx. 510 kcal per serving

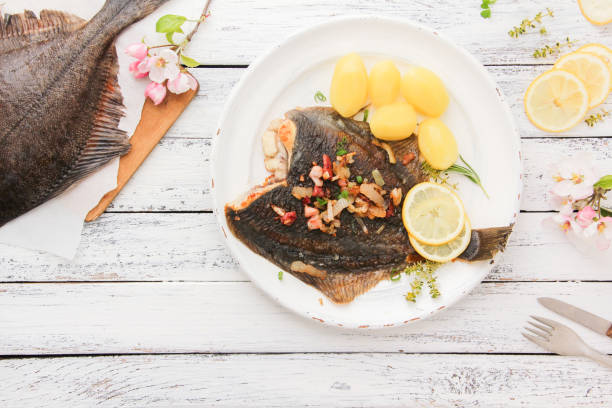
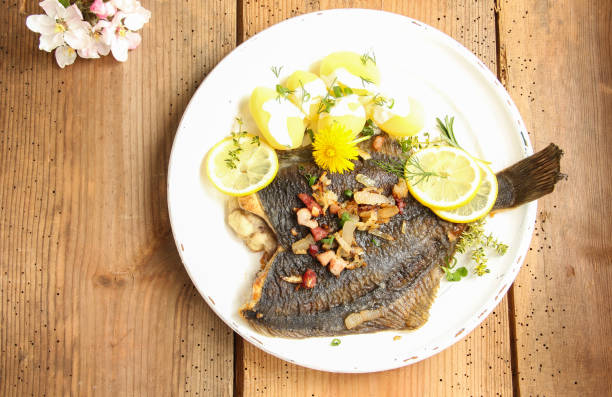
All landlubbers agree on that. A fried plaice is always a delicious meal and worth the slightly higher effort.

Ingredients for 2 people

  • 1 small cucumber
  • 1 medium onion
  • 2-3 sprigs of dill
  • 2 tablespoons white wine – vinegar
  • ½ tsp mustard, salt, pepper
  • 3 tbsp oil
  • 500 g waxy potatoes
  • 2 ready-to-cook plaice
  • 2-3 tbsp lemon juice
  • 40 g smoked and streaky bacon
  • 2-3 tbsp flour
  • 2 tbsp clarified butter
  • lemon for garnish

Preparation

  1. Wash the cucumber and slice or cut it. peel onion. Cut one half into wedges, one into cubes. Wash and finely chop the dill. Whisk together vinegar, mustard, salt, and pepper. Beat in 1 tbsp oil. Mix with cucumber, diced onion, and dill.
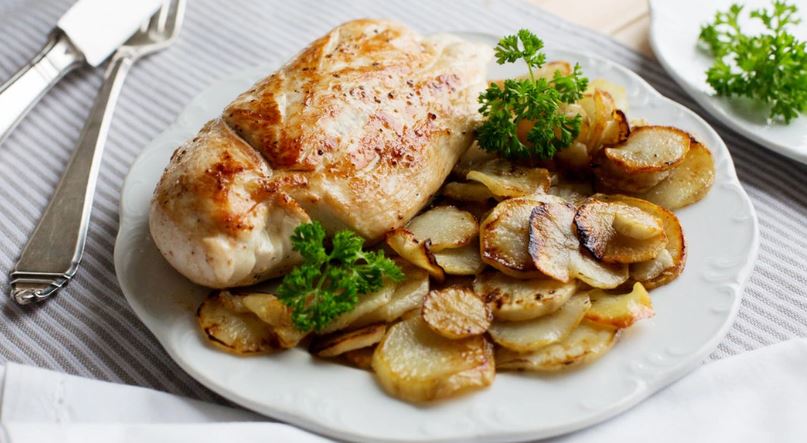
  2. Peel, wash, and thinly slice the potatoes. Fry in 2 tablespoons hot oil for 20-25 minutes, turning occasionally. Add the onion wedges after about 10 minutes. Season with salt and pepper. keep warm.
  3. Wash the place thoroughly and pat dry. Drizzle with lemon juice. Finely dice the bacon. Fry in a large coated pan until crispy. Then take it out.
  4. Place flour on a large plate. Pat the clods dry again. Season with salt and pepper and dredge in flour. Knock off excess flour. Heat 1 tablespoon of clarified butter in the bacon fat and fry the plaice for 4-5 minutes on each side until golden brown. Keep warm or fry the plaice in two large pans at the same time.
  5. Serve the plaice with fried potatoes and cucumber salad. Heat the bacon in the frying fat and spread it over the place. Garnish with lemon and serve. Good Appetite.

Useful additional knowledge

Sea fish such as plaice, salmon, herring, or sardines contain many important nutrients. This includes plenty of iodine for the production of important hormones, valuable protein for cell formation, and omega-3 fatty acids for the heart and circulatory system. Nutrition experts, therefore, recommend sea fish 1-2 times a week.

Jerusalem artichoke is known, among other things, under the names earth artichoke, earth apple, earth sunflower, or even “diabetic potato”. It resembles the potato, its taste is sweet and artichoke-like. Due to its high inulin content, an indigestible carbohydrate that does not affect blood sugar levels, it is ideal for diabetics.

Ingredients for 4 servings

-500 g chicken breast fillet
-1 small stick of leeks
-1 bay leaf
-2 large carrots
-150 g of celery
-750 g Jerusalem artichoke


-50 g of diced bacon
-3 tbsp butter
-Salt, pepper, nutmeg
-200 ml strong Instand vegetable broth
-100 ml apple juice
-4 tablespoons of flour
-200ml milk

Preparation

First cut the chicken breast fillet into small pieces. Then wash the carrots thoroughly, clean, peel, and cut into small sticks. Wash the celery carefully under running water, removing the leaves on the sides. Then cut the celery into slices. The leek is also washed, cleaned, and then cut into small rings. Set all the chopped vegetables aside. Now the Jerusalem artichoke is washed, peeled, and cut into small cubes. The bacon is now fried with 1 tablespoon of butter, then the chicken and Jerusalem artichoke are added and roasted.

The chopped celery and carrot pieces are now also added. Finally, the whole thing is seasoned with salt, pepper, and nutmeg. The apple juice and the instant broth are added. Bring everything to a boil over high heat. Then simmer gently over medium heat for about 30 minutes. It is important that the Jerusalem artichoke is soft at the end. Sweat the remaining butter, i.e. the 2 tablespoons of butter, with the flour until a dark yellow semi-solid mass is formed. Stir constantly with the whisk so that nothing burns. Then add the cold milk and let it boil. Pour the sauce into the stew while stirring and continue to cook for a few minutes.

Useful additional knowledge

When buying Jerusalem artichoke, you should definitely make sure that the skin is intact, because the vegetable is very sensitive. Varieties with particularly light skin have the best aroma and taste fine and nutty. Unlike potatoes, Jerusalem artichoke cannot be stored for long and is, therefore, best prepared soon after purchase. Jerusalem artichoke is a wonderful alternative to potatoes. Almost every dish that is prepared with potatoes can also be cooked with Jerusalem artichokes. The tuber is ideal for puree, gratins, soups, or salads.