Tag

without

Browsing

An apple punch warms you up from the inside after a walk on cold winter days. Because this apple punch recipe does not contain any alcohol, it is also suitable for children.

Apple punch is a fruity alternative to classic eggnog or mulled wine at Christmas time. Boiled and filled into pretty glass bottles, it also makes a good gift.

We’ll show you a simple recipe that doesn’t contain any alcohol – so it’s also perfect for Dry January. You will also learn how you can vary your apple punch.

You need these ingredients for apple punch

For two liters of apple punch you need the following ingredients:

1 liter of water
6 tsp fruit tea
2 organic oranges
5 cloves
2 sticks of cinnamon
1 liter of apple juice
Sugar or honey to taste
To cook the apple punch, you need a large saucepan with a lid.

Preparation time: 5 minutes
Cooking time: 20 minutes
Cinnamon is indispensable in the winter time. However, by the time it ends up on our shelves, it has had to travel long distances. Buy organic spices and also look for fair trade cinnamon. This is how you can support fair working conditions.

Also make sure that the other ingredients for your apple punch are organic and of regional origin. Products from the region have shorter transport routes and are therefore better for the climate.

Apple punch: the preparation

The apple punch is quick and easy to make. Follow this guide step by step:

Boil the water for the non-alcoholic apple punch in a kettle or saucepan. Put the fruit tea in a teapot and pour the boiling water over the tea. Let the tea steep for eight to ten minutes.
Wash and slice an orange. Stud the slices with some cloves as shown in the picture above. With this trick you can easily remove the cloves from the finished apple punch.
Squeeze the second orange and pour the orange juice into a large saucepan.
Add the apple juice, spices and some sugar. Stir the liquid well to dissolve the sugar.
Warm the apple juice gently, it must not boil.
Pour the finished tea through a sieve into the apple juice.
Season the apple punch with sugar or honey and stir well until the sugar has dissolved.
Heat the apple punch to just before boiling point without boiling it.
Let the apple punch stand for five to ten minutes so that the aroma can develop fully.

Apple punch: possible variations

This is how your apple punch tastes a little different:

Use two organic lemons as well. Slice one lemon and squeeze the second.
Cut an apple into small pieces and put a few pieces directly into the cup. It looks nice and the apple pieces quickly cool the apple posh down to drinking temperature.
The color of the apple punch depends on the type of tea. Use apple peel tea for a light apple punch. Fruit tea with hibiscus or rosehip gives the apple punch a reddish colour.
Add 2-3 slices of ginger root to the apple punch. The fiery taste of ginger also warms you up.
Two to three pieces of star anise add variety to the taste of your apple punch.
Try to reduce or eliminate the sugar altogether. Apple juice is naturally sweet. Alternatively, you can also cook a few raisins, as they sweeten the apple punch slightly.


Traditionally, Europeans are fried in fat. We’ll show you how you can easily bake donuts in the oven without a deep fryer.

In keeping with carnival, it’s time again for a very specific pastry. In any case, what is meant is a yeast pastry fried in fat, sprinkled with sugar and filled with jam. You can also fill Berliners with vegan chocolate cream, nougat spread or vanilla pudding just as well.

The traditional preparation in fat can be a bit impractical at home. Especially if you don’t fry something that often, because then you have to dispose of a lot of frying oil. There is also a fairly stubborn odor when frying.

If you still want to make donuts yourself, you can bake the donuts in the oven. They are less greasy and therefore a bit healthier. When buying the ingredients, it is best to pay attention to organic quality. You may also find regional offers from your area. Especially with animal ingredients such as eggs, pay attention to good seals, such as the Demeter or Bioland seal, which also supports the rearing of male chicks.

Donuts from the oven

Ingredients:

150 ml plant-based milk
350 grams of flour
5 tablespoons sugar 0.5 cubes of yeast 1 egg salt
3 tablespoons soft margarine/butter
4 tbsp jam/filling of your choice some (powdered) sugar

Directions:

Warm the milk slightly. It should be lukewarm. Yeast does not tolerate high temperatures.
Put the flour in a bowl and make a well in it.
In a second small bowl, mix the milk with the sugar and crumble in the yeast. Mix everything until the yeast has dissolved. Pour the mixture into the flour trough and dust some flour on top. Leave the mixture in a warm place for 15 minutes.
Stir in the egg and a pinch of salt. Add 2 tablespoons of the margarine/butter. Knead everything thoroughly for about 5-10 minutes to form a dough.


Form 8 balls of the same size from the dough and place them on a baking tray lined with baking paper.
Cover the dough balls with a clean towel and let them rise in a warm place for 45 minutes.
Bake the donuts for about 15-30 minutes at 160 degrees.
Fill the jam or another filling of your choice into a piping bag with a small nozzle and fill the donuts with it. Tip: make your own piping bag: simple instructions
Melt the remaining margarine/butter and brush the donuts with it. Sprinkle with sugar and/or powdered sugar.

Croissants from the bakery are rarely vegan because they contain butter and often eggs. But if you don’t want to do without the French pastries, you can use the following recipe to prepare vegan croissants.

You need a lot of time to prepare the vegan croissants, most of which is resting time for the dough. The actual work takes about an hour.

Vegan croissants: fluffy and delicious

Tip: It is best to cook the dough the night before and leave it in a sealed bowl in the fridge overnight.

Ingredients:

500g flour
60 gsugar
2 teaspoons dry yeast
1 tsp salt
300 mloat milk
250 g vegan butter or margarine

Directions:

In a large bowl, whisk together the flour, sugar, yeast, and salt until you have a smooth batter. Heat the oat milk to about 40°C and stir it into the batter. Knead the dough well again for five to eight minutes.
Cover the bowl of dough with a damp kitchen towel and place in the fridge for 60 minutes. If you prepare the dough the night before: Place the dough in a sealable container and leave it in the fridge overnight.
Roll out the dough into a large rectangle. The rectangle should have straight edges and right angles. It is best to straighten it with your hands.
Cut the vegan butter or margarine into thin, even strips and distribute them in the middle third of the dough. Be sure to leave some space around the edges so the butter doesn’t spill out while baking. Now fold the bottom third up and the top third on top, making three layers.
Laminating for the first time: Carefully roll out the dough into a long rectangle. Press with the rolling pin first, then roll to avoid cracking the dough. Then put the top and then the bottom third in the middle. Wrap the dough in parchment paper or a suitable parchment paper substitute and place in the fridge for an hour.
Second time laminating: Rotate the dough 90° and repeat the process of the previous step. Put the dough back in the fridge for an hour.
Laminate for the third time: Turn the dough 90° again and repeat the whole procedure a third time. Let the dough rest again in the fridge for an hour.
Roll out the dough into a square. Using a sharp knife, cut it in half to create two rectangles. Cut out six triangles per rectangle. Pull each triangle apart slightly and cut a slit (1 cm) down the middle of the wide side. Now pull the two ends of the wide side slightly apart and roll them up towards the opposite tip.
Place the croissants on a baking sheet and cover with a damp kitchen towel. Let the dough rise again for an hour. The croissants should then be about twice as big.
Bake the croissants at 220 °C top/bottom heat for about 15 minutes until golden brown. Your homemade, vegan croissants are ready.

Both sweet and savory go well with the vegan croissants, such as these vegan spreads made from 2 ingredients or fresh jam with pectin as a vegan gelatine substitute. Nut butter or sugar-free pear butter also taste delicious on the vegan croissant. You could also make ham substitute from smoked tofu and enjoy a hearty croissant with vegan cheese.

Chickpea Brownies are a delicious alternative to traditional brownies. In this article we will show you a recipe that is gluten-free, vegan and high in protein and does not require flour.

These chickpea brownies are particularly juicy and full-bodied. At the same time, you stay full longer because they are rich in protein and fiber thanks to the chickpeas. They are very easy to make and taste good with afternoon coffee or as a snack in between. In addition to an oven and a baking pan, you will also need a blender.

We recommend that you buy the ingredients in organic quality. This is how you avoid chemical-synthetic pesticides. We can particularly recommend the organic seals from Demeter, Bioland and Naturland, as they follow stricter criteria than the EU organic seal. In addition, it makes sense, especially with cocoa powder, to pay attention to the Fairtrade seal. This is how you support better working conditions and fairer trade.

A recipe for chickpea brownies – without flour

Ingredients:

450 g canned or jarred chickpeas
5 tbsp rolled oats
3 tablespoons cocoa powder
1 teaspoon Baking powder
2 tbsp almond butter
1 tablespoon coconut oil
3 ELA horn syrup or raw cane sugar
150 ml plant drink
1 pinch(s) of salt
1 pinch(s) of cinnamon

Directions:

Wash the chickpeas in a colander under running water and drain well. You can also use your own cooked chickpeas.
Place the chickpeas in a blender with all other ingredients. Make sure that the coconut oil has a liquid to creamy-soft consistency and is not too hard. Reheat briefly on the stovetop, in the microwave, or in the oven if necessary. Mix everything until a homogeneous mass is formed.
Pour the batter into a medium-sized, shallow baking dish. You can also use a casserole dish.
Heat the oven to 180 degrees Celsius and let the chickpea brownies bake for 35 to 40 minutes.
Remove the chickpea brownies from the oven and let them cool before slicing.

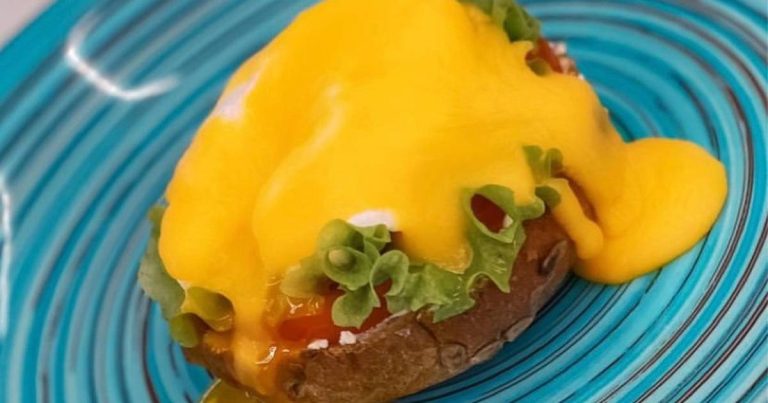
You can serve vegan Hollandaise sauce wonderfully with asparagus. We’ll show you how to prepare the classic sauce – without egg and without butter.

If you’ve ever tried to make the classic hollandaise sauce yourself, you know it’s not easy. Because if the water bath or butter is too hot, the sauce will curdle very quickly. You are on the safe side from the start with our recipe for vegan hollandaise sauce.

If possible, use regional organic products for the ingredients for your vegan hollandaise sauce. You can use seals such as Demeter, Naturland, and Bioland as a guide, which follow stricter criteria than the EU organic seal.

Vegan Sauce Hollandaise: The recipe

Ingredients:

250g margarine
200 ml cold (asparagus) water
3 tbsp cornstarch (level tbsp)
200 mloat cream
1 pinch(s) of salt some pepper
1 pinch(s) nutmeg
0.5 tsp turmeric (optional)

Directions:

Pour the cold (asparagus) water into a measuring cup. Stir in the cornstarch with a whisk until there are no lumps.
Place the vegan margarine in a medium or large saucepan. Melt them on low. Make sure it doesn’t start bubbling.
While the margarine melts, briefly bring the water and starch mixture to a boil. So the dusty taste of the cornstarch disappears.
Gradually pour the water mixture into the melted margarine while stirring with the whisk. Stir until you get a thick consistency. Warning: You may not need the entire starch mixture for this – depending on how thick you want your vegan hollandaise sauce to be.
Stir in the oat cream and season with salt, pepper and nutmeg.
Optional: Use some turmeric at the end to give your vegan hollandaise sauce a stronger color.

This is how you can use the vegan hollandaise sauce

Sauce Hollandaise goes wonderfully with asparagus, but also with various other vegetables or potatoes.

You can also prepare creamy mashed potatoes without milk. We will tell you which ingredients are suitable for the potato main course or side dish.

Mashed potatoes without milk can be just as creamy as the classic recipe. Traditionally, mashed potatoes are made with cow’s milk. However, if you avoid dairy products, you can prepare the homemade mashed potatoes with alternative products.

In addition to milk alternatives, you need potatoes and spices of your choice. Potatoes are healthy because they contain protein, fiber and important micronutrients, among other things.

When choosing your ingredients, make sure they come from organic farming. In this way you avoid residues of chemical-synthetic pesticides in and on your food. You also reduce your carbon footprint if you choose regional potatoes.

Tip: Easily plant potatoes yourself.

Plant-based milk alternatives

To cook mashed potatoes without milk, you can switch to plant-based alternatives. These lactose-free and vegan products are particularly suitable:

Oat milk: Easily make your own oat milk from oatmeal and water. The oat milk has a slightly tart taste and goes well with the hearty recipe. You can also get oat flakes and oat milk from regional cultivation.
Soy milk: Milk made from soy is a popular alternative because it is nutritious and tastes creamy. However, soy milk is mostly imported and therefore contributes to more CO2 emissions.
Almond milk: With our simple quick recipe you can make almond milk yourself. It is a bit sweeter than other alternatives and gives the mashed potatoes a nutty note.

Alternatives to dairy products

If you want to cook your mashed potatoes without milk or milk alternatives, you can choose the following products:

Catch the cooking water from the potatoes and mix some of it with the potatoes as you mash. This preserves the aroma of the potatoes and you avoid wasting nutrients in the potato water. The starch contained in the water makes the mashed potatoes particularly creamy.
Vegetable broth is a flavorful alternative. Make your own vegetable broth and cook a hearty puree with it.
In addition to the vegetable broth, you can also use yeast flakes. They are flavorful and add a creamy texture to the mashed potatoes without milk. So that the mashed potatoes don’t get too dry, it’s good to mix the potatoes with yeast flakes and some water.
Use fats or oils. Vegan margarine and olive oil are flavor carriers and bind the potatoes into a smooth mass when pureed.
The amount of ingredients depends on the amount of potatoes you have. It’s best to drain off the cooking water, catch as needed, and then gradually add the milk alternatives until you get a creamy and smooth consistency.

Bread on a stick is a hit with children – and not just during the barbecue season. Read recipes and inspiration for quick and easy stick bread dough with or without yeast here.

Bread on a stick is part of the campfire. This childhood memory can still make us happy as adults. And the best thing is: stick bread is so easy to make! Whether yeast dough or not, you can spice up stick bread with your favorite ingredients. Gluten-free and vegan variants are also possible. So there is something for everyone at the barbecue and around the campfire.

Bread dough: recipe without yeast

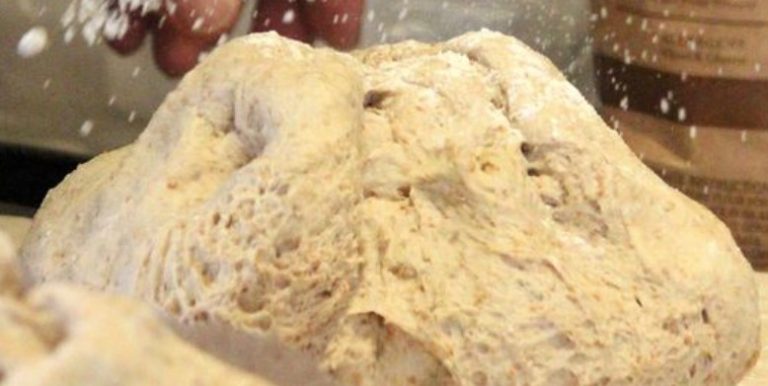
If it has to be quick and you don’t have time to “wait” for the yeast dough, you can also prepare stick bread dough without yeast. Here it is important to knead the dough really well so that it becomes airy.

For 10 to 15 stick breads you need:

400 grams of flour
1 tsp salt
2 teaspoons of baking soda
50 g fat (oil or vegan margarine)
220 ml plant drink or milk
If you’re using margarine, let it melt.
Meanwhile mix the dry ingredients together.
Add the plant drink and fat and knead well (about 10 minutes).
Done: Divide the dough and wrap it around the stick.
Hold the stick bread over the embers until it is golden brown on the outside, similar to the crust of regular bread.
Tip: You can incorporate herbs, olives or even vegetables of your choice into the stick bread dough. So you have a little variety around the campfire. You can also prepare sweet stick bread with cinnamon and sugar, for example. Simply add a pinch of salt to the batter and add sugar and cinnamon. Chocolate drops or garlic cloves are also good in stick bread dough.

Classic stick bread recipe

Classically, stick bread dough is a yeast dough. You should plan a little time for this so that it can go.

For the yeast dough you need:

400 grams of flour
1/2 cube of fresh yeast or 1 packet of dry yeast
1 pinch of sugar
2 tsp salt
250 ml lukewarm milk or plant drink
To stimulate the yeast, you must first mix the yeast, sugar, and lukewarm milk in a bowl.
Add 200 grams of flour and let it rise for half an hour.
Now mix the remaining flour with the salt and fold it into the yeast-milk mixture.
Knead everything well and let the stick bread dough rise in a warm place for about one to two hours.
Divide the dough into small portions and wrap it around sticks: your stick bread is ready.

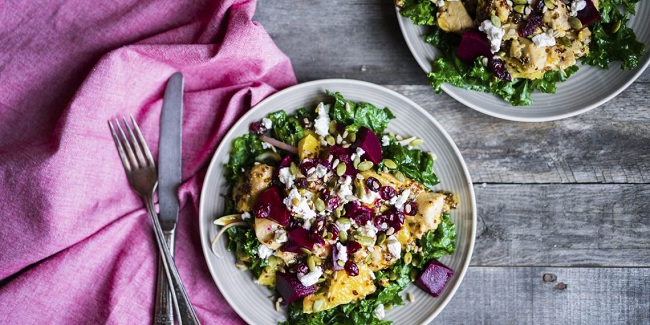
Cooking salads is not difficult. But this process can be made even easier and more convenient. There are many helpful hints and tips for cooking, cleaning, slicing and stacking food. Today we will introduce you to the most interesting life hacks.

  1. To arrange a salad “like in a restaurant”, you can use an ordinary plastic water bottle as an improvised means. It is cut off at both ends – a tube is obtained. The form is placed on a flat plate and the products are laid out in the desired sequence. Pick up the tube with a gentle scrolling motion.
  2. Before grating the cheese, grease the grater with vegetable oil. As a result, the pieces of cheese will not stick together, and the grater can be easily washed.
  3. If you need to coat a layer of cheese in a salad with mayonnaise or sour cream, but first, it is better to gently crush it with wet hands. In this case, the grated cheese will not stick to the spoon, and it will be convenient and easy to grease.
  4. If the greens had time to wither by the time the salad was prepared, then you can reanimate them by alternately lowering them into hot water and immediately into cold water.
  5. For salads, potatoes are often boiled in their skins. To prevent the peel of this vegetable from cracking, it is recommended to add vinegar to the water – just a few drops.
  6. Beets for salads are usually cooked for a very long time – about two hours. To shorten this time, boil the beets without vinegar for 50-60 minutes. After that, the hot broth is drained and the vegetable is poured with new cold water. Another 20 minutes and the beets are ready.
  7. Carrots and green peas will retain their beautiful vibrant color when boiled in sweetened water.
  8. So that in the morning after eating garlic salad you do not smell of its smell, you need to remove the green sprout from the garlic cloves during cooking.
  9. The onion will not slide on the cutting board when finely sliced if you leave a “tail” on it from which the green feathers grow. For it, you can hold the onion, and then discard the “tail”.
  10. Small onions and garlic are sometimes poorly peeled. To facilitate this matter, they are first immersed in water for a couple of minutes.
  11. It is preferable to cut raw vegetables on a plastic cutting board, as it does not absorb juices, unlike wooden ones.
  12. If mayonnaise is not at hand, then it can be made from sour cream. To do this, add the yolk of a boiled egg and a spoonful of mustard to it. The yolk is thoroughly ground, and the mustard is added to taste.
  13. To clean boiled eggs without any problems, you need to add salt to the water when boiling them. As a result, the shell will peel off easily.