Tag

Yeast

Browsing

It’s Sunday, I didn’t go shopping, and the kids are screaming for pizza. No yeast and no quark in the house, but it is still possible to make a delicious pizza without yeast and quark.

Ingredients for 3 people

For 1 baking tray, you need 300g flour, 1 sachet of baking powder, approx. 75 ml olive or sunflower oil, 1 tsp salt, and some milk.

Preparation

Mix the flour, the packet of baking powder, the salt, and the oil, preferably with a hand mixer, until you get a crumbly mass, then keep adding a little milk until the dough binds. Sometimes it happens that the dough is a bit sticky, then you can add a little more oil.

Spread the dough out on a pre-greased baking sheet or parchment paper, spread with tomato sauce (mix the tomato passata with Italian herbs or pizza seasoning + a little salt), and top with the desired or existing ingredients. Then spread cheese over the ingredients, for a particularly good taste you can also spread some mozzarella.

Put the tray with the pizza in the preheated oven (200° top/bottom heat or 180° convection) and let it bake for about 30 minutes.

Useful additional knowledge

The baking powder makes the dough a little thicker and fluffier, but you can prevent this by using a little less baking powder.

The flavor enhancer glutamate is now less and less often found on the list of ingredients than it was a few years ago. It was replaced by yeast extract – but what exactly is that?

Is yeast extract made from yeast?

Although yeast extract is obtained from baker’s or brewer’s yeast, it is the concentrate of the soluble ingredients of yeast cells, i.e. the liquid of the yeast cells. During production, the so-called autolysis, the yeast cells are killed by heat: the yeast stops growing.

The yeast’s own enzymes split the proteins out of the yeast and partially dissolve them in the cell walls of the yeast cells. The smaller molecules from the yeast cells detach. The resulting cell juice is “washed” and concentrated.
At the end, yeast extract is left: either as a brown paste or as a yellowish-brown powder.

How does yeast extract taste?

Real fresh yeast tastes less spicy.

Yeast extract, on the other hand, has a strong, spicy taste reminiscent of broth made from boiled meat. This is also due to the fact that the natural amino acid glutamic acid is only released when the yeast is extracted. Free glutamic acid tastes hearty, spicy, meaty or “umami”, which is the fifth taste (besides sweet, sour, salty, bitter).

Free and bound glutamic acid also occurs naturally in protein-rich foods, for example in relatively high concentrations in parmesan, tomatoes or fish. And even our very first meal, breast milk, contains glutamic acid.

The percentage of glutamate in yeast extract is typically given as around 5 percent.
Incidentally, the British eat the extract pure on bread: as a spread called Marmite, a spicy paste. In Australia there is something similar under the name Vegemite, in the USA as Vegex and in Germany under the name Vitam-R (typically in health food stores).

Is yeast extract the same as glutamate?

The salts of glutamic acid are called glutamate. It has been repeatedly associated with Chinese restaurant syndrome in recent years and is said to stimulate the appetite. Although these effects have not been proven, the consumer advice centers advise against frequent consumption of the flavor enhancer. Glutamate is produced artificially, and genetically modified components can also be used. Yeast extract differs from the isolated flavor enhancer glutamate: in addition to around five to twelve percent glutamic acid, it also contains many other amino acids and is relatively rich in B vitamins and some minerals.

In contrast to glutamate, the extract does not count as a food additive on paper (although it is a substance that is added to foods) and therefore does not have to be labeled as a flavor enhancer by law (although it fulfills this function).

So the yeast extract is not the same as glutamate, although it also naturally contains glutamate (salts of glutamic acid) and also has a flavor-enhancing effect (otherwise you wouldn’t be using it).

Is extra yeast gluten free?
Yeast extract, when obtained from baker’s yeast, is gluten-free. However, the production of the extract from brewer’s yeast may contain very small amounts of gluten. In this case, however, the product must be labeled accordingly.

Is Yeast Extract Healthy?

While many people avoid glutamate because of its disrepute for its possible harmful effects on health, little is known about the health effects of yeast extract.

Since glutamate, or glutamic acid, is a natural component of so many foods we eat every day, it would be surprising if it were harmful to the body. In contrast to this naturally occurring form of glutamic acid, the flavor enhancer glutamate is an artificially produced additive. And whether this is actually harmful to health has not yet been clearly clarified. However, many consumers now reject it.

Yeast extract contains only a small proportion of glutamate (approx. 5%). It is therefore relatively unlikely that it will harm our health. Nonetheless, it is an industrially modified ingredient used to improve flavor.

Yeast from beer is an easy secret recipe for when you don’t have yeast at home. Be it for pizza, yeast braid or cake – we’ll show you how you can make yeast from beer yourself.

Yeast consists of microscopic organisms that make dough rise. Yeast is also an essential ingredient in beer – here it ensures that beer ferments. You can take advantage of this if you don’t have any yeast in the house and still want to bake something.

Note: Even though yeast consists of small organisms, yeast is vegan: they are unicellular fungi.

You only need three ingredients to make yeast from beer

The following ingredients replace about one cube of yeast. This amount is therefore suitable for about 500 to 1000 grams of flour.

What you need:
100 ml beer: Here you can use a beer of your choice, preferably naturally cloudy.
1 tbsp flour
1 tsp sugar
Recommended kitchen utensils:
1 small bowl
1 fork or 1 small whisk for mixing
1 kitchen scale or 1 measuring cup
1 jar or other container that you can seal

Make yeast from beer yourself: It’s that easy

Pour 100 milliliters of beer into a small bowl.
Slowly pour in the flour and sugar while whisking constantly. This will prevent lumps from forming.
If there are small lumps, try to crush them with a small fork and stir to break them up.
Pour the whole thing into a screw-top jar and seal it tightly. If you don’t have a screw-top jar handy, you can use another container like a food storage box or a bowl covered with a plate.
Set the beer-flour-sugar mixture aside and let it sit for several hours, preferably overnight.
Note: Use 100 milliliters less liquid for the recipe you want to use the yeast for.

Tip: You can use the rest of the beer to prepare a dish with beer batter, or you can mix up a tincture for your skin or hair – because brewer’s yeast is also good for this thanks to its healthy effects. Or you simply enjoy the rest on the balcony or by the window.

Yeast from beer or “normal” yeast?

Yeast that you can buy at the grocery store is a type of pressed yeast, and there are about ten billion yeast cells in a gram. In beer, yeast converts sugar contained in the beer ingredient malt into alcohol and carbonic acid. Yeast also contributes to the flavor of beer.

It doesn’t matter whether you use “normal” yeast from the supermarket or make yeast from beer yourself, there is no difference in taste. But the difference between the two types is the driving force: that of brewer’s yeast is somewhat weaker. So your dough will need a little more time to rise. Optionally, you can prepare a pre-dough that you let rise several times over several hours or freeze.

If you don’t yet know what you can do with the homemade beer yeast: how about a yeast braid with raisins or a plum cake? If you don’t like plums, you can also prepare a simple yeast dough and top it with fruit of your choice. If you want it hearty, we also have a recipe for pizza dough for you.

Another way to make your own yeast is to use dates or other unsulphured dried fruit to make yeast water. However, this alternative must rest for up to a week. Yeast substitutes such as baking powder are also suitable for some recipes. Making your own yeast from beer is easy and also quickly ready for use, which is a clear advantage for us over other variants.

Freezing yeast makes sense if you have leftover yeast after baking or you bought it in advance. Here we explain how you can freeze the fresh yeast.

Freeze yeast: in jars and in cans

Would you like to stock up on fresh yeast or did you only need half a yeast cube for your yeast dough? Then simply freeze the fresh yeast. Frozen yeast keeps for several months and you don’t have to waste food
Place the yeast cube in a small tin or jar

Thaw yeast after freezing

If you want to use the frozen yeast, thaw it ahead of time. There are two variants:
Defrost gently: Put the yeast in the fridge the day before you want to bake and let it thaw slowly.
If you’re in a hurry: Thaw the yeast in a warm liquid if your recipe uses that liquid. Note, however, that yeast does not tolerate temperatures above 45°C, as the yeast then loses its effectiveness.
The yeast may become slightly softer and runnier after thawing than before freezing. But that’s not a problem, you can use them normally for baking.

We recommend organic yeast

Organic yeast is the ecologically better yeast:
While conventional yeast is produced using chemical substances that have to be washed out afterwards, organic yeast is much more sustainable. Because organic yeast does not have to be washed out, it requires less water during production and no unnecessary chemical substances get into the waste water.
In addition, genetically engineered enzymes can be used in the production of conventional yeast. Since there are no long-term studies on the use of genetic engineering, it can harbor undiscovered risks. The production processes of organic products do not contain any genetically modified substances.

Yeast dough is a classic that many people love. However, you absolutely have to let the yeast dough rise properly! For a fluffy yeast dough, both the pre-dough and the main dough or the topped sheet cake must rise in a warm environment. You can also use your oven for this.

The dough should be nice and fluffy but is often compact and firm. One reason for this is that the yeast dough cannot rest and “grow” long enough. In addition, the wrong temperature is often decisive. We’ll show you the right tips to make your dough rise safely!

Properly “feeding” the yeast for the yeast dough

With fresh baking yeast, you must first make a pre-dough. This step is usually omitted with dry yeast. Whether you prefer to use fresh or dry yeast for your dough is up to you. A cube of fresh yeast (42g) corresponds to 2 sachets of dry yeast (each 7g). For the pre-dough, put the amount of flour required according to the recipe in a bowl and make a well in the middle.

In this well, mix the crumbled fresh yeast with a few tablespoons of water or milk and some flour from the edge of the well. The liquid used should always be lukewarm (30-35° Celsius), as the yeast can “work” better that way. Yeast consists of unicellular fungi that feed on sugars. Therefore, “feed” your yeast with a pinch of sugar to make the pre-dough succeed. Salt as an ingredient in a recipe should not be added to the pre-dough as it inhibits the action of the yeast.

The pre-dough forms bubbles in the warm oven

Yeast develops its fermenting effect best at temperatures of 32°C. In summer it is a good idea to leave the pre-dough covered in the sun. In cooler seasons you can simply use the oven as a helper by letting the pre-dough rest in the oven at 32°, covered with a damp cloth. The oven light that is on should produce approximately this temperature.

In addition, you can set this low temperature in a steam oven. Otherwise, any place with a constant temperature of 32°C without drafts would do, such as a sunny window sill or under the covers. If the yeast has bubbled after about 20 minutes and the volume of the pre-dough has increased significantly, you can take the bowl out of the oven again.

Knead the ingredients and let the yeast dough rise

Finally add the remaining ingredients such as fat, eggs, the remaining liquid, and salt to the dough and knead everything for at least 10 minutes. If possible, the ingredients should be taken out of the fridge one hour before baking so that they are hand-warm when preparing the dough and the yeast can do its job better. Now knead the dough well with your hands or the food processor for 10 minutes.

If it’s sticky, add a little more flour and knead again. Depending on the recipe, the yeast dough must now usually be covered for at least one hour in the 32 °C ovens or in another 32 °C warm and draught-free place. When the dough has doubled in volume, you can remove the bowl from the oven. Otherwise, you have to be patient and give the dough enough time.

Let the filled yeast dough rise a third time

After kneading again, shape, braid, and cover the dough until you hold the desired end product in your hands. For a fluffy yeast dough, it is once again important to cover the dough in the finished form with a damp cloth and let it rise with the topping for about 15 minutes, for example on a warm windowsill.

Finally, heat the oven to the desired baking temperature to bake the yeast dough, which will hopefully have risen nicely. Before baking, brush your yeast pastry with egg yolk, but milk is also suitable so that it does not dry out during baking. Finish baking your pastry and enjoy your fluffy yeast cake with a good breakfast or brunch with friends.

You can let the yeast dough rise and store in the fridge overnight. This reduces the effort for fresh rolls or yeast buns in the morning. Here we show you what you should consider.

Many recipes with yeast dough state: the ingredients should not come cold out of the refrigerator, the yeast should be dissolved in lukewarm liquid and the dough must rise in a warm place. These clues are there because yeast is a leavening agent and consists of yeast fungi. These yeasts die off when the yeast is processed too hot and do not become active when it is too cold.

But the last aspect is not entirely correct. Yeast fungi also work in the cold, but much more slowly. Some recipes take advantage of this and let yeast dough rise in the fridge rather than in the heat. This has many advantages that you can take advantage of when baking with yeast.

Leaving yeast dough in the fridge has advantages

If you let the yeast dough rise in the fridge, you benefit from a number of advantages:

You can prepare the yeast dough the night before, let it rise in the fridge overnight and use the risen dough straight away in the morning. So you can look forward to fresh, homemade cinnamon rolls, rolls and more for breakfast. Doing it yourself is particularly worthwhile for pastries, as you can do without many of the additives. You can find out more about this in the article: This is why many people can no longer tolerate bread.
If you have made more yeast dough than you can handle at once, you can store the rest in the fridge for up to a day and don’t have to throw it away. Alternatively, you can also freeze it. It lasts like this for several months.
In addition, you only need half the yeast for refrigerator yeast dough.
The refrigerator dough is prepared with cold liquid. This avoids the risk of your yeast dying from water that is too hot.
Yeast dough from the refrigerator is often looser later. Because he has enough time to rise. Pastries made from frozen and thawed yeast dough are in no way inferior to fresh yeast pastries. The taste does not change when stored in the cold.

Yeast dough in the fridge: you have to pay attention to this

You can let yeast dough rise in the fridge overnight and store it there for up to a day. Pay attention to the following:

Prepare the yeast dough with cold liquid so that it doesn’t puff up too much.
You don’t need a pre-dough and you shouldn’t let the yeast dough rise in a warm place first.
Immediately after kneading, dust the yeast dough all over with flour and put it in a reusable and sealable bag or tin. This should be large enough for the yeast dough to spread out.
Now put the yeast dough in the fridge and let it rise overnight. The ideal duration for this is 12 to 18 hours. You can use the dough first thing in the morning or keep it in the fridge. However, it should not be left in the fridge for more than 24 hours, otherwise it could ferment.

Tips for the yeast dough in the fridge

You can form the yeast dough into balls, snails or braids before you even leave it. If you have formed small balls or pastries, you can store them in a bag that you blow open after filling. This creates more space in it and the yeast pieces do not hit the bag and deform when they rise.
Alternatively, place the yeast pieces on a baking sheet lined with parchment paper or on a floured board. Pay attention to the distance between the individual pieces of dough. You then slide the baking sheet or board into a large bag, which you seal and put in the fridge.
The bag or tin should always be closed tightly so that the dough does not dry out.
After rising: The yeast dough has risen well in the fridge overnight. If you want to bake it now, shape it as you like (if you haven’t already done so) and let the shaped pieces of dough rise again at room temperature for 20 minutes. This makes the pastry particularly fluffy.

Freezing yeast dough: What you have to consider

If you don’t want to use your yeast dough immediately after rising, you can store it longer. To do this, you put it in the freezer. There it stays at minus 18 degrees Celsius for up to six months. You can store yeast dough in the freezer as follows:

Shape the dough into a ball or patty before freezing. Then flour the dough.
Place the dough in freezer bowls or freezer bags and place in the freezer.
If you want to bake the dough later, let it thaw thoroughly beforehand.
After thawing, you can process it like conventional yeast dough. So he has to rise first. Give the yeast dough enough time to do this. Defrosted yeast dough takes about twice as long to rise as fresh dough.
Once the dough has risen, you can process it like conventional dough.

Whether dry yeast or fresh yeast – you can bake airy pizza dough and bread with both types of yeast. In this guide you will find out what the differences are and how you can use fresh yeast and dry yeast.

Yeast is a unicellular microorganism that belongs to the fungi family. This living organism feeds on the sugars and starches in the dough and converts them into carbon dioxide gas, among other things. This is reflected in the bubbles in the dough, which allow it to rise and make it more airy. We use this property of yeast for many recipes – whether pizza dough, home-baked bread or cinnamon rolls.

You can find yeast in two main forms on the market: as dry yeast and fresh yeast, which is also called block yeast. We will explain how the two differ, what you need to look out for when storing and using them, and how you can convert one type of yeast and replace it with the other.

Dry yeast and fresh yeast: differences in yeast types

Dry yeast and fresh yeast have much more in common than differences:

Both dry yeast and fresh yeast are the same strains of yeast (Saccharomyces cerevisiae), also known as baker’s yeast or brewer’s yeast.
Dry yeast and fresh yeast serve the same purpose in the bakery: they convert sugar and starch into gaseous carbon dioxide, allowing the dough to rise.
The yeast cultures were also grown and propagated in the same way: on a carbohydrate-rich culture medium. The exact cultivation form depends on whether it is conventional yeast or organic yeast – but not whether it is dry yeast or fresh yeast. You can find out below how organic yeast differs from conventional yeast.

But there are also big differences between dry yeast and fresh yeast:

While fresh yeast consists of around 70 percent water, dry yeast only contains around five percent residual moisture. Therein lies the biggest difference: For dry yeast, fresh yeast is dried.
As a result, dry yeast has a significantly longer shelf life than fresh yeast. While you can store fresh yeast in the fridge for a maximum of two weeks, dry yeast can be stored at room temperature for between several months and a year.
The fungal cultures contained in the dry yeast are inactivated and are only activated by adding liquid. Nevertheless, they are living microorganisms – only in a “resting state”.

Dry yeast or fresh yeast – which is better?

Both dry yeast and fresh yeast do an excellent job as leavening agents. In the finished recipe, the difference is hardly or not at all noticeable.

The benefits of fresh yeast are rather subjective:

Some (hobby) bakers swear by fresh yeast because it gives the baked goods a rounder, slightly sweeter taste.
Some also report that yeast dough rises slightly better with fresh yeast than with dry yeast.
If baked goods require a particularly long fermentation time or several resting phases to rise, fresh yeast is usually recommended. Because it is said to have a longer-lasting driving force than dry yeast.
On the other hand, dry yeast has prevailed today mainly because of its practical advantages over fresh yeast:

Dry yeast can be stored at room temperature for several months in a closed packet. Once opened, you can store the packet tightly sealed in the fridge for another two weeks. Fresh yeast, on the other hand, must be stored in the refrigerator and used within two weeks of purchase.
You don’t have to stir the dry yeast into liquid beforehand, you can mix it directly with the dry baking ingredients. This makes it a little easier to mix the dry yeast with the dough than fresh yeast.
In addition, thanks to its shape, dry yeast is a little easier to dose than fresh yeast in block form.

Conclusion of the comparison:

Fresh yeast should give the baked goods a slightly better taste and also have a higher raising power than dry yeast. For a few recipes like yeast loaf or Berlin pancakes, this is possibly the better yeast.
On the other hand, dry yeast is the much more practical form of yeast, especially for hobby bakers: it lasts much longer and is easier and faster to process.

Using dry yeast and fresh yeast: tips for the kitchen

If you want to make yeast dough yourself, you should consider the following points when preparing it:

First stir fresh yeast with some of the lukewarm liquid from the recipe and some sugar and let this mixture stand for about ten minutes. You can tell by the formation of bubbles that the yeast have started their activity. After the ten minutes, you can mix the liquid with the remaining baking ingredients.
You don’t need to mix dry yeast with liquid first. Mix directly into the dry ingredients in the recipe. Make sure that the remaining ingredients are not too cold: you should therefore take them out of the fridge some time beforehand.
Whether fresh yeast or dry yeast: yeast has the best raising power at temperatures between 25 and 30 degrees. At more than 45 degrees, the yeast fungi die off, while at less than ten degrees, the metabolic processes run considerably more slowly. That means: The cooler, the more walking time you have to plan.
When baking, you can easily convert and replace fresh yeast with dry yeast:

You can replace one cube of fresh yeast (42 grams) with two packets of dry yeast (fourteen grams).
As a result, one packet of dry yeast is equivalent to about half a cube of fresh yeast (21 grams).
As a rule of thumb, half a cube of fresh yeast or a packet of dry yeast is sufficient for 500 grams of flour. However, this amount varies greatly depending on the recipe.
In principle, you can also mix fresh yeast and dry yeast in a recipe, should this ever be necessary.

Buy yeast: organic quality and list of ingredients

It doesn’t matter whether it’s dry yeast or fresh yeast: we recommend that you pay attention to organic quality when buying. Because there are some differences between organic yeast and conventional yeast:

Growth medium: Conventional yeasts are often cultivated on molasses (a by-product of sugar production), phosphorus or inorganic nitrogen. Organic yeasts, on the other hand, are cultivated on natural raw materials from controlled organic cultivation, often on grain or sugar beet syrup.
Defoaming agent: To prevent growth-inhibiting foam from forming, sunflower oil is added to organic yeast as a defoaming agent. With conventional yeasts, synthetic substances are used for this purpose, which later have to be rinsed out with plenty of water. Therefore, according to the Bavarian Consumer Center, more water is used in the production of conventional yeast than in the case of organic yeast.
Genetic engineering: In addition, no genetically modified organisms (GMOs) are used in the production of organic yeast. Since there are still no reliable long-term studies on the health effects of GMOs, we recommend non-GMO foods.
If you want to buy dry yeast, you should also take a closer look at the ingredients:

Some of the dry yeast contains emulsifiers so that the yeast does not dry out. The most commonly used emulsifier is sorbitan monostearate with the E number 491. There are even some emulsifiers in fresh yeast.
Organic manufacturers in particular usually deliberately avoid using emulsifiers. With their yeast, there is nothing else in the packet but yeast.

Germ is the Austrian term for yeast. Dry yeast is a preserved raising and loosening agent that does not have to be touched (no steam necessary).

1 packet of dried yeast contains about 7 g and is sufficient for about 500 g of flour. The dry yeast can be mixed directly with the flour. Basically, you need a little more dry yeast and the dough needs a little more time to rise.

1 cube of fresh yeast has 42 g and is sufficient for 1 kg of flour. Dissolve the fresh yeast in the warm liquid (water and/or milk) and only then mix with the flour. A Dampfl can also be prepared as a fermentation test.

Dampf as a fermentation test

A steamer or pre-dough can be used to check whether the yeast is still suitable as a leavening agent, and the yeast dough becomes particularly fluffy. Beat the yeast in the warm liquid with a little sugar and flour until the dough comes off the wooden spoon. Then dust with flour and cover and leave to rise for about 10 minutes. If the Dampfl rises, the yeast is fresh. For further processing, mix the Dampfl with the other ingredients for the yeast dough.

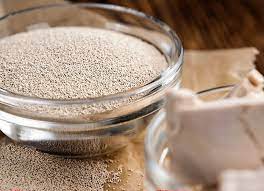
Have you ever heard of Lievito Madre? Here you can find out what makes this sourdough variant special, how you can make it yourself and what delicious things you can bake with it.

Lievito Madre means mother yeast in German. It is the Italian variant of the sourdough known in Germany. You can make it yourself relatively easily and use it to bake various foods such as bread, rolls or pizza. Similar to yeast or baking powder, Lievito Madre ensures that the pastries are nice and fluffy. It has a much milder taste than German sourdough, so you can even use Lievito Madre for sweet pastries.

The next section shows you an example recipe to grow your own Lievito Madre. Don’t be discouraged if you don’t get it right on the first try. It takes time and experience to learn how the dough reacts and how best to handle it.

The sample recipe is designed so that you don’t have to throw anything away. Many recipes use relatively large amounts of ingredients and require regular disposal of appropriately sized leftovers, but this is food waste that you can easily avoid. You don’t need 100 grams or more flour for the first batch, you can also do it with less. However, dough residues always occur in the process. It is best to collect these in a separate container in the fridge and use them later when baking.

There are many different ways to schedule a Lievito Madre. Using dried Lievito Madre as a base, you can make a baking batch in just one day. Without it, the whole process takes up to 25 days at room temperature. But you can easily speed this up by placing the dough in a place that is around 28 to 30 degrees Celsius. In winter, for example, this can be with the heating, or you take a cooler and put the dough in it with a bottle of hot water, which you change regularly. In just five days at best, follow the steps below to create your own Lievito Madre.

How to make the Lievito Madre approach

Ingredients:

225 organic wheat flour
115ml water
0.5 tsp organic olive oil
0.5 tsp organic honey

Directions:

Day 1 Of the ingredients you need today: 30 g flour
15 ml lukewarm water
0.5 tsp honey
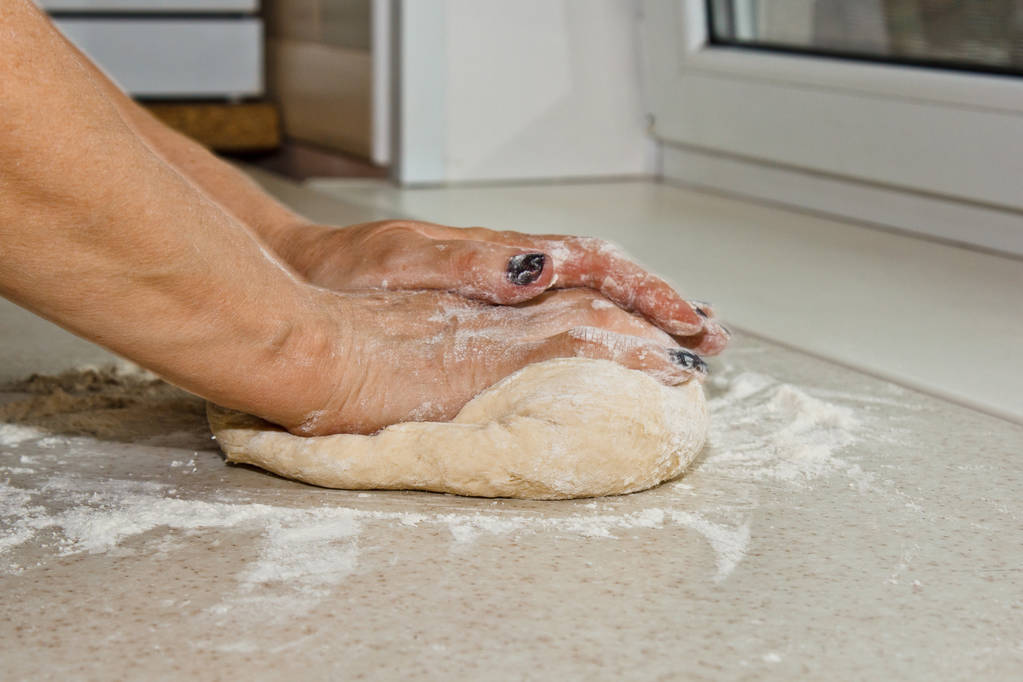
0.5 tsp olive oil Put the flour in a bowl and add the remaining ingredients. First mix the ingredients roughly with a spoon and then knead them thoroughly by hand until a smooth dough is formed. It is really important here that everything is mixed and there are no lumps. Form the dough into a ball and cut a cross in the top with a knife. Then place it in an easy-to-clean jar with a lid. Just put the lid on loosely. Place the dough in a warm place and let it rest for 24 hours.
Day 2Today you need: yesterday’s dough
25 ml lukewarm water
45 g flour Mix your dough with the water until it dissolves. Then add the flour and knead again very carefully. Place the dough in a loosely sealed jar and keep warm until tomorrow. Today, and every day that follows, it’s important to make sure the dough doesn’t spoil. If mold does form, you’ll have to get rid of it entirely and unfortunately start over. Good dough smells pleasantly of flour, yeast and slightly sour. Even a slightly alcoholic smell is not bad.
Day 3 to 5 On each of these days you will need: 50g of dough from the previous day (collect the rest in a separate container in the fridge)
25 ml lukewarm water
50 g flour Mix your dough with the water until it dissolves. Then add the flour and knead again very carefully. Place the dough in a loosely sealed jar and keep it warm on the third and fourth day until the next day. On the fifth day, the batch is placed in the refrigerator with the lid closed for further storage. The Lievito Madre should now, on the fifth day, have doubled in size compared to the previous day and be nicely bubbled. If this is not the case yet, then continue the procedure of the last few days a little longer, sometimes it just takes more time.
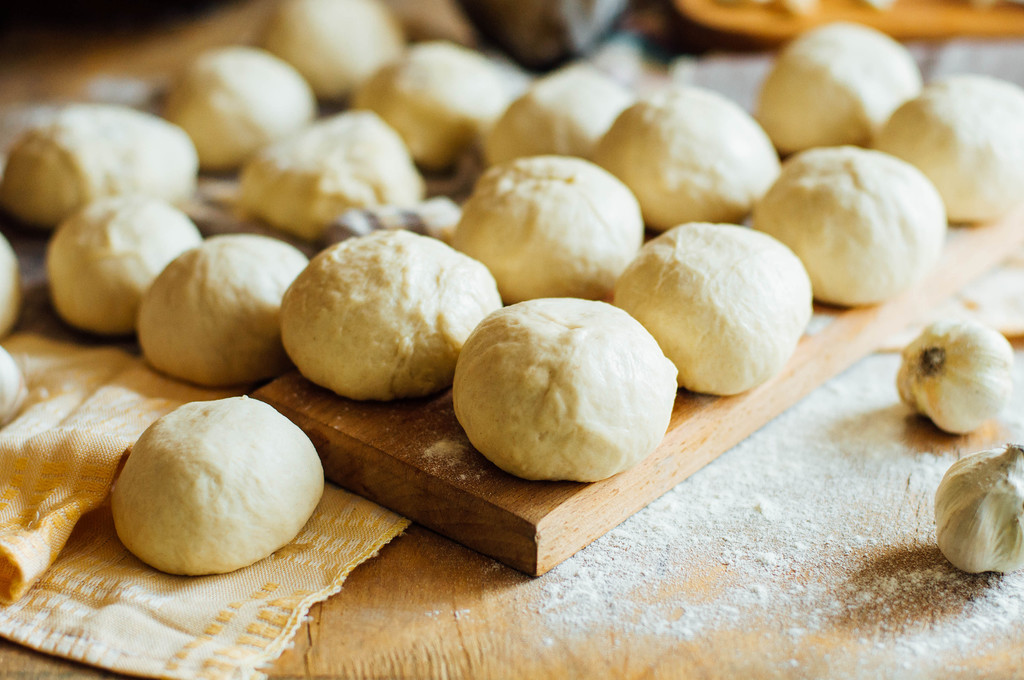
You can simply use the dough leftovers from the past few days for a pastry. They are very mild, so they fit in bread or roll dough as well as in sweet yeast dough.

How to properly care for your Lievito Madre

You did it and bred your first own Lievito Madre. So that you can enjoy it for a long time, it is important never to use it up completely when baking and to feed it regularly. The more dough you have, the less often you need to feed him, generally every eight to ten days is recommended. You can also use the intensity of the smell of alcohol as a guide: the more intense it is, the more urgently the dough needs more flour and water.

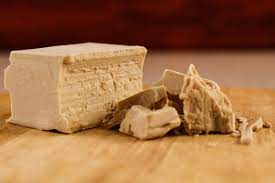
14 days without feeding are normally not a problem for the Lievito Madre. If you’re going to be away for a longer period of time, you’d better dry it off beforehand. To do this, only add a very small amount of water when refreshing, so that the dough is very tough.

Feeding is very easy. Take the dough out of the fridge well in advance so that it comes to room temperature. Over time, a harder layer has formed on the surface. You can remove these and simply mix them in when baking. Mix the soft part thoroughly with 50 g flour and 25 ml lukewarm water.

If you are already planning to bake a specific recipe, you can adjust the amount of flour and water to get the amount of Lievito Madre you need plus a small reserve for storage. The important thing is that you always use twice as much flour as water.

Then put the batter in a fresh jar. Wait for the dough to double in size, then place it back in the fridge with the lid on.

Lievito Madre and Sourdough – What’s the Difference?

The difference between Lievito Madre and sourdough lies in the ratio of flour to water. With classic sourdough it is 1:1, i.e. just as much flour as water. For Lievito Madre, on the other hand, you use twice as much flour as water, i.e. the ratio is 2:1 flour to water.

Another difference is that you add olive oil and honey to the base for Lievito Madre, sourdough is always just flour and water. The types of flour are also different. Rye flour is usually used for sourdough, while wheat flour is used for Lievito Madre.

As a result, Lievito Madre is less acidic and contains more natural yeasts than a classic sourdough, making it more versatile. If you already have a sourdough starter in the fridge, you can easily make a Lievito Madre out of it. The necessary steps are:

Weigh the sourdough starter and add the same amount of flour and half the amount of lukewarm water. With 20 grams of sourdough, for example, 20 grams of flour and 10 milliliters of water.
Knead everything thoroughly and place the dough in a clean, loosely sealed container.
Place the dough in a warm place for 12 hours.
Repeat steps 1 through 3, adjusting the amount of flour and water, two or three more times. The dough should double in volume within 6 hours.
In the further procedure, i.e. use, storage and feeding, you don’t have to pay attention to anything other than with the directly applied Lievito Madre.

If you’re really in the mood for baking now, you’ll find a recipe to try in the next section.

How to make focaccia with Lievito Madre

Ingredients:

70 gLievito Madre (fed the day before)
350 gorganic wheat flour
280 ml lukewarm water
1 tsp salt
1.5 tbsp organic olive oil
Herbs, olives, tomatoes or other favorite ingredients

Directions:

Knead the flour thoroughly with 230 milliliters of the water to form a dough and leave covered for 30 minutes.
Add the Lievito Madre and the salt and gradually add the remaining water while kneading for at least five minutes. You can do this by hand or with a food processor fitted with a dough hook.
Grease a flat baking pan with some olive oil.
Spread the dough out in the pan and let it rise, covered, in a warm place for at least two hours. If you have more time, you can also put it in the fridge overnight. This way the result gets even better.
Press small indentations into the dough from above with your fingers.
Brush the dough with the olive oil and spread the olives, tomatoes, or whatever you have chosen on the dough.
Bake the focaccia in the oven at 180 degrees Celsius for 20 to 30 minutes. It should be lightly browned. Actual baking time will vary by oven.

Yeast dough is versatile and not difficult to make. We will show you a classic and a vegan recipe for sweet yeast dough and tell you what is important when it comes to the dough – and also how it is made into a braid.

Recipe for vegan yeast dough without egg, butter, and milk

You can easily make a vegan, sweet yeast dough yourself.

You need for this:

500 g flour (light organic wheat or spelled flour)
80 grams of sugar
1 cube of yeast
250 ml plant milk (e.g. oat or soy milk)
70g vegan margarine
1 tsp apple cider vinegar
1 pinch of salt
Optional: some light-colored jam for spreading, quince or apricot jam without pieces is best.
You also need:

a bowl,
a whisk,
a kitchen scale,
a pastry brush,
a clean tea towel.

This is how the vegan yeast dough succeeds

Whether for Easter or for a nice Sunday breakfast – you can easily make a vegan yeast plait yourself with a little preparation time. There is no need to use eggs, milk or butter, because this vegan yeast dough is delicious and buttery soft.

How to make the dough:

Place all liquid ingredients and in a bowl. The plant-based milk and margarine should be lukewarm.
Add the yeast cube and stir until it has dissolved.
Then add the salt and sugar to the liquid.
Add the flour while stirring constantly until the dough has reached the typical consistency.
Knead the dough well on a floured work surface for several minutes.
Cover the bowl with a tea towel and let the dough rise in a warm place for at least an hour. The cloth is important to protect the dough from drafts.
The dough is ready when it has doubled in size.
Important: The decisive factor for a successful yeast dough is the temperature. With fresh yeast, the liquid should be warm but not hot. If it’s too hot, the yeast culture will die and your dough won’t rise. Cold, on the other hand, does not harm the yeast. It just takes longer for your dough to rise. If you’re not in a hurry, you can leave the dough in the fridge overnight and bake it the next day.

This is how you succeed in making the perfect yeast braid

Take the dough out of the bowl and knead it well again on a floured work surface.
Divide the dough into three equal parts and form long strands out of the dough balls.
Braid the strands of dough loosely and pinch the ends together.
Use a pastry brush to brush the braid with some light-colored jam or plant-based milk.
Place the braid on a baking sheet and let it rise for another 20 minutes.
Halfway through the resting time, preheat the oven. If you want to bake with top and bottom heat, set the stove to 200 degrees Celsius and 175 degrees Celsius for circulating air.
Bake the braid on the bottom shelf of the oven for about 25 minutes.
Take the braid out of the oven and let it cool down a bit.

Recipe for classic yeast dough

For a classic yeast dough you need:

500g flour
80 grams of sugar
1 cube of yeast
250 ml lukewarm milk
70 grams of butter
1 pinch of salt
1 organic egg
You also need:

a bowl,
a whisk,
a kitchen scale,
a pastry brush,
a tea towel.
The preparation and processing of the classic yeast dough hardly differs from that of a vegan one. The following variant is for a yeast dough with pre-dough:

Sift the flour into a bowl and mix it with a pinch of salt.
In another bowl, mix lukewarm milk with sugar and crumble in the yeast. Stir the liquid a little until the yeast has dissolved.
Make a well in the flour and pour in the liquid. Thicken the yeast milk with a little flour using a spoon and then leave the bowl covered for 15 minutes.
Then add the other ingredients and knead the dough for several minutes.
Cover the bowl with a tea towel and let the dough rise in a warm place for at least an hour.
The dough is ready when it has doubled in size.
You can use this dough as a base for cakes or a yeast plait. If you want to make a yeast plait, you can brush it with milk before baking to brown it nicely.

Tip: If you made too much dough, you can freeze the leftover yeast dough. It will last up to six months this way.