Tag

Chocolate

Browsing

Stefania Abbona is on a big mission with her Algae Factory: She is looking for ways to feed the growing world population in a healthy and ecologically beneficial way. Her solution: chocolate with spirulina flakes.

Goal: useful and tasty food

The world’s population is growing in seconds, but food resources are limited. The solution: algae. Cultivation is ecologically advantageous and the nutrient content is high. Spirulina is currently mainly available on the market as tablets or in powder form.

But the Algae Factory has a bigger goal. They want to ensure that their products are not only useful but also really taste good. That’s why they combine the beneficial ingredients with goodies. The chocolate variant with spirulina flakes should still be unique. And who knows, maybe that way we can get used to the food of the future better.

Spirulina is so healthy

Said spirulina are cyanobacteria, which are also called blue-green algae or microalgae. Algae are rightly considered super suppliers because they contain a lot of proteins and important vitamins. The vitamin B12 content of some types of algae is even higher than that of meat! Algae also contain important minerals such as calcium, magnesium, phosphorus, and iron. Algae also provide significant amounts of the important trace element iodine. On average, there is around 10 mg iodine per 100 g of algae. This makes algae particularly valuable for vegetarians and vegans.

It doesn’t necessarily have to be the spirulina chocolate

If you are following a healthy diet and want to include spirulina in your diet, you don’t need to buy Algae Factory’s Spirulina Chocolate. We have great alternative recipes for you that you absolutely have to try!

Pizza Margherita, salami or Hawaii? This decision is often not easy. But how about a sweet version for a change: Thanks to Dr. Oetker will soon be able to do this because from April the “Dolce al Cioccolato” – a chocolate pizza – will be in the freezers of the supermarkets!

Dolce al Cioccolato – the sweet seduction

Preheat the oven to 200 degrees, and slide in the chocolate pizza for eight to ten minutes – the sweet dessert is ready! On the thin “pizza crust” of the Dolce al Cioccolato, chocolate sauce, delicate shavings of milk chocolate, chocolate droplets and pieces of white chocolate combine to create a heavenly dessert for those with a sweet tooth.

The sweet sin can be divided into several pieces, served either pure or with ice cream and fruit and is an unusual change on the dessert or cake plate, as the company Dr. Oetker explained in his press release.

The chocolate side of pizza

The Dolce al Cioccolato presents itself optically from its chocolate side with every single one of its total of 300 grams, but the chocolate pizza should not be served too often to calorie-conscious people: With 320 kilocalories per 100 grams, this chocolate bomb is not exactly a lightweight.

Curious connoisseurs will definitely not want to miss out on the chocolate cake alternative from the frozen pizza ranks and will try them out together with family or friends.

Summer, sun, sunshine – and ice cream! This vegan ice cream simply tastes like summer: fresh mint, crunchy chocolate, and creamy fine ice cream. We can’t get enough of this green avocado ice cream. And you don’t even need an ice cream maker. It’s so easy to make your own avocado ice cream.

Make your own avocado mint ice cream

You’ve certainly never eaten ice cream like this: fresh mint gives the creamy-green avocado ice cream a particularly refreshing note – and really helps to cool off on hot days. The crunchy pieces of chocolate give a certain crunch effect. And on top of that, it’s also vegan ice cream!

To make the avocado ice cream yourself, you only need a few ingredients: coconut milk, avocados, mint, chocolate, and possibly some agave syrup. Although avocados have a relatively high number of calories and a high-fat content, healthy polyunsaturated fatty acids predominate.

Mint and lemon provide vitamin C and at the same time provide a fresh kick. The whole thing is also done in no time at all: you only need 15 minutes until the ice is in the cooler – but then you have to wait. But anticipation is often the best joy!

We fell in love with the creamy avocado ice cream – just try it out and enjoy the fresh licking fun on hot days.

The recipe for the avocado mint ice cream with chocolate

For 6 servings

  • 1 can of coconut milk
  • 3 ripe avocados
  • 2 tbsp lemon juice
  • Agave syrup (optional)
  • fresh mint (or mint extract)
  • 100 g chocolate drop (or to taste)
  • Besides that
  • cling film

Preparation steps

  1. Open the coconut milk and scoop out the solid part at the top – don’t shake the can first – and pour it into a large bowl! Using a hand mixer, beat the solid coconut milk until fluffy, and then pour into a cake or casserole dish.
  2. Split the avocados, pit and scoop out the flesh, and place in a food processor. Blend together with the lemon juice, agave syrup, and mint leaves until smooth and creamy.
  3. Put the avocado mixture on the fluffy coconut cream, sprinkle the chocolate chips over it, and mix the mixture carefully but evenly.
  4. The surface of the mass should be relatively smooth. Now place cling film on top and press lightly so that there is no air between the film and the ice cream mass. Place the ice cream in the freezer for at least two hours.
  5. Let it thaw and enjoy.

You can easily make these crispy chocolate pralines yourself and without baking! They are also great as a gift – even for yourself. Because you might not want to share them as delicious as they are. Do it quickly and enjoy!

Who doesn’t love them, the small, crunchy chocolate treats? But why not do it yourself? The homemade, crunchy chocolate pralines simply taste good without any baking and are super quick to prepare.

And they are healthier than the original: they only contain natural ingredients and are lower in fat. Besides, you know exactly what’s in it.

Ingredients for 30 crispy chocolate pralines:

  • 200 g dark chocolate
  • 40 g muesli flake mixture
  • 100 g spelled flakes
  • 25 g cherries (dried, unsweetened)

Preparation steps:

  1. Fill a pot with water, bring to a boil and then turn the stove to the lowest setting.
  2. Finely chop the dark chocolate and place about two-thirds of it in a bowl. Place the bowl in the saucepan and gently melt the chocolate in a water bath. Stir occasionally.
  3. Once the chocolate is completely melted, remove the bowl from the heat and add the remaining chocolate, stirring slowly until melted.
  4. In a large bowl, carefully combine the granola mixture, spelled flakes, dried cherries, and melted chocolate so everything is coated in chocolate.
  5. Form about 30 chocolate pralines with two teaspoons and place them on baking paper. Then let it dry in a cool environment for about 2-3 hours.

This recipe is so easy you could actually make it every day. Of course, you don’t do that…or do you? Because the small chocolate pralines are also great as gifts or for parties. Enjoy your meal!

Here is the recipe for a super quick and super easy chocolate cake to take home or for a birthday. Without a baking mix with natural ingredients, the preparation is easy even for non-housewives.

Ingredients for 1 cake

  • 200g dark chocolate 70%
  • 200g butter
  • 200 grams of sugar
  • 200g ground almonds
  • 1/2 pack packing powder
  • 1 packet of vanilla sugar
  • 4 eggs

Preparation of super fast chocolate cake

  1. Melt chocolate + butter in a water bath.
  2. Mix together the sugar, almonds, baking powder, vanilla sugar, and salt.
  3. Slowly add the butter and chocolate mixture to this
  4. Finally, add the eggs
  5. Bake at 160°C for about 40 minutes

There are many foods that can provide iron to our body. These include meat and chocolate; but what is more of it?

The importance of iron for our body

Iron is a trace element that can be found in many animal products, but also in plant foods such as legumes or whole grains. The mineral is involved in many bodily processes, such as oxygen transport and oxygen storage in the muscles. Iron also plays an important role in blood formation, the functionality of important enzymes and various metabolic processes.

If you eat no meat or are very low in iron, you may have an iron deficiency. Typical symptoms are tiredness, constant cold, exhaustion and an increased susceptibility to infections. If you suspect an iron deficiency, you should have the suspicion clarified medically and adjust your diet.

Iron suppliers: meat versus chocolate

Chocolate is best known as a candy and is very popular with many; but she can also convince in her iron values. How high the iron content of the chocolate is depends largely on the cocoa content; you can even find dark chocolate varieties that have 8 mg of iron per 100 g.

If you compare these values ​​with the iron values ​​in beef, a clear difference becomes apparent. Beef has only about 1.9 to 2.4 mg per 100 g cut. However, it is important not to look exclusively at this value. There is

Because chocolate is high in sugar and fat, and therefore high in calories, it should only be consumed in moderation. However, moderation is also required when consuming meat: The German Society for Nutrition

With a chocolate mask, you get velvety soft skin that is nice to bite on, smells good, and has a silky shimmer. Many natural extracts offer the skin lasting care, but the simple block chocolate can do much more.

Chocolate for facial care

The ingredients of “good” chocolate, which should consist of at least 70% pure cocoa, not only have an antiseptic effect, but also many vitamins that help the skin shine. An estimated 300 different substances in cocoa stimulate the skin. These include caffeine, proteins, antioxidants, and, of course, fats that give the skin a silky sheen. Another advantage; Applied to the skin, cocoa does not make you fat.

Material for the chocolate mask

  • Liquid, warm chocolate at least 70% – better more
  • A roll of cling film
  • Salt and olive oil for the body scrub
  • Scented candles for a cozy ambiance
  • A bathtub is an advantage
  • towels

The application of the chocolate mask

The skin should be thoroughly cleansed (if necessary depilated) before the treatment. Full body scrub with olive oil and salt is best. This can be applied before or after showering. However, the body should be free of all substances, because salt on the skin starts to burn after a while. The skin should now be slightly dry so that the liquid and warm chocolate adhere better to the skin.

  • The liquid chocolate is now applied to start from the feet and wrapped in cling film after each section.
  • It is advisable to cut the strips of cling film to size beforehand and place them within reach. After applying the chocolate, the whole body should be wrapped in foil so that the active ingredients penetrate deeply with the help of body heat. If it gets too cold for you, you can cover yourself with towels. The exposure time is 20 to 30 minutes.
  • Then remove the foil and simply shower off. The effect is stunning. The skin does not need any further treatment, it now smells and tastes chocolate and gives the skin a silky, shimmering chocolate shine, which, however, disappears again after the next shower. However, the care substances are retained. For regulated sustainability, an application once a month is recommended.

For the sake of simplicity, you can stay in the bathtub, because the chocolate likes to spread to places in the bathroom that you don’t want.

The heating of the chocolate

On the one hand, the chocolate can be liquefied in a water bath, it should never be heated directly on the stove, as it can then curdle quickly and then become unusable because it has lost consistency. If you have a warmer, you can heat the chocolate slightly over the tea light, stirring in between so that it heats up evenly. A skin test would be in order because the chocolate that is too hot is not good for the skin.

In order for the chocolate coating to have a nice shine, you have to heat the chocolate properly. Here you can find out what you have to pay attention to and which methods are available.

Tempering Chocolate: Why is it Important?

Chocolate is very sensitive to temperature. Just one degree more or less can change its consistency. This is due to the cocoa butter it contains, which can harden into six different crystal forms depending on the temperature. Only in the fifth crystal form (from about 28°C) does the chocolate harden stably. The tempering of chocolate is therefore also referred to as “pre-crystallization”. This gives your chocolate the following properties when it has solidified:
smooth and shiny surface
crisp break
quick drying
If you don’t temper the chocolate, it may not harden, may not break cleanly, or may form a gray-white haze as it dries – called a fat glaze.

Tempering chocolate: The temperature is crucial

The optimum temperature for pouring depends on the chocolate. You can use the following information as a guide:
Dark chocolate: 31-32°C
Milk chocolate: 30-31°C
White chocolate: 29-30°C
Ideally, you should use a thermometer to accurately measure the temperature. With a little sensitivity, however, you can also temper chocolate without a thermometer.

Tempering Chocolate: Three Methods

There are various methods of bringing the chocolate to the desired temperature. But the basic principle is the same for all.

1. Vaccination method:
Melt chocolate: Chop or grate the chocolate into small pieces. Place 2/3 of the chocolate in a bowl and melt over a water bath while stirring. Make sure the water isn’t boiling and the bowl isn’t touching the water. It is also important that no water gets into the chocolate, as this could cause lumps.
Lower the temperature: Remove the chocolate from the water bath and add the remaining third. It is important that you stir constantly so that the chocolate melts evenly. The mass thereby cools down to about the desired processing temperature. If the chocolate has melted evenly and become thicker, you can now use it. It is best to check the temperature with a thermometer.
Measure the temperature: If the chocolate has a temperature of around 29 to 32 degrees Celsius (depending on the type of chocolate), you can use it. If the temperature is lower, heat the liquid chocolate again over the water bath to the desired temperature.
2. Tabling method:
Melt the chocolate: Melt the chocolate as described above (to about 45-50 degrees Celsius) and pour 2/3 of the melted chocolate onto a smooth and cool work surface (a marble slab works best here).
Lower the temperature: Use a kitchen spatula to spread the chocolate over the plate and push it back towards the center. Keep the mixture moving until it has cooled and become more viscous. The chocolate should now be around 27 degrees Celsius.
Measure the temperature: add the slightly cooled chocolate back to the remaining third of the melted chocolate and mix thoroughly. The chocolate should now be at the optimum temperature for pouring. To be on the safe side, you can use a thermometer as a precaution and, depending on the cocoa content, bring the chocolate to the exact temperature with the help of a warm or cold water bath.
3. In the microwave:
Microwave the chocolate on high for about 20 to 30 seconds, then stir vigorously.
Repeat this process until most of the chocolate has melted. If there are only a few pieces left, you no longer need to put the chocolate in the microwave. Then stir until all the lumps are melted.
The chocolate should now be slightly viscous and have reached the optimum processing temperature. You can check this with a thermometer.

Tempering chocolate: more tips

And here are a few tips…
To test if the chocolate is setting the way you want, you can dip a spoon in it and let it dry. After a minute or two, the chocolate should set and have a slight sheen – that’s how you know everything worked out!
In general, the more you stir, the better. Because that promotes crystal formation and you get a better end result.
If you want to make it a little easier for yourself, you can use cake icing or fat icing instead of chocolate. These are specially made for coating sweet delicacies and have a higher fat content. This means you don’t have to pay so much attention to the temperature when melting and the glaze still gets a nice shine.

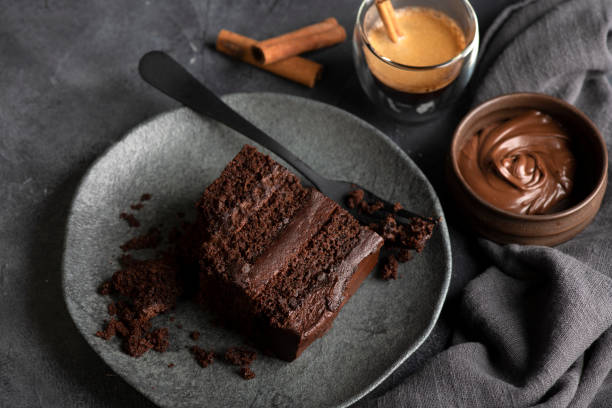
Many tips for removing chocolate stains at a glance. Small children and babies especially love chocolate. Unfortunately, the little ones pay little attention to the fact that the delicious treat disappears completely in their mouth. The little hands are quickly smeared with soft chocolate mass, which is then unerringly distributed on the sofa, trousers, or car seat.

But chocolate stains usually look worse than they are. First of all, keep calm and act prudently. Many people tend to immediately rinse the chocolate stain under warm water. However, this is counterproductive and can allow the stain to penetrate even deeper into the fabric. With the right tips, you can almost always completely remove the annoying stains without having to resort to expensive stain removers or special cleaners.

General chocolate stain tips

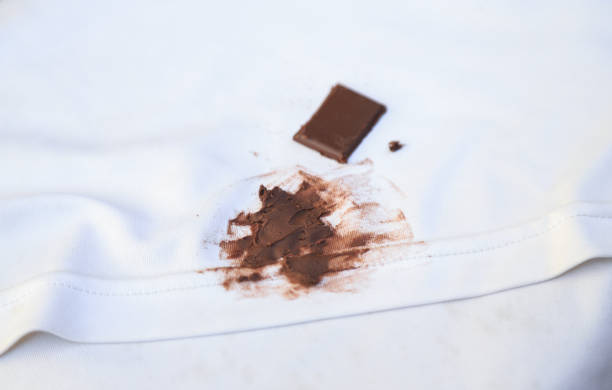
Depending on the type and amount of material the chocolate stain is on, you should use different stain removal procedures. However, there is one thing in common: In the beginning, you always remove the chocolate with the unsharpened back of a breakfast knife, regardless of the surface. Using gentle pressure, scrape off the excess chocolate mass with the knife without making the stain worse.

A large part of the contamination has already disappeared. What remains is a small residue and a grease stain. And this is the real problem with a stain treatment. You need the following things to completely remove chocolate stains:

  • dinner knife
  • gall soap
  • cloth or sponge
  • detergent
  • possibly flour and salt
  • possibly milk
  • possibly potato flour
  • possibly sparkling mineral water
  • spirit of wine

Remove chocolate stains from clothing

Blouses, jeans, jackets, dresses, skirts, and T-shirts, in particular, are popular targets for chocolate stains. Be sure to remove the garment for cleaning. This makes it a lot easier to clean. First, carefully remove the excess chocolate mass with the blunt side of the knife. Then dab and rub the remaining chocolate off the garment with a soft cloth, some warm water, and a few drops of washing-up liquid.

A light greasy film will probably remain in the fabric. To remove this as well, rub the greasy spot with some effective gall soap and leave it on for a good 10 to 20 minutes. Then wash the garment at the highest possible temperature (observe the washing label) in the machine. After the wash, the chocolate stain should be a thing of the past. You should also try the following household tips for removing chocolate stains:

  • Lukewarm milk is a home remedy for removing chocolate stains. Pour slightly tempered milk into a large bowl or bowl. Then soak the dirty clothes in it for a good 30 minutes. Then rinse the chocolate stain out with cold water and wash the clothing in the washing machine at the highest possible temperature.
  • You can also tackle this annoying stain with potato flour. Sprinkle this on the remaining grease stain and let it soak in well. The finely ground flour literally attracts and binds the fat molecules. After about 20 to 30 minutes you can brush the potato flour out of the stain again. Last but not least, with this household tip you have to wash the wardrobe at a high temperature in the washing machine.
  • Another possibility for this staining problem is bottled water. But it must contain carbonic acid. Pour the carbonated water generously over the dirt and let it soak in. In the meantime, you should regularly rub your finger gently over the stain. You can also use it to remove fruit stains.
  • Flour and salt also give good results and you probably have these two ingredients at home. First, sprinkle the salt on the chocolate stain and let it sit for a while. Then shake it off and sprinkle flour over it, which you also leave to work. After shaking off the flour, you can machine wash the fabric. Salt and lemon have a similar effect against red wine stains.

Remove chocolate stains from upholstered furniture

When nibbling or snacking, a chocolate crumb falls on the seating area or sofa. You quickly sit this wide and only notice the mishap later. In order to be able to clean the upholstery properly, proceed as follows: First scrape off the chocolate mass with a paring knife. Then rub the stain with a cloth, lukewarm water, and a little washing-up liquid without enlarging it or smearing it. The detergent dissolves the fat and is absorbed by the cleaning cloth. Then treat the dirt with gall soap to remove the last shadows. Finally, rub the damp area dry with absorbent towels.

Eliminate chocolate stains from velvet and silk

Silk and velvet are very sensitive fabrics, which is why the chocolate grease stain often gets stuck in the fabric. We ingest from the pharmacy is your salvation here. Rub the area with it and then wipe with lukewarm water.

Making chocolate yourself is made easy with the instructions for making chocolate at home. Everyone knows chocolate! But hardly anyone is aware of how easy it can be made with just a few ingredients. Best of all, chocolate making is easy to do at home. You can be making and eating delicious chocolate in just a few hours!

Ingredients for the chocolate

  • 200g cocoa butter
  • 2 tablespoons cocoa powder
  • 2 teaspoons agave syrup

Accessories for making the chocolate

  • silicone mold
  • Key
  • spoon

Recipe for making the chocolate

First, you put about 200g of cocoa butter in a bowl and start to stir it. Gradually add the cocoa powder and stir until you get a liquid consistency. Then you add about 2 teaspoons of agave syrup and stir everything until you get a liquid chocolate-like mass. Alternatively, you can use honey instead of thick juice.

Individual decoration of the chocolate

Now comes the part where you decide how your chocolate will taste afterward. In this step, you put the desired amount of your extra ingredients in the bowl and distribute the whole thing. Fruits such as raisins or cranberries are suitable as ingredients, but you can also add nuts or slivers of almonds to your chocolate and decorate it according to your own individual taste.

At this point, you can let your imagination run wild and add whatever ingredients you want later on in your chocolate. There are no limits, you can also create your own combinations, e.g. with pistachio nuts or salt. You decide how your chocolate will look and taste afterward!

When you’re done and your chocolate is fully mixed and runny, pour all of the liquid into a mold of your choice. Of course, you can use any mold you have in your kitchen for this. In order to be able to easily remove the chocolate from the mold later, we recommend using a silicone mold with the appropriate areas the size of a praline. So you can easily share your chocolate later with your friends or give it away.

Now your work is finished and you can put the silicone mold filled with liquid chocolate in your fridge. The cold that prevails there hardens the chocolate and you can eat it after just a few hours.

Enjoy the chocolate

Once the chocolate has hardened, we simply push it out of the silicone mold. Homemade chocolate makes a great gift because individual tastes can be accommodated by adding the ingredients during production. The chocolate must be kept in a cool place for longer storage!