Tag

cook

Browsing

Meat is the most common food cooked and eaten in all countries. But how to make sure that the meat is not dry, or how not to forget about it and then not be content with “coal”? What is better to serve as a side dish and what sauce to season?

  1. Always cook meat at room temperature – let it rest for an hour after the refrigerator, then the meat will be juicier and the roasting will be more predictable.
  2. The dishes are simple: a frying pan or a grill – it doesn’t matter. This also does not affect the taste. But it is still very important – the dishes must be heavy enough so that the pan can gain maximum energy and heat. If we use a very light frying pan, then it keeps little heat and as a result, when we spread the steak, it loses its power very quickly, and we get low-quality frying: the meat can give juice, and then we get not a fried steak, but its likeness!
  3. Heat the pan: the first smoke from the pan will be the signal for cooking. If you have one, you can proceed.
  4. Well-cooked meat goes well with a sauce based on ripe tomatoes, garlic, and cilantro. As a side dish, we offer boiled basmati rice with butter and a salad of fresh cucumbers and tomatoes with fragrant cilantro, red onion, and olive oil. Also, potatoes fried with onions go well with meat.
  5. But everyone’s favorite side dish for meat is vegetables fried over an open fire: eggplants, zucchini, tomatoes, and bell peppers.

How to choose good meat

On the market

  • The first thing you should pay attention to is the color of the meat. It should be deep red. The color may vary: fresh beef is just red, lamb is a little darker, pork is pink, veal is deep pink.
    Take a closer look at the color of fat and bones. Some unscrupulous sellers refresh stale meat by soaking it in a solution of potassium permanganate. In this case, the fat will be pinkish, and the bones will be yellow. Very yellow fat is a sign of an old animal. This meat will be tough and will take much longer to cook. Good young beef has white fat and crumbles, and fresh pork has white-pink elastic layers of fat.
  • Do not be afraid to taste the meat with your finger: it should spring back when pressed.
  • Another important nuance is the smell. If you even feel a subtle unpleasant scent, go to another seller. But there is a subtlety here: for example, the meat of non-castrated pigs can look and smell just perfect when raw, and when frying will give a terrible stench. Ask the butcher to cut a small piece and light it with a lighter. If it smells like barbecue, you can take it.

In the shop

  • In the store, the situation is different: in most cases, meat is now sold in vacuum packaging. The main thing is that it is not swollen.
    The piece of meat must be solid and of the correct thickness. For example, for ribeye, it is 2.5-3 centimeters.
  • After unpacking, the meat must be allowed to breathe for 15-20 minutes, and it is better to wrap it in parchment and leave it overnight: in the morning you will see a significant color difference.
  • But it is better not to buy ready-made meat in marinades – not the freshest pieces are most often used there.

Cooking

  • The steaks are best grilled on an open grill, but a grill pan will work at home.
  • Take the meat out of the refrigerator one hour before cooking and let it sit at room temperature.
  • For Medium roasting, first crust on both sides and then roast the meat for another 2-3 minutes on each side. You can turn it over every minute – so the juices are better distributed inside.
    If cooking in a skillet, add fresh thyme, rosemary, and garlic during frying, and at the very end add a lump of butter (3 x 3 cm).
  • Transfer the meat to a baking sheet with a wire rack and let it rest for 4-5 minutes. It is now that the meat can be salted.
  • Serve the steak with a light green salad or mint avocado, seasoned with lemon juice and olive oil.

What’s better than a sumptuous marbled steak? – Only properly fried marbled steak.

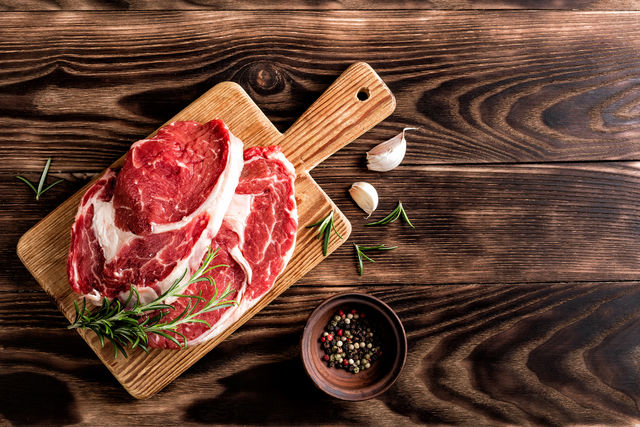
Before we start distributing useful tips, and you start frying delicious beef, let’s remember that a steak is a proportional and beautiful piece of meat suitable for frying, which is at least 2.5 cm thick. permeated with thin veins of fat and creating marbling praised by poets from cooking, makes it possible to cook the juiciest tender and mouth-watering steak in the world.

  1. What kind of meat to take?

In fact, in addition to premium cuts like Ribeye, which is a thick rim, and Striploin, this, in turn, is a thin rim, as well as fillet Mignon, the carcass of a marble goby is rich in a variety of pieces of excellent meat, suitable for frying in a pan and grilling … The main differences between premium marbled meat and alternative parts of the carcass can be considered the ease of processing and cutting of the steak, the softness of the resulting steak.

That is, by choosing the classic part of the carcass, you are guaranteed to get even, proportional steaks with a luxurious taste and aroma. These are delightfully tender and juicy pieces of marble goby that are perfect in both skillet and grill.

When choosing premium cuts – rump, flank, shoulder fillet, and some other parts, be sure to pay attention to the special instructions of the manufacturer and seller. Since each piece of alternative beef can be used for different types of cooking. You should be interested in the line: for frying, for grilling. If such a line is present, then you can safely purchase delicious marbled meat and cook your favorite steaks. The price of such meat will be lower, and sometimes several times lower than the classic cuts. Don’t let that scare you. This does not make the meat less tasty. In contrast, many alternative steaks have a richer, more “beef” flavor. So, separate the dense fat layers from the meat pulp, cut the meat into steaks across the fibers and you can send them to fry. Wait a minute …

  1. The degree of roasting or how not to spoil an excellent steak?

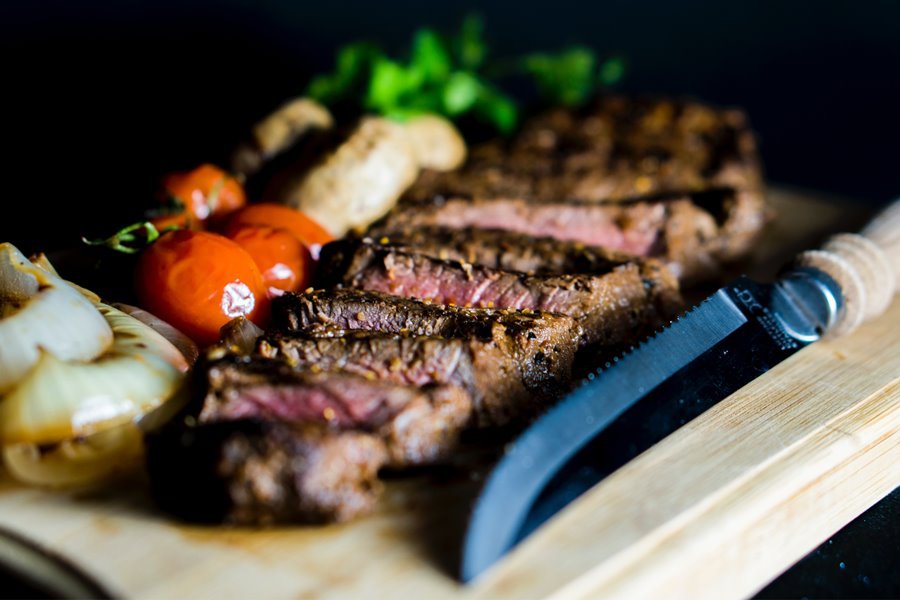
At the bottom of the blog, you can check out a photo that shows slices of steaks of various degrees of roast. The degree of roasting you need can be determined visually, as well as knowing how much time you need to create just such a meat. Chefs and true gourmets prefer what is called “meat with blood”, that is, the degree of roasting Rare and Medium Rare. However, let’s take a look at the table.

Recommended cooking levels for steaks:

Blue – the so-called raw roast (no more than 2-3 minutes), the meat inside has a temperature of no higher than 39-40 ° C.

Rare is practically uncooked meat (only 3-4 minutes to cook). However, there are many connoisseurs of just such steaks, fried on the outside and red on the inside. t ° of meat, in this case, is 45-48 ° C

Medium rare is lightly fried meat with juice that has a deep pink color. (It will take 5-6 minutes to cook), meat temperature will be about 48-53 ° C

Medium – medium-rare meat, the most preferred degree of roasting, in which the meat retains the light pink juice inside. (It will take 6-7 minutes to cook), the temperature of the meat will be 53-57 ° C

Medium Well is normally fried meat with clear juice inside (it will take 8-9 minutes to fry), meat temperature is about 57-62 ° C

Well Done is a slice of well-done meat that has a grayish to brown color without red and pink interlayers, practically without clear juice. It will take about 10 minutes or more to cook, and the meat temperature will be 65 ° C or more.

Choose the degree of roast you need, try, experiment, find exactly yours, and ignore popular opinions. If you like perfectly cooked meat, do it that way, if you are a fan of almost raw beef, fry the steak for no more than 3-4 minutes and have fun.

  1. How to fry the right steak?
  • The thickness of a traditional steak, at which you can accurately determine the cooking time and get an excellent result of at least 2.5 cm.
  • Taking meat out of the refrigerator, leave it to lie on a plate for 20-25 minutes. The fact is that cold meat behaves differently when heated and you risk spoiling the taste of the dish.
  • The pan must be heated as much as possible before frying.
  • You can put your favorite vegetable oil on the steak itself, or you can spread it over the pan. When sending meat to the grill, you do not need to grease it. Do not salt or pepper!
  • Fry the steak on each side to the degree you need, an average of 3 minutes, then reduce the heat slightly and brown the meat a little more on each side.
  • Place the steak on a preheated plate and let it rest for a short time. The warmth of the plate and a few minutes of rest will keep the meat warm and fully reveal its luxurious taste and juiciness.
  • Season with salt and pepper.

Your steak is ready! Enjoy your meal!

To prepare a delicious juicy steak, you need two things – good meat and knowledge of a dozen nuances. We share the secrets of how to fry the most perfect steak.

  1. The steak should be no thinner than 2.5 cm. If you are preparing steaks from the tenderloin (filet mignon), cut it into pieces at least 5 cm thick.
  2. Before frying the steak, let the meat stand at room temperature for 1-2 hours. This will make it much easier for you to control the process and the degree of roasting.
  3. To grill the steaks, use a cast-iron ribbed grill pan that you heat until a light haze appears. Do not add oil to the pan to avoid smoke in the kitchen.
  4. The surface of the steaks must be perfectly dry. Use paper towels to dry the meat. And do not try to wash the steaks, you can only wipe them off.
  5. Just before placing the steaks in the pan, season them with salt and pepper on both sides and then begin to fry. Do not put more than two steaks in one pan, otherwise, the temperature inside the pan will drop sharply, and the meat will begin to stew in its own juice instead of frying, forming a golden-brown crust that reliably keeps all the meat juices inside the steak.
  6. Fry the steaks for 1.5-2.5 minutes on each side. If you want a nice mesh on each side, fry it for 1.5 minutes in a grooved grill pan, then turn it clockwise 90 degrees, fry for another 30-45 seconds, and then turn it over to the other side.
  7. Use tongs to turn the steaks only, and never with a fork, so that the juice does not leak out.
  8. Before flipping the steak to the other side, make sure that the first side is sufficiently browned and the steak is nicely colored. If the meat does not lag behind the pan, then the crust has not yet formed, and you need to give the steak some more time.
  9. When the steaks are fried on both sides, place them in a baking container, cover the container with foil, and place in an oven preheated to 190 degrees for 10-12 minutes (filet mignon 5 cm thick) or 7-8 minutes (ribeye/sirloin steaks). If you want more pronounced frying, you can for all 15 and 10 minutes, respectively.
  10. After this time, remove the steaks from the oven and, without removing the foil, let them “rest” for a minute, then boldly serve.

Whether you are cooking marbled meat for the first time, or with regular consistency, read the answers to the questions in this section. You will definitely find something interesting for yourself.

Step 1. Remove the meat from the refrigerator a few hours before cooking and place it on an absorbent surface. The meat should warm up to room temperature so that it is evenly fried throughout the entire volume during cooking.

Step 2. If you are cooking a steak in a cast-iron skillet, put the pan on the fire and heat it well. If you prefer a steak more fried, then preheat the oven to a temperature of 200 ̊С, it is better if there is a grate in the oven. If you are grilling a steak, turn on the grill or light the coals and heat the grate well on which you will cook the steak.

Step 3. Brush the meat with a little oil, pepper and salt with coarse sea salt.

Step 4. Wipe the pan or grill rack with a waffle towel with a little oil, when the pan starts to “smoke” you can put the steak on the wire rack.

Step 5. Fry the steak on each side for 1.5-2 minutes, then place the steak on the edge, as if sealing it on all sides.

Step 6. If you are cooking a steak in a cast-iron skillet, while the steak is on the rib, add a little butter, crushed garlic, and a couple of thyme sprigs into the skillet. Dip the steak in boiling oil on each side.

Step 7. If you prefer less roast, then the steak can be removed from the pan or wire rack, but not immediately onto the plate. Let the meat rest for a few minutes, so that all the meat juice inside the steak is distributed throughout the entire volume.

Step 8. If you prefer the steak more cooked, then hold it on the wire rack for a few more minutes, turning it constantly so that it does not burn. If there is an oven, then place it in the oven for 4-6 minutes, then take it out and also let it rest.

Step 9. Then serve the steak on a plate, add salt and pepper and voila, the steak is ready!

To get a taste of the steak, forget about the sauce, at least for the first couple of slices. Add a little more salt. As a side dish for me, the best option is grilled vegetables. But anything can go with a steak, even pasta!

Is it possible to cook perfect steaks at home while being self-isolated? It is possible, and even necessary.

  1. Choose the fattest meat. Do not be afraid of white layers, they have all the taste. For example, striploin: is moderately fatty, has a rich meaty flavor, and is cheaper than a ribeye.
  2. After buying Dry Aged meat in a store, keep it in a vacuum or store package for another five days. The meat will then exactly “reach” the desired condition of softness. Do not be afraid if you have everything in order with the temperature in the refrigerator, nothing will happen to the meat.
  3. Remove the steaks an hour before cooking, cut 2.5-3 cm, cover with cling film, preferably gauze and let them reach room temperature.
  4. Take not a ribbed frying pan, but an ordinary solid one – heavy, cast iron, with a thick bottom, which holds and transmits heat well.
  5. If you have a regular electric stove (0-9), steaks should be cooked for 8. Heat a frying pan and pour butter: 50/50 oil and butter, quite a lot, 30 grams each. Next, put a sprig of thyme or rosemary, a couple of cloves, crushed by hand, garlic.
  6. Salt the steaks just before frying. Not in 10 minutes – we do not need marinated meat, we need the salt to react with the meat and give a perfect crust
  7. Put the steaks and add the temperature. Fry for 2 minutes on each side, uncovered. Otherwise, instead of steak, you will get a piece of stewed beef. If you want a higher degree of roasting, lower the temperature and increase the time, but in the end, still, give a boost for the crust.
  8. Let the steak rest for 5 minutes and you can serve. The perfect side dish is vegetables: broccoli, onions, tomatoes, mushrooms – anything!

Steaks are in great demand in restaurants because for some reason everyone thinks that it is much more difficult to cook them at home than other dishes. In fact, it is not that difficult. It is enough just to know some subtleties and follow some tips.

By the way, these tips concern not only the cooking process itself but also the correct choice of meat. Any chef will tell you that the right choice of meat is 80% of success.

  1. For the steak to be tender, the meat must be aged. If you fry a fresh meat steak right after slaughtering, the steak will be tough. This is due to the fact that the muscle in the piece of meat is not relaxed. When you buy meat in a supermarket, look not at the date of packaging, but at the date of slaughter (it must also be indicated), count 20-25 days from it – this will be the date from which you can fry the steak. Of course, we are talking about pieces of meat in vacuum packaging – for example, marbled beef.
  2. The steak should be no thinner than 2.5 cm.If you are preparing steaks from the tenderloin (filet mignon), cut it into pieces at least 5 cm thick.
  3. Leave the meat at room temperature for two hours before frying the steak. This will make it much easier for you to control the process and the degree of roasting.
  4. To grill the steaks, use a cast iron ribbed grill pan that you heat until a light haze appears. Do not add oil to the pan. Firstly, this will make the steak “dry”, and secondly, this way you will avoid smoke in the kitchen.
  5. The surface of the steaks must be perfectly dry. Use paper towels to dry the meat. And do not try to wash the steaks! They can only be wiped off.
  6. Just before placing the steaks in the pan, season them with salt and pepper on both sides and then begin to fry. Don’t put more than two steaks in one pan. This will cause the temperature inside the pan to drop sharply, and the meat will begin to stew in its own juice instead of frying, forming a golden brown crust that reliably keeps all the meat juices inside the steak.
  7. Sear the steaks for 1.5-2.5 minutes on each side. If you want a nice mesh on each side, fry one side for 1.5 minutes in a grooved grill pan, then turn clockwise 90 degrees, fry for another 30–45 seconds, and then turn to the other side.
  8. Before turning the steak to the other side, make sure that the first side is sufficiently browned and the steak is beautifully colored. If the meat does not lag behind the pan, then the crust has not yet formed and you need to give the steak a little more time.
  9. Use tongs to turn steaks, never with a fork. The fork pierces the meat, causing all the juice to drain out.
  10. When the steaks are fried on both sides, place them in a baking container, cover the container with foil and place in an oven preheated to 190 degrees for 10-12 minutes (filet mignon 5 cm thick) or for 7-8 minutes (ribeye / striploin) … If you want a more pronounced frying, you can for all 15 and 10 minutes, respectively.
  11. After this time, take the steaks out of the oven and, without removing the foil, let them “rest” for a minute, then boldly serve.

There are certain subtleties that relate to the choice of meat and various culinary methods of toasting, the knowledge of which will help in mastering this virtuoso art. So, let’s try to cook meat steak at home!

  1. The most important rule of steak cooking is choosing the right meat. Initially, steaks were prepared from beef, so if they say “steak”, then they mean exactly a dish of beef. For other meat, clarification is required, so in this case, they write pork, chicken, salmon steak, and so on. But true steak connoisseurs argue that steaks made from any meat other than beef are not steaks.
  2. They say that the most delicious steaks are obtained from slightly dried meat. The most important thing is that the meat is not steamed, otherwise, the steak will turn out to be tough, and its taste, which is just provided by fermentation, will not be so rich and rich.
  3. The meat should be removed from the refrigerator about an hour before cooking to bring it to room temperature. This is necessary to evenly grill the steak.
  4. You can quickly and deliciously cook a steak in the oven, the Josper charcoal grill oven, on an open grill, and on a grill pan in which the meat does not burn and acquires an appetizing pattern.
  5. Some cooks mix the two oils for the best result, but steaks are ideal in ghee that does not burn and is mild in flavor.
  6. The main rule for preparing a steak is that at first it is fried very quickly in a hot pan until crusty, and then it is brought to readiness over a slower heat.
  7. The fact is that the protein curls up under the influence of high temperature and does not allow the juice to flow out of the meat.
  8. Before frying, some cooks dry the steak for an hour in the oven at a temperature of 60 ° C, since the dried meat instantly gives a dense golden brown crust when frying. If you neglect this rule, the steak will be dry and tough.
  9. When doing this, do not forget to fry the sides of the steak as well, holding it for convenience with meat tongs.
  10. A steak covered with a dense crust on all sides will cook well and remain juicy. This is one of the main steak cooking tricks.
  11. Do not overdo it with the fire and do not bring the pan to the point that it starts to smoke, because if the steak burns, you will not be able to continue frying, and it will turn out raw.
  12. An important secret of steak preparation is to give it a “rest” and recover from intense frying. To do this, place a piece of butter on the steak, cover it loosely with foil and leave for 10 minutes. The longer the steak “rests”, the tastier, more aromatic, and tender it will turn out.

Introduction: Exploring Eswatini Cuisine

Eswatini, located in southern Africa, is a country rich in cultural heritage and history that is reflected in its cuisine. Traditional Eswatini dishes are known for their bold flavors, unique combinations, and the use of local ingredients such as cornmeal, vegetables, meat, and dairy products. If you are looking to broaden your culinary horizons and learn how to cook traditional Eswatini dishes at home, there are a few steps you can take to get started.

Researching Traditional Eswatini Dishes

Before you begin cooking Eswatini dishes, it is important to familiarize yourself with the cuisine. Researching traditional Eswatini dishes can be done through online resources or by speaking with people who are familiar with the cuisine. You can also visit local Eswatini restaurants or attend cultural events that feature Eswatini cuisine. As you research traditional Eswatini dishes, pay attention to the ingredients and cooking methods used in each dish.

Essential Ingredients for Eswatini Cooking

Traditional Eswatini dishes use a variety of ingredients that are readily available in most grocery stores. Cornmeal, also known as mealie meal, is a staple ingredient in Eswatini cuisine and is used to make dishes such as pap, a porridge-like dish. Other essential ingredients include beans, lentils, vegetables, meat, poultry, and fish. Dairy products such as cheese and yogurt are also used in some dishes. When shopping for ingredients, look for locally sourced and fresh produce to ensure the best quality and flavor.

Tools and Equipment for Eswatini Cooking

To cook traditional Eswatini dishes, you will need basic kitchen tools and equipment such as pots, pans, knives, cutting boards, and utensils. A mortar and pestle is also useful for grinding spices and herbs used in many Eswatini dishes. Traditional cooking methods such as open fire cooking and steaming are still used in many households in Eswatini. If you have access to an outdoor grill or oven, you can also use these to cook Eswatini dishes.

Step-by-Step Guide to Cooking Eswatini Dishes

To cook Eswatini dishes, start by gathering all the necessary ingredients and tools. Follow the recipe instructions carefully, paying attention to cooking times and temperatures. Many Eswatini dishes require slow cooking, so be patient and allow enough time for the dish to cook properly. As you become more familiar with the cuisine, feel free to experiment with different spices and ingredients to create your own unique twist on traditional Eswatini dishes.

Common Mistakes to Avoid in Eswatini Cooking

One common mistake in Eswatini cooking is overcooking or undercooking dishes. It is important to follow the recipe instructions carefully and check the dish regularly to ensure that it is cooking properly. Another mistake is using too much or too little seasoning, which can impact the overall flavor of the dish. Finally, it is important to use fresh ingredients and avoid using ingredients that are past their expiration date.

Tips for Perfecting Eswatini Dishes

To perfect Eswatini dishes, practice is key. Take the time to understand the flavors and ingredients used in the cuisine and experiment with different spices and combinations. Another tip is to cook with patience and allow enough time for the dish to cook properly. Finally, don’t be afraid to ask for feedback from others who have experience with Eswatini cuisine to improve your cooking skills.

Conclusion: Sharing the Flavors of Eswatini with Others

Learning how to cook traditional Eswatini dishes at home is an exciting way to explore new flavors and cultures. By researching traditional Eswatini dishes, gathering the necessary ingredients and tools, and following recipe instructions carefully, you can create delicious and authentic Eswatini dishes at home. Whether you are cooking for yourself or sharing the flavors of Eswatini with others, cooking traditional Eswatini dishes is a fun and rewarding experience.