Tag

cooking

Browsing

If you want to prepare a salad, you should follow a few guidelines. In this article we will show you which five mistakes you should better avoid.

Salads can provide a refreshing and nutritious meal within a balanced diet. Depending on the ingredients, they provide you with various vitamins and minerals, as well as fiber. There are a few things to keep in mind so that you can absorb as many nutrients as possible and prepare a delicious salad.

For a salad that is as sustainable as possible, we recommend that you first pay attention to organic quality when buying the ingredients. In this way you avoid chemical-synthetic pesticides and synthetic fertilizers. If you also buy regionally and seasonally, you avoid long transport routes and the associated CO2 emissions.

Mistake #1 in salad preparation: Washing wrong

In order to prepare a nutrient-rich salad, you should avoid washing the lettuce leaves immediately after chopping them. After chopping, the lettuce has a particularly large number of interfaces. If you wash it exactly then, it loses an unnecessarily large number of nutrients through contact with water. It is best to detach the leaves from the stalk by plucking them and wash them whole. Even then, you should only expose the lettuce leaves to the water for as long as necessary so that the lettuce loses as few nutrients as possible.

Mistake #2: Not drying lettuce

In order to prepare delicious, crunchy lettuce, you should always dry it as well as possible after washing. If you leave it wet, it can collapse faster. Drying also has the advantage that the salad dressing sticks better to the leaves and the sauce is less likely to pool with leftover water at the bottom of the bowl. You can gently dry the lettuce with a clean kitchen towel or in a salad spinner.

Cooking the salad: Mistake #3

The third mistake when preparing salad is to let too much air get into the salad. Some vitamins are particularly sensitive to oxygen in the air. It is therefore better to pluck the lettuce than cut it when chopping it up. When you cut, you break up the cell structures. On the one hand, the valuable plant sap can escape and on the other hand, the interfaces have direct contact with the air.

When you pluck, the lettuce often tears along the veins of the leaves, which is gentle on the lettuce. If you don’t want to eat the salad immediately after preparing it, store the salad in a tightly sealed container and if possible in a cool place.

Mistake #4: Wrong timing for dressing

If possible, add your salad dressing to the salad just before eating. Otherwise, the lettuce may lose some of its crispness and collapse and become mushy. This is mainly due to the salt that is usually contained in the dressings. This draws the water out of the lettuce.

Mistake #5: Too little variety in the salad cooking

From a nutritional point of view, it makes sense if you make your salad varied and diverse. This means that you should use or combine more nutrient-rich types of lettuce such as dark green and red lettuce, lamb’s lettuce, rocket or spinach.

It is best to add fresh herbs, other types of vegetables, sprouts or wild plants such as nettles, wild garlic or dandelion that you have collected yourself. This is how you add nutrients to your salad. You can also supplement your salad with protein-rich foods. Foods like tempeh, nuts, or beans will keep you full longer.

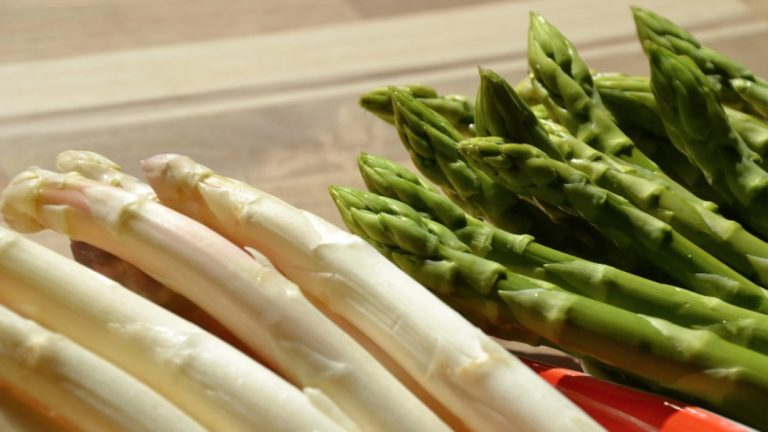
Peeling green asparagus is quick, but in many cases it is not necessary. We will show you what you have to consider and how to properly process green asparagus.

In contrast to white asparagus, green asparagus are not pricked as soon as the head sticks out of the ground, but continues to grow in the sun. That is why green asparagus does not need black foil. Sunlight gives it its green colour, plus more healthy vitamins and a stronger flavor than white asparagus.

Since green asparagus is less expensive to grow and harvest than white, it is usually a little cheaper. It is also less complicated to prepare. Because of its thin skin, you usually don’t have to peel green asparagus! If you buy it seasonally, you can also be sure that its growth has not been artificially accelerated by heaters or thermal foils. So there is a lot to be said for accessing seasonal green asparagus.

Note: The use of foil when growing white asparagus makes it a real problem for the environment. Not only does the film pollute the environment during its production and disposal, it also destroys the natural habitat of many endangered bird species.

Peel, cut, or break green asparagus?

Whether or not you need to peel green asparagus depends on how it was harvested. If the bottom third is purple-whitish and hard, be sure to peel that part and cut off the dried ends. The white rim has not yet seen sunlight and will still be very firm and brittle after cooking.

When the asparagus is green all the way through, just cut off the end an inch. You should never peel the green and soft asparagus skin. Most of the vitamins are just under the skin. If the asparagus spears are still very thick and the skin feels hard, peel only the lower third.

You can also break green asparagus instead of cutting them. Since the inedible part cannot be broken off, the asparagus will break off above the woody end. So you don’t have to use a peeler or knife and you can prepare your asparagus quickly and easily. For this, the asparagus must be very fresh and crisp.

Green asparagus tastes best fresh from the market. If necessary, you can wrap it in a damp cloth in the fridge and keep it fresh for a few days.

In order to avoid long transport routes and to protect the environment and climate, you should only buy asparagus regionally and seasonally. To be sure your asparagus is chemical-synthetic free, buy organic asparagus.

Boil green asparagus

The easiest way to prepare green asparagus is in boiling salted water. The cooking time is significantly shorter than with white asparagus and, depending on the thickness, is only around eight minutes.

In order for the asparagus to keep its bright green color, you can also add some white vinegar or lemon juice to the cooking water and shock the asparagus with ice water when they are done.

Or you can simply fry green asparagus in a pan with some cooking oil or fat. Cut into fine pieces, it is cooked within five minutes.

Of course, asparagus can also be grilled or put in the oven as an asparagus casserole. Green asparagus soup tastes particularly delicious. You can also use the woody ends that you removed earlier and boil them as a broth for the soup. In this way you use every gram of your precious asparagus and there are no leftovers that you have to throw away at the end.

You don’t have to be vegan to want to give up eggs. Substituting them isn’t difficult, but which vegan egg substitute is best for what? Foodnerdy has put together a range of foods and products that you can use to easily replace eggs.

In principle, vegans do not consume any animal products – and of course no eggs either. But many vegetarians or omnivores also want to consume fewer or no eggs. There are numerous reasons for this: On the one hand, there are the problematic housing conditions for laying hens. On the other hand, both changing nutritional recommendations and regular egg scandals unsettle us as to whether eggs are really that healthy.

6 ideas for vegan egg substitutes

If you are looking for a vegan egg substitute for the kitchen, you have many options. Only the “classic” boiled egg cannot be conjured up with plant-based alternatives. For everything else there are – among others – the following tricks and products.

Fruit puree from avocado, banana, apple sauce replaces eggs

As a binder when baking, fruit puree is ideal as a vegan egg substitute. Pureed avocados are preferred in savory dishes as “vegan eggs”, mashed bananas or apple sauce in baking.

Fruit purees are one of the easiest ways to replace eggs: after all, you can buy fruit everywhere and you can easily make applesauce yourself.

When it comes to quantity, it means experimenting a bit. The amount of fruit puree you need to replace an egg depends on the other ingredients and the method of preparation. Generally speaking, half a mashed banana or a tablespoon of applesauce replaces one egg. While you can often taste bananas as a vegan egg substitute, applesauce is relatively tasteless.

Incidentally, an “egg” can also be prepared with avocados as a topping for bread: For this, you need the Indian salt “Kala Namak” for the avocado, which contains hydrogen sulfide and therefore tastes like eggs. You can find it in health food stores or health food stores. This salt is also suitable, for example, to create an egg taste in the salad – or even to prepare vegan “scrambled eggs”.

Tip: If the recipe calls for egg whites, then there are (at least) two options: either a mixture of sparkling water, oil, flour, and baking powder – or “aquafaba”, chickpea water.

Linseed as a vegan egg substitute for savory pastries

Flaxseed is a suitable vegan egg substitute for bread and other savory pastries. Linseed is available in health food stores and health food stores, but also in the bakery section of the supermarket. About one tablespoon of flaxseed mixed with three tablespoons of water equals one egg.

Chickpea flour and soy flour mixed with water (two tablespoons of flour to two tablespoons of water) are also suitable as binding agents in baked goods.

Tofu – egg substitute also for vegan “scrambled eggs”

As a tasty egg substitute, tofu is suitable for the preparation of vegan “scrambled eggs”. There are countless different ways to do this. The type of tofu used and the other ingredients depend on individual taste.

To replace an egg in the batter when baking, puree about 75 grams of silken tofu and mix it into the batter. Pureed silken tofu is also suitable as an egg alternative in quiches or casseroles, as it sets like real eggs. You can even use it for cream desserts – but then you should balance the grainy soy taste with something sour.

Tofu is now available in almost every supermarket, but you can definitely buy it in all sorts of variations in health food stores and health food stores.

“Scrambled eggs” made from chickpeas and pasta

This vegan egg substitute is a bit more complex than just using tofu:

To do this, puree the cooked pasta until it is chunky.
Then you puree chickpeas with turmeric until a creamy mass forms.
You mix both and season the mass (very important for egg taste: Kala Namak).
Then you fry the whole thing in a pan with onions and vegetables as “scrambled eggs”.

Tip: Without heating it is more of a vegan “egg salad” (vegan mayo is also suitable).

Vegan egg substitute powder: the all-rounder?

You can get powdered vegan egg substitutes in many health food stores, organic shops or online shops. You can find a large selection of organic egg replacers at Vekoop, Vantastic Foods or Amazon, for example.

In our taste test, you can find out how vegan egg substitute in powder form can taste in the end using Greenforce’s “Easy to mix vegan egg” as an example.

Mix the powder with water, depending on the amount you need, and then add it to the other ingredients. This egg substitute is suitable for both sweet and savory dishes.

If you want an egg substitute powder, we at Utopia recommend organic products. Because organic cultivation protects soil, water and biodiversity. Incidentally, some products contain ingredients from palm oil (e.g. monoglyceride), which we also view critically. In a test, the consumer advice center also criticized the fact that most egg substitute powders contain hardly any nutrients. They contain all sorts of additives such as thickeners, emulsifiers and acidifiers.

Egg snow without eggs

By the way, you can use chickpea water (the water from a glass/can or the water that is left over after boiling dried chickpeas) to make vegan beaten egg whites – it will be just as firm as real ones. All you have to do is froth the chickpea water with a whisk or hand mixer and add a little baking powder or locust bean gum. The whole thing is called aquafaba – or vegan egg snow.

The vegan egg is “none”

Incidentally, it doesn’t always have to be an egg or a vegan egg substitute: We’ve found that in many recipes that call for an egg, you can simply omit the egg entirely or replace it with oil or a plant-based drink at the end, especially with the Bake. Just try it!

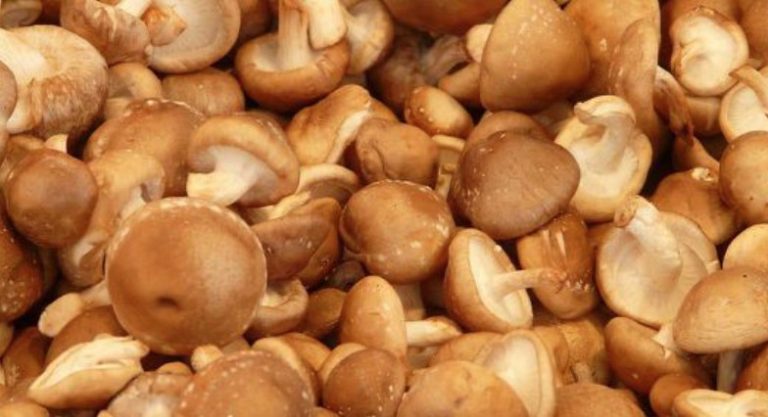
If you want to prepare shiitake mushrooms, there are a few things to consider. We will tell you how best to clean, cook and store the aromatic mushroom.

Shiitake mushrooms have been known in Asia for two thousand years as a food and medicinal product. The edible mushroom is very aromatic and a popular delicacy. It is used in a variety of ways, especially in Chinese and Japanese cuisine.

Cultivating mushrooms is not difficult and shiitake can also be cultivated without any problems in our climate zone. They grow particularly well on the deadwood of oak and hornbeam. The first harvest is possible after about 12 months. After that, you can continue harvesting from the same wood for a few more years.

Things to know about shiitake mushrooms

When you buy shiitake, it is best to find out about the origin and quality of the mushrooms. Make sure the mushrooms are organic and locally sourced. In this country, shiitake mushrooms are often imported from Asia. However, such products have a long transport route behind them and cause high CO2 emissions. If possible, buy the mushrooms in the mushroom season, i.e. in the fall.

Choose shiitake that look plump and juicy. You should not eat mushy specimens. Small cracks, spots or scales are also typical of the appearance of the mushrooms. You can easily rub them off when cleaning before you prepare the shiitake mushrooms.

Whether you have to wash mushrooms is a question that cannot be answered unequivocally. It is usually not recommended to wash fresh mushrooms under running water. It is enough if you wipe the shiitake mushrooms with a brush or a damp cloth. With mushrooms from the field, there is often more dirt that can only be washed off with water. In any case, make sure that the shiitake mushrooms are clean before preparing them.

Preparing shiitake mushrooms: you should pay attention to this

There are a few things to keep in mind when preparing the shiitake mushrooms:

You can get shiitake mushrooms fresh or dried. The dried mushrooms are particularly aromatic because they no longer contain any moisture. The fresh mushrooms are fleshier in consistency and slightly milder in taste.
In dried form, shiitake are used in Asia as dried mushrooms for sauces or soups. The advantage: dried, the mushrooms can be kept for many months and can also be eaten outside of the mushroom season.

The best way to store fresh shiitake mushrooms is in the fridge. Store them in an air-permeable container, paper bag, or wrapped in cotton cloth. So they can be kept for a few days. Attention: In a plastic bag, the mushrooms mold very quickly and can form toxic substances.
Traditionally, shiitake mushrooms are fried, steamed or dried. Edible mushrooms cannot be boiled. You can use small mushrooms whole. It is best to cut larger specimens into fine slices so that they can cook through.
In principle, you can also eat shiitake mushrooms raw. However, the consumer center advises against excessive consumption of raw mushrooms. They can be contaminated with pollutants and are usually difficult to digest. The consistency of the shiitake mushrooms is also very firm to the bite. If you are preparing shiitake mushrooms, you should heat them well and slice them thinly.

Prepare Shiitake Mushrooms: Easy Mushroom Skillet

This simple shiitake mushroom pan is suitable as an accompaniment to warm dishes, as a snack between meals or with fresh bread and salad. Due to the simple method of preparation, the mushrooms develop their own aroma particularly well.

Season the mushroom pan with the herbs of your choice. Parsley, chives or thyme, for example, go well with the mushrooms.

Ingredients:

200g shiitake mushrooms
50g butter or margarine
1 pinch(s) of salt
1 pinch(s) of pepper
1 handful of fresh herbs as needed

Directions:

Wipe the shiitake clean and cut into 2-inch slices. You can also fry small mushrooms whole.
Melt the butter in a frying pan. Use plant-based margarine if you want to prepare the shiitake mushrooms vegan.
Add the shiitake to the pan and stir to coat all of the mushrooms in butter.
Fry the mushrooms over medium heat for four minutes until they turn slightly brown.
Remove the mushroom pan from the heat and season the shiitake with salt and pepper.
Serve the shiitake mushroom stir-fry with your choice of chopped herbs.

Tip: You can also add variety to other mushroom dishes by preparing them with shiitake mushrooms. Simply replace the mushroom varieties in the recipe with shiitake.

Get inspired by simple recipes with chanterelles and porcini mushrooms.
Try the shiitake in a mushroom soup as an alternative to porcini mushroom soup or chanterelle soup.
A classic mushroom dish is pasta with chanterelles. You can also prepare this classic with shiitake mushrooms.
If you want something a little more unusual: Shiitake taste great in risotto. You can use our recipes for porcini mushroom risotto or chanterelle risotto as a guide.
Use the mushrooms as a meat substitute, for example in a mushroom goulash.

You can either completely replace the mushrooms in the recipes or add just a portion of the shiitake. But keep in mind that the aroma of the shiitake is very intense and can quickly mask the flavors of the other ingredients.

Do you like fish cakes? After our advice, they will definitely not leave you indifferent! 🙂

  1. For the cutlet mass, you can use any fresh or well-soaked salted fish that does not contain small bones.
  2. The most suitable fish for this purpose are cod, pike perch, haddock, catfish, pike, sea bass and burbot, motley catfish, fresh chum salmon.
  3. Fish for cutlet mass, cut into fillets without skin and bones, cut into pieces and pass through a meat grinder.
  4. Stale wheat bread soaked in milk or cold water (without a crust), salt, ground pepper are put into the resulting mass, everything is mixed well and then passed through a meat grinder for the second time.
  5. You can add raw pork fat, fat or butter to the cutlet mass from low-fat fish (50 – 100 g per 1 kg of pulp).
  6. When using raw lard and fat from the insides of the fish, it is passed through a meat grinder together with the fish; the butter is pre-softened and then mixed with the finished cutlet mass.
  7. If fat is not added to the cutlet mass from low-fat fish, then to increase the friability it is recommended to add chilled steamed fish passed through a meat grinder.
  8. To obtain a homogeneous consistency, the cutlet mass is thoroughly stirred.
  9. Cutlets, meatballs, meatballs, zrazy and rolls are prepared from the cutlet mass.
  10. For 1 kg of fish fillets, take 250 g of wheat bread from flour not lower than the first grade, 350 – 400 g of water or milk. 20 g salt, 1 g pepper.

These tips are sure to help you cook the tastiest fish ever! 🙂

  1. The fish is easier to peel if the hard fins are cut off with scissors or a knife first.
  2. When boiling fish that smells like mud, you need to add a little spicy herbs and spices to the water.
  3. To prevent the fish from falling apart during frying, it must be salted 10-15 minutes before the start of heat treatment.
  4. Fish fried in breadcrumbs looks more appetizing than fish fried in flour, but inside it is not fried enough. Therefore, in order to bring the fish to full readiness, it is necessary to put it in a preheated oven for a short time.
  5. If the broth prepared for jellied fish turns out to be cloudy, it can be clarified with egg white. To do this, it is enough to pour the protein into the chilled broth, stir, heat to a boil and hold for 15 minutes over low heat. Then let it settle and carefully, without shaking, strain the broth through a napkin.
  6. Do not cook the fish over high heat: otherwise it will become tough, and the broth will become cloudy.
  7. The fish will be tastier if you fry it in a mixture of sunflower oil and butter (both equally). Do not cover the pan – and the pieces will be covered with a crispy appetizing crust.
  8. Herring will be very tender and juicy if, after cutting, it is soaked for 40 minutes in milk or in tea infusion.
  9. Boiled fish will be very tender if fresh milk is poured into boiling water.
  10. Fish fried in foil is very tasty and juicy. The fish should be peeled, washed, salt, spices, wrapped in foil and placed in a preheated oven.

It is rare to meet a person who does not like fried fish. Thanks to our tips, you can cook fish fast, tasty and hassle-free!

  1. Fish is fried, sprinkled with salt, pepper and breaded in wheat flour.
  2. Products from the cutlet mass are also breaded in silt breadcrumbs in white breading before frying.
  3. To give the fish a more delicate flavor, you can moisten it with cold milk before breeding.
  4. Put prepared fish in a frying pan or baking sheet with well-heated fat and fry on the stove until a crispy crust forms on both sides.
  5. If the portioned pieces of fish have not been fried during the formation of the crust, they are placed in the oven for 5-7 minutes.
  6. You can fry fish in vegetable lard, hydro fat, ghee or vegetable oil.
  7. From vegetable fats the best for frying fish in this way are sunflower oil, olive oil and refined cottonseed oil.
  8. Can be used for frying fish and melted pork lard.
  9. Beef and lamb fat for frying fish in this way is usually not used, since these fats are not in harmony with the taste of the fish.
  10. The total duration of frying portions of fish is 10 – 15 minutes.
  11. Deep-fried fish is mainly fried, cut into fillets with skin or bey skin and without rib bones. The exception is small fish (navaga, smelt, hamsa, etc.), which are fried whole.
  12. Before frying, fish is breaded in flour, moistened in an egg and breaded in breadcrumbs or white breading.
  13. For deep fat, you can use vegetable oil (sunflower, cottonseed), vegetable lard, hydro fat.
  14. The best fat for deep-frying fish is a mixture of 60% hydro-fat and 40% vegetable oil, 1 since such a fat does not change its chemical composition when heated to a high temperature, as a result of which, when frying it, chad is formed, and fried products are of higher quality.
  15. The ratio of fat and simultaneously fried product in it must be at least 2: 1; the best ratio is 4: 1.
  16. Before frying, the fat is heated to a temperature of 170 -180 °.
  17. Breaded fish is dipped into the heated fat and fried until golden brown.
  18. The fried fish is quickly removed from the deep fat, transferred to a dry baking sheet or frying pan and, if the fish has not reached readiness, put it in the oven.
  19. The fish is deep-fried for 3 to 5 minutes and cooked in an oven for 5 to 7 minutes.
  20. After three to four frying times, the fat sometimes needs to be filtered through a metal sieve, as the charred particles of the breading left over from previous frying impairs the appearance of the fried fish.
  21. It is recommended to fry the fish just before serving it to the consumer.

These are the most helpful tips that you will definitely need!

  1. Fish dishes must not be cooked over high heat. As the fish broth boils, you should reduce the heat and continue cooking the fish over low heat (boiling should be, but very weak).
  2. When cooking, frozen fish can only be put in cold water.
  3. It is recommended to fry fish in a small amount of fat; it is better to use a mixture of butter and vegetable for this.
  4. To get an appetizing crust on all sides, you should not put the fish pieces in the pan tightly to each other.
  5. Small fish or cut into pieces are placed in boiling water. This is done so that it is not digested. When cooking, large fish is placed in cold water, and when the water boils, water is added as needed.
  6. Granular caviar will last longer and will not dry out if you pour a thin layer of vegetable oil into the jar with it on top and then close the jar tightly with a lid.
  7. If there is fried or boiled fish left after lunch or dinner, it can be stored in the refrigerator for no more than 1-2 days, and before serving, boiled fish should be boiled in fish broth (or water), and the fried fish should be fried one more time as usual – on both sides each piece of fish.
  8. To make fish broth tastier and more aromatic, use several types of fish when cooking it.
  9. Determining the readiness of boiled fish is simple – stick a match into it. If it easily enters the meat of the fish, then the fish is ready.

Everyone loves to eat fish, but not everyone knows how to cook it properly and tasty. Following our advice, you will have the most delicious fish!

  1. At the flounder, the head is removed with an oblique cut so that the abdomen is simultaneously opened, then the fish is gutted. After that, grab the skin on the dark side of the fish with a knife and finger and tear it off with a sharp movement, then cut off the fringe of the fins and the caudal fin, peel off the scales on the light side of the skin and thoroughly wash the fish.
  2. The carp and silver carp are cleaned of scales, the head is cut off and, without cutting the abdomen, the insides are removed, and the gills are removed from the head. After that, they are washed in cold water and cut across into portions.
  3. It is recommended to remove the skin from burbot, eel and large navaga; in small navaga, the skin may not be removed.
  4. The skin is removed only from large fish and in the manufacture of minced cutlet.
  5. In burbot, eel and catfish, the skin around the head is cut and, by separating the skin from the meat with your fingers, it is removed entirely. Then the abdomen is cut, the entrails and fins are removed, and the head is cut off. The cut fish are washed with plenty of cold water.
  6. Mackerel should be cleaned as follows: with your thumb and forefinger, take the gills from one side of the head and tear them off with a sharp movement, while part of the viscera is removed along with the gills. Then, with a sharp knife, cut along the abdomen, open and clean thoroughly. Rinse with plenty of water and soak in cold water for 10 minutes. You do not need to cut off the head, after baking or frying it will be soft and tasty.
  7. Processing zander and perch should begin with the removal of the hard dorsal fin. Pull the fin towards the head, after cutting the flesh on both sides of it. It is advisable to dip the fish in boiling water for a minute.
  8. Sauces and soups can be prepared from broth in which heads without gills, spine, rib bones were cooked; fins, tail and skin with scales. It is advisable to strain the broth.
  9. To obtain a fillet with skin and rib bones, the pulp is cut along the back of the carcass to the ribs, then cut along the spine, while cutting off the pulp with rib bones. Two fillets are obtained: one with a backbone and rib bones, the other with only rib bones. If you need to get both fillets with only rib bones, then the first is also cut from the spine. This is how fish is cut for cooking and frying in portions.
  10. Fillets of pike perch, catfish, cod, mackerel are cut into thin wide slices (one per serving), sprinkled with salt, pepper, breaded in flour, moistened in a lezon (an egg loosened with 1 tablespoon of milk) and breaded again in breadcrumbs.
  11. Portions are fried on a wire rack, medium-sized fish is fried as a whole. Before frying, place a grate over hot coals and, when it warms up, rub it with pork bacon, then put the fish and fry on both sides.
  12. Fish, fried on a spit or wire rack, is served with lemon and herbs, sauces, ketchup – tomato or kebab.

We’ve put together some important fish cooking tips for you!

  1. Before frying, the fish should be salted as follows: dilute one teaspoon of salt in a glass of cold water and pour the prepared fish with the resulting brine, drain the brine after 5-7 minutes.
  2. In order for the fish to brown well, it is recommended to dry it with a paper towel before frying.
  3. So that the fish is well browned during frying and does not burn, pork fat or butter is added to the vegetable oil.
  4. Fried fish turns out to be delicious if it is kept in milk before frying, then rolled in flour and fried in boiling vegetable oil. To prevent the fat from splashing and the fish to be fried better, cover the pan with an overturned colander.
  5. Regardless of the size, the fish is baked or fried in a highly heated oven.
  6. When frying, the fish will not fall apart if it is salted 10-15 minutes before cooking.
  7. Boiled fish is ready if its fins come off easily. Fried fish is ready if clear juice flows out when pressed with a spoon.
  8. After fish and fatty meals, you should not drink cold water.
  9. Do not store fish next to dairy products, as this can give them a fishy smell.
  10. If the dishes retained the smell of fish or onions, they should be rinsed with water and vinegar, then the smell will disappear.
  11. Herring will be tender and soft if soaked in milk.