Tag

for

Browsing

Garlic confit is a method that significantly extends the shelf life of garlic. Here you will find a simple recipe for the aromatic oil bulbs.

Confit is a good way to preserve garlic and prepare it for further processing. Making garlic confit yourself is also very easy and only takes a few minutes.

When buying garlic, look for organic quality if possible. You are supporting ecologically more sustainable agriculture that treats the earth’s natural resources with care. We particularly recommend the organic seals from Demeter, Bioland, and Naturland, as they set stricter criteria than the EU organic seal.

By the way: Even without processing it into confit, you can significantly extend the shelf life of garlic by storing it well. In another article, we show you how to store garlic properly.

Make garlic confit yourself: Here’s how

Ingredients:

3 bulbs of garlic
300 ml rapeseed oil

Directions:

Peel the garlic cloves. This is particularly easy with our tips for peeling garlic.
Place the garlic cloves in a small saucepan. Add the canola oil so that all the cloves are completely covered.
Heat the oil at low temperature. Let the garlic simmer in the warm to hot oil for 45 minutes or until the cloves are soft and lightly browned.
Then put the garlic cloves in a sufficiently large and sterilized screw-top jar and pour in enough oil to completely cover them. Complete!

Garlic confit: shelf life and further processing

Covered with enough rapeseed oil, the garlic confit will keep in the fridge for up to six months.

You can use both the preserved garlic and the oil for a variety of recipes:

Toum: Vegan Garlic Sauce Recipe
Aubergine Soup with Garlic and Herbs: A plant-based recipe
Skordalia: Greek Potato Garlic Cream Recipe
Garlic Potatoes: A recipe for the hearty side dish

You can simply process the cloves like fresh garlic. They taste a little milder than the fresh version. Garlic confit oil is good for adding a savory flavor to dishes.

Did you know that food-grade cream chargers can be used for more than just whipping your favorite dessert? You can also use them for:

  • Filling Cannoli shells
  • Cleaning funnels
  • Making meringue pies and more

This post will provide different product uses to show how versatile they are. Read on to find out.

Filling Cannoli Shells

A popular use for food-grade cream chargers is filling cannoli shells. If you have ever tried to fill them yourself, it can be tough not to break the delicate pastry shell. Food-grade cream chargers are great because they will hold up much better than a hand-held pastry bag or even an icing syringe. The best part is that they can be reused, so you do not have to worry about wasting cream.

Cleaning Funnels and Syringes

Food-grade cream chargers are great for cleaning funnels or even syringes. For example, if the tip of a funnel becomes clogged, there is no need to use a toothpick or other similar tool; charge the cream charger and use it to blow out the clog.

If you are using a syringe for dispensing icing or some other substance, food-grade cream chargers can be used to help get rid of any air bubbles that may develop in the device.

Make Meringue for Pies

Meringue is a delicious topping for pies made with either whipped cream or egg whites. If you want to make meringue using whipped cream, you need some food-grade cream chargers from Nangs Delivery and an airtight container.

To make the meringue, start by whipping the cream until it forms stiff peaks. Then, charge two cream chargers and add them to the whipped cream. Next, gently fold the charged cream into the whipped cream until fully incorporated.

Pipe Borders on Cakes

A simple way to dress up a cake is by piping a border around the edge. This can be done with either buttercream or royal icing and will add a touch of elegance to any dessert.

To pipe a border using buttercream, start by loading your pastry bag with the desired frosting color. Then, twist the top of the bag closed and insert the cream charger. Squeeze the bag until you have released the air, then charge it again. Next, pipe a thin line of frosting around the entire edge of the cake, and repeat until you have completed your border.

Adds Air to Batters

Food-grade cream chargers from Nangs Delivery can also be used to add air to batters. This is a great way to make lighter and fluffier cakes, as well as mousses and souffles.

To add air to a cake batter, start by charging two cream chargers and adding them to the bowl of your mixer. Next, turn on the mixer and beat the batter for about 30 seconds. Then, stop the mixer and fold in any additional ingredients. Repeat this process until the cake is ready to be baked.

In conclusion, food-grade cream chargers are great for whipping up desserts, filling cannoli shells, cleaning funnels and syringes, making meringue for pies, piping borders around cakes, or icing them with royal icing. They can also be used to add air to the cake batter.

Therefore, if you are looking for a versatile product that can help with all of your dessert-making needs, food-grade cream chargers from Nangs Delivery are a perfect choice. So what are you waiting for? Get baking.


Mushroom salt is versatile. It goes well with warm dishes, refines salads, or seasons your bread. We’ll tell you how to make it yourself with just three ingredients.

Mushroom salt is an interesting alternative to conventional table salt. The mushrooms give the salt an earthy, nutty note. It goes particularly well with vegetable dishes or salads, and the salt also tastes good on bread and butter.

Herb salt or chili salt are already known in many kitchens. With this mushroom salt you bring variety to your dishes. It is also a great gift for family and friends.

If you buy the ingredients, then pay attention to organic quality. Organic seals such as Demeter, Naturland, or Bioland are good indicators of ecologically sustainable cultivation. Choose the products from regional trade. This saves long transport routes and thus reduces the ecological footprint of your food.

Make mushroom salt yourself

WHO recommends eating salt in moderation. Therefore, use the mushroom salt carefully and use a salt substitute if necessary. Gomasio, Japanese sesame salt, is also suitable for this.

Ingredients:

  • 60 coarse salt
  • 60 g dried mushrooms of your choice
  • 1 teaspoon of colored peppercorns

Directions:

  • Place the mushrooms, salt, and peppercorns in a mortar or high-powered blender.
  • Grind the ingredients very finely.
  • Pour the finished mushroom salt into clean screw-top jars.

Tip: Store the mushroom salt airtight and protected from moisture. Then it can be kept practically indefinitely.

The mushroom salt consists of two main ingredients: mushrooms and salt. There are many different types of salt. In this recipe, we recommend using a fairly coarse one. Simply choose your favorite varieties for the mushrooms in this recipe. Dried porcini, oyster mushrooms or chanterelles taste particularly good.

You must dry the mushrooms before preparing the mushroom salt. You can find dried mushrooms in an organic supermarket or gourmet specialty store.

You can also collect or grow your own mushrooms. You should note a few things:

Wild mushrooms are in season in autumn. Then they grow in the forest and garden.
Choose local edible mushrooms for your recipe. In this way, you avoid high CO2 emissions due to long transport routes.
If you are collecting edible mushrooms, use mushroom identification tools.
Grow mushrooms yourself to be absolutely sure it’s the right kind.
Air or oven-dry the mushrooms. Then they have a long shelf life and you can use them for the mushroom salt.

These tips will help you slice your fish without the hassle.

  1. Fish of all types is cut in portions, except for small ones, which are also directed to the whole form by heat treatment. Partial fish, cut into fillet layers and intended for cooking, are cut with skin and vertebral bone (or with skin and rib bones) in the transverse direction, starting from the head; while holding the knife at right angles to the fish.
  2. So that during cooking the fish does not deform, the skin on each piece is cut in two or three places.
  3. Fillet-cut small fish, intended for frying and passing, is cut obliquely, while holding the knife at an angle of 30 °, trying to make the pieces wider.
  4. For cooking and frying, portions can be cut from non-stick fish (round).
  5. After removing cartilage and skin, sturgeon fish, except sterlet, are cut, starting from the tail, into wide pieces.
  6. For hodgepodge, osetrovaya fish is cut into pieces weighing 20-30 g.
  7. In this case, first of all, they use the tail part left over from cutting the fish into portioned thin pieces.
  8. After cutting, the sturgeon pieces are scalded as described on the previous page and washed with cold water.
  9. A large sterlet is cut into portioned pieces after the removal of the beetles and the plating of the fish, or they are treated with a “ring”, or prepared entirely for heat treatment.

Do you like fish cakes? After our advice, they will definitely not leave you indifferent! 🙂

  1. For the cutlet mass, you can use any fresh or well-soaked salted fish that does not contain small bones.
  2. The most suitable fish for this purpose are cod, pike perch, haddock, catfish, pike, sea bass and burbot, motley catfish, fresh chum salmon.
  3. Fish for cutlet mass, cut into fillets without skin and bones, cut into pieces and pass through a meat grinder.
  4. Stale wheat bread soaked in milk or cold water (without a crust), salt, ground pepper are put into the resulting mass, everything is mixed well and then passed through a meat grinder for the second time.
  5. You can add raw pork fat, fat or butter to the cutlet mass from low-fat fish (50 – 100 g per 1 kg of pulp).
  6. When using raw lard and fat from the insides of the fish, it is passed through a meat grinder together with the fish; the butter is pre-softened and then mixed with the finished cutlet mass.
  7. If fat is not added to the cutlet mass from low-fat fish, then to increase the friability it is recommended to add chilled steamed fish passed through a meat grinder.
  8. To obtain a homogeneous consistency, the cutlet mass is thoroughly stirred.
  9. Cutlets, meatballs, meatballs, zrazy and rolls are prepared from the cutlet mass.
  10. For 1 kg of fish fillets, take 250 g of wheat bread from flour not lower than the first grade, 350 – 400 g of water or milk. 20 g salt, 1 g pepper.

These tips are sure to help you cook the tastiest fish ever! 🙂

  1. The fish is easier to peel if the hard fins are cut off with scissors or a knife first.
  2. When boiling fish that smells like mud, you need to add a little spicy herbs and spices to the water.
  3. To prevent the fish from falling apart during frying, it must be salted 10-15 minutes before the start of heat treatment.
  4. Fish fried in breadcrumbs looks more appetizing than fish fried in flour, but inside it is not fried enough. Therefore, in order to bring the fish to full readiness, it is necessary to put it in a preheated oven for a short time.
  5. If the broth prepared for jellied fish turns out to be cloudy, it can be clarified with egg white. To do this, it is enough to pour the protein into the chilled broth, stir, heat to a boil and hold for 15 minutes over low heat. Then let it settle and carefully, without shaking, strain the broth through a napkin.
  6. Do not cook the fish over high heat: otherwise it will become tough, and the broth will become cloudy.
  7. The fish will be tastier if you fry it in a mixture of sunflower oil and butter (both equally). Do not cover the pan – and the pieces will be covered with a crispy appetizing crust.
  8. Herring will be very tender and juicy if, after cutting, it is soaked for 40 minutes in milk or in tea infusion.
  9. Boiled fish will be very tender if fresh milk is poured into boiling water.
  10. Fish fried in foil is very tasty and juicy. The fish should be peeled, washed, salt, spices, wrapped in foil and placed in a preheated oven.

It is rare to meet a person who does not like fried fish. Thanks to our tips, you can cook fish fast, tasty and hassle-free!

  1. Fish is fried, sprinkled with salt, pepper and breaded in wheat flour.
  2. Products from the cutlet mass are also breaded in silt breadcrumbs in white breading before frying.
  3. To give the fish a more delicate flavor, you can moisten it with cold milk before breeding.
  4. Put prepared fish in a frying pan or baking sheet with well-heated fat and fry on the stove until a crispy crust forms on both sides.
  5. If the portioned pieces of fish have not been fried during the formation of the crust, they are placed in the oven for 5-7 minutes.
  6. You can fry fish in vegetable lard, hydro fat, ghee or vegetable oil.
  7. From vegetable fats the best for frying fish in this way are sunflower oil, olive oil and refined cottonseed oil.
  8. Can be used for frying fish and melted pork lard.
  9. Beef and lamb fat for frying fish in this way is usually not used, since these fats are not in harmony with the taste of the fish.
  10. The total duration of frying portions of fish is 10 – 15 minutes.
  11. Deep-fried fish is mainly fried, cut into fillets with skin or bey skin and without rib bones. The exception is small fish (navaga, smelt, hamsa, etc.), which are fried whole.
  12. Before frying, fish is breaded in flour, moistened in an egg and breaded in breadcrumbs or white breading.
  13. For deep fat, you can use vegetable oil (sunflower, cottonseed), vegetable lard, hydro fat.
  14. The best fat for deep-frying fish is a mixture of 60% hydro-fat and 40% vegetable oil, 1 since such a fat does not change its chemical composition when heated to a high temperature, as a result of which, when frying it, chad is formed, and fried products are of higher quality.
  15. The ratio of fat and simultaneously fried product in it must be at least 2: 1; the best ratio is 4: 1.
  16. Before frying, the fat is heated to a temperature of 170 -180 °.
  17. Breaded fish is dipped into the heated fat and fried until golden brown.
  18. The fried fish is quickly removed from the deep fat, transferred to a dry baking sheet or frying pan and, if the fish has not reached readiness, put it in the oven.
  19. The fish is deep-fried for 3 to 5 minutes and cooked in an oven for 5 to 7 minutes.
  20. After three to four frying times, the fat sometimes needs to be filtered through a metal sieve, as the charred particles of the breading left over from previous frying impairs the appearance of the fried fish.
  21. It is recommended to fry the fish just before serving it to the consumer.

These are the most helpful tips that you will definitely need!

  1. Fish dishes must not be cooked over high heat. As the fish broth boils, you should reduce the heat and continue cooking the fish over low heat (boiling should be, but very weak).
  2. When cooking, frozen fish can only be put in cold water.
  3. It is recommended to fry fish in a small amount of fat; it is better to use a mixture of butter and vegetable for this.
  4. To get an appetizing crust on all sides, you should not put the fish pieces in the pan tightly to each other.
  5. Small fish or cut into pieces are placed in boiling water. This is done so that it is not digested. When cooking, large fish is placed in cold water, and when the water boils, water is added as needed.
  6. Granular caviar will last longer and will not dry out if you pour a thin layer of vegetable oil into the jar with it on top and then close the jar tightly with a lid.
  7. If there is fried or boiled fish left after lunch or dinner, it can be stored in the refrigerator for no more than 1-2 days, and before serving, boiled fish should be boiled in fish broth (or water), and the fried fish should be fried one more time as usual – on both sides each piece of fish.
  8. To make fish broth tastier and more aromatic, use several types of fish when cooking it.
  9. Determining the readiness of boiled fish is simple – stick a match into it. If it easily enters the meat of the fish, then the fish is ready.

Will the weather be good for the May holidays? .. You know, it doesn’t matter. True connoisseurs of “rest with taste” are ready for anything: they have already ordered the Grill Master uniform, for which the decree is only the owner’s appetite! Are you planning to join too? Then it’s time to get acquainted with useful recommendations and master the subtleties of cooking nutritious and aromatic … Light, juicy and crunchy … Ruddy, bright, striped … In general, absolutely irresistible treats on a home grill!

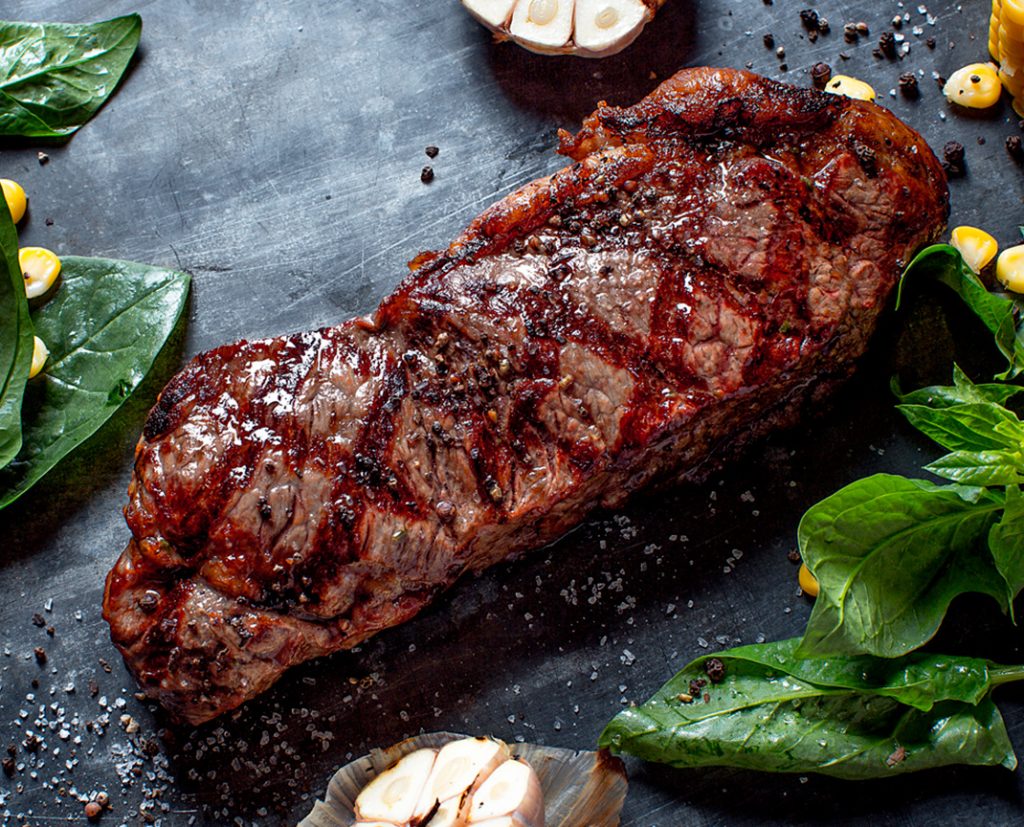
  1. Remove the meat from the refrigerator 20 minutes before grilling to allow it to warm to room temperature. Frozen meat will not cook evenly.
  2. Do not leave meat at room temperature for more than an hour, otherwise, bacteria will multiply rapidly and the meat will become less fresh. If you need to defrost meat, leave it overnight or all day in the main compartment of the refrigerator.
  3. Do not add salt until the steak is cooked or it will become tough as the salt wicks moisture away.
  4. Do not pierce the meat with a fork or prong. The juices will run away, the meat will become drier and less flavorful. Use a spatula or tongs to push or turn the pieces.
  5. When grilling, do not rush to turn it over – wait until the crust appears on the grill. If you try to lift the meat until it is tender, it may stick to the wire rack.
  6. Indirect heat is best for grilling chicken, i.e. placing the meat in a cooler grill area for a slow, soft, and even heat.
  7. Test for hardness with the simplest tool: your own finger. A poorly done steak feels soft and spongy, a medium steak is lightly served when pressed, and a well done feels firm.
  8. Do not overdo it. It is better to undercook the grill than overcook it. You can always grill the meat if it’s damp.
  9. Let the dish rest. After removing the grill from the wire rack or baking dish, wait at least 5 minutes before slicing. This will allow the juices to soak back into the meat.

Everyone loves to eat fish, but not everyone knows how to cook it properly and tasty. Following our advice, you will have the most delicious fish!

  1. At the flounder, the head is removed with an oblique cut so that the abdomen is simultaneously opened, then the fish is gutted. After that, grab the skin on the dark side of the fish with a knife and finger and tear it off with a sharp movement, then cut off the fringe of the fins and the caudal fin, peel off the scales on the light side of the skin and thoroughly wash the fish.
  2. The carp and silver carp are cleaned of scales, the head is cut off and, without cutting the abdomen, the insides are removed, and the gills are removed from the head. After that, they are washed in cold water and cut across into portions.
  3. It is recommended to remove the skin from burbot, eel and large navaga; in small navaga, the skin may not be removed.
  4. The skin is removed only from large fish and in the manufacture of minced cutlet.
  5. In burbot, eel and catfish, the skin around the head is cut and, by separating the skin from the meat with your fingers, it is removed entirely. Then the abdomen is cut, the entrails and fins are removed, and the head is cut off. The cut fish are washed with plenty of cold water.
  6. Mackerel should be cleaned as follows: with your thumb and forefinger, take the gills from one side of the head and tear them off with a sharp movement, while part of the viscera is removed along with the gills. Then, with a sharp knife, cut along the abdomen, open and clean thoroughly. Rinse with plenty of water and soak in cold water for 10 minutes. You do not need to cut off the head, after baking or frying it will be soft and tasty.
  7. Processing zander and perch should begin with the removal of the hard dorsal fin. Pull the fin towards the head, after cutting the flesh on both sides of it. It is advisable to dip the fish in boiling water for a minute.
  8. Sauces and soups can be prepared from broth in which heads without gills, spine, rib bones were cooked; fins, tail and skin with scales. It is advisable to strain the broth.
  9. To obtain a fillet with skin and rib bones, the pulp is cut along the back of the carcass to the ribs, then cut along the spine, while cutting off the pulp with rib bones. Two fillets are obtained: one with a backbone and rib bones, the other with only rib bones. If you need to get both fillets with only rib bones, then the first is also cut from the spine. This is how fish is cut for cooking and frying in portions.
  10. Fillets of pike perch, catfish, cod, mackerel are cut into thin wide slices (one per serving), sprinkled with salt, pepper, breaded in flour, moistened in a lezon (an egg loosened with 1 tablespoon of milk) and breaded again in breadcrumbs.
  11. Portions are fried on a wire rack, medium-sized fish is fried as a whole. Before frying, place a grate over hot coals and, when it warms up, rub it with pork bacon, then put the fish and fry on both sides.
  12. Fish, fried on a spit or wire rack, is served with lemon and herbs, sauces, ketchup – tomato or kebab.