Tag

making

Browsing

Hot and soothing coffee is something that hardly any of us can do without. No other drink can compare in popularity with a tonic drink.

Original: porcelain coffee filter

The porcelain coffee filter has been one of the must-have items in every home. A somewhat older generation probably still remembers the original Melitta porcelain filter that you saw every day at your grandparents. Here, brewing was still done by hand by hand. There was a kettle of water on the stove. Then it was necessary to pour boiling water over a porcelain filter, which, in turn, stood on a coffee pot. In this way, the aromas of the ground coffee inside the filter have been dissolved and an incomparable aromatic coffee has been created. This brewing method is still used today to test the quality of many coffees.

Ibrik: Traditional Coffee Brewing Tour

Ibrik represents, so to speak, the beginning of all types of coffee making. Those who wanted to make coffee always used a small, inconspicuous coffee pot. About a third of all coffee drinkers still use this method. Especially in the Arab countries, Ibrik has a lot of fans. This is where he comes from. At the same time as coffee beans, the method of preparation came to us in Europe around the 16th century. Whether in China, in the south of Russia, in Turkey, Greece or anywhere else – the centuries-old cooking method is known everywhere.

Napoletana: coffee in the process of being turned

The Napoletana is a reversible pitcher that works on a very simple principle. It’s easy to recognize from the outside.
The jug consists of two small pots. They are located directly above each other and fastened with screws. There are handles on the upper and lower ends of the reversible jug – here you can immediately see the possibility of rotation.

State-of-the-art coffee technology: fully automatic machine

The fully automatic machine is an innovative all-rounder among coffee machines. No other device can make coffee in such variety and perfection. Less coffee is brewed here than coffee is “created”.

Espresso machine – coffee in its class

Who does not know them: espresso machine. Hardly any other coffee machine is as famous as a wonderful machine that brews delicious espresso. But unlike a fully automatic machine, you still have to do it yourself. This not only leads to some work, but also helps individual taste. The degree of grind, water, and use largely determine the taste of the coffee in the end. Of course, you should invest in a decent device beforehand. A good espresso machine is the key to first-class results. What you make of it is, of course, entirely up to you.

Lifestyle coffee discs and pods

With the invention of discs and pads, the coffee industry hit the nerves of our time. Small, filled containers contain exactly the amount of coffee needed to make a delicious and aromatic coffee drink. The founders of this movement are Philips and roaster Douwe Egberts. About 10 years ago, a new way of making coffee was invented.

World of coffee: pleasure for everyone

Anyone who wants to make coffee must, of course, choose the right kind of coffee in advance. Depending on the method, it is always worth varying individual varieties and tastes. A lamb pot, for example, is best filled with dark roasted coffee beans. On the other hand, fully automatic machines can handle any type of bean well.

Brewing good coffee is not that easy – there are many factors that can influence the taste. Some of these are common knowledge, others perhaps less well known. We introduce you to ten common mistakes when making coffee.

Coffee is one of the most popular hot drinks in Germany: For many, the daily cup for breakfast and in the afternoon is a matter of course. Coffee is not only an everyday drink, but also a luxury food.

However, the enjoyment quickly becomes clouded if coffee is prepared incorrectly. It then tastes too bitter, too thin or even burnt. This is due to various mistakes that often happen when making coffee. In this article we will show you which coffee mistakes are particularly common – and how you can avoid them.

Store coffee incorrectly

You should always store coffee in a dark, cool and dry place so that it does not lose its taste and quality. Heat, moisture and oxygen damage it. Many people therefore fill the coffee into a container. It is best to leave the coffee in its original packaging, seal it well and also store it in an airtight container. Coffee isn’t in good hands in the refrigerator if air can get in: it quickly absorbs the smells of other foods and changes its taste.

Caution: Even if stored well, coffee loses its aroma over time. So only ever buy as much as you need and use it up within six to eight weeks.

The wrong type of coffee

If you don’t like your coffee, it might not be because of the machine, but because of the type. Because coffee is not just coffee: there are over 100 known types of coffee with different flavors. For example, Arabica beans have a milder and less bitter taste than the robust beans of the Robusta plant. Robusta coffee usually also has a higher caffeine content than Arabica coffee. You can find out what you personally like best by trying it out.

The wrong degree of roast

The type of bean doesn’t taste like it does in your favorite café? This could be because you use a different method of preparation. Depending on whether you brew your coffee with a filter machine, an espresso maker or a French press, different degrees of roasted coffee are recommended.

For filter coffee, you should use beans with a medium or light roast.
A dark roast is recommended for espresso.
If in doubt, seek advice from a specialist retailer or take a look at the coffee packaging. Often you will find additional information there.

Mistake: Buy conventional coffee

When buying coffee, not only pay attention to the type of beans and the degree of roasting, but also keep an eye on the production conditions. Conventional coffee is repeatedly criticized because it is often contaminated with pesticides. This is doubly problematic: On the one hand, chemical-synthetic pesticides that are spread over large areas damage the environment. On the other hand, coffee contaminated with pesticides can also have a negative effect on your own health.

It is therefore best to buy organic coffee. It comes from sustainable cultivation and you avoid harmful residues because chemical-synthetic pesticides are banned in organic farming. Various test results also suggest that organic coffee is better for your health: Oko-Test, for example, took a closer look at 22 espresso roasts and found that many beans contain critical amounts of acrylamide. The substance is produced during roasting and is considered carcinogenic.

Grind coffee beans in advance

You can get coffee either ready-ground or in the form of whole beans. Many coffee lovers swear by the second variant and like to freshly grind their coffee at home. It should then have a more intense and pleasant taste than pre-ground coffee powder.

However, this is only true if you actually grind the beans right before brewing. Grinding a whole pack of coffee beans in advance may be more convenient, but it makes little sense: ground coffee loses its aroma faster than whole coffee beans. Therefore, pre-ground coffee does not differ significantly from conventional coffee powder.

Grind bean coffee with the wrong degree of grinding

When you grind your coffee yourself at home, it’s not only important to do it fresh every time – you should also consider the correct grind size. If the powder is ground too finely, the coffee releases too many bitter substances into the water, resulting in an unpleasantly bitter taste. On the other hand, powder that is too coarse does not release enough aromas into the water – the result is a rather thin coffee with little taste.

Basically, you should use medium-fine ground beans for the filter coffee machine
and use finely ground beans for hand filter coffee.
A coarser grind is recommended for espresso makers and French presses.

Mistake: Buying unfair coffee

In addition to the organic seal, you should also look out for the Fairtrade seal on the coffee pack of your choice. Poor working conditions often prevail on coffee plantations and local coffee farmers are often badly paid by bulk buyers. Fairtrade coffee, on the other hand, is traded and exported under fair conditions: For example, fair trade sets a minimum price for coffee that is not subject to the usual price fluctuations on the world market. This guarantees that the farmers can cover their production costs and their existence is not threatened. Other goals of fair trade are to enable coffee farmers to receive further training, to strengthen their negotiating position with customers and to combat child labor on coffee plantations.

In addition to the social aspect, Fairtrade coffee is usually also more sustainable, because fair trade focuses on environmental protection and bans certain pesticides. In addition, Fairtrade companies are more careful with valuable resources such as water. Our guide gives you an overview of the best places to buy Fairtrade coffee.

Incorrect amount of ground coffee

Coffee often gets too strong or too weak because you use too much or too little powder. For a pleasant taste you can use the following rule of thumb:

You need seven to ten grams of ground coffee per cup of coffee (125 to 150 milliliters). Ten grams is approximately one heaped tablespoon. For a more accurate dosage, you can also use a special teaspoon to help you measure.

Brew coffee with water that is too hot

You should avoid this mistake especially if you brew your coffee with a French press or prepare Turkish coffee. Boiling hot water weakens the aroma of coffee and more bitter substances are released. Ultimately, the finished coffee tastes much more bitter.

It is better to use water with a temperature below 100 degrees Celsius for these types of preparation; 90 to 95 degrees are ideal. If you don’t have a way to measure the water temperature precisely, you can simply let the water cool slightly after boiling before using it to brew the coffee.

Water quality is also important

What many people don’t take into account: It’s not just the coffee powder itself that contributes to the taste of a cup of coffee, but also the quality of the water. Be sure to use fresh and pure water to brew your coffee and pay particular attention to the calcium and magnesium content. If it is particularly high, we speak of hard water – this has an unfavorable effect on the taste of the coffee and can also calcify the coffee machine. Too soft water with very little mineral content is not recommended either. The ideal water hardness is a maximum of 8 °dH.

If you are unsure about the composition, you can have your tap water tested. If it’s high in calcium and magnesium, you can soften it by using a water filter. Alternatively, you can brew your coffee with mineral water. In principle, however, tap water is better for the environment than plastic bottles.

Valuable tips for making the perfect milk froth yourself for delicious milk coffee or cappuccino. The choice of the right milk and temperature is crucial, while the methods for frothing milk are versatile.

Tips for making milk foam yourself

Anyone who likes to drink milk coffee or cappuccino knows how important good milk froth is. Because the perfect milk froth rounds off your favorite drink. And really good coffee always tastes best when prepared the Italian way, using frothed milk instead of regular milk. However, good and solid foam can only be achieved if you follow a few rules. Therefore, we have collected the most important tricks for preparing frothed milk. These help you to enjoy a creamy coffee even without a practical fully automatic coffee machine or espresso machine.

Which milk to use for frothing milk?

To froth the milk for a coffee specialty such as cappuccino, latte macchiato, or milk coffee, you should definitely use milk with a fat content of at least 3.5% – no skimmed milk. Protein content of 3.1 – 3.5% is also ideal for making milk froth. Fresh milk from the farmer is best, as it contains even more fat.

Methods for making milk foam

After you have chosen the right milk with your favorite flavor, you can start frothing the milk. Now you have to heat the milk so that the froth stays firm and stable. You will also need various tools, depending on the type of foam preparation you choose. We have an overview of the three most common ways to make milk foam yourself:

Note the temperature of the milk

The milk for milk froth should never be heated above 80 degrees. About 70 degrees is ideal. If the milk and milk froth gets too hot, the milk molecules will be destroyed and the firmness of the milk froth will be reduced dramatically.

1) Use an electric milk frother

An electric milk frother is easy to use, inexpensive and effective. To do this, heat the milk in a saucepan or in the microwave. Then insert the whisk at the end of the frother into the milk and froth it up. This works well with smaller amounts of milk. The SEVERIN milk frother stick is battery-operated and easy to clean, making it a practical help in the kitchen.

2) Make milk froth yourself with a manual frother

You can also froth your milk manually. Use a manual frother for this. Because it’s easy to make milk foam yourself. Consequently, heat milk and put it in the manual device. Then take the lid on which a kind of sieve is attached. Now you can froth the milk with up and down movements and create a perfect milk coffee or cappuccino.

3) Froth milk with induction frother

Another way to conveniently produce delicious milk froth is to use an induction milk frother. This has the advantage that you can heat the milk directly in the vessel. The milk is then frothed automatically.
Make milk froth in a disposable glass

If you don’t have one of these devices at home, you can use a disposable glass. To do this, put the milk in the glass, close it tightly and shake well. Then put the jar in the microwave for about 30 to 45 seconds. The milk should now be a little frothy. Not perfect, but still.

Frequently asked questions and answers

  • What must be considered when frothing milk?
    The fat content, which should be at least 3.5%, is important in the preparation. And the protein content should ideally be between 3.1 and 3.5%. It is also important to heat the milk a little beforehand so that it remains firm and stable.
  • Which milk is suitable for making milk froth?
    Milk froth works best with (lactose-free) cow’s milk, oat milk, or soy milk. You can also use goat milk or hazelnut milk. Unfortunately, it doesn’t work with coconut, almond, or rice milk.
  • How can you make milk foam yourself?
    To prepare the frothed milk, use an electric or manual milk frother. In addition, an induction frother is very helpful for making milk froth yourself.

Re-liquefying honey is easy and saves food waste – because you don’t have to throw away crystallized honey. Here you can find out how.

Honey is a popular sweetener for drinks and food. Handling is easiest when it is liquid. However, all natural honeys crystallize over time and become hard. The honey can then no longer be dosed and used so easily.

But you don’t have to give up crystallized honey immediately: you can avoid food waste by re-liquefying honey that has become hard. This is easy to do with a hot water bath. After that, you can continue to use it as before.

Things to know about crystallized honey

Fresh honey is always liquid. Chemically, honey is a solution of water and sugar and contains important enzymes and nutrients.

However, some types of sugar are not entirely soluble in water. When a certain concentration of sugar content is reached, crystals form. The more crystals that form, the harder the honey becomes.

Glucose forms crystals particularly quickly. Honey types with a high glucose content therefore harden more quickly, including rapeseed honey, for example. Honey types with a higher fructose content, on the other hand, form crystals less quickly. Honeys containing fructose include forest honey or chestnut honey. But no matter what kind it is: It is not difficult to make crystallized honey liquid again.

Crystalized honey is not harmful

Even types of honey with a low glucose content crystallize after a while. But that’s not bad. On the contrary: if your honey crystallizes, this is a sign of real quality and a natural origin.

Although crystallized honey is not harmful, the crystals can become uncomfortable when consumed. It is therefore best to store the honey at room temperature. Glucose forms crystals more quickly in the refrigerator and honey solidifies sooner.

Also, stir the honey regularly. Stirring will break up the sugar crystals and keep the honey liquid longer. Should crystals nevertheless form, a simple water bath is sufficient to make the honey liquid again.

Making honey liquid again: Here’s how

Crystallized honey usually becomes softer again just by stirring it extensively. You can use a water bath to make solid honey completely liquid again.

Here’s how you do it:

Heat some water in a small saucepan. This should not exceed a temperature of 40 degrees Celsius, otherwise the enzymes and nutrients contained in the honey will break down.
Place the honey jar in the warm water bath.
Leave the jar in the water bath until the honey has become liquid again. Stir constantly to speed up the process.
Important: Since the nutrients in honey are sensitive to heat, the honey should not be exposed to high heat for too long. Therefore, try to avoid crystallization by stirring constantly.

When buying honey, always make sure that it comes from fair and bee-friendly production. This helps the bees and protects the environment. Therefore, buy honey from local beekeepers and if possible in organic quality.

It is no longer just the coffee-to-go or a simple filter coffee. We combine a cup of coffee with aromatic coffee enjoyment and different coffee variations. But who actually conjures up the stylish little milk froth images on the surface of our coffee? It is the barista who conjures up a true work of art from a simple cup of coffee and turns coffee drinking into an experience for us. The term barista comes from the Italian and means nothing else than bartender. Roughly speaking, the profession of barista describes the activity of professionally preparing coffee in an espresso bar or a café. Much more important, however, is the passion and lifeblood of a barista, with whom every coffee creation becomes a work of art.

With know-how and passion to become a true barista artist

A barista is a true artist in his field. Passion and a fine taste make him a specialist in preparing various coffee specialties. A good barista can do them all: a strong and aromatic espresso, a frothy cappuccino or an excellent latte macchiato.

To prepare the perfect coffee, a barista needs a certain amount of theoretical knowledge and practical skills:

Theoretical knowledge for the barista profession
physical understanding
Knowledge about different types of coffee
Knowledge of coffee roasts and grinds

Practical knowledge for the barista profession
special care in the preparation
Brew coffee for the best aroma result
Operation and maintenance of an espresso machine and coffee grinder
frothing milk
Communication skills in dealing with customers
Professional customer advice
latte art
Is there training to become a barista?
There is no classic recognized training to become a barista. However, you can take part in courses and seminars with a final certificate in order to learn how to be a barista. The term barista is not protected, so in principle anyone can call themselves a barista.

Working as a barista – organization & passion

In addition to the passion for latte art and the magic of phenomenal works of art on the milk froth of the coffee, there is much more that characterizes a good barista. In addition to the technical understanding of the professional maintenance of the coffee machines, a good barista must be communicative when dealing with his guests.

Friendliness, empathy and helpfulness characterize the character traits of a barista. The barista job can be quite stressful, so baristas should be very organized. Most baristas develop their own system over time. Among other things, it can be helpful to consider which are the most popular coffee specialties.

Win coffee competitions as a barista

Trained baristas have the opportunity to compete against other coffee specialists to demonstrate their passion for coffee. In Germany, for example, there is the “German Barista Championship” once a year, in which all participants show their skills in the disciplines of cappuccino, espresso and their own creations.

Are you an absolute coffee lover and would like to drink a delicious, freshly prepared cappuccino or latte macchiato in your office that tastes like it was freshly made by a barista?

They still exist! The traditionalists, the nostalgic, the idealists and perfectionists. Those who see a craft in coffee culture and practice it with devotion. Those who still prepare filter coffee with a coffee machine and ignore fully automatic coffee machines in favor of the espresso maker – the elite of coffee makers, so to speak. They often stand in groups in front of the filter coffee machine in the office and talk shop together about the different ways of making coffee. If you want to have a say, you have to be very knowledgeable!

Even before there were professional coffee machines and filter coffee machines, grinding was done by hand. Even today, the coffee beans are often ground by hand with cone grinders, where the degree of grinding can be adjusted. But all of this is no longer necessary. However, the basic principle of coffee grinding has not changed to this day. Do you know the process of maceration? That means something like wearing down or leaching. Here, the ground coffee is poured over with boiling water and left to steep for at least five minutes. Today, for example, the popular mocha coffee is also prepared with maceration. The coffee preparation of percolation means the usual filtering of the ground coffee beans.

Coffee making in the traditional way at a glance:

Oldie but goldie: the espresso maker

Let’s start with the most traditional of all types of coffee preparation: The espresso maker is, so to speak, the mother of all coffee makers. The classic design of the small coffee pot made of stainless steel or aluminum originally dates from 1933 by Alfonso Bialetti and brings tears of joy to the eyes of coffee enthusiasts and treasure collectors alike.

Especially in Italy, the preparation with the espresso maker is very popular. Connoisseurs appreciate the coffee preparation in Italian, which means celebrating the process extensively – a lout who only thinks of quick enjoyment. It starts by pre-boiling water to speed up the brewing process, to the right water temperature, and grinding fresh coffee. The degree of grinding should tend to be coarser than that of espresso for the portafilter, similar to sand. The water tank of the espresso maker is filled with water up to the valve and the coffee filter above it is filled to the brim with coffee powder and smoothed out. And now: screw the pot on, place it on the stove over medium heat and, with the lid open, watch how creamy, aromatic coffee is extracted. Maintain this state until only steam rises from the pot.

Then remove the pot from the heat and wrap the bottom part with a cold, damp cloth to stop the extraction. The self-brewed coffee is then ready to be served and released for tasting in – attention, Pro-Tip – preheated (!) cups.

Coffee making by hand filter

Anyone who has overheard the coffee nerds in their technical discussions may be familiar with the term pour over method. This means coffee preparation with a hand filter; a way of making coffee, where the filigree technicians are in demand among coffee lovers. By the way, the principle of filter coffee machines is very similar:

Hot water is poured from above onto a filter filled with ground coffee until it drips through the bottom end. The big difference to the filter coffee of the coffee machine is that the coffee preparation with a hand filter allows more individuality. This means that the taste of the coffee can be influenced according to your own preferences by skilfully pouring in the hot water and the degree of grinding of the ground coffee.

The hand filter is the bedrock of coffee brewing styles, who would have thought that brewing a coffee by hand could become a science? And as science likes to do, let’s start by calculating the right amount of coffee. The amount of ground coffee depends on the amount of coffee that is to be drunk later; however, the amount of coffee powder does not increase proportionally to the amount of water. As a guide, half a liter of coffee requires about 30 grams of finely ground coffee; a cup about 10 grams. In the end, however, it is your personal taste that counts. By using a paper filter, coffee oils and coffee grounds are retained.

Speaking of taste: In order not to lose it, there are a few simple points to consider.

1. The paper filter is easily rinsed with water after inserting it into the hand filter. Sounds strange, but the inveterate coffee maker swears that otherwise there will be notes of paper on his taste buds afterwards. In addition, the paper filter fits better to the hand filter, which promotes a more even extraction of the coffee.

2. After filling the ground coffee into the filter and placing a pot or cup underneath to catch the coffee, hot water is poured in from above. The ideal water temperature is 95 degrees. When brewing the coffee, only enough water is poured on in the first step so that the ground coffee is soaked to the surface and swells a little.

3. After half a minute, in which the coffee “blooms” (the process is also called blooming), water is poured out. It should be poured in smooth, circular motions and never touch the filter. The water should never stand in the filter, but always seep through completely.

4. After three to four minutes of brewing time, the coffee should be completely infused and ready to be enjoyed. Depending on how the end result tastes, more or less ground coffee can be used next time.

Pure nostalgia: the espresso machine

Admittedly, the placement of an espresso machine in this list of coffee makers is debatable. At the thought of buying an espresso machine, one or the other representative of the coffee elite may even roll their eyes, but true enthusiasts also appreciate the coffee preparation with a portafilter machine.

Apart from that, the first attempts to produce an espresso using a steam machine date back to the 19th century – so in terms of tradition, this type of coffee preparation can easily keep up with the others. It is therefore important to broaden one’s French Press-influenced horizon of experience and to open oneself up to the fine art of espresso preparation. Ready?

The few steps that are required when using an espresso machine are quickly explained: When it comes to the right temperature, the espresso is the diva among the types of coffee – nothing works without a preheated cup. Rinsing the latter with hot water is therefore a must. It continues with the coffee, which should be freshly ground in the finest setting. Fill the portafilter to the brim with ground coffee and smooth down the surface. When “tamping” a kind of tamper is used, with the help of which the coffee in the portafilter is compressed into an even and firm shape. In the last step, the portafilter is attached to the previously cleaned brew head. Just 25 seconds later, you’re holding a dark, oily espresso with a distinctive crema that all coffee connoisseurs are sure to appreciate.

A good coffee fills the room with its delicious aroma, impresses with its round, aromatic taste and awakens the desire for another with the first sip. Do you remember your last excellent coffee? If you have to think about it, you’re probably making one of the top five coffee-making mistakes. Regardless of whether you use a filter coffee machine at home or operate a fully automatic coffee machine in the office, serious errors in the preparation of all coffee machines can spoil the coffee enjoyment.

Buy a high-priced filter coffee machine and brew cheap coffee

A common misconception is to buy an expensive filter coffee machine for the home or to set up an expensive fully automatic coffee machine in the office, brew the cheapest coffee in it and think that the high-priced coffee machine will gild the hot drink in terms of taste. Unfortunately, an excellent filter coffee machine cannot do magic at a high price. No high-quality fully automatic coffee machines in the office can do that either. Don’t skimp on your favorite gourmet food, coffee. When choosing, pay attention to quality. At Coffee Perfect you will find an excellent range of aromatic coffee beans and high-quality coffee powder. When buying, pay attention to the purity of the variety, the roasting and the type of bean.

Pre-ground coffee and then store

If you pre-grind coffee for the filter coffee machine with the coffee grinder so that it can be prepared more quickly the next morning, you lose aromatic substances. Once the coffee has been ground, the air extracts the aroma from it. As long as the aroma is in the bean, it is protected. Only grind as much fresh coffee as you drink. If grinding takes too long for you, you can also use a fully automatic coffee machine in the office or at home, which will do this work for you. Regardless of whether you use the fully automatic coffee machine in the office or the filter coffee machine in your free time, drinking coffee is more digestible and tastier when the coffee is aromatic and fresh. The freshness makes the taste, regardless of whether you prepare the coffee in the filter coffee machine or in the fully automatic coffee machine in the office.

Store coffee for the fully automatic coffee machine in the office in the refrigerator

It’s almost unbelievable what people keep in refrigerators at work. In many companies, the coffee for the fully automatic coffee machine in the office lies carelessly in the refrigerator, next to the cheese and opened sausage packages. Coffee quickly takes on foreign aromas. It only takes a few minutes and the coffee tastes like other foods. Then you can no longer think about preparing it in the filter coffee machine or in the fully automatic coffee machine in the office. Store the coffee at around 10° to 18° C, dry and protected from light. Ideally, the coffee packaging has an aroma protection valve and the coffee can release CO2 and keep the aroma longer.

Transfer coffee powder for filter coffee machines at home or fully automatic coffee machines in the office into a can

Do not fill the coffee for the filter coffee machine or the coffee machine in the office into a can. Coffee should always be kept in its original packaging. When refilling, oxygen gets into the ground coffee or the coffee beans. Once that happens, the coffee oxidizes and deteriorates. The coffee fats, which are flavor carriers, can become rancid due to the oxygen, which greatly affects the taste. Whether you keep ground coffee for your filter coffee machine at home or coffee beans for the fully automatic coffee machine in the office, neither should ever be put into a can.

Brew coffee with boiling water

Boiling water burns the coffee and robs it of its aroma. Only brew coffee after allowing the boiling water to cool for two minutes. It should be around 93° to 95°C. If the water is too hot, the aromas evaporate and bitter substances are released. The taste becomes slightly bitter and acquires a burnt note. To avoid this, you should not let the water cool down for too long. The temperature should not be too low, then the taste will be sour.

Summary:

Neither the filter coffee machine at home nor fully automatic coffee machines in offices can improve the taste of bad coffee.
When buying coffee for the filter machine or the fully automatic coffee machine in the office, pay attention to the following characteristics: purity of variety, roasting, and the type of bean. Arabica is high quality, Robusta is not.
Do not pre-grind. Better to drink fresh coffee.
Never keep the coffee for the filter coffee machine or the coffee machine in the office in the refrigerator.
Do not transfer coffee. As soon as air comes into contact with the coffee, it loses its aroma.
Do not brew coffee with boiling water. The ideal temperature is between 93° and 95°C.

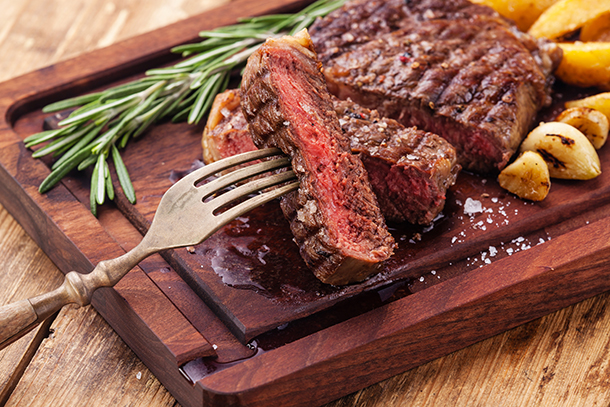
A rare hero admits that clothes as a gift are not exactly what he dreams of on his only men’s holiday. But what – at least as a “warm-up” before the main present – no real man will definitely refuse, is a juicy meat steak.

  1. Classification of steaks

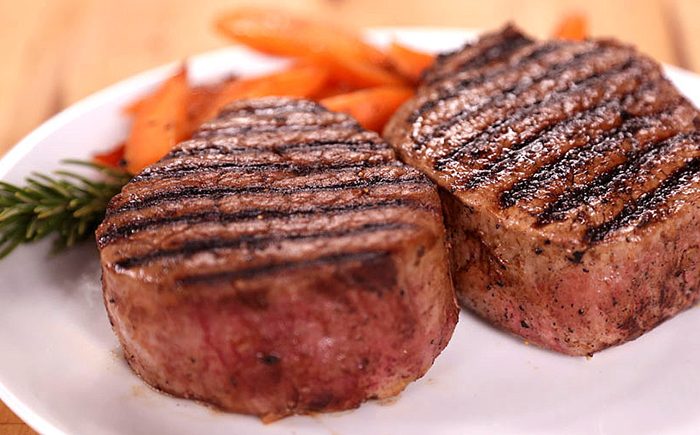
According to the most popular classification, meat is divided into 3 types: marble steaks are steaks from a thick or thin edge (Ribeye, Striploin, New York), lean steaks from tenderloin (Mignon, Chateaubriand), and alternative steaks such as Machete, Tibon steak, Tomahawk. At home, you can cook almost any kind, the main thing is to be patient and understand the cooking technology of each.

  1. How to choose meat for this or that type of steak

The main mistake of those who want to get an appetizing steak at home is excessive savings on meat. A regular fillet of beef for cooking Ribeye, Chateaubriand, or any other type of steak you choose is not at all suitable, it will turn out to be very tough. It is better to buy marbled meat steaks from trusted butchers or take vacuum packaging with ready-made chopped steaks. If you take a cut of beef to cut the steaks yourself, opt for the most popular ones – Ribeye and Mignon.

The quality of meat for a Minion can be checked in the following way: a finger falls into a good cut, and after you remove it, the flesh quickly recovers. Rib-eye steak meat should be fairly marbled and soft, with streaks of fat. It is much more difficult to choose a quality Top Blade and not to confuse it with the stiffer part of the shoulder blade. It will be difficult for a layman to define quality, so it is better to stick to the classics.

  1. Is it possible to cook from frozen meat

You can also cook frozen meat steaks. The main thing is the correct defrosting process. The meat must be put from the freezer into the refrigerator a day before cooking so that the defrosting is soft and delicate. Then there will be no heat stress for the meat, which leads to a large loss of precious juice. Defrosting meat in the refrigerator will leave all the juice inside – and the steak will be soft and tasty.

  1. How to fry a steak at home and how to choose a frying pan

Frying a steak is most convenient in a grill pan or a regular skillet with a very thick bottom. The thick bottom of the pan ensures that after heating it does not lose its temperature and will keep it at the same mark for a sufficient amount of time. If the pan has a thin bottom, it cools down quickly, and the meat is not fried, but boiled in its own juice.

  1. How to prepare meat for frying

It is necessary to get the meat out of the refrigerator a couple of hours before frying and let it reach room temperature. If you do decide to cook an alternative steak, you need to marinate it (we’ll talk about this a little later). Half an hour before cooking, the meat must be freed from the film so that the tenderloin is slightly weathered around the edges and the meat is covered with a light crust, which during frying will help keep all the juices inside the steak.

Salt and pepper the meat only after cooking! On this, I would like to focus special attention. Salting the meat before or during frying will help the juices flow out, which can make the meat tough.

  1. Steak cooking technology

For the preparation of marbled steaks (Ribeye, Striploin, New York), you need to use a minimum amount of oil, giving preference to olive oil. The cooking technology is quite simple. Place the meat in a well-heated frying pan and fry for 2-3 minutes on each side, then reduce the heat to low, cover the steak with a lid and let it stand for another 1-2 minutes. Please note that the longer we leave the steak covered, the higher the degree of doneness will be. For marbled steaks, medium to medium-well roast is best. At the end of cooking, you can add garlic, rosemary, thyme, or chili pepper.

Lean tenderloin steaks (Mignon, Chateaubriand) are prepared using the same technology, but with a lot of oil. After we fry the steak on both sides and it acquires a golden crust, add butter to the pan and reduce the temperature to medium. We continue to fry the meat in a mixture of butter and olive oil, constantly pouring it with the juice that comes out of the steak itself. This will give the steak the right roast.

Alternative steaks (Machete, Tibon, Tamaghawk) must be marinated in herbs in advance. To make the meat softer, you can add a little mineral water to the marinade. For alternative steaks, medium doneness is better. It is not recommended to consume this type of steak with blood.

  1. How to determine the degree of doneness

Do not forget to control the degree of doneness! To determine it, it is better to use a thermal needle. Each degree of roast has its own ideal temperature: Rare – 40-43 degrees, Medium Rare – 44-46, Medium – 47-50, Medium Well – 55-57, Well Done – 60 and above. If you do not have a thermal needle at hand, you can try to determine the degree by touching with your finger. If the steak is too soft, it is not cooked enough, the meat is still raw. If the steak is dense, then the roast is high. You should not cut the meat to check readiness, as the juice will immediately flow out of the meat.

  1. Spices and sauces for steaks

The more laconic the spices on the steak sound, the better. Therefore, do not use more than 2-3 spices at a time. Rosemary, garlic, and in rare cases – thyme are ideal for steak. To convey the aroma of these spices to the dish, it is enough to put a sprig of rosemary or a clove of garlic on a ready-made steak, the meat itself will take on their rich aroma.

There are many sauces with which it is proposed to complement the taste of the steak, for example, a sauce based on fresh herbs. To prepare it, you need to take 20 grams of fresh parsley and cilantro, half a head of garlic, chop them finely and finely with a knife until they form a gruel, add a little black pepper, salt, and chili, and pour over with olive oil. It makes a wonderful sauce that goes well with any steak.

Another quick and delicious sauce is French. If you want to make it, take your time to remove the pan in which the meat was fried. Remove the meat, put the pan on medium heat, add a little red wine, butter, chicken broth, salt, and pepper. Cook the sauce over medium heat to the desired consistency. You can add not only wine and spices but also cream, interesting Asian sauces like Teriyaki – here you can give free rein to your imagination!

  1. Side dishes for steak

In this matter, everything, of course, depends on the person – who likes what more. But from the point of view of physiology and proper nutrition, it is better to eat the steak along with fresh or fried vegetables. Grilled vegetables or red fresh tomatoes with onions and herbs are the most ideal options.

  1. Serving and serving

One of the main rules of a perfect meal: steak should be served immediately. Steak is an independent dish, simple and straightforward. You should not invent an original serving, the main thing is the unsurpassed taste of the steak itself.

Enjoy your meal!

A properly cooked steak is a piece of incredibly juicy meat that just melts in your mouth. To prevent it from turning into a rubber sole, you need to know 10 secrets that will completely change the idea of cooking.

  1. There is no need to take meat out of the refrigerator and leave it for half an hour or an hour to warm it up to room temperature. This is a completely useless procedure. We take a piece of meat from the refrigerator and cook immediately.
  2. Yes, the meat should be marinated in natural yogurt, which will make the steaks tender and flavorful.
  3. When frying in a pan, the pepper will simply burn out, so you need to pepper the meat when it has been removed from the stove or grill. It is enough just to salt it, if desired, you can lightly sprinkle it with cornstarch, which will help form a beautiful golden crust.
  4. The butter often burns while the steak is fried. Therefore, it is recommended to cook meat with animal fat or ghee. But thanks to bacon, the steak will have a more pronounced meat flavor.
  5. Gordon Ramsay suggests using the easiest way to determine the degree of doneness of a steak. This is its own face. The bloody steak feels like our cheeks, the medium-rare steak matches the chin, and the well-done can be compared to the forehead.
  6. Everyone loves the grill marks on the meat. And in vain, because they are nothing more than burnt meat. A properly cooked steak is a completely caramelized piece.
  7. Another myth is that a steak is flipped only once. Chefs recommend doing this at least six times, frying for a total of 3-4 minutes on each side.
  8. This is the most difficult task when preparing steak. The meat should rest for 10 minutes so that all the juices are distributed over the piece. To keep it warm, you need to cover it with foil.
  9. It is customary to first fry the steak in a pan, and then bring it to readiness in the oven. We suggest doing the opposite. We bake the steak in the oven at a low temperature, and then fry it in a pan and get a piece of fragrant and juicy meat with a beautiful crust.
  10. It is possible to marinate meat before frying, but this often complicates the process of obtaining a crust on the steak, in addition, the sugar, herbs and garlic contained in the marinade can burn. It is best to marinate the meat after cooking when it is resting.

Sometimes you want to make delicious sushi or hot rolls at home. How to choose the most important component for them – rice? Nothing seems to be easier. However, choosing the right rice and preparing it will depend on the quality of the final dish.

  1. Not all types of rice are suitable for making sushi and rolls. Usually, round grains of rice with a high starch content are chosen for this dish so that the final product has sufficient stickiness. The following varieties can be recommended: Kokuho, Kahomai, Maruyu, Minori and Nishiki, but you can limit yourself to absolutely any round grain, opaque rice.
  2. Choosing the right sort of rice for sushi is half the battle. It is much more important to cook it correctly so that the rolls turn out to be canonical and tasty. It is necessary to cook the rice in such a way that balls can be easily molded from it.
  3. It is washed first. At this stage, due to the treatment with water, all dirt, dust and husks, as well as excess starch, are washed off the rice. Important! Rice must be rinsed with cold water until it becomes completely transparent, otherwise it will burn to the bottom of the pan during cooking. Some adherents of Asian traditions are sure that clean water should be passed through rice nine times. After that, you will need to drain all the liquid from the rice, leaving it to dry.
  4. Now it’s time for cooking. To cook rice properly, it is important to maintain the correct proportions. For water and rice grains, they are 1: 1.25. Let’s choose a saucepan in which we cook ordinary rice. You can add nori algae to the pot to add a sea-scent flavor while boiling. After boiling, it is removed. Adding other ingredients will add spice and extra flavor to the rice. Try using rice wine or even sake for this.
  5. The final stage is rice dressing. Spread the boiled rice in an even layer in a container, evenly pouring rice vinegar mixed with salt and sugar on its surface. In this case, the rice must be mixed. After stirring, the rice should be transferred with a spatula to one half of the container. Then each portion is leveled with a spatula to allow each rice grain to soak in the vinegar. When the rice is spread over the bottom, cover it with paper towels for the final soak.