Tag

secrets

Browsing

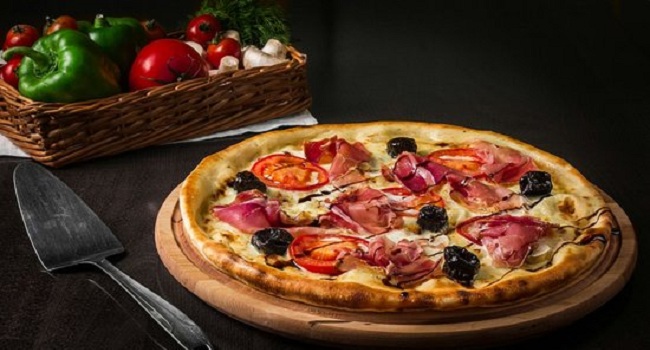
Pizza! At the mere mention of this word, profuse salivation begins and in the subsequent time, you will not be abandoned by thoughts of a delicious aromatic pizza with the most tender dough and stretching cheese. There is hardly a person who would say that he does not like this divine delicacy, and if such an eccentric lives on this planet, then he, most likely, tried some kind of wrong pizza. The basis of a delicious pizza is, of course, the dough, which must be cooked correctly for the dish to be truly unforgettable. We have prepared for you the secrets of the perfect pizza dough.

  1. The easiest way is to roll out the dough on baking paper, after sprinkling it with flour. This will save you from unnecessary and completely unnecessary movements since you can send the pizza to the oven right on the parchment.
  2. Pizza tastes differ dramatically from person to person. If you love the fluffy dough, then take on board a simple life hack: let the rolled dough rest for 5-10 minutes. If you are worried that during this time it will have time to wind up, cover it with cling film.
  3. If, on the contrary, you like a thin dough that will crunch in your mouth, then you need to roll it out as much as possible, sparing no effort, and bake at elevated temperatures – 230-250 degrees.
  4. Another secret to the deliciously crispy dough is olive oil. They should grease a baking sheet. Put the dough on top and send it to the oven preheated to 220 degrees for 5 minutes. Only then add the filling.
  5. What if you didn’t roll out the dough on parchment? Do not worry ahead of time. You will need a rolling pin. Wrap it in half of the dough and transfer it while holding the handles.
  6. You can and should experiment with the ingredients for the dough. So, advanced gourmets prepare pizza dough from a mixture of flour and semolina. It turns out to be more crunchy and tender. You can use this mixture not only for making dough but also for dusting a baking sheet.
  7. The tedious part of making pizza is waiting for the dough to rise. Add more yeast to speed up this process. You only need 3/4 teaspoon more than the recipe says.
  8. Italians love aromatic herbs and actively use them in cooking. Take on board a cool life hack: To make the dough tastier and more aromatic, stir in oregano, basil, or other dried seasonings of your choice.

Pizza is a dish originally from sunny Italy in the form of a round open pie covered with tomatoes, melted cheese (as well as various fillings (meat, ham, salami, seafood, vegetables, fruits, mushrooms, herbs, etc.).

  1. The dough is rolled out in a small layer, spread on a preheated pan, greased with a large amount of vegetable oil, and immediately put the filling on it. Cover with a lid and reduce the heat to a minimum so that the dough is baked evenly.
  2. In a frying pan, pizza is cooked much faster than in an oven: the baking time is 15 minutes. The plain dough can be kept on the fire for 10 minutes as it roasts faster than yeast dough. We remind you: its thickness should not be too large.
  3. The readiness of the test is checked with a match, piercing it in the thickest place. If the match is dry, the pizza is ready. In an open pan, the dough is baked in 2 steps, so the baking time is slightly increased (the pancake must be allowed to cool slightly before placing the filling). On average, it takes 20-25 minutes to cook pizza.
  4. Since the dough is baked pretty quickly, the raw filling simply won’t keep up with it. Therefore, it must be prepared in advance – fried, stewed, or boiled.
  5. The thickness of the filling must also be monitored so that it does not spread, since the juice or syrup will be absorbed into the dough and will remain damp and tasteless. In addition, the liquid can seep through the dough and burn the pizza. The best filling option, in this case, is when the bottom layer is meat or fish, dry boiled vegetables, and slightly softer or raw foods on top. Then they will saturate the lower layers, but nothing will leak to the bottom of the pan.
  6. When baking pizza in a frying pan, do not top with mayonnaise or the like (to prevent the main layers from burning).
  7. Any baked goods lower the stomach tone, and not everyone can afford baked pizza, and the desire to taste such delicious food is great. For such cases, the option of cooking a dish on a steam bath is provided: for steamed pizza, light yeast dough is taken. It is kneaded on a large number of eggs, aged a little longer than simple, but it should not be peroxidized. The dough is rolled out in a rather thick layer; you can simply stretch it over the grill surface. In this case, the pizza is cooked for 40 minutes.

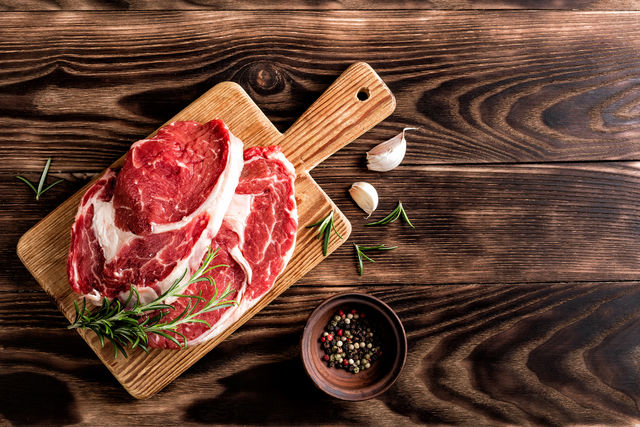
Meat is the most common food cooked and eaten in all countries. But how to make sure that the meat is not dry, or how not to forget about it and then not be content with “coal”? What is better to serve as a side dish and what sauce to season?

  1. Always cook meat at room temperature – let it rest for an hour after the refrigerator, then the meat will be juicier and the roasting will be more predictable.
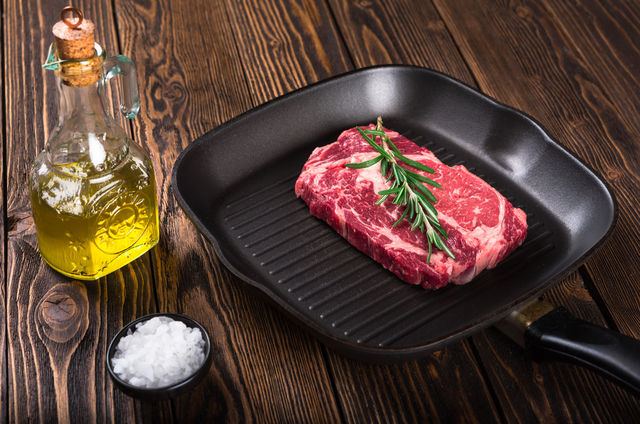
  2. The dishes are simple: a frying pan or a grill – it doesn’t matter. This also does not affect the taste. But it is still very important – the dishes must be heavy enough so that the pan can gain maximum energy and heat. If we use a very light frying pan, then it keeps little heat and as a result, when we spread the steak, it loses its power very quickly, and we get low-quality frying: the meat can give juice, and then we get not a fried steak, but its likeness!
  3. Heat the pan: the first smoke from the pan will be the signal for cooking. If you have one, you can proceed.
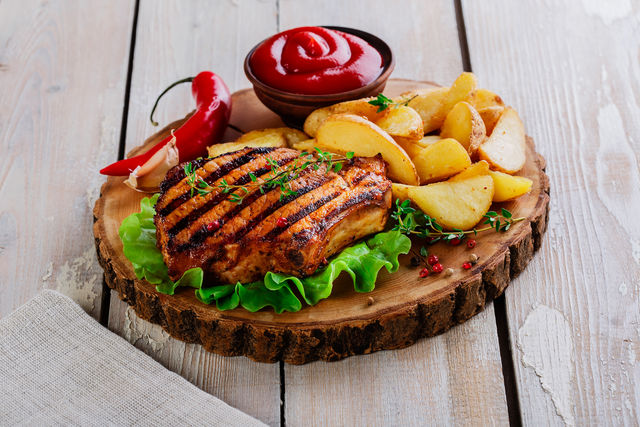
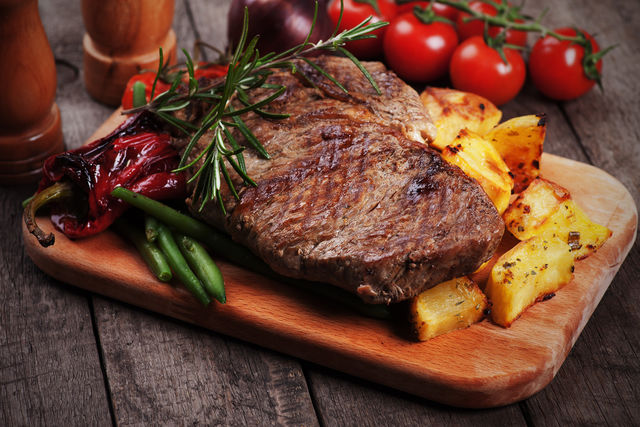
  4. Well-cooked meat goes well with a sauce based on ripe tomatoes, garlic, and cilantro. As a side dish, we offer boiled basmati rice with butter and a salad of fresh cucumbers and tomatoes with fragrant cilantro, red onion, and olive oil. Also, potatoes fried with onions go well with meat.
  5. But everyone’s favorite side dish for meat is vegetables fried over an open fire: eggplants, zucchini, tomatoes, and bell peppers.

Pizza is a tasty and satisfying dish that goes perfectly with any table.

  1. You will need 900 g flour; 10 g yeast (fresh); 0.5 l of water; 10 g vegetable oil (or olive oil); 20 g of sea salt (finely ground). Be sure to knead the dough in a calm, warm atmosphere and in a good mood. To make the dough airy, sift the flour through a sieve. In a bowl, dilute the yeast with cold water until completely dissolved. Gently add half of the flour and mix thoroughly so that there are no lumps. Then add the rest of the flour and salt.
  2. It is better to add olive oil to the mixed mass, which will give elasticity. We knead everything thoroughly. Then put the dough out of the bowl on the table and knead it until it lags behind the hands.
  3. Divide the dough into several pieces and leave it to rise at room temperature for about 1 hour. It should double in volume. Roll out the dough in a thin layer with your hands. Sprinkle flour on the surface of the dough and begin to gently stretch it from the middle to the edges. In this case, it is advisable to hold the middle of the cake with your hand. We make the edges a little thicker for the sides.
  4. Grease the baking dish with olive oil and sprinkle it with flour so that the dough does not stick to the baking dish. We spread the filling and send it to a heated oven (180-200 degrees) for about 10 minutes.
  5. For a pizza of medium diameter, add no more than 3 tablespoons of sauce. As a sauce, we use not only traditional tomato paste, but also delicate cream cheese, hummus, squash caviar, or pesto sauce. We monitor the consistency of the sauce: it should not be liquid.
  6. Be concise and don’t use more than 4 ingredients in one pizza. There should be only one layer of filling and no more than 1 centimeter. Do not fill the entire surface of the dough with ingredients, because there will be a layer of grated cheese on top. Place ingredients such as greens and lettuce on the pizza before serving.

Most steaks are grilled very quickly – literally in minutes. It is important to use this time correctly, but it is equally important to consider that the dish begins to cook even before it reaches the wire rack. Therefore, everything in order. Here’s how a Weber chef advises making your steaks taste even better.

  1. SALT THE STEAKS ON TIME
    You may have heard the warning not to salt meat long before grilling because salt can draw out juices. It indeed draws out moisture, but within 20-30 minutes, this is good, because the salt begins to dissolve in a small amount of moisture. When the steak hits the hot grill, the sugars and proteins of the meat juice combine with salt and other seasonings to create that very aromatic crust. But if the meat loses a lot of moisture, it will affect the taste and aroma for the worse.
  2. LET THE REFRIGERATOR MEAT STAND
    What kind of steak do we want when we grill it? Juicy and crispy, perfect toasted, right? But if you put the cold steak on the wire rack, it will take longer than usual to cook to the desired degree, and the meat inside can become overcooked and become gray and dry. Let the steaks sit at room temperature for 20-30 minutes before grilling – then the core will cook faster and the steaks will remain juicy.
  3. ROY MEAT – IT IMPROVES THE TASTE
    It is a good habit for barbecue masters to fry steaks at high temperatures, such as the Weber Sear Grate GBS grill. Pros understand that roasting gives hundreds of flavors and aromas to the surface of the steak, so let the meat sizzle indirect heat until the surface turns dark brown. Don’t let anyone convince you that roasting “traps the juices inside.” This is just a myth. But she really makes the steaks tastier.
  4. MOVE THICK STEAKS TO INDIRECT HEAT
    Most steaks cook excellently indirect, high heat, and only need to be moved when there is a burst of flame. However, some steaks can be so thick that if left on direct heat they will burn on the outside faster than they will cook on the inside to the desired degree. Therefore, if your steaks are thicker than 2.5 cm, then use the indirect method. After you have cooked both sides well in direct high heat, move the steaks to the indirect heat zone and finish cooking there.
  5. GET THE MOMENT OF READY
    Since steaks are fried over high heat, they quickly lose moisture. This is the price we pay for delicious meat. Perhaps the most important step in cooking a steak is to remove it from the heat before the meat loses too much moisture. As a rule, in just 1-2 minutes, the degree of doneness changes from medium-rare to medium, or from medium to medium-well. To get into this window, you need to be careful. Don’t go too far while your steaks are grilling. And remember that it is better to take them off undercooked and then return to the grill than overcooking.

The fact that you are not a professional chef and you do not have a grill is not a reason to leave your loved one without juicy, tasty meat. We assure you that you can get the perfect steak even in a frying pan, if you remember our tips and apply them in practice.

First of all, let’s figure out what ingredients are needed for a classic steak:

  • meat (beef, cut into pieces no thicker or thinner 3-5 cm);
  • salt, pepper, spices;
  • oil (sunflower or olive)

Actually, this is all that is needed for a basic recipe that can be modified depending on your taste. At first glance, both the list of ingredients and the cooking process seem simple enough, but this is not at all the case. This is exactly the case when the devil is in the details.

  1. Defrosting meat

In no case should you defrost the meat in the microwave: as a result of this manipulation, the edges of it will begin to cook, and the middle will remain frozen. This will prevent you from controlling the process of roasting the steak. The best option is to place the meat in a vacuum package in cold water.

  1. Preparation

Sprinkle the meat with pepper around the entire perimeter (fatty beetroot), and then salt and add spices. Then – grease the steak with butter on all sides: this will contribute to better thermal conductivity, which will allow the middle to fry evenly around the edges. Do not under any circumstances beat the meat, otherwise, it will lose its structure and release all the juice.

  1. Cooking

Heat a skillet without oil over high heat and place the meat on one side. After two and a half minutes, turn the steak over and fry on the other side. Repeat the same manipulations one more time (on each side again for two and a half minutes). Juicy steak – ready. Tip: when roasting meat, take into account the desired degree of doneness.

There are certain subtleties that relate to the choice of meat and various culinary methods of toasting, the knowledge of which will help in mastering this virtuoso art. So, let’s try to cook meat steak at home!

  1. The most important rule of steak cooking is choosing the right meat. Initially, steaks were prepared from beef, so if they say “steak”, then they mean exactly a dish of beef. For other meat, clarification is required, so in this case, they write pork, chicken, salmon steak, and so on. But true steak connoisseurs argue that steaks made from any meat other than beef are not steaks.
  2. They say that the most delicious steaks are obtained from slightly dried meat. The most important thing is that the meat is not steamed, otherwise, the steak will turn out to be tough, and its taste, which is just provided by fermentation, will not be so rich and rich.
  3. The meat should be removed from the refrigerator about an hour before cooking to bring it to room temperature. This is necessary to evenly grill the steak.
  4. You can quickly and deliciously cook a steak in the oven, the Josper charcoal grill oven, on an open grill, and on a grill pan in which the meat does not burn and acquires an appetizing pattern.
  5. Some cooks mix the two oils for the best result, but steaks are ideal in ghee that does not burn and is mild in flavor.
  6. The main rule for preparing a steak is that at first it is fried very quickly in a hot pan until crusty, and then it is brought to readiness over a slower heat.
  7. The fact is that the protein curls up under the influence of high temperature and does not allow the juice to flow out of the meat.
  8. Before frying, some cooks dry the steak for an hour in the oven at a temperature of 60 ° C, since the dried meat instantly gives a dense golden brown crust when frying. If you neglect this rule, the steak will be dry and tough.
  9. When doing this, do not forget to fry the sides of the steak as well, holding it for convenience with meat tongs.
  10. A steak covered with a dense crust on all sides will cook well and remain juicy. This is one of the main steak cooking tricks.
  11. Do not overdo it with the fire and do not bring the pan to the point that it starts to smoke, because if the steak burns, you will not be able to continue frying, and it will turn out raw.
  12. An important secret of steak preparation is to give it a “rest” and recover from intense frying. To do this, place a piece of butter on the steak, cover it loosely with foil and leave for 10 minutes. The longer the steak “rests”, the tastier, more aromatic, and tender it will turn out.

The sauce is an important element of pizza. It should be juicy, rich, but at the same time not too bright. Such that it would set off and emphasize the taste of the filling, but not drown it out.

  1. Don’t be lazy. Want to make the right sauce? Do not use prepared tomato paste as a basis. Instead, use canned tomatoes in your own juice: you can find both Russian and Italian ones in large supermarkets. Drain, grind and add spices. Provencal herbs, salt, pepper – done!
  2. Experiment. Unable to buy canned tomatoes? Nothing wrong. A great sauce can be made with fresh tomatoes. Peel them, cut, and pour them over with boiling water. Simmer in a skillet for 10 minutes, then pass through a blender. Add spices: oregano, garlic, bay leaf. Return the sauce to the stove and boil it about twice.
  3. Don’t overdo it. There should not be too much sauce. The most delicious pizza recipes emphasize no more than three tablespoons of sauce per standard circle of dough.
  4. Watch the consistency. Make the sauce too runny and your pizza will float.
  5. Get creative. Classic sauces are made from tomatoes, but the beauty of pizza at home is that you can invent new unusual combinations for it. You can substitute hummus or squash caviar for tomatoes. Or take cream cheese – it goes well with chicken and pineapple.
  6. And a little bonus: Jamie Oliver’s perfect and easy sauce. Prepares in 10 minutes. You will need 3 cans of canned tomatoes in their own juice, 4 cloves of garlic, a bunch of basil, 8 tablespoons of olive oil, salt, and pepper. Chop the garlic, fry it with the basil in olive oil. Add the tomatoes, salt, and pepper. After a couple of minutes, remove from heat, pass through the city. And simmer for another 10 minutes over low heat.

Before you embark on this exciting business, try to create in your kitchen that magical atmosphere that accompanies the preparation of pizza in her homeland. Pizza has more than enough homeland, so in the process of culinary creativity you can imagine yourself anywhere.

  1. A thick layer of dough is good for fluffy, layered, and moist filling. You can also layout the main filling of vegetables and meat on it.
  2. The frying pan has a lot of advantages over baking on a baking sheet: the dough is easily removed, practically does not burn; you can bake different pizzas and put different toppings.
  3. Before baking, the pan, like the oven, is heated to the required temperature, a small amount of vegetable oil is poured to lubricate the bottom and soak the pizza, and heated. Then spread the dough, fry on one side, and remove from the pan.
  4. You can also bake pizza under the lid. This is even easier since it will be baked all at once, it does not need to be turned over. There are pans with thermal glass lids; they are most convenient for baking pizza.
  5. Roll out the dough in a small layer, spread it on a preheated pan greased with a large amount of vegetable oil, and immediately put the filling on it. Cover with a lid and reduce the heat to a minimum so that the dough is baked evenly.
  6. In a frying pan, pizza is cooked much faster than in an oven: the baking time is 15 minutes. The plain dough can be kept on the fire for 10 minutes, as it roasts faster than yeast dough. We remind you: its thickness should not be too large.
  7. Its readiness is checked with a match, piercing it in the thickest place. If the match is dry, the pizza is ready. In an open pan, the dough is baked in 2 steps, so the baking time is slightly increased (the pancake should be allowed to cool slightly before putting the filling). Thus, pizza preparation takes 20-25 minutes.
  8. Since the dough is baked pretty quickly, the raw filling simply won’t keep up with it. All of it must be prepared in advance – fried, stewed, or boiled.
  9. Its thickness must also be monitored so that it does not spread, as the juice or syrup will be absorbed into the dough and it will remain damp and tasteless. In addition, the liquid can seep through the layer of dough and burn the pizza. The best filling option, in this case, is when the bottom layer is meat or fish, dry boiled vegetables, and on top – slightly softer or raw foods. Then they will saturate the lower layers, but nothing will leak to the bottom of the pan.
  10. It is quite easy to bake sweet pizzas in a skillet: they usually do not flow, and they do not take a lot of time. The filling for sweet pizzas is mainly fresh fruits, dried fruits, or thick jam (apple, pear, etc.), which do not require prolonged heat treatment. The dough for sweet pizzas can be made with cottage cheese, with the addition of juices and jams: it turns out softer and bakes better.
  11. When baking pizza in a frying pan, do not top with mayonnaise or the like (to prevent the main layers from burning).
  12. Since, due to health problems, not every person can afford baked pizza, and the desire to try such a tasty treat is great. For these cases, the option of cooking on a steam bath is provided.

Pizza is an ideal meal for a company: family dinner, get-togethers with friends, big party. First, everyone loves her – well, almost everyone. Second, pizza is a lot of fun to make. It’s very simple and you can experiment along the way. And the result is guaranteed to be delicious. In this article, we will reveal the secrets of making real Italian pizza and share the tips of professional chefs.

  1. Homemade pizza starts with the dough. Of course, you can buy a ready-made semi-finished product in a store. But it’s much more interesting to make it yourself. By the way, it takes a few days for real pizza makers to make pizza, and it’s the dough that matters. They knead it and leave it to rise for a few days. You will say – but I want pizza here and now. Well, there is a special life hack for this. To make the dough rise faster, you can heat it up in the oven. Heat the stove to 70 degrees. Then cool for 10 minutes and place the dough in the oven. Make sure that the temperature is not higher than this mark, otherwise, the yeast will die. You can put a tray with warm water under the baking sheet – then the dough will be even more tender and fluffy.
  2. Is the dough ready? Remove the rolling pin! This is not a joke: Italian chefs do not roll out the dough with a rolling pin, but knead it with their fingers and then unwind it, thanks to which the cake takes on the look we are used to. By the way, perfectly round pizzas are the prerogative of fast food. It is difficult to achieve the shape of the correct circle by hand, so the pizza from the hands of a real pizza maker can be a little uneven – this is a sign of its authenticity. Well, if you don’t have a special round board, it doesn’t matter. Homemade pizza is good because it can be anything – even round, even rectangular, in the shape of a baking sheet.
  3. The thickness of the dough according to the classic recipe of Italian pizza is 3 mm in the center, up to 2 cm at the edges.
  4. As you know, all people are divided into two categories: those who eat the pizza crust, and those who leave it on the plate. Personally, we think crisp is the tastiest thing in dough! She is also needed to hold a piece and not get your hands dirty. Therefore, when you smear the dough with sauce and spread the filling, do not fill the whole cake – leave 1.5 – 2 cm around the edges. Here’s how to make the crust really crunchy. Turn the baking sheet upside down. Cover it with parchment and sprinkle it with cornflour. And put the pizza on top. Then we put it in the oven for 10 minutes, and voila: the crunch is no worse than in the best Italian pizzeria.
  5. By the way, it is also better to reheat yesterday’s pizza in the oven. In the microwave, it loses its crunchiness, becomes dry and hard. And if you put it on the same parchment and put it in the oven for 5 – 8 minutes, it will be just as tasty as yesterday.
  6. There are many recipes for pizza dough. We offer classic – easy and quick to prepare. You will need five ingredients: flour, yeast, olive oil, salt, and water. The main thing here is flour: we advise you not to skimp on it and take a good, Italian one.
  7. Dissolve a bag of yeast in 125 ml of warm water. Pour flour in a slide into a deep bowl, season with salt. Make a small indentation in the center of the slide and carefully pour the water and yeast into it. Stir the mixture with a fork. Then, when the dough begins to turn out, knead it with your hands. Add flour, if necessary, until it becomes one piece. Pour olive oil into a bowl and knead for another 10 minutes. After that, the dough will become elastic and smooth. Wait for it to rise and you can cook.