Tag

steps

Browsing

Be active instead of waiting: What you can do now!
Especially in the currently tense and unfamiliar times, it is all the more important to give the body what it needs to build a strong defense and stay fit. We have put together five easy-to-implement tips for you on how you can strengthen your immune system quickly and effectively in times of corona and flu.

1. Ferment vegetables

The process of fermentation not only allows you to preserve your harvest, but also brings surprises in terms of taste and health. During fermentation, organic substances are microbially converted by probiotic bacteria and fungi. We’re all familiar with fermented foods – whether it’s sauerkraut, soy sauce, black tea, sourdough, wine, cheese or chocolate.

And what is so healthy about the salt bath for your vegetables? On the one hand, ferment is rich in vitamin C. On the other hand, the fermentation of fresh vegetables retains nutrients and enzymes and the lactic acid cultures that are so important for the intestinal flora are formed. The intestine has less to do because the lactic acid bacteria act like a pre-digestion and thus protect our gastrointestinal tract. Because nutrients are broken down into smaller components, they can be more easily absorbed by the body. To put it simply: A treat for your intestines from which your immune system benefits!

2. Mix golden milk

The miracle roots from Asia have now also made a name for themselves on our supermarket shelves. In the fresh food department, for example, the eye stumbles across ginger shots with lemon and honey, or the eye discovers ingredients for the golden milk on the spice shelf. Turmeric and ginger both come from the ginger family and are a real power duo.

Turmeric is an all-rounder when it comes to health promotion and enjoys an excellent reputation in the world of medicinal products – and rightly so! Because turmeric has a detoxifying, anti-inflammatory and antioxidant effect. The name turmeric, as turmeric is also known, is due to the coloring agent curcumin it contains, which not only gives Indian curry powder – but if you are not careful – hands and textiles an intense yellow-orange colour. Turmeric is said to have a positive effect against a wide variety of diseases or deficiencies and, for example, to help with diabetes, high cholesterol or intestinal problems.

3. Grow sprouts and seedlings

When the garden is less busy during the cold season, you can comfortably grow sprouts and seedlings on the windowsill or in your kitchen. The small nutrient bombs, made from seeds, cereals or legumes, are ready to eat after just a few days, depending on their size, and give you a real vitamin boost. You will find the largest possible selection of sprouts and seedlings in the meine ernte shop and allow you to try them out and get to know your favorite sprouts. In a sprout jar, your seedlings will thrive in just a few days, depending on the variety.

During germination, metabolic processes are stimulated that provide the nucleus with enough power. During this time, the nutrient content is probably higher than at any other time in the growth process. The perfect moment to harness the enormous power of the plant seedling and supply your body with healthy amino acids, B vitamins and minerals such as zinc and iron, as well as secondary plant substances. The best thing about it: The sprouts and seedlings are not only healthy, but also really tasty! The little power packs give every salad, bread or wrap the final kick of freshness. They are also a crunchy, juicy garnish for the palate as an addition to soups or stews.

4. Grow barley grass

Another superfood that you can easily grow in your own home during the cold season is barley grass, also known as smoothie grass. After just over a week, the young shoots of barley are ready to eat and are just waiting to make your smoothies, salads or vegetable juices that little bit healthier. We are happy about the boom in barley grass, the positive effects of which were studied many years ago and are now on everyone’s lips again.
Interesting not only for vegans and vegetarians: barley grass has a very high protein content and contains all the essential amino acids. Other ingredients include iron, vitamin K, various B vitamins including B12, potassium, calcium, beta-carotene and zinc. In addition, barley grass also shines with a high bioavailability, so the nutrients can be easily absorbed in the body. By the way: Fresh barley grass contains important roughage that is lost when the stalks are processed into a powder. Therefore, it makes sense to let the barley grass grow itself, after 5-7 days you can then enjoy the full power of the stalk, for example on the breakfast sandwich.

5. Forest bathing

If you spend most of your time indoors due to work or the temperatures, it is even more important to go outside regularly and breathe fresh air. Many know about the calming and grounding effect of the forest. Forest bathing means spending time in the forest undisturbed, perceiving it intensively with all your senses in mindfulness. Noises, smells and looking at the treetops are proven to be good for the body and not only the forest dwellers are happy if you spend this time consciously still and your smartphone stays in sleep mode. Particularly exciting: Staying in the forest can significantly increase the number of human immune cells. According to studies, the scents of the forest, called terpenes, are among other things significantly involved in this process. Treat yourself to a forest bath and let your soul dangle on a long walk!

Whether in the autumn sun on the terrace or for breakfast in bed: The cappuccino is more popular than almost any other coffee drink – rightly so, in our opinion. The good news: You don’t need barista training to make a good cappuccino, just a little practice. We’ll show you how to make the perfect cappuccino at home.

First things first: Cappuccino preparation

Froth 100 – 150 milliliters of milk: Professionals work here with the steam nozzle of the portafilter machine, but an electric or manual milk frother will also work
As soon as the milk has foamed finely, put the milk jug aside for a moment
Now prepare an espresso in a large, preheated cup
Now pour the frothed milk into the cup.
Already done – not that difficult, right?

Cappuccino on the coffee machine

Probably the easiest way to quickly get a cappuccino is to prepare it in a fully automatic coffee machine – one push of a button and the drink is in the cup. Unfortunately, one has to admit that the “finished” cappuccino often leaves a lot to be desired in terms of taste. If you still want to enjoy your cappuccino from the fully automatic machine, we recommend “separate preparation” – i.e. leaving the espresso and milk foam out of the machine separately.

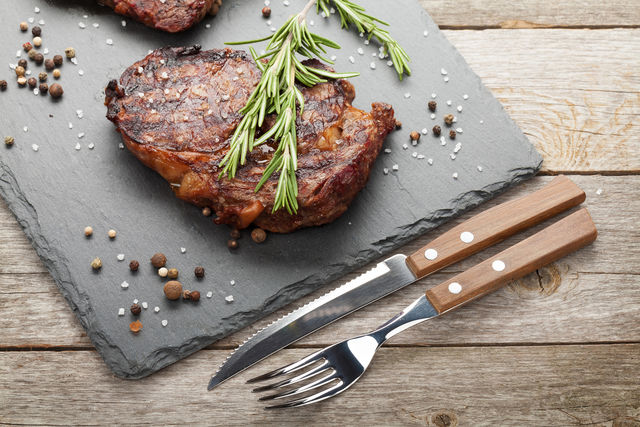
Delicious steaks are made only from the rib and lumbar parts of the carcass. So that the meat does not deform during frying, it must be on the bone, and layers of fat are needed for the taste. The ideal option is a piece of beef from the lumbar part of the carcass on a T-bone. It is called a short loin and contains a thin edge of the dorsal muscle with a soft notch. We advise you not to waste time looking for it in stores but order it from a butcher in the market. In this case, you will have to cut the meat into steaks yourself with a hacksaw, but we think that this is a slight inconvenience compared to the deliciousness that will turn out.

  1. You can cook steaks from fresh meat, but they will turn out to be harsh and not fragrant. In steak houses, cuts are exposed for a long time, up to 4 weeks, in refrigeration chambers at low humidity, good ventilation, and temperatures close to zero. This process is called “dry” maturation. During it, meat enzymes destroy connective tissue fibers and some proteins, it loses excess moisture. As a result, completely different meat is obtained: tender, rich in flavoring, and aromatic substances. Frying it is a real pleasure.
  2. Pickled and defrosted meat is not suitable for “dry” ripening: changes have taken place in it, due to which ripening becomes impossible.
  3. Before cooking, cut off the dried “crust” if you have meat after “dry” aging, and let it warm up to room temperature: a cold steak will take longer and unevenly to grill. Cut the meat across the grain into pieces at least 2.5 cm thick. One steak should weigh between 500 and 800 g. Before frying, brush the meat with vegetable oil – it will be juicier.
  4. The actual roasting: press the piece against the wire rack for a short time so that the “classic” stripes appear on it. Fry one side for 2-5 minutes, then use tongs or a spatula to turn the meat over to the other side. To check if the steak is ready, do not poke the steak with a knife or fork over and over again to prevent the juice from leaking out. Do this once in the fourth minute, and if the meat is not tender enough, hold the steak for another minute or one and a half.
  5. When the steaks are ready, cover them with foil and let them rest. Let them get to the condition due to the internal heat.

Cooking a perfect steak can be challenging, even for a skilled cook: small cuts of meat can cook too quickly, becoming dry and tough, too large to burn on the outside without being cooked on the inside. If you are new to steak, I recommend using a heavy skillet or grill pan – charcoal or electric grills are also great for steaks, but the pan will be easier to control the temperature.

Step 1 – prepare the steak

  • Cooking a steak begins by choosing meat from a grocery store or butcher. As a rule, imported beef is used for steaks, and although quality steaks from Russian beef have recently begun to appear, foreign terminology is still used to classify meat cuts. It is easiest to train in frying steaks on ribeye and striploin steaks, aka New York (in our classification, these cuts more or less correspond to a thick and thin edge) – they are soft in themselves, and will turn out to be tasty, even if you miss a little with the fry …
  • Pay attention to the so-called marbling of meat: the fat should be distributed as evenly as possible over the meat, then during the preparation of the steak, these inclusions of fat will melt, making the meat more tasty and juicy. The classic thickness of steaks is 2.5 centimeters, and if you buy meat already cut, make sure that the steaks are of the correct thickness, if you take a large piece, try on how you will cut it. So let’s get started.
  • If the steak has been frozen, defrost it overnight in the refrigerator and wipe it dry.
  • Remove the steak from the refrigerator at least 20 minutes before frying to allow it to warm to room temperature.
  • Brush the steaks on both sides with vegetable oil (I use olive oil, but you can use any unscented vegetable oil instead) and season generously with salt.

Step 2 – preheat the pan

  • Preheat the skillet over medium-high heat – it should be hot, but not smoking (if the skillet is too hot, the steak will burn on the outside before cooking on the inside, and it will be tough).
  • The hiss after placing the steaks in the pan will tell you if it is at the correct temperature.
  • Another way to check the heating of the pan is to drip a little water on it: if you have heated the pan well, the droplet will gather into an elastic ball that will run along the surface of the pan like crazy.

Step 3 – cook to taste

  • For medium-rare, place the steaks in the skillet so that they are not touching and let cook for 1 minute.
    Use tongs to gently turn the steaks over (be careful not to damage them to prevent the juices from leaking out) and cook for 1 minute more to form a crust.
  • Turn steaks over again and reduce heat to medium. Cook for 2 minutes, turn over and cook for another 2 minutes.
  • To check the doneness, gently press down on the steak with your fingertip. The steak with blood should be soft and pliable, well done and firm, and the middle one, as expected, will be something in between.

Steak cooking time

You can vary the degree of frying of the steaks to your taste by increasing or decreasing the cooking time. Below is the approximate time that is suitable for a 2.5 cm thick steak. Thicker steaks require a longer cooking time and vice versa.

  • Rare (with blood) – 1-2 minutes on each side, rest for 6-8 minutes;
  • Medium rare (low roast) – 2-2.5 minutes on each side, rest for 5 minutes;
  • Medium – 3 minutes on each side, rest 4 minutes
  • Well done – 4.5 minutes on each side, rest 1 minute.
  • However, the most accurate (although not always accessible to a beginner) way to determine the degree of doneness of a steak is to use a meat thermometer.

Step 4 – rest the steaks

  • Leaving the meat to lie down for a while is just as important as cooking it correctly – in these few minutes, the juices will be distributed inside the piece, the temperature will even out inside and outside, and the whole steak will become warm, juicy and tender.
  • Remove steaks from skillet, season with black pepper, and place in a baking dish. Place a slice of butter on each steak, cover with foil and leave in a warm place for 4-5 minutes.
  • Remember, it’s better to rest the steak longer than necessary, and not less, this will allow it to acquire the greatest flavor and softness.

Step 5 – serve the steaks

  • Steaks require sharp, non-serrated knives to cut the meat evenly.
  • Serve the steaks on hot plates to keep them cool.
  • It is believed that good meat does not need sauce – and if you agree with this statement, simply pour the juices mixed with the melted butter on the bottom of the mold on the steak.
  • Choosing a side dish for a steak is a personal matter, I prefer a green salad.

Whether you are cooking marbled meat for the first time, or with regular consistency, read the answers to the questions in this section. You will definitely find something interesting for yourself.

Step 1. Remove the meat from the refrigerator a few hours before cooking and place it on an absorbent surface. The meat should warm up to room temperature so that it is evenly fried throughout the entire volume during cooking.

Step 2. If you are cooking a steak in a cast-iron skillet, put the pan on the fire and heat it well. If you prefer a steak more fried, then preheat the oven to a temperature of 200 ̊С, it is better if there is a grate in the oven. If you are grilling a steak, turn on the grill or light the coals and heat the grate well on which you will cook the steak.

Step 3. Brush the meat with a little oil, pepper and salt with coarse sea salt.

Step 4. Wipe the pan or grill rack with a waffle towel with a little oil, when the pan starts to “smoke” you can put the steak on the wire rack.

Step 5. Fry the steak on each side for 1.5-2 minutes, then place the steak on the edge, as if sealing it on all sides.

Step 6. If you are cooking a steak in a cast-iron skillet, while the steak is on the rib, add a little butter, crushed garlic, and a couple of thyme sprigs into the skillet. Dip the steak in boiling oil on each side.

Step 7. If you prefer less roast, then the steak can be removed from the pan or wire rack, but not immediately onto the plate. Let the meat rest for a few minutes, so that all the meat juice inside the steak is distributed throughout the entire volume.

Step 8. If you prefer the steak more cooked, then hold it on the wire rack for a few more minutes, turning it constantly so that it does not burn. If there is an oven, then place it in the oven for 4-6 minutes, then take it out and also let it rest.

Step 9. Then serve the steak on a plate, add salt and pepper and voila, the steak is ready!

To get a taste of the steak, forget about the sauce, at least for the first couple of slices. Add a little more salt. As a side dish for me, the best option is grilled vegetables. But anything can go with a steak, even pasta!

Experts recommend a certain number of steps per day to keep fit and prevent diseases caused by lack of exercise. Are you sticking to this step goal?

Laziness can make you ill – this is why daily exercise is important

Adult diabetes, heart attack, cancer, Alzheimer’s disease and osteoporosis – these are all diseases whose risk of contracting increases due to prolonged lack of exercise. Experts, including the North Rhine Medical Association, therefore recommend a step goal of 10,000 steps a day. In order to be able to better understand the steps, mobile phones now have a pedometer function. Other possibilities are fitness trackers, or you can estimate the number of steps.

However, there are also opinions that set the daily step goal a little lower. Often, instead of 10,000 steps, you hear 8,000 or 6,000 to do something good for yourself. Researchers put 6,000 steps as the minimum for walking to have a positive effect on health. Exceeding the guideline is absolutely harmless, since the human body can cover about 20 kilometers a day without any problems.

According to a Stanford study that evaluated data from pedometers worldwide, around 4900 steps a day is the average value. At 5200, Germany is slightly above the average, while Hong Kong citizens are at the top of the world rankings with an average of 6880 steps per day.

If you consider that a bathroom has an average lifespan of around 20 years, then the furnishing and design of the bathroom should be a priority. The bathroom should be redesigned so that rancid tiles, dilapidated fittings, and boring bathing utensils are a thing of the past.

Bathroom remodeling tips

If the sight of the bathroom reminds you of times long past, then it’s high time for something new! Because this old look can cause discomfort in the bathroom. Instead, a new look should be created so that you feel comfortable and enjoy spending time in the bathroom. In this article, we transform your bathroom into a feel-good space in just 5 steps with clever bathroom redesign tips. There is no need for a complete bathroom renovation or refurbishment. Even small changes are enough.

Step 1: Make the bathroom look bigger

The basic rule for making small rooms appear larger is: Create optical width through minimalism and spaciousness! And you can do that with a few simple tricks:

  • Consistently clearing out: Who doesn’t have a lot of bathing utensils and drugstore items building up over time? So everything out that doesn’t necessarily have to stay inside. Mucking out can be done for the whole apartment.
  • Creating clever storage space: It is important to use the space in the bathroom as sensibly as possible. A cupboard under the sink can work wonders.
  • Mirrors for more room depth: Mirrors cover a relatively large area, giving the impression of an extended room.
  • Install light sources: Light, when used properly, can create more spaciousness. Several small ceiling lights are recommended.

Step 2: Make the bathroom look brighter and friendlier

How does it work? By painting over the tiles and giving the toilet a new “paint”. Best in a neutral, modern tone like a creamy beige, gray or classic white. This is by far the easiest, fastest and cheapest way to spice up the bathroom again. The tiles only have to be cleaned and then painted over with the color of your choice. However, if there are tiles that are cracked or even broken, then unfortunately you cannot avoid new tiles.

Step 3: Old out – new in

Colorful shower curtains or old-fashioned frosted glass have no place in a modern bathroom. Completely clear glass shower cubicles are currently the trend. The experts from the platform www.Luvett.de advise those who would rather save money to focus on cheaper highlights, this can be a rain shower head or a new toilet seat. These are now available in countless colors. The trend colors for toilet seats in 2021 include pastel colors in particular. And the sink can either be replaced or embellished at a low cost. Anyone who decides against a new one and in favor of a make-over can, for example, attach a self-made mosaic mirror.

Step 4: The right packaging

The hand soap has an orange plastic dispenser, the many hair shampoos in red, green, purple, and blue are scattered throughout the shower and the trash can is silver. Such a wildly mixed collection in the bathroom cannot look tidy at all. In order to bring a clear structure to your bathroom, shampoos and soap can be poured into uniform pots. The best bathroom sets are where the soap dispenser, toothbrush cup, trash can, and even the toilet brush are in a uniform look. This creates a tidy and structured effect in the bathroom.

Step 5: Decorate nicely

Finally, it’s time to decorate the room. Because modern bathroom accessories can not only set accents but also give the bathroom an individual, personal touch. However, the following applies here: less is more! Because the decisive criterion of a modern bathroom is the minimalist, reserved style. Therefore, it is advisable to simply combine the beautiful with the use and create decorations that not only look chic but which you can also use to store your bathroom products and utensils.