Tag

very

Browsing

Coffee and Germany simply belong together. No other drink is drunk as much as coffee. The causes for this are manifold.

Coffee at any time of the day

For most Germans, the start of the working week is not really positive. You are tired, stressed and know that a hard day is ahead. What can improve your mood in the morning as quickly as a freshly prepared and good coffee? No wonder most people love to start the day with a delicious cup of coffee. At weekends, the coffee is part of a relaxed breakfast ceremony. In the afternoon it is literally part of “drinking coffee” with cake and other delicacies. So it’s no wonder that the Germans’ love of coffee isn’t waning.

Germans love coffee so much that for several years there has always been a day of action on the first Saturday in September: Coffee Day. This was initiated by the German Coffee Association. The Germans love their coffee because it goes with every occasion. Whether in the morning for breakfast, in between at work, as a nightcap in the form of an espresso after dinner, whether at weddings, birthdays or any other celebration – a coffee is never out of place!

A love full of coffee enjoyment

Coffee is the epitome of enjoyment for all the senses. It starts with opening the coffee bag. The subtle rustling of the individual brown roasted beans exudes a spicy roasted aroma that stimulates all the senses. Even the sound of grinding the coffee bean makes your mouth water in anticipation of the enjoyment ahead. Coffee not only smells extremely good and tastes great, it also feels phenomenal. Soft and full-bodied, it melts on the tongue until it glides comfortably warm down the throat.

Coffee is the epitome of enjoyment for all the senses.

However, coffee has many more benefits than just an aromatic smell and taste. The Germans benefit from their love of coffee, after all it makes you awake and healthy. It stimulates the cardiovascular system, improves physical performance and has a positive effect on the ability to concentrate. Enjoyed in moderation, coffee is good for the body and soul.

The many facets of coffee

Another enormously positive property of coffee is the many areas of application. In ground form it is considered an effective peeling. Caffeine is even said to make tired eyes perk up again and have an anti-aging effect. Many gardeners use it to combat ants or as a fertilizer for flowers. It is also said to provide excellent service as a grill cleaner. It also eliminates bad smells from cars and refrigerators. In addition, coffee can be used to prepare many delicious meals and dishes, such as delicious desserts. Hardly any other love is as diverse as our love of coffee.

What exactly is a specialty coffee? The term is protected by strict guidelines of the “Specialty Coffee Association of America” ​​(short: SCAA). The world’s largest specialty coffee organization tests the quality of a coffee bean based on very specific criteria. So-called Q-graders, professional coffee experts, evaluate and award the coffee. For this purpose, the SCAA has developed an evaluation system for the quality of green coffee, in which the coffee is evaluated physically and sensorially. The physical check is carried out, among other things, by identifying defects. From a sensory point of view, the coffee is evaluated in so-called cuppings (tastings) on a scale of up to a maximum of 100 points.

A specialty coffee must achieve 80 points or more on the SCA scale before it can bear this title. High quality is the most important factor, this is achieved through ecologically sustainable cultivation. However, complete transparency of the entire delivery process is also important, as well as direct communication channels from the roasters to the coffee farmers. In addition, fair wages and the promotion of social projects in the country of origin also play a major role in creating a specialty coffee.

High-quality standards for specialty coffee

The different quality differences of the coffee beans are classified in so-called grades from 1 to 5. Where 1 is the highest and 5 is the worst quality level. The types of coffee with the highest grade may then bear the title of specialty coffee. The classification is related to the number of defective beans.

With specialty coffee, only three broken, no unripe and no discolored coffee beans may be contained in 300 grams. The coffee is assessed using various criteria in order to find the best possible quality. For this purpose, five samples of one coffee are prepared in parallel in order to then evaluate the uniformity, the purity of taste and the sweetness. The coffee receives the best rating when all cups taste uniform, pure and sweet – then it is classified as a specialty coffee.

Evaluation of the coffee bean

The coffee is judged by the Specialty Coffee Organization in professional cuppings, also known as coffee tastings. This is based on the following classification:

Below 80 points: Conventional merchandise. This is ordinary coffee from the supermarket with no special taste and sometimes irregular roasting due to existing defects.
More than 80 points: This coffee is a specialty coffee. The coffee can only bear this title if it achieves more than 80 points.
80 – 84.99 points: Particularly good coffee with special taste characteristics. The aromas are finer and the coffee has no serious defects.
85 – 89.99 points: Excellent coffee with a refined taste, exceptional complexity and a special sweetness.
90 – 100 points: Absolute rarities, not even 1% of all coffees are rated that well. In this category there are only coffees with extraordinary aromas that clearly stand out from the other varieties.

The origin of a specialty coffee

The indication single origin refers to the origin of the coffee. The beans differ depending on the season and harvest time, so that they can definitely show differences in taste. For this reason, many manufacturers mix the coffee beans from different growing areas (blend) in order to retain the usual taste. However, this process loses some of the quality as many blends have a similar taste. Accordingly, a single origin, i.e. a single-variety coffee, is an indicator of the high quality of the beans and is therefore important for the production of specialty coffee.

The perfect cup of coffee: roasting and brewing

Did you know that coffee contains more than 800 aromas? During roasting, as many of these aromas as possible should unfold in order to get the best possible taste. It is important that when roasting specialty coffee, none of the special sensory properties are covered, because it is precisely these properties that make specialty coffee so special. Traditionally, the coffee is roasted gently and slowly (15-20 minutes) at a temperature of 200 to 230 degrees. Each coffee has its own roasting profile, which is precisely documented in order to bring out the special quality of the coffee bean.

Japanese cuisine has so long and firmly entered our lives that among your friends there can easily be more sushi lovers than salads. So throwing a sushi party is a very tempting idea. But what if your first attempt at making sushi on your own failed? Then this article is especially for you.

  1. Have you ever cut a tomato with a dull knife? Exactly. The fish knife should be very sharp. And long. To prevent a slice of fish from falling apart, it must be cut off in one, maximum two movements, then the slice will be smooth, even and, most importantly, whole. If you completely hit the authenticity, there are special Japanese knives for cutting fish and sushi with one-sided sharpening. Our chefs start every day with a sharpening knife. And before cutting the rolls, the knife is barely moistened with water. The fish should be cut at an angle of about 45⁰ along the grain, so that the slice will not fall apart.
  2. It’s hard to imagine Japanese cuisine without rice. But unlike rice, which we use for porridge, pilaf and other dishes, to prepare sushi we need a different type of product and a different method of cooking. First, the rice must be round grain. In stores, this rice is usually marked “for sushi”. Such polished grain is quite sticky, but at the same time it does not stick together in a lump. Of course, if you cook it properly. And it is necessary to cook clearly to the degree of al dente (when the rice is already ready, but has not yet lost its elasticity), in no case should it be overcooked. To simplify the task, you can use a slow cooker or rice cooker, in which the product will be ready in 25 minutes. You can add a special dressing of rice vinegar, salt and sugar to the finished rice – in addition to giving a special taste, it will allow the rolls to keep their shape better.
  3. The importance of choosing good fresh fish is hard to overstate. Take fish that has been shock-frozen. Temperatures from -18⁰C to -30⁰C kill absolutely everything that your stomach may not like. Buy fish in trusted stores, and in no case “off hand” in some spontaneous market. Choose vacuum-packed fish in stores.
  4. An indispensable sauce for most Japanese dishes is sold in our stores in powder form. Don’t worry, there is no chemistry in it, it just keeps the grated green Japanese horseradish. In order for it to take the form you know, it must be diluted with boiled water at room temperature. But be careful, when mixing the powder with water, the fumes are the same as when chopping onions. The strength level can be controlled independently – the more water, the less burning your wasabi will turn out to be.
  5. Wasabi. The correct soy sauce consists of only 4 ingredients: soybeans, wheat, salt and water. Read the composition carefully. It is advisable to buy soy sauce in a glass bottle – it is stored in it much longer than in a plastic container. Also, soy sauce can be sold concentrated or already diluted. Again, study the label. Restaurants serve ready-to-eat sauce, but when ordering delivery, couriers bring in a concentrate (as written on the cap), which must be diluted to taste.
  6. Before making your sushi, make sure you have the correct bamboo curling mat. Many novice “home sushi” use a plastic bag to shape the rice, which is fundamentally wrong and unproductive – the rice will still fall apart. So you can’t do without a mat. So, put the rice on nori (green sticky seaweed) and put it on the mat, after wetting your hands with vinegar water, evenly lay out the other ingredients – the filling, and twist with effort. We fix it for a few seconds and carefully unfold it. The result is the perfect rice sausage. Cut it with our super-sharp knife soaked in water and sprinkle with sesame seeds or other spices to taste. Knowledge, patience, sleight of hand and a little magic.

We’ve prepared 10 Best Tips for you to make the best salad ever!

  1. It is recommended to salt the salad first, and only then season with vegetable oil. Remember, salt does not dissolve in oil.
  2. For the vinaigrette, first mix the beets with vegetable oil, and only then add other vegetables so that the beets do not stain them.
  3. Parsley for salad should be in hot water to make it more flavorful.
  4. Do not replace fresh herbs with dried ones, use fresh herbs better, they are healthier.
  5. For the salad, first pour the onions over with boiled water, then cool them cold and only then chop, so it will be tastier.
  6. Add a little sugar when boiling the beans, so they will cook much faster.
  7. If you are boiling green peas, you do not need to add salt to the water, they can become harder and take longer to cook.
  8. For salads, chicken eggs are boiled for no longer than 10 minutes.
  9. Use lemon juice or apple cider vinegar for salad dressings.
  10. If your salad is made from rice, then you shouldn’t put potatoes in it either.

Do you want to cook the most delicious salads? We will help you with this!

  1. Salad potatoes will not darken when boiled with a little vinegar.
  2. If potatoes for salad are boiled “in their uniform”, then they must first be pierced with a fork in several places, then the peel will not burst.
  3. Beets for salad will taste better when cooked in unsalted water. To prevent the beets from losing their color during the cooking process, add a little sugar to the water or pour in kvass, as was done in the old days.
  4. It is not recommended to bake or stew beets in a metal dish or on a metal baking sheet – this impairs its taste.
  5. Do not cook beets and carrots together, as this will not only lose color, but also taste.
  6. So that the beets do not color all the vegetables in the vinaigrette, it must be separately seasoned with vegetable oil and only then combined with other products.
  7. Boiled root vegetables are easy to peel warm.

Before you embark on this exciting business, try to create in your kitchen that magical atmosphere that accompanies the preparation of pizza in her homeland. Pizza has more than enough homeland, so in the process of culinary creativity you can imagine yourself anywhere.

  1. A thick layer of dough is good for fluffy, layered, and moist filling. You can also layout the main filling of vegetables and meat on it.
  2. The frying pan has a lot of advantages over baking on a baking sheet: the dough is easily removed, practically does not burn; you can bake different pizzas and put different toppings.
  3. Before baking, the pan, like the oven, is heated to the required temperature, a small amount of vegetable oil is poured to lubricate the bottom and soak the pizza, and heated. Then spread the dough, fry on one side, and remove from the pan.
  4. You can also bake pizza under the lid. This is even easier since it will be baked all at once, it does not need to be turned over. There are pans with thermal glass lids; they are most convenient for baking pizza.
  5. Roll out the dough in a small layer, spread it on a preheated pan greased with a large amount of vegetable oil, and immediately put the filling on it. Cover with a lid and reduce the heat to a minimum so that the dough is baked evenly.
  6. In a frying pan, pizza is cooked much faster than in an oven: the baking time is 15 minutes. The plain dough can be kept on the fire for 10 minutes, as it roasts faster than yeast dough. We remind you: its thickness should not be too large.
  7. Its readiness is checked with a match, piercing it in the thickest place. If the match is dry, the pizza is ready. In an open pan, the dough is baked in 2 steps, so the baking time is slightly increased (the pancake should be allowed to cool slightly before putting the filling). Thus, pizza preparation takes 20-25 minutes.
  8. Since the dough is baked pretty quickly, the raw filling simply won’t keep up with it. All of it must be prepared in advance – fried, stewed, or boiled.
  9. Its thickness must also be monitored so that it does not spread, as the juice or syrup will be absorbed into the dough and it will remain damp and tasteless. In addition, the liquid can seep through the layer of dough and burn the pizza. The best filling option, in this case, is when the bottom layer is meat or fish, dry boiled vegetables, and on top – slightly softer or raw foods. Then they will saturate the lower layers, but nothing will leak to the bottom of the pan.
  10. It is quite easy to bake sweet pizzas in a skillet: they usually do not flow, and they do not take a lot of time. The filling for sweet pizzas is mainly fresh fruits, dried fruits, or thick jam (apple, pear, etc.), which do not require prolonged heat treatment. The dough for sweet pizzas can be made with cottage cheese, with the addition of juices and jams: it turns out softer and bakes better.
  11. When baking pizza in a frying pan, do not top with mayonnaise or the like (to prevent the main layers from burning).
  12. Since, due to health problems, not every person can afford baked pizza, and the desire to try such a tasty treat is great. For these cases, the option of cooking on a steam bath is provided.

Gluten-free bread is not available from every bakery. If you have to or want to do without gluten, you will find an uncomplicated bread recipe for everyday use here with teff flour, chia, and psyllium husks.

Those who cannot tolerate gluten-containing products must keep their eyes open when shopping. Getting gluten-free bread or rolls is anything but easy. In the meantime, however, there are baking mixes for gluten-free bread in health food stores, organic markets, or well-stocked supermarkets. If you don’t want to use a baking mix and want to bake your own bread, you can try this rather uncomplicated bread recipe.

Locust bean gum and psyllium husks ensure a nice bond. Organic psyllium husks in particular consist of up to 80 percent dietary fiber. They also contain mucilage. These swell in the digestive tract and bind up to 40 times their weight in water. Flea seed shells, for example, are great as an egg substitute for vegan baking. Why not try the organic psyllium husks from Steinberger! Alternatively, you can use chia seeds as a binding agent for gluten-free bread, for example, which swell into a thick gel when combined with warm water. Caution: The baking time will be slightly longer if you use chia seeds as a binding agent.

The types of flour can be replaced with other gluten-free flour; It is only important that the number of flour totals 500 grams.

Gluten-free bread: the ingredients to bake yourself

  • 500 ml lukewarm water
  • 1 cube of fresh yeast
  • 1 tsp honey
  • 200 grams of rice flour
  • 150 g teff flour
  • 150 grams of buckwheat flour
  • 2 tsp locust bean gum
  • 1 tbsp ground psyllium husk
  • 1 tsp salt
  • 1 tsp vinegar
  • 2 tablespoons oil
  • a handful of nuts, seeds, or kernels (we used hazelnuts)
  • 1 loaf pan (26 centimeters)

Gluten-free bread: preparation

  1. Put water in a bowl, dissolve yeast and honey in it
  2. Add the other ingredients and knead with the dough hook of the hand mixer until a viscous mass is formed. If the dough is still too dry, add some lukewarm water.
  3. Grease the loaf tin with a little oil and pour in the dough. Cover with a kitchen towel and leave to rise for an hour in a warm place.
  4. Preheat the oven to 220 ° C (fan oven). Place a small pan of water on the bottom of the oven. Brush the surface of the bread with some oil and put it in the oven for an hour. After 10 minutes, turn the temperature back down to 200°C.
  5. Let the bread cool down and turn it out of the pan.

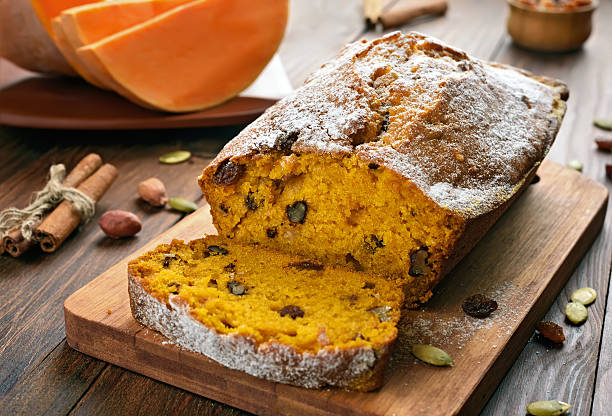
It’s bright orange and extremely juicy and delicious: we’re talking about pumpkin bread. But the autumn baked goods are rarely found in stores. So now it’s time to bake pumpkin bread!

You only need a few ingredients and a little patience to bake pumpkin bread, because the pastry is made from yeast dough. When it comes to choosing the type of pumpkin, the only limit is your imagination – we chose the Hokkaido pumpkin because it doesn’t even have to be peeled.

Bake pumpkin bread – healthy ingredients

Pumpkin bread not only scores points in terms of taste with its fluffy and juicy consistency and the slightly sweet and nutty aroma, the ingredients are also impressive thanks to good ingredients.

The wholemeal flour in the dough provides a good deal of fiber and B vitamins, while the pumpkin contains few calories (25 kilocalories per 100 grams) and plenty of beta-carotene, the plant-based precursor of vitamin A. Pumpkin seeds also score points with polyunsaturated fatty acids and iron.

Bake Pumpkin Bread

The ingredients for 1 pumpkin bread:

  • 450 g pumpkin of your choice (makes approx. 300 g pulp)
  • 500 g wholemeal spelled flour
  • 1 cube of yeast (42 g)
  • 1/2 tsp honey
  • 350 ml of lukewarm milk of your choice (e.g. goat milk, buttermilk)
  • 110 grams of butter
  • 1 tsp salt
  • 60 g pumpkin seeds

The preparation:

  1. Wash or peel the pumpkin, clean and cut into small cubes. Place the diced pumpkin in a saucepan, cover with water and cook covered for about ten minutes. Then drain, finely puree, and leave to cool.
  2. Meanwhile, put the flour in a bowl, make a well in it and crumble the yeast into the well. Mix the honey, milk, and some flour from the edges to form a pre-dough, cover, and leave to rise for 15 minutes in a warm, draft-free place. Melt 100 grams of butter.
  3. Add butter, salt, pumpkin puree, and 50 grams of pumpkin seeds to the pre-dough and knead everything into a smooth dough.
  4. Grease a loaf pan with the remaining butter and fill in the batter. Cover and let rise for another 15 minutes. Sprinkle the bread with the remaining pumpkin seeds and bake the pumpkin bread in a preheated oven at 200 °C (180 °C fan oven; gas: level 3) for approx. 60 minutes.

Fried pickles are all the rage! The food trend sounds a bit weird, but it is true soul food. It’s worth trying!

Frying vegetables – that always works. Now it’s the turn of the pickles: In the USA, fried pickles have long been a popular snack for the heart and stomach. The hype after the crispy bite is slowly spilling over to Germany.

It’s that easy:

The fried pickles are not only super delicious but also very easy and quick to prepare and are sure to be eaten quickly.

To do this, cut the gherkin into slices like chips or into sticks (like French fries), season to taste, coat in breadcrumbs, and fry in hot fat until golden brown.

A spicy sauce should not be missing

Various sauces are suitable for dipping the crazy vegetarian snack. Whether sour cream, yogurt dip, ketchup, mayonnaise, honey-mustard sauce, horseradish, or guacamole: all dips are an exciting combination with fried pickles.

Salty, sweet, greasy, and spicy: everything your heart desires! It doesn’t just sound tempting, it’s also the perfect finger food for every party or a different, hearty snack to take home.

How healthy is the snack?

Fried vegetables are always better than chocolate, chips, or other unhealthy and processed snacks. However, the fried gherkins ultimately have a high-fat content and should not be consumed excessively.

Cucumbers are so healthy

Cucumbers in their raw form are incredibly healthy. They are very low in calories because they are 95 percent water and are not called “slim vegetables” for nothing. They are full of minerals such as potassium, iron, zinc, fluorine, and some vitamin C.

So if you fancy a low-calorie and healthy snack, you should grab raw cucumbers and dip them in a homemade herb quark, hummus, or guacamole, for example.

Cucumbers are also the perfect ingredient for smoothies, as they are rich in water and give the drink a refreshing aroma.

Would you like to peel almonds but don’t know how to do it? It’s easy. We explain how it works and what you should know about almonds.

Peel almonds – what do you mean by that?

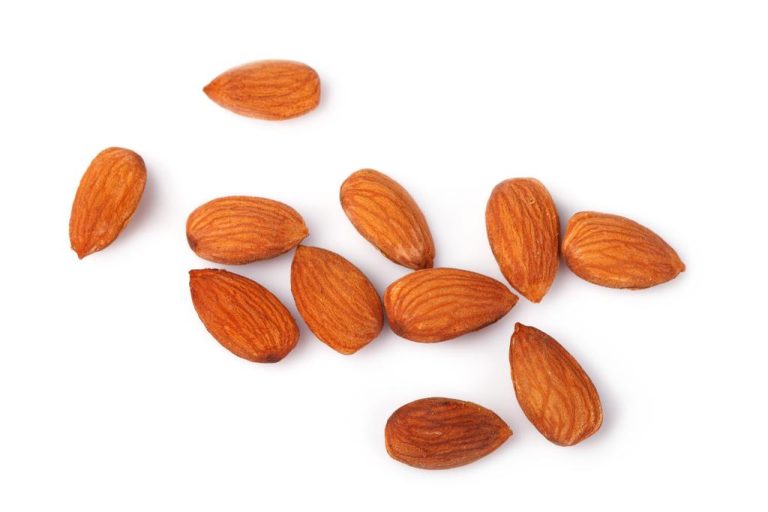
Almonds are delicious and contain valuable oils and proteins. You can get them in stores mainly as almond kernels, where the hard shell has already been removed. If you want to process them, you may want to peel the almonds even further for certain recipes. What is meant by this is the thin brown skin that surrounds the amygdala. This skin is often a bit bitter. But it can be easily removed with a simple trick.

How to peel almonds

To peel almonds, you have to blanch them briefly. When dry, you will hardly be able to remove the skin. How to do it right:
Put as many almonds in a saucepan as you need.
Cover the almonds with water and let the almonds boil.
Let the almonds cook for 2-5 minutes.
Pour them into a colander and shock them with cold water.
The skin can now be removed very easily: You can practically push the almond out of the skin. The best way to do this is to press your fingers together at the rounded end of the almond.
If you want to peel a lot of almonds, the above method can be a bit tedious. In that case, try this trick:
Blanch the almonds as described above.
Put the quenched almonds on a kitchen towel and fold it shut.
You rub this packet through a bit and then collect the skinned cores.
You may need several passes until all the almonds are shelled.