Tag

way

Browsing

Loose buttons are often a problem. You often lose them on the way and your favorite piece of clothing is broken. So that this doesn’t happen to you again in the future, you have to fix buttons with a simple trick. Because buttons last longer and don’t get lost.

Trick to fix buttons

You’re in a hurry and need to change quickly for the meeting. That’s when it usually happens – a button tears off! Bad luck! But there is a great trick to prevent this in the long run. This button trick worked in the self-test. All you have to do is to fix the button correctly, for this take the following tools at hand and fasten your buttons:

1) Buttons last longer with nail polish

With nail polish, you not only get beautiful nails but you can also fix your buttons. To secure the button, dab the yarn under the button with clear nail polish after purchasing the new item of clothing. Then the buttons are guaranteed to stay on longer thanks to the “sealing”. Try to put the clear nail polish in the holes of the button without getting your clothes dirty. You can also use nail polish to repair minor paint damage that affects the appearance of your household appliances.

2) Sew the button again

Small sewing jobs are not rocket science. Whether patching small holes in T-shirts, repairing loose stitches, or sewing on buttons. In order for your buttons to last longer and not come loose, you should react quickly and sew the button back on firmly. Sewing on the button is very easy and a good tip even for sewing beginners.

Eating garlic raw is worthwhile – the healthy components of the tuber are better preserved. In this article you will find out why this is and which preparation methods are recommended for garlic.

Garlic adds flavor to many warm dishes, but it can also be eaten raw. The aroma of the fresh cloves is significantly sharper and more intense than that of fried garlic and therefore does not appeal to everyone. For people who generally appreciate the taste, it is worth eating garlic raw: the tuber has healthy components that are better preserved.

Why is garlic healthy?

Science has been studying the health benefits of garlic for a long time. The exact interaction of the ingredients has still not been clearly clarified to this day. Garlic, for example, is said to protect the vessels and thus prevent cardiovascular diseases – according to the Apotheken-Umschau, however, there is still no clear evidence of this. Garlic is also repeatedly attributed an antimicrobial and blood sugar-lowering effect.

Scientists often attribute these effects to the ingredient allicin, a cleavage product of the amino acid alliin. When garlic is crushed, the enzyme alliinase is formed and combines with alliin to form alicin. Among other things, this also creates the characteristic smell.

However, garlic also contains the secondary plant substance saponin, which is said to have a cholesterol-lowering effect. However, this effect can only develop from a quantity of four grams per day, reports the NDR. To do this, you would need to eat a large clove of raw garlic per day.

Is it Healthier to Eat Garlic Raw?

Allicin quickly loses its effectiveness after cutting or pressing. It is therefore advisable to consume the garlic as soon as possible afterwards in order to be able to benefit from this effect. A study from 2020 was able to detect allicin in the blood and excretions of test subjects after they had consumed pressed raw garlic.

In general, the nutrient and vitamin content of vegetables often decreases when they are boiled or roasted. Therefore, other types of vegetables are also healthier if you eat them raw.

Another study published in 2015 examined different garlic preparation methods and found the highest allicin content in (minced) raw garlic. The authors of the study, on the other hand, recommend stir-frying as the most gentle warm form of preparation.

If you don’t want to eat garlic raw, you can also mix pureed cloves with oil to make a garlic paste and gently cook them at 70 degrees. According to the NDR, some sulfur compounds are destroyed in the process – but the taste is milder and there are still enough healthy ingredients left.

You can use raw garlic in dips and spreads such as homemade tzatziki, homemade vegan aioli, skordalia or garlic butter.

Freezing gooseberries is a good solution if you’ve harvested too many to eat them all fresh. Here you can find out what you should pay attention to.

Freezing gooseberries works very well if you pay attention to a few things. The green, smooth gooseberries are particularly suitable for freezing. The berries don’t have to be quite ripe yet, because that way you reduce the risk of them bursting later.

Unlike other fruits, you don’t have to freeze gooseberries immediately after picking them – you can store them for a few days beforehand.

Freezing gooseberries: the preparation

Wash and trim gooseberries

Wash the gooseberries in the sink or a bucket, then remove their flowers and stems. The water should only be lukewarm or even cold.

Blanch gooseberries

To prepare, you should also blanch the gooseberries. To do this, put them in a pot of boiling water for about two minutes and then take them out again. Then pour cold water over them.

Sugar or not?

Optionally, you can sugar the gooseberries before freezing. This is not a must, but sugar makes the berries even more durable. Simply sprinkle the berries with a little sugar or boil it in some water and then pour the liquid over the berries.

Recommendation: shock-freeze gooseberries

Fruit often freezes together in the freezer and you can no longer remove it in portions. To prevent this, you should flash freeze the gooseberries before freezing:

Place them individually next to each other on a baking sheet or large plate.
Then store them in the freezer for two hours.
Important: The gooseberries should not touch each other and the freezer compartment should be set to the highest level for a short time.

The actual freezing

The last step follows: Freezing.

Take the shock-frozen gooseberries out of your freezer after two hours and store them in containers.
Make sure not to use plastic bags, but rather more environmentally friendly variants. Old jam jars or stainless steel cans, for example, are well suited. You can find out what other options are available here: Freezing food without plastic: 5 tips.
Store the jars in the freezer or freezer compartment.
The berries can now be kept for eight months. You can even store them in the freezer for up to a year.

If you have a surplus harvest or simply want to prepare cauliflower out of season, you can freeze it and preserve it that way. We’ll show you how.

Cauliflower is in season in Germany from June to October. Then you can harvest the vegetables in your garden or buy them at the market. But you shouldn’t freeze it raw – otherwise it will probably become soft after thawing. We will show you how to proceed as gently as possible and how to preserve the important nutrients in the vegetables.

Before freezing: chop the cauliflower

  • Wash the cauliflower and remove any leaves.
  • Cut the cauliflower into pieces. Depending on the intended use, you can decide how big the pieces should be. We recommend cutting the cauliflower into bite-sized pieces.

Freezing cauliflower: this is how it works

To preserve the nutrients in cauliflower, you need to blanch it before freezing.
Bring water to a boil in a saucepan.
Meanwhile, have a bowl of ice water ready.
When the water boils, add a squeeze of lemon juice. This prevents the cauliflower from turning brown.
Place the cauliflower in the boiling water for about three minutes.
Then take the cauliflower out of the hot water with a slotted spoon and place it in the ice water.
Remove the cauliflower from the ice water and gently pat dry with a towel.


Place the cauliflower in freezer-safe containers and place them in the fridge. It’s important to portion the cauliflower or it will freeze together. This makes it difficult to separate and portion.
The cauliflower will keep for several months. When you prepare the cauliflower, add it to the cooking water from frozen. If you thaw it beforehand, it will quickly become mushy.

They still exist! The traditionalists, the nostalgic, the idealists and perfectionists. Those who see a craft in coffee culture and practice it with devotion. Those who still prepare filter coffee with a coffee machine and ignore fully automatic coffee machines in favor of the espresso maker – the elite of coffee makers, so to speak. They often stand in groups in front of the filter coffee machine in the office and talk shop together about the different ways of making coffee. If you want to have a say, you have to be very knowledgeable!

Even before there were professional coffee machines and filter coffee machines, grinding was done by hand. Even today, the coffee beans are often ground by hand with cone grinders, where the degree of grinding can be adjusted. But all of this is no longer necessary. However, the basic principle of coffee grinding has not changed to this day. Do you know the process of maceration? That means something like wearing down or leaching. Here, the ground coffee is poured over with boiling water and left to steep for at least five minutes. Today, for example, the popular mocha coffee is also prepared with maceration. The coffee preparation of percolation means the usual filtering of the ground coffee beans.

Coffee making in the traditional way at a glance:

Oldie but goldie: the espresso maker

Let’s start with the most traditional of all types of coffee preparation: The espresso maker is, so to speak, the mother of all coffee makers. The classic design of the small coffee pot made of stainless steel or aluminum originally dates from 1933 by Alfonso Bialetti and brings tears of joy to the eyes of coffee enthusiasts and treasure collectors alike.

Especially in Italy, the preparation with the espresso maker is very popular. Connoisseurs appreciate the coffee preparation in Italian, which means celebrating the process extensively – a lout who only thinks of quick enjoyment. It starts by pre-boiling water to speed up the brewing process, to the right water temperature, and grinding fresh coffee. The degree of grinding should tend to be coarser than that of espresso for the portafilter, similar to sand. The water tank of the espresso maker is filled with water up to the valve and the coffee filter above it is filled to the brim with coffee powder and smoothed out. And now: screw the pot on, place it on the stove over medium heat and, with the lid open, watch how creamy, aromatic coffee is extracted. Maintain this state until only steam rises from the pot.

Then remove the pot from the heat and wrap the bottom part with a cold, damp cloth to stop the extraction. The self-brewed coffee is then ready to be served and released for tasting in – attention, Pro-Tip – preheated (!) cups.

Coffee making by hand filter

Anyone who has overheard the coffee nerds in their technical discussions may be familiar with the term pour over method. This means coffee preparation with a hand filter; a way of making coffee, where the filigree technicians are in demand among coffee lovers. By the way, the principle of filter coffee machines is very similar:

Hot water is poured from above onto a filter filled with ground coffee until it drips through the bottom end. The big difference to the filter coffee of the coffee machine is that the coffee preparation with a hand filter allows more individuality. This means that the taste of the coffee can be influenced according to your own preferences by skilfully pouring in the hot water and the degree of grinding of the ground coffee.

The hand filter is the bedrock of coffee brewing styles, who would have thought that brewing a coffee by hand could become a science? And as science likes to do, let’s start by calculating the right amount of coffee. The amount of ground coffee depends on the amount of coffee that is to be drunk later; however, the amount of coffee powder does not increase proportionally to the amount of water. As a guide, half a liter of coffee requires about 30 grams of finely ground coffee; a cup about 10 grams. In the end, however, it is your personal taste that counts. By using a paper filter, coffee oils and coffee grounds are retained.

Speaking of taste: In order not to lose it, there are a few simple points to consider.

1. The paper filter is easily rinsed with water after inserting it into the hand filter. Sounds strange, but the inveterate coffee maker swears that otherwise there will be notes of paper on his taste buds afterwards. In addition, the paper filter fits better to the hand filter, which promotes a more even extraction of the coffee.

2. After filling the ground coffee into the filter and placing a pot or cup underneath to catch the coffee, hot water is poured in from above. The ideal water temperature is 95 degrees. When brewing the coffee, only enough water is poured on in the first step so that the ground coffee is soaked to the surface and swells a little.

3. After half a minute, in which the coffee “blooms” (the process is also called blooming), water is poured out. It should be poured in smooth, circular motions and never touch the filter. The water should never stand in the filter, but always seep through completely.

4. After three to four minutes of brewing time, the coffee should be completely infused and ready to be enjoyed. Depending on how the end result tastes, more or less ground coffee can be used next time.

Pure nostalgia: the espresso machine

Admittedly, the placement of an espresso machine in this list of coffee makers is debatable. At the thought of buying an espresso machine, one or the other representative of the coffee elite may even roll their eyes, but true enthusiasts also appreciate the coffee preparation with a portafilter machine.

Apart from that, the first attempts to produce an espresso using a steam machine date back to the 19th century – so in terms of tradition, this type of coffee preparation can easily keep up with the others. It is therefore important to broaden one’s French Press-influenced horizon of experience and to open oneself up to the fine art of espresso preparation. Ready?

The few steps that are required when using an espresso machine are quickly explained: When it comes to the right temperature, the espresso is the diva among the types of coffee – nothing works without a preheated cup. Rinsing the latter with hot water is therefore a must. It continues with the coffee, which should be freshly ground in the finest setting. Fill the portafilter to the brim with ground coffee and smooth down the surface. When “tamping” a kind of tamper is used, with the help of which the coffee in the portafilter is compressed into an even and firm shape. In the last step, the portafilter is attached to the previously cleaned brew head. Just 25 seconds later, you’re holding a dark, oily espresso with a distinctive crema that all coffee connoisseurs are sure to appreciate.

Freezing chickpeas is a great way to always have the healthy legumes ready to cook. We’ll show you what to look out for when freezing chickpeas and how to use them.

Freezing chickpeas preserves the legumes even when cooked. Recipes that use chickpeas usually call for cooked chickpeas. However, the cooking time of legumes is very long, so they are not suitable for a quick meal uncooked.

Chickpeas are healthy because they have valuable vegetable protein, proteins and other healthy ingredients. Legumes are used in a variety of ways in the kitchen. If you freeze cooked chickpeas, you’ll always have them ready to cook.

When buying chickpeas, pay attention to organic quality. This protects the environment, since organically certified seals such as Demeter or Bioland do not use synthetic chemical pesticides.

By the way: in your own garden is very easy. You can grow your own chickpeas in the garden to avoid having to buy them at the store. This is how to plant and care for chickpeas.

Freeze chickpeas: this is how it works

Freezing chickpeas is quick and easy. Only the cooked chickpeas are suitable for freezing. Because in the dried state, properly packaged, the legumes can be kept for many months.

If you want to freeze chickpeas, then proceed as follows:

Cook the chickpeas according to package instructions. In another article, you’ll learn everything you need to know about cooking or soaking chickpeas.
Catch the chickpea water, because you can use it in many ways. In another post we have tips on this: Don’t throw away chickpea water! 5 ideas how to use it
Let the cooked chickpeas cool.
Place the cooked chickpeas in a freezeproof, sealable container. Make sure the containers are reusable. This is how you avoid rubbish. Also read: Freezing food without plastic
Place the container of chickpeas in your freezer. Important: If you are freezing in glass, do not fill the glass to the top, but leave some space so that the chickpeas can expand during freezing. Also, only close the lid after a few hours in the freezer, otherwise the jar may burst if the contents expand too much.
Tip: Freeze the chickpeas in several small containers. So you always have the right amount at hand for a meal.

Recipe ideas for chickpeas

Freezing cooked chickpeas will keep the legumes for a few months. Get them out of the freezer when you need them and use them in delicious dishes. You have two options for this:

Thaw the chickpeas before cooking:

Place them in a bowl in the fridge overnight to use the next day, or
let them thaw at room temperature for a few hours.
If you want it a little faster, put the frozen chickpeas in a small bowl and thaw them in a water bath over medium heat.
With the thawed chickpeas, you can cook particularly well recipes in which the chickpeas are pureed or should be used fresh, i.e. not further cooked and baked. For example, try the recipe for a classic hummus or a fresh chickpea salad.

Use frozen chickpeas:

Add the frozen chickpeas to a soup or warm dish and cook with the remaining ingredients until soft again.

Recipes that use cooked chickpeas also work well to use your frozen chickpeas. For example, they taste great in chickpea curry or chickpea soup.

Tip: Fry the frozen chickpeas in a little oil in a pan. Once they have softened, season them with herbs and spices of your choice.

Cialledda comes from southern Italy. The salad consists of leftover bread, olive oil and fresh tomatoes. We show you how to prepare the salad.

Bread dries out quickly and becomes hard. You can prevent this, for example, by storing the bread properly. However, any braid or bun will dry out after some time, that’s all. Under no circumstances should you throw it in the trash. You can avoid such food waste and use food more sustainably.

Cialledda comes from southern Italy. The bread salad has its origins in the city of Matera in the region of Basilicata and in the adjacent region of Puglia. The dish comes from rural cuisine and is quickly prepared with inexpensive ingredients. The main component is stale bread, plus vegetables, spices and oil.

Cialledda: This is a great way to use leftover bread in a salad

Ingredients:

150 g bread
150 ml water
70 g olives
150 g cocktail tomatoes
4 tablespoons olive oil
2 tspOrengano
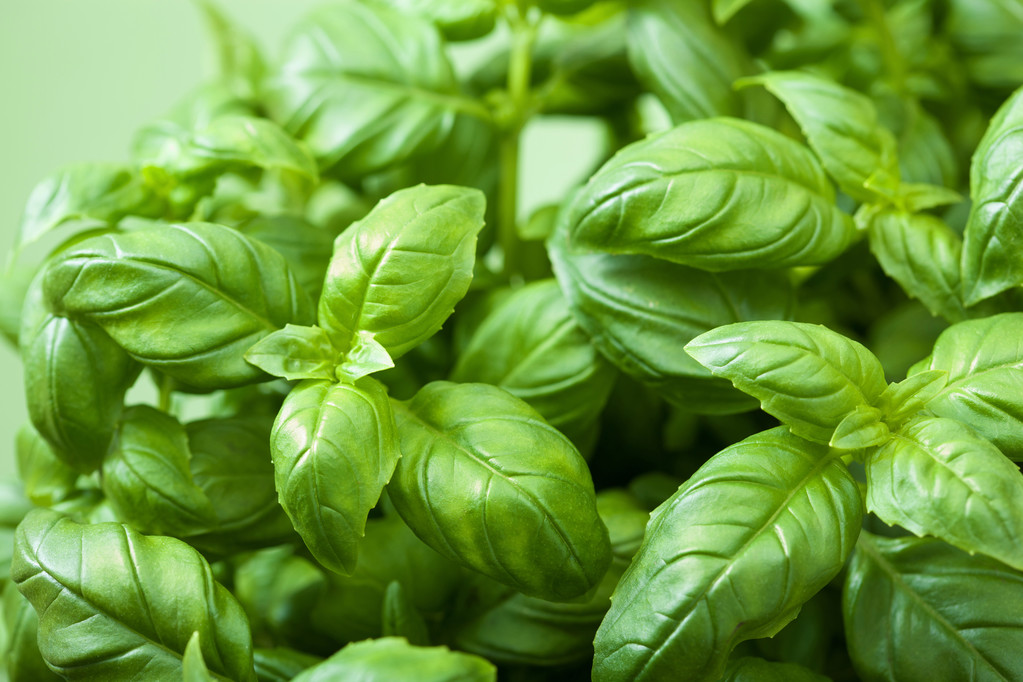
1 bunch basil
0.5 tsp pepper
0.5 clove(s) garlic
0.5 red onion

Directions:

Cut the bread into cubes about 1 inch by 1 inch and place in a bowl.
Now pour the water over the bread and roll it in it until it becomes soft. Then you can pour off the excess water and gently wring out the bread with your hand.
Now cut the tomatoes, the onion and the garlic into small pieces.

Add all the ingredients to the bread and pour over the oil and spices as well.

Mix everything together thoroughly so that the spices are distributed. The Cialledda salad is ready.

Cialledda in different variants

Cialledda comes from the rural kitchen and is used for leftovers. You can therefore prepare the bread salad with a wide variety of vegetables and use different types of bread. More ideas for the bread salad:

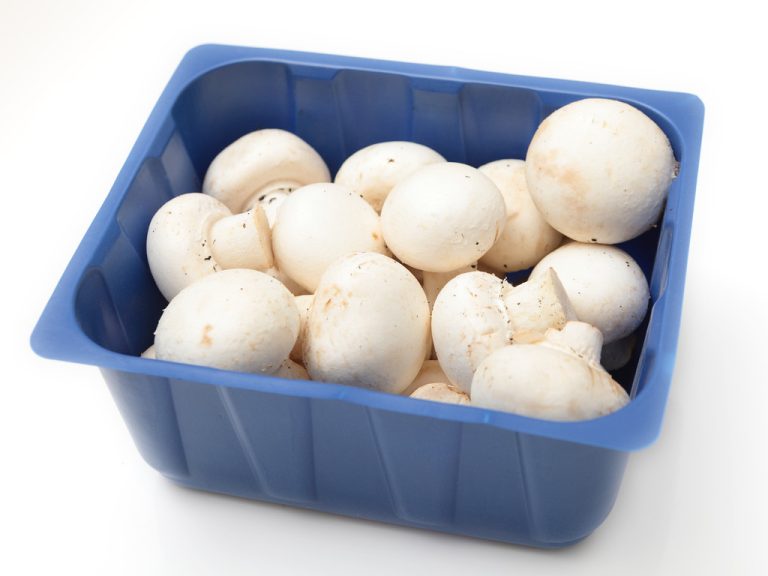
Other vegetables: You can also use zucchini or mushrooms. You can add them raw or toss them in a pan with a little oil and fry them lightly.
Mozzarella: In order to have another component in the salad in addition to the broth and the vegetables, you can also add a sliced mozzarella ball.
Toasted bread: You can also toast the pieces of bread after soaking for a slightly crispy texture and toasted aromas. To do this, fry the pieces of bread in a pan for about five minutes until golden brown.

Today in the culinary world steaks are prepared from fish, veal, pork, and other meats, but beef is still considered a classic dish. An impeccably cooked steak can be a tough task even for a seasoned cook, as sometimes the meat comes out dry and tough, scorching on the outside before being cooked on the inside. To prevent this from happening, and the dish turned out to be correct and truly tasty, you should know some subtleties.

  1. For the steak, choose a beef tenderloin of a mature animal, but not old or young. The meat should be red or dark red in color, but not pink or burgundy. It is advisable to choose parts of the carcass with fewer tendons and powerful muscles, with fat evenly distributed throughout the piece.
  2. You can determine the softness of the steak with your finger by pressing on the raw meat – the finger is easily immersed, leaving a deep hole, which, after pressing, returns to its original position. If this happens, then the meat is good. If the hole does not expand, the meat is not fresh enough, and if it is difficult to press on it, the steak will be tough.
  3. For a tasty steak, the meat should be properly prepared – remove the film and upper tendons. Cut a piece that is not too thin, and at least 7 cm long. Otherwise, the meat will lose moisture, shrink and become dry. Then, in the center of the piece on the side where the fibers are located along, an incision is made to the middle of the thickness, and the meat is opened like a butterfly.
  4. The steak is marinated from 12 to 48 hours, and before going to the fire, it is well dried with a paper towel. The traditional marinade mixture is vegetable oil, soy sauce, wine vinegar, salt, and seasonings.
  5. The frozen stack is thawed in the refrigerator for 12-14 hours. After that, it is wiped dry and left for 20 minutes before marinating, so that it warms up to room temperature. It is not recommended to defrost the steak in the microwave. Since the top layers of meat are already starting to cook in defrosting mode, the middle remains cold. Subsequently, it will be difficult to get an even roast. Also, it is not advised to defrost meat at room temperature and in warm water.
  6. Meat is fried exclusively in a well-heated heavy frying pan or grill pan. In this case, the pan should not smoke, otherwise, the steak will burn on the outside, but inside will not have time to cook, which will turn out tough. During frying, the protein quickly curls up on the surface of the piece and prevents the liquid from escaping, so the steak is first fried over high heat for 1 minute on each side. This will “seal” the fibers and the meat will retain the juice, which means the steak will be juicy and soft. Next, the dish is brought to the desired degree of roasting at a lower temperature.
  7. The finished meat should be left to lie down for a while. During this time, the juice will be distributed inside the piece, the temperature inside and outside will equalize, and the steak will become warm, tender, and juicy everywhere.
  8. Serve the steak on warm plates, then it will not cool down so quickly. For use, you need sharp knives without chipping so that you can even cut the meat.

Introduction: Traditional Cabo Verdean dishes

Cabo Verde, a group of ten volcanic islands off the coast of West Africa, is known for its rich culture, music, and food. The country’s cuisine is a fusion of African, Portuguese, and Brazilian influences, making it unique and diverse. Traditional Cabo Verdean dishes often feature a mix of seafood, meat, vegetables, and rice, cooked in various styles and flavors.

Overview: How Cabo Verdean cuisine differs

Cabo Verdean cuisine is different from other African cuisines due to its Portuguese and Brazilian influences, which bring European and Latin American flavors to the table. The use of spices and herbs is also unique, as Cabo Verdean dishes are not as spicy as other African dishes. Another notable difference is the use of beans, corn, and cassava, which are staple foods in Cabo Verdean cuisine. The country’s cuisine is characterized by its simplicity, with dishes often cooked over an open flame or grilled, resulting in a distinct smoky flavor.

Unique cooking methods used in Cabo Verdean cuisine

Cabo Verdean cuisine uses unique cooking methods, such as grilling, stewing, and roasting, to bring out the flavors of different ingredients. Grilling is a popular method used for cooking meat, fish, and vegetables, while stewing is used for dishes like cachupa (a stew made with corn, beans, and vegetables) and feijoada (a bean stew with meat). Roasting is used for dishes like frango no churrasco (grilled chicken) and porco no espeto (spit-roasted pork). Another unique cooking technique is the use of a clay pot for cooking, which is used for dishes like arroz doce (sweet rice pudding).

The role of spices and herbs in traditional Cabo Verdean dishes

Spices and herbs play an important role in traditional Cabo Verdean dishes, adding flavor and aroma to the food. Some commonly used spices and herbs include cumin, garlic, bay leaves, coriander, and parsley. While Cabo Verdean dishes are not as spicy as other African dishes, they still use chili peppers, paprika, and black pepper to add heat and flavor.

Popular Cabo Verdean dishes cooked in a unique way

One of the most popular Cabo Verdean dishes cooked in a unique way is cachupa, which is made with corn, beans, vegetables, and a variety of meats such as pork, beef, and chicken. The dish is slow-cooked for several hours, resulting in a creamy and hearty stew. Another unique dish is caldo de peixe, a fish soup made with a variety of fish, vegetables, and spices. The soup is slow-cooked and served with crusty bread.

The significance of seafood in Cabo Verdean cuisine

Seafood is an important part of Cabo Verdean cuisine, as the islands are surrounded by the Atlantic Ocean. Some popular seafood dishes include grilled or stewed fish (like tuna or grouper), octopus salad, and shrimp with rice. The use of fresh seafood gives Cabo Verdean dishes a distinct flavor and texture.

Regional variations in cooking techniques and ingredients

Cabo Verdean cuisine varies from region to region, with different islands having their own unique dishes and cooking techniques. For example, the island of Santiago is known for its cachupa, while the island of Boa Vista is known for its seafood dishes. The use of ingredients also varies by region, with some islands using more corn, beans, and cassava, while others use more rice and fish.

Conclusion: The rich and diverse flavors of Cabo Verdean cuisine

Cabo Verdean cuisine is a unique blend of African, Portuguese, and Brazilian influences, resulting in a rich and diverse range of flavors. The use of unique cooking techniques, spices, and herbs adds depth and complexity to traditional dishes, while regional variations in ingredients and cooking methods make each dish unique. Whether you’re a fan of seafood or meat, Cabo Verdean cuisine has something to offer for everyone to enjoy.

Introduction to Traditional Serbian Meat Prep

Meat preparation is a crucial aspect of Serbian cuisine as meat dishes have been an integral part of Serbian culture for centuries. The traditional Serbian way of preparing meat involves a blend of locally available ingredients and techniques that are passed down from generation to generation. The art of meat preparation is considered a sacred skill and is a feature in many Serbian family gatherings, social events, and religious celebrations.

Importance of Meat in Serbian Cuisine

Meat is a staple in Serbian cuisine, with beef, pork, and lamb being the most commonly used meats. The traditional Serbian way of preparing meat involves slow-cooking methods that allow the meat to absorb the maximum amount of flavor, resulting in tender and juicy dishes. Meat is often grilled, roasted, or stewed, and spices such as paprika, garlic, and onion are used to enhance the taste. In addition to being a source of protein, meat is also considered a symbol of hospitality and generosity in Serbia.

Key Ingredients Used in Meat Preparation

The traditional Serbian way of preparing meat involves using locally sourced ingredients that are readily available. Some of the essential ingredients used in meat preparation include paprika, garlic, onion, salt, and pepper. Paprika is used to add a smoky flavor to grilled meat, while garlic and onion are used to enhance the taste and aroma. Salt and pepper are used sparingly to bring out the natural flavors of the meat.

Techniques for Grilling and Roasting Meat

Grilling and roasting are two of the most common methods used to prepare meat in Serbia. Grilling involves cooking meat over an open flame, while roasting involves cooking meat in an oven. Grilling is typically done outdoors, and the meat is placed on skewers or spits and rotated continuously to ensure even cooking. Roasting, on the other hand, involves cooking meat in an enclosed space, and the heat is circulated around the meat. Slow-cooking methods are used to ensure that the meat is tender and juicy.

Popular Meat Dishes in Serbia

Some of the most popular meat dishes in Serbia include cevapi, a type of grilled meat served with onion and bread, sarma, a dish made with meat and vegetables wrapped in cabbage leaves, and pljeskavica, a type of grilled meat patty. Other popular dishes include goulash, roasted lamb, and pork, and bean soup with smoked meat.

Conclusion: The Timeless Art of Meat Prep in Serbia

The traditional Serbian way of preparing meat is an art that has been passed down from generation to generation. It involves a blend of locally available ingredients and techniques that result in tender and juicy dishes. Meat is a staple in Serbian cuisine and is often served at family gatherings, social events, and religious celebrations. The art of meat preparation is considered a sacred skill in Serbia and is a testament to the country’s rich culinary heritage.