Tag

making

Browsing

Homemade pizza like from a pizzeria? Is quite real. To make the perfect pizza in the most ordinary oven, it is important to remember the following:

  1. The dough recipe is not so important, the sauce recipe and the type of filling are not so important as the baking temperature. Italian pizza is originally cooked in a wood-burning oven at a temperature of 450-550 C, no more than 1 minute, due to which it turns out to be crispy on the outside, with a thin elastic crust, it is not easy to simulate a wood-burning oven with such a high baking temperature at home, therefore such methods are used: preheat the oven to the maximum (250-300 C), instead of a baking sheet, use a special stone sheet, which is heated together with the oven. Pizza is baked on the stone for no longer than 10-15 minutes. Since I have no stone, I bake on a metal baking sheet, but at the highest temperature (250-300 C) in an oven very well preheated to this temperature. It takes 10-15 minutes to bake, depending on the size of the product. As soon as the sides of the dough are browned, and the cheese melts and begins to bubble, the pizza is ready. Take it out immediately! It is important not to overdry the pizza, this often happens if it is baked at medium temperatures (about 180 C) for a long time (20-30 minutes).
  2. The pizza dough is made according to the simplest recipe for lean yeast dough with the addition of olive oil, the ascended dough is not crushed a second time but immediately stretched with the palms of the cake to the desired size. It is believed that the rolling pin destroys air bubbles in the dough, so it is not used. I still roll out the dough with a rolling pin, but I let the base “breathe” for about 20 minutes so that air bubbles inside again form.
  3. To prevent the pizza base from becoming dry and greasy during baking, after rolling out the cake, place it on a baking sheet sprinkled with flour (you do not need to grease it with butter, only flour).
  4. To prevent the base from becoming wet from excess moisture in the filling and sauce, after placing the dough in a baking sheet, first of all, grease the side on which you will spread the filling with olive oil, only then distribute the sauce and filling.
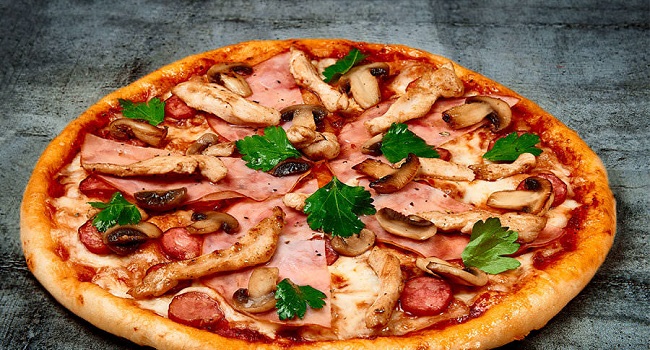
  5. To make the pizza tasty and baked well in a short time, do not overload it with ingredients, distribute the cheese in slides at a short distance.
  6. When baking pizzas in new modern ovens, use the oven manufacturer’s recommendations. See instructions. Why is it so important? Old ovens are almost always a little leaky and natural ventilation (convection) is provided during baking. In the old oven, it is enough to set the maximum heating temperature, warm up the oven itself well and the pizza turns out to be perfect – with dry crispy sides and a juicy cheese center. Furnace effect. Modern ovens are hermetically sealed and therefore with standard heating (classic heating top + bottom) moisture does not evaporate and the pizza turns out to be moist. The result is not at all the same. Therefore, I recommend using the mode for baking pizza, which is offered in the instructions for your oven, usually, it includes powerful heating + fan mode. I have such a mode called “Heating from below + ventilation heating” while the baking sheet should be placed not in the middle, but closer to the bottom of the oven. I set the temperature to 220C. The pizza turns out to be perfect, not wet, very tasty!

Pizza is a dish originally from sunny Italy in the form of a round open pie covered with tomatoes, melted cheese (as well as various fillings (meat, ham, salami, seafood, vegetables, fruits, mushrooms, herbs, etc.).

  1. The dough is rolled out in a small layer, spread on a preheated pan, greased with a large amount of vegetable oil, and immediately put the filling on it. Cover with a lid and reduce the heat to a minimum so that the dough is baked evenly.
  2. In a frying pan, pizza is cooked much faster than in an oven: the baking time is 15 minutes. The plain dough can be kept on the fire for 10 minutes as it roasts faster than yeast dough. We remind you: its thickness should not be too large.
  3. The readiness of the test is checked with a match, piercing it in the thickest place. If the match is dry, the pizza is ready. In an open pan, the dough is baked in 2 steps, so the baking time is slightly increased (the pancake must be allowed to cool slightly before placing the filling). On average, it takes 20-25 minutes to cook pizza.
  4. Since the dough is baked pretty quickly, the raw filling simply won’t keep up with it. Therefore, it must be prepared in advance – fried, stewed, or boiled.
  5. The thickness of the filling must also be monitored so that it does not spread, since the juice or syrup will be absorbed into the dough and will remain damp and tasteless. In addition, the liquid can seep through the dough and burn the pizza. The best filling option, in this case, is when the bottom layer is meat or fish, dry boiled vegetables, and slightly softer or raw foods on top. Then they will saturate the lower layers, but nothing will leak to the bottom of the pan.
  6. When baking pizza in a frying pan, do not top with mayonnaise or the like (to prevent the main layers from burning).
  7. Any baked goods lower the stomach tone, and not everyone can afford baked pizza, and the desire to taste such delicious food is great. For such cases, the option of cooking a dish on a steam bath is provided: for steamed pizza, light yeast dough is taken. It is kneaded on a large number of eggs, aged a little longer than simple, but it should not be peroxidized. The dough is rolled out in a rather thick layer; you can simply stretch it over the grill surface. In this case, the pizza is cooked for 40 minutes.

The sauce is an important element of pizza. It should be juicy, rich, but at the same time not too bright. Such that it would set off and emphasize the taste of the filling, but not drown it out.

  1. Don’t be lazy. Want to make the right sauce? Do not use prepared tomato paste as a basis. Instead, use canned tomatoes in your own juice: you can find both Russian and Italian ones in large supermarkets. Drain, grind and add spices. Provencal herbs, salt, pepper – done!
  2. Experiment. Unable to buy canned tomatoes? Nothing wrong. A great sauce can be made with fresh tomatoes. Peel them, cut, and pour them over with boiling water. Simmer in a skillet for 10 minutes, then pass through a blender. Add spices: oregano, garlic, bay leaf. Return the sauce to the stove and boil it about twice.
  3. Don’t overdo it. There should not be too much sauce. The most delicious pizza recipes emphasize no more than three tablespoons of sauce per standard circle of dough.
  4. Watch the consistency. Make the sauce too runny and your pizza will float.
  5. Get creative. Classic sauces are made from tomatoes, but the beauty of pizza at home is that you can invent new unusual combinations for it. You can substitute hummus or squash caviar for tomatoes. Or take cream cheese – it goes well with chicken and pineapple.
  6. And a little bonus: Jamie Oliver’s perfect and easy sauce. Prepares in 10 minutes. You will need 3 cans of canned tomatoes in their own juice, 4 cloves of garlic, a bunch of basil, 8 tablespoons of olive oil, salt, and pepper. Chop the garlic, fry it with the basil in olive oil. Add the tomatoes, salt, and pepper. After a couple of minutes, remove from heat, pass through the city. And simmer for another 10 minutes over low heat.

Pizza is an ideal meal for a company: family dinner, get-togethers with friends, big party. First, everyone loves her – well, almost everyone. Second, pizza is a lot of fun to make. It’s very simple and you can experiment along the way. And the result is guaranteed to be delicious. In this article, we will reveal the secrets of making real Italian pizza and share the tips of professional chefs.

  1. Homemade pizza starts with the dough. Of course, you can buy a ready-made semi-finished product in a store. But it’s much more interesting to make it yourself. By the way, it takes a few days for real pizza makers to make pizza, and it’s the dough that matters. They knead it and leave it to rise for a few days. You will say – but I want pizza here and now. Well, there is a special life hack for this. To make the dough rise faster, you can heat it up in the oven. Heat the stove to 70 degrees. Then cool for 10 minutes and place the dough in the oven. Make sure that the temperature is not higher than this mark, otherwise, the yeast will die. You can put a tray with warm water under the baking sheet – then the dough will be even more tender and fluffy.
  2. Is the dough ready? Remove the rolling pin! This is not a joke: Italian chefs do not roll out the dough with a rolling pin, but knead it with their fingers and then unwind it, thanks to which the cake takes on the look we are used to. By the way, perfectly round pizzas are the prerogative of fast food. It is difficult to achieve the shape of the correct circle by hand, so the pizza from the hands of a real pizza maker can be a little uneven – this is a sign of its authenticity. Well, if you don’t have a special round board, it doesn’t matter. Homemade pizza is good because it can be anything – even round, even rectangular, in the shape of a baking sheet.
  3. The thickness of the dough according to the classic recipe of Italian pizza is 3 mm in the center, up to 2 cm at the edges.
  4. As you know, all people are divided into two categories: those who eat the pizza crust, and those who leave it on the plate. Personally, we think crisp is the tastiest thing in dough! She is also needed to hold a piece and not get your hands dirty. Therefore, when you smear the dough with sauce and spread the filling, do not fill the whole cake – leave 1.5 – 2 cm around the edges. Here’s how to make the crust really crunchy. Turn the baking sheet upside down. Cover it with parchment and sprinkle it with cornflour. And put the pizza on top. Then we put it in the oven for 10 minutes, and voila: the crunch is no worse than in the best Italian pizzeria.
  5. By the way, it is also better to reheat yesterday’s pizza in the oven. In the microwave, it loses its crunchiness, becomes dry and hard. And if you put it on the same parchment and put it in the oven for 5 – 8 minutes, it will be just as tasty as yesterday.
  6. There are many recipes for pizza dough. We offer classic – easy and quick to prepare. You will need five ingredients: flour, yeast, olive oil, salt, and water. The main thing here is flour: we advise you not to skimp on it and take a good, Italian one.
  7. Dissolve a bag of yeast in 125 ml of warm water. Pour flour in a slide into a deep bowl, season with salt. Make a small indentation in the center of the slide and carefully pour the water and yeast into it. Stir the mixture with a fork. Then, when the dough begins to turn out, knead it with your hands. Add flour, if necessary, until it becomes one piece. Pour olive oil into a bowl and knead for another 10 minutes. After that, the dough will become elastic and smooth. Wait for it to rise and you can cook.

For several centuries, the technology of making pizza has hardly undergone any changes – except that home ovens have become gas and electric (in real professional pizzerias, ovens are still fired with wood, and not anyhow, but with a special choice). And everything else, including the obligatory manual dough preparation, remained traditional. Real Italian pizza does not tolerate hack-work and, despite all the speed of its preparation, does not like fuss: all processes should proceed clearly and measuredly.

  1. Making pizza is very simple, and you can bake it without even having great culinary skills. At home, it is made in several ways: baked in the oven or in the microwave, stewed or fried – here the flight of your imagination is unlimited.
  2. If you decide to bake your pizza in the oven, it is best to knead the yeast dough. Let it stand for 30-60 minutes before baking. The dough must be precipitated 2 times and only then can it be laid out in the mold.
  3. You can bake pizza in the oven in 2 ways – on a baking sheet or in a frying pan, and its thickness should be at least 2 mm. (Thin baking pans are not suitable!) Grease the baking sheet with vegetable oil. When baking sweet pizza, you can also use cooking fat, which is then sprinkled with flour to prevent the dish from burning.
  4. You do not need to roll out the pizza crust – the dough is laid out on a baking sheet and evenly stretched with your fingers over the entire surface so that its edges hang slightly over the edges. Before putting the dough in the oven, it needs to stand for 5-7 minutes.
  5. If you prefer to bake pizza in a frying pan – a classic round shape, generously grease the bottom and edges with vegetable oil, as the dough will rise a lot, and then sprinkle a little with semolina so that the finished pizza can be freely removed from the mold. Put the dough in a skillet and place for 10-15 minutes in a warm place, and then in the oven.
  6. Usually, the dough is placed in the oven without filling and baked until half cooked – when it is still raw inside, and a thin crust has formed on top. At this moment, they take it out of the oven, layout the filling in layers, and bake until tender.
  7. The average baking time is 30-40 minutes at a temperature of 250 ° C. Each pizza is special, so there are slight differences in the recipes.
  8. So, the dough can be thin or thick. Thin is baked in 30 minutes. A thicker layer can be left in the oven for almost 1 hour, but at the same time reduce the heat slightly by lowering the temperature to 220 ° C.
  9. The baking time also depends on the filling. If its layer is thin or loose, it is necessary to reduce the time; denser and bulkier require longer baking times.
  10. The filling can also be divided into liquid and thick (dry). Liquid or sweet ones require preliminary evaporation (10 minutes can be allocated for this), that is, the baking time also increases, and the temperature decreases slightly so that the dough does not burn during this time. The dry filling is done as standard.
  11. If you use different types of filling, then put the raw one on top (for faster cooking). In this case, it is advisable to sprinkle it with cheese or a layer of some other product so that it is not open, but languishes, as if under a lid.
  12. By the way, it is better to spread a small layer of filling on a thin cake, but not too raw. It is best if it is meat, cheese, fish, pressed or dry vegetables, and dried fruits.

Making pizza is very simple, and you can bake it without even having great culinary skills. And our tips will help you make it even easier and faster.

  1. So, if you decide to make pizza, first you need to knead the yeast dough. Let it stand for 30-60 minutes before baking. The dough must be precipitated 2 times and only then can it be laid out in the mold. To prevent the dough from sticking to your hands, you need to grease your hands with oil.
  2. You can bake pizza in the oven in 2 ways – on a baking sheet or in a frying pan, and its thickness should be at least 2 mm. Grease the baking sheet with vegetable oil.
  3. You don’t have to roll out the pizza crust – the dough is laid out on a baking sheet and evenly stretched with your fingers over the entire surface so that its edges hang down a little. Before putting the dough in the oven, it must stand for at least 5-7 minutes.
  4. If the dough is very damp, place a sheet of parchment on top of it and roll it straight through the paper.
  5. If you prefer to bake pizza in a frying pan – the classic round shape, generously grease the bottom and edges with vegetable oil, as the dough will rise a lot, and then sprinkle a little with semolina or dust with flour – so that the finished pizza can be freely removed from the mold. Put the dough in a skillet and place for 10-15 minutes in a warm place, and then in the oven.
  6. Sometimes the dough is put in the oven without filling and baked until half cooked – when it is still raw inside, and a thin crust has formed on top. At this moment, they take it out of the oven, lay out the filling in layers, and bake it until tender.
  7. The average time for baking pizza is 30-40 minutes at a temperature of 250 ° C. Each pizza is special, so there are slight differences in the recipes.
  8. So, the dough can be thin or thick. Thin is baked for 20-30 minutes. A thicker layer can be left in the oven for almost 1 hour, but at the same time reduce the heat slightly by lowering the temperature to 220 degrees C.
  9. The baking time also depends on the filling. If its layer is thin or loose, it is necessary to reduce the time; denser and bulkier require longer baking times.
  10. If you use different types of filling, then put the raw one on top (for faster cooking). In this case, it is advisable to sprinkle it with cheese or a layer of some other product so that it is not open, but languishes, as if under a lid.
  11. By the way, it is better to spread a small layer of filling on a thin crust, but not too raw. It is best if it is meat, cheese, fish, pressed or dry vegetables, and dried fruits.
  12. A thick layer of dough is good for fluffy, layered, and moist filling. You can also layout the main filling of vegetables and meat on it.
  13. If the pizza turns brown too quickly when baking, then cover it with clean paper dipped in water.

Today we will reveal to you all the secrets of making the perfect Italian pizza, we will talk about the correct dough, the peculiarities of using the sauce.

  1. The basis of any pizza is dough, and the final result will depend on how you prepare it. The most popular option is a simple yeast dough, which requires just four ingredients: yeast, water, flour, and a little salt. However, there are a number of rules, the observance of which will allow you to prepare an excellent basis for further experiments with fillings.
  2. For a medium-sized pizza, you will need no more than three tablespoons of sauce.
  3. Do not be afraid to experiment and use not only traditional tomato paste as a sauce but also delicate cream cheese, hummus, squash caviar, or pesto sauce.
  4. Pay attention to the consistency of the sauce: it should not be runny.
  5. Be concise and don’t use more than four ingredients in one pizza.
  6. There should be only one layer of filling and no more than 1 centimeter.
  7. Do not fill the entire surface of the dough with ingredients, because on top you will still have grated cheese.
  8. Place ingredients such as herbs and lettuce on top of the pizza before serving.

Introduction: Exploring the Traditional Dominican Dish

Sancocho is a hearty and flavorful stew that has been enjoyed by Dominicans for generations. This traditional dish is a staple in Dominican cuisine and is often served during special occasions and family gatherings. The dish is known for its rich and savory taste, and it is made using a variety of ingredients such as meats, vegetables, and spices.

Sancocho has a long history that dates back to the indigenous Taíno people of the Dominican Republic. The stew evolved over time, incorporating ingredients from the Spanish and African cultures that have influenced Dominican cuisine. Today, there are many variations of sancocho, each with its own unique blend of ingredients and flavors.

Ingredients: What You Need to Make Sancocho

To make sancocho, you will need a variety of meats, vegetables, and spices. The most common meats used in sancocho are beef, pork, and chicken. You will also need a variety of root vegetables such as yucca, malanga, plantains, and potatoes. Other vegetables that are commonly used include onions, bell peppers, tomatoes, and garlic.

In terms of spices, sancocho typically includes oregano, cilantro, salt, and pepper. Some variations of the dish may also include other spices such as cumin, annatto, and bay leaves. It is important to have all of the ingredients prepped and ready to go before starting the cooking process.

Step 1: Preparing the Meat

To start making sancocho, you will need to prepare the meat. Cut the meat into bite-sized pieces and season with salt and pepper. Heat some oil in a large pot and brown the meat on all sides. Once the meat is browned, remove it from the pot and set it aside.

Step 2: Boiling the Ingredients

Next, you will need to boil the ingredients. Add water to the pot, along with the yucca, malanga, plantains, and potatoes. Bring the water to a boil and then reduce the heat to a simmer.

Step 3: Adding the Vegetables

Once the root vegetables have started to soften, add the onions, bell peppers, tomatoes, and garlic to the pot. Return the meat to the pot as well.

Step 4: Letting it Simmer

Allow the sancocho to simmer for about 30 minutes until all of the ingredients are tender and the flavors have melded together.

Step 5: Serving and Enjoying

Once the sancocho is done cooking, it is ready to be served. It is often served with white rice and a side of avocado.

Conclusion: A Flavorful and Satisfying Dish

Sancocho is a flavorful and satisfying dish that has been enjoyed by Dominican families for generations. The process of making sancocho involves a variety of meats, vegetables, and spices, all cooked together to create a rich and savory stew. Whether you are looking to try a new dish or want to experience traditional Dominican cuisine, sancocho is a must-try dish that will surely impress your taste buds.

Introduction to Molokhia

Molokhia is a famous Egyptian dish that is made from jute leaves. The dish is known for its unique flavor and is a favorite among locals and tourists alike. It is a nutritious meal that is rich in iron, calcium, and vitamins, making it a popular choice among health-conscious individuals. The dish can be served with rice or bread and is often enjoyed with family and friends.

The History of Molokhia

The history of molokhia dates back to ancient Egypt, where it was considered a delicacy by the pharaohs. The dish was often served to guests at royal banquets and was believed to have medicinal properties. The word “molokhia” is derived from the Arabic word for “king,” highlighting its regal status in Egyptian cuisine. Over time, the dish gained popularity among the common people and became a staple in Egyptian households.

Ingredients Required for Making Molokhia

To make molokhia, you will need fresh jute leaves, garlic, coriander, chicken or meat broth, and salt. Some prefer to add onions or tomatoes for additional flavor. You can also use vegetable broth instead of chicken or meat broth to make a vegetarian version of the dish. It is essential to use fresh jute leaves as dried leaves can affect the taste and texture of the dish.

Preparation of Jute Leaves

To prepare jute leaves for cooking, you will need to wash them thoroughly with water and remove any dirt or debris. Then, separate the leaves from the stems and chop them into small pieces. Some people prefer to blanch the leaves in boiling water for a few minutes before cooking to reduce the slimy texture of the dish.

How to Cook Molokhia

To cook molokhia, start by sautéing garlic and coriander in a pot with some oil. Add the jute leaves and broth and let it simmer for about 30 minutes. Add salt to taste and continue cooking until the leaves have softened and the soup has thickened. You can also add meat or chicken to the dish for added flavor and protein.

Serving Molokhia

Molokhia is traditionally served with rice or bread. It is often garnished with lemon juice or a side of pickled vegetables. The dish is usually served hot and is perfect for cold winter nights.

Molokhia Variations

There are many variations of molokhia, depending on the region and personal preference. Some people prefer to add okra or spinach to the dish, while others like to add tomato paste or cumin for added flavor. In some regions, molokhia is served as a soup, while in others, it is a thick stew.

Conclusion: Molokhia, a Traditional Dish with Modern Twist

Molokhia is a traditional Egyptian dish that has stood the test of time. Its unique flavor and health benefits have made it a popular choice among locals and tourists alike. With its versatile ingredients and cooking methods, molokhia is a dish that can be customized to suit individual tastes. Whether served as a soup or stew, with meat or vegetables, molokhia is a dish that is sure to satisfy and impress.

Introduction: What is Basbousa?

Basbousa is a traditional Egyptian dessert that is loved by many in the Middle East and around the world. This dessert is made from semolina, a coarse wheat flour, and sweetened with sugar syrup. Basbousa has a deliciously crumbly texture and is often served with Arabic coffee or tea. The dessert is a staple at festive occasions such as Ramadan, Eid, and weddings.

Ingredients used in making Basbousa

The ingredients used in making Basbousa are simple and can be found in most grocery stores. The main ingredient is semolina, which gives the dessert its signature texture. Other ingredients include sugar, butter, baking powder, yogurt, and milk. Some variations of Basbousa may also include coconut flakes or ground nuts for added texture and flavor.

Preparing the semolina mixture

To prepare the semolina mixture, the dry ingredients (semolina, sugar, and baking powder) are combined and mixed well. Softened butter is then added to the mixture and worked in until it resembles coarse sand. Next, yogurt and milk are added to the mixture and stirred until a thick batter is formed.

Making the sugar syrup

Sugar syrup is a crucial component of Basbousa and is made by dissolving sugar in water and boiling until a thick syrup is formed. The syrup is then flavored with lemon juice or rose water, depending on preference.

Baking the Basbousa

Once the semolina mixture and sugar syrup are prepared, the batter is poured into a baking dish and spread evenly. The dish is then baked in a preheated oven until the Basbousa is golden brown and cooked through.

Soaking the Basbousa in syrup

Once the Basbousa is baked, it is removed from the oven and immediately soaked in the prepared sugar syrup. The syrup is absorbed by the cake, giving it a sweet and moist texture.

Serving and storing Basbousa

Basbousa is traditionally served at room temperature or slightly warmed, with a drizzle of extra sugar syrup on top. Leftovers can be stored in an airtight container at room temperature for up to two days or refrigerated for up to a week.

Conclusion: Tips for making perfect Basbousa

To make the perfect Basbousa, it is important to use fresh and high-quality ingredients. The semolina mixture should be well-mixed and evenly spread in the baking dish. The sugar syrup should be boiled until it reaches a thick consistency and should be poured over the Basbousa immediately after baking. Over-soaking the cake can result in a mushy texture, so it’s essential to monitor the soaking time carefully. With the right ingredients and techniques, making delicious Basbousa at home is easy and enjoyable.