Tag

own

Browsing

You can easily make these crispy chocolate pralines yourself and without baking! They are also great as a gift – even for yourself. Because you might not want to share them as delicious as they are. Do it quickly and enjoy!

Who doesn’t love them, the small, crunchy chocolate treats? But why not do it yourself? The homemade, crunchy chocolate pralines simply taste good without any baking and are super quick to prepare.

And they are healthier than the original: they only contain natural ingredients and are lower in fat. Besides, you know exactly what’s in it.

Ingredients for 30 crispy chocolate pralines:

  • 200 g dark chocolate
  • 40 g muesli flake mixture
  • 100 g spelled flakes
  • 25 g cherries (dried, unsweetened)

Preparation steps:

  1. Fill a pot with water, bring to a boil and then turn the stove to the lowest setting.
  2. Finely chop the dark chocolate and place about two-thirds of it in a bowl. Place the bowl in the saucepan and gently melt the chocolate in a water bath. Stir occasionally.
  3. Once the chocolate is completely melted, remove the bowl from the heat and add the remaining chocolate, stirring slowly until melted.
  4. In a large bowl, carefully combine the granola mixture, spelled flakes, dried cherries, and melted chocolate so everything is coated in chocolate.
  5. Form about 30 chocolate pralines with two teaspoons and place them on baking paper. Then let it dry in a cool environment for about 2-3 hours.

This recipe is so easy you could actually make it every day. Of course, you don’t do that…or do you? Because the small chocolate pralines are also great as gifts or for parties. Enjoy your meal!

Waffles are something fine – especially when they come freshly baked from the hot iron and exude their wonderfully sweet scent. If you are looking for an alternative to the otherwise carbohydrate-rich treat, you should definitely try our homemade low-carb waffles!

High in protein and wonderfully crispy

Sure, no other waffle recipe comes close to Grandma’s, but you should definitely try this one for low-carb waffles! The waffles consist of only five ingredients, which are one thing above all: rich in protein! And so you can treat yourself to the low-carb waffles in the evening without a guilty conscience because they fill you up for a long time and do not have a negative effect on fat burning – on the contrary: the little protein hearts even boost them!

Choose low-carb toppings so you don’t miss out on the benefits of low-carb waffles. Low-sugar fruits such as berries (also frozen goods) or grapefruit, natural yogurt, and pure cocoa powder still ensure a lot of waffle fun on the plate. If you prefer something savory, you can upgrade the waffle batter with grated seasonal vegetables, small cheese slicers, and spices – whatever tastes good is allowed! Here is the recipe for making low-carb waffles yourself!

Make your own low-carb waffles

The ingredients:

  • 50 grams of butter
  • 100 g low-fat quark
  • 4 eggs
  • 2 tbsp canola oil
  • 6 tbsp protein powder (vanilla or chocolate)

The preparation:

  1. Preheat the waffle iron. Melt the butter in a saucepan and set aside.
  2. Using a hand mixer, mix together the butter, low-fat quark, eggs, and rapeseed oil.
  3. Now stir the egg white powder into the batter and bake the waffles in the waffle iron until golden brown – serve with your choice of toppings.

From kidney beans, avocado and nuts we conjure up – no, not chili con carne, but – super juicy brownies! Thanks to dates, almond milk, coconut oil, and cocoa, the small squares taste wonderfully sweet and chocolaty. The simple recipe follows immediately: make bean brownies yourself.

Bean power in brownie form

Baking fairies have already discovered a very special ingredient for their creations from the hot oven: vegetables. It makes many baking classics even juicier than the original and you can save a few calories when baking with vegetables. This is because some of the flour that is otherwise used can be replaced with zucchini, sauerkraut, or – like here – beans, thus creating more volume.

Like all legumes, kidney beans provide a large portion of vegetable protein and fiber, which keeps you full for a long time. In addition, the tiny ones contain around 150 milligrams of magnesium per 100 grams and thus ensure strong nerves and healthy muscles. These chocolaty bean brownies prove that kidney beans can not only end up savory on the plate!

Make your own bean brownies

The ingredients (for 16 pieces):

For the bean brownie:

  • 20 soft dates (soaked in hot water for 10 minutes)
  • 180g kidney beans
  • 120 ml canola oil
  • 130 ml almond milk (or other plant-based milk)
  • 3 eggs (size M)
  • 50 g rolled oats (tender)
  • 50 almonds (ground)
  • 50 grams of cocoa powder
  • 1 teaspoon Baking powder
  • 1 pinch of salt
  • 5 tbsp walnuts (chopped)

For the frosting:

  • 1 ripe avocado
  • 3 tbsp coconut oil (melted)
  • 3 tablespoons of espresso
  • 3 tbsp cocoa powder
  • 5 tbsp maple syrup
  • Crumbles or coarse sea salt to taste

The preparation:

  1. Preheat the oven to 180 degrees top/bottom heat. Process the dates together with the kidney beans into a pulp using a hand blender or a food processor.
  2. Now add rapeseed oil, almond milk, eggs, oat flakes, ground almonds, cocoa powder, baking powder, and salt to the date and bean mush and mix to form a brownie batter.
  3. Now fold the chopped walnuts into the batter and pour the whole thing into a casserole dish (approx. 26×20 centimeters) lined with baking paper and bake for 30 minutes. Then let it cool down completely.
  4. Now process all the ingredients for the frosting with a hand blender or a food processor until you get a fine chocolate cream and spread it over the bean brownie using a spatula. Refine with toppings as you like, cut them into 16 pieces, and store them in the fridge.

Make oat milk yourself – this is how it works: This plant-based milk is for everyone who is looking for an alternative to cow’s milk or nut milk. You can make your own oat milk with just three ingredients. This is full of valuable nutrients and provides you with many vitamins. Try it out – we’ll show you how quickly and easily you can make your own oat milk.

Healthy Flakes

Oatmeal is extremely healthy because it has a high-quality nutrient composition and complex carbohydrates keep you full for a long time. They contain a lot of dietary fiber, which ensures good digestion, as well as unsaturated fatty acids.

They are also said to reduce the risk of cardiovascular disease, diabetes, and high blood pressure. Blood sugar levels don’t rise as much after eating oatmeal, which helps prevent cravings. A good reason to make your own oat milk.

The small flakes also contain a lot of minerals, trace elements, and vitamins as well as iron, zinc, folic acid, vitamin E, vitamin B2, vitamin B6, copper, sodium, potassium, magnesium, calcium, and phosphorus.

Not only a hit in porridge

If you want to integrate the delicious flakes into your diet, you don’t necessarily have to eat porridge all the time. You can also make your own oat milk! This is not only a good milk alternative but also another plant-based milk that can add some variety to the diet.

Whether due to lactose intolerance or because no animal products are to be consumed, oat milk can be used as an alternative to cow’s milk along with almond milk and the like. But be careful: oats contain gluten, so they are not suitable for people with gluten intolerance.

If you make the oat milk yourself, vary the amount of water as you like, depending on how thick or creamy you like the milk.

Homemade oat milk also scores with few ingredients – and you can sweeten and season as you like. The finished oat milk will keep in an airtight container in the refrigerator for about three days. Alternatively, you can boil the milk again and fill it hot into airtight bottles – this way the oat milk will last longer.

Make your own oat milk

The ingredients for 1 liter:

  • 100 g tender oat flakes
  • 1 liter of water (or to taste)
  • pinch of salt

Preparing the oat milk:

  • Put the rolled oats and salt in a bowl, cover with 1l of cold water and stir briefly. Let the oat flakes swell for about 5 minutes and then puree them with a hand blender or in a blender.
  • Place the puree in a nut milk bag (or linen cloth), drain the liquid into a container, and squeeze the mixture well so all the liquid comes out.
  • Finished! Now you can sweeten or spice it up as you like, for example with dates, cinnamon, or vanilla.

And now a cool ice cream for refreshment! But it has to be healthy because not everyone wants to lick a sugar bomb. We have the solution: creamy Nicecream! Made from bananas and some almond milk, this ice cream is the perfect treat for anyone who relies on natural ingredients and valuable ingredients. We’ll show you how you can make delicious nice cream yourself – like a banana split!

What is nice cream?

The banana-based ice cream is known in English as Banana Ice Cream – abbreviated to Nana Ice Cream. The frosty dessert is now also known as ice cream and is being eaten more and more frequently by those who are health-conscious or have allergies.

Topped with other fruits, chocolate, or nuts, the Nicecream is a great ice cream variant free from refined sugar, artificial additives, and flavor enhancers. Ripe bananas in particular are ideal as nice cream due to their sweetness and do not have to be thrown away.

Cut into slices, frozen, and processed into a creamy ice cream mass in the blender, the ice cream can be quickly made and licked at home.

That’s how healthy the Nicecream Banana Split is

Bananas are not only a healthy snack, they also provide B vitamins, vitamin C, calcium, potassium, and a large portion of magnesium. Very ripe bananas contain up to 23 percent fructose, which quickly gets into the bloodless ripe bananas and provides more starch.

Due to the ideal combination of quickly digestible sugar, “slower” starch, and about three percent fiber, bananas not only fill you up quickly but also for a long time – and with relatively low-calorie content. Make your own ice cream: Let’s go, here’s the simple recipe.

Make your own ice cream

The ingredients:

  • 5 bananas
  • 50 ml almond milk (or water)
  • 2 handfuls of berries to taste
  • 20 g chocolate (70 percent cocoa content)

The preparation:

  1. Peel three bananas and cut them into finger-thick pieces. Place everything in a freezer-safe bag and place in the freezer for about four hours.
  2. Take the frozen banana slices out of the freezer and put them in a powerful blender together with the almond milk. Puree to a creamy mass and add a little liquid if you like – the ice cream is ready!
  3. For the Nicecream Banana Split, peel the two remaining bananas, cut them in half lengthways, and place them on the plates. Spread the ice cream balls on top and serve sprinkled with berries and finely chopped chocolate.

This banana bread is the perfect combination of super moist, cinnamon-sweet, and crunchy crumble topping. Due to the sweetness of the bananas, sugar can optionally be omitted. We’ll show you how easy it is to make this banana bread yourself.

Banana bread with sprinkles

Once again the banana has become too ripe, but you shouldn’t throw away the good one! Because you can conjure up a wonderful and juicy banana bread from ripe bananas. And we’ll add one more thing: crispy crumbles with cinnamon.

This banana bread has everything a treat needs. Due to the natural sweetness of the bananas, you can also completely do without sugar in the dough, optionally of course without the crumbles if you want it even healthier. But sometimes it can also be a little treat!

Coarsely chopped nuts can give banana bread an extra crunch. This is how you combine many healthy ingredients: bananas, nuts, buttermilk, and cinnamon. The fruity delicacy tastes just as good warm from the oven as it does when chilled – the 15 pieces are gone faster than you can say “cinnamon banana bread with crumbles”.

The recipe for the banana bread

For the banana bread

  • 1 egg
  • 80 g sugar (optional)
  • 1 tsp vanilla sugar
  • 115g butter
  • 250 buttermilk
  • 2 ripe bananas
  • 260 g wholemeal spelled flour
  • ½ g salt
  • 2 teaspoons of baking soda
  • 1 tsp cinnamon
  • coarsely chopped nuts (optional)

For the sprinkles

  • 40 g powdered sugar
  • 60 g wholemeal spelled flour
  • 4 tablespoons melted butter
  • ½ tsp cinnamon
  • Salt
  • Besides that
  • Butter for greasing the mold

Preparation steps

  1. In a large bowl, combine the egg, sugar (optional), and vanilla sugar using a hand mixer. Add the butter and mix until a fluffy mass is formed.
  2. Add buttermilk and bananas.
  3. In a second bowl, mix together the flour, salt, baking powder, and cinnamon.
  4. Gradually pour the flour mixture into the liquid mixture.
  5. Optionally, mix a few chopped nuts (e.g. Brazil nuts, almonds, hazelnuts, walnuts) into the batter.
  6. Grease a mold and dust with some flour. Pour in the batter and preheat the oven to 180 degrees.
  7. For the crumbles, melt the butter and mix with the powdered sugar, flour, cinnamon, and salt. Mix with your hands and pour over the dough in the mold as a fairly coarse crumble.
  8. Bake in the oven at 180 degrees for 45 to 50 minutes.

Application examples of own urine in the domestic and medical field. Reasonable and useful measures. Traditional methods and refuted theses.

There are actually a few options for using your own urine. Much of what has spread in the field of own urine as a natural remedy, however, can be refuted today.

What is your own urine?

A person produces up to 1.5 liters of urine every day. A liquid composed mostly of water, enriched with creatinine, phosphates, salts, uric acid, and urea. Urine with a diet containing animal proteins has an acidic pH value, with a predominantly plant-based diet it has a basic pH value. Urea has a nitrogen content of over 46%, which makes it interesting for further use in the chemical industry and leads to numerous possible applications. Using a process called reverse osmosis, you can recover pure drinking water from your own urine. A method developed by NASA to supply astronauts with liquid as self-sufficiently as possible.

Using your own urine as a home remedy

For domestic use, urine mixed with water in a ratio of 1:10 can be used very well as a plant fertilizer for indoor and garden plants. A type of nutrient-rich hummus is made by mixing the diluted urine with coffee grounds powder and grated or ground eggshells into a homogeneous mass. This highly nutrient-rich fertilizer made from free waste products can be used in vegetable beds and for ornamental and crop plants.

Previous examples of the use of partially fermented urine as a natural cleaning agent or even as a substitute for shampoo have not become established as household remedies. Not because of a lack of effect or health concerns, but mostly due to the human aversion to urine.
All of the useful uses from old traditions for the further use of urine are no longer necessary today.

In the past, urine was used to tan leather. A remnant of this knowledge was the tradition, practiced until modern times, of soldiers urinating into new leather boots in order to make the leather supple and fit the boots perfectly to their own feet. This prevents the later formation of bubbles during long marches.

Own urine as a remedy

As a remedy in alternative medicine, the use of one’s own urine is limited to emergency external use for the initial treatment of abrasions, cuts, blisters, or sores. Own urine has an antibacterial and anti-inflammatory effect. You should really only use your own urine for this, as urine is already contaminated with up to 10,000 germs per milliliter when it leaves the bladder. If it is the body’s own terms, through the use of one’s own urine, the wound disinfection is harmless.

The internal use of one’s own urine as a natural remedy is not recommended, since there are no studies that can prove its effectiveness. There is at most a placebo effect here. While drinking your own urine poses few health risks, it also has no proven benefits. If you are taking medication and have an existing illness, you should generally avoid drinking the metabolized waste products.

The fact that there are still many traditional therapies with one’s own urine as a natural remedy in the Indian-Asian region, as well as the use of urine in the preparation of certain dishes, seems rather strange to the enlightened Central European.

Conjure up a beautiful Christmas scent at home with cinnamon and citrus fruits – this is the scent mixture that puts us in the Christmas spirit. Arranged nicely in a bowl, it not only appeals to the nose but also to the eyes. Here are a few tips that I like to use again and again at Christmas time.

Christmas scents for a great Christmas celebration

A lot of people are tired of Christmas because it increases the stress factor. The contemplative time is overshadowed by nerve-wracking shopping tours through crowded city centers in search of the right gift. This does not have to be the case if you take care of the right presents for your loved ones at an early stage. You can then indulge in a contemplative time, especially if you stimulate your sense of smell with Christmas scents. This is usually completely unproblematic and not only creates a scent experience but also fun and joy. With Christmas scents in the pre-Christmas period, you create a good mood and anticipation for a contemplative celebration.

Conjure up simple Christmas scents in the run-up to Christmas

There are plenty of Christmas scents during the pre-Christmas period, you just have to discover them. It would be great if you indulged yourself in a more conscious pre-Christmas period. It’s very easy and guarantees a wonderful celebration, where contemplation and Christmas tradition once again determine Christmas. It would therefore be advisable to make your home a real Christmas retreat with Christmas scents during the Advent season.

1) Green fir trees with Advent wreath

Fresh fir branches and a homemade Advent wreath exude a woody smell throughout the apartment. This can be supported by decorating the Christmas decorations with dried orange slices, cinnamon sticks, and cloves. These should best be placed on the heating, then this natural Christmas scent can spread throughout the home and get the brain in the mood for Christmas.

2) Christmas baking makes the apartment smell

Another scent experience means the Christmas baking of delicious Christmas cookies. Natural aromas such as vanilla pulp, almonds, or the typical gingerbread spice mixture should be used. Baking creates a true fragrance explosion in the apartment, which is a messenger substance for the brain and makes you look forward to Christmas. The pastry can be placed decoratively in a bowl on the table so that the scent lasts for a long time. The Christmas cookies can also be hung from green fir branches with a bow so that the scent spreads to several rooms at once. In addition, the pastries can create a contemplative afternoon with delicious Christmas tea.

3) Pomander

This is what oranges, lemons, or limes studded with cloves are called. To do this, use a knitting needle to poke holes in the fruit and press a clove into each one up to the head.

4) Scored citrus fruits.

Cut the peel of fresh oranges and lemons lengthways with a sharp knife. Slice more fruit.

5) Cloves with cinnamon and fruits

Decorate cinnamon sticks with pomander and the other fruits in a bowl. Let everything dry in a warm room. The fruits become dark and hard over time (approx. 3 – 4 weeks) and give off their Christmas scent as they dry.

Scents give those who are grumpy about Christmas a taste

In the run-up to Christmas, those who don’t like Christmas have the chance to look forward to a wonderful Christmas party. Christmas scents convey this joy to the human brain. In the run-up to Christmas, there are many opportunities for fragrant experiences: by setting up natural Christmas decorations or by going to the local Christmas bakery. Christmas scents just have to be discovered.

It’s all quick and easy to make and is always a good idea as a small gift during the Advent season. With this gift, the recipient will be reminded of me and the beautiful aspects of Christmas by the long-lasting and aromatic fragrance. My daughters eagerly await “their Advent bowl” every year.

Not only is making your own Christmas wreaths fun, but you can also make them fresh so they can get through the holidays with ease. With individual natural jewelry, you can create your own personal Christmas decoration.

Tie and design your own Christmas wreaths

With a little skill, you can easily tie Christmas wreaths yourself and design them beautifully. So you can be sure that you will get a great, individual Christmas decoration that is also nice and fresh and will survive the long holidays well.

Necessary accessories for the Christmas wreath

For the wreath, you need fir and conifer greens, a metal wreath and iron wire, garden shears and gloves as well as decoration material. The best way to obtain all of the accessories is in a well-stocked hardware store with a Christmas exhibition and garden department. You can use whatever decoration you want, for example, natural elements such as rose hips, red dogwood branches, dried fruit, or small cones.

Binding the base

For the basic work, you first need a wire wreath and iron wire. So that the wreath does not come apart later, first tie about 10 cm of wire tightly around the wreath and place the coil of wire on the outside. Now the work with the coniferous green begins. With the garden shears, you cut the green into oblong tufts. Larger tufts result in a bushy, spreading wreath, and smaller ones in a fine, narrow wreath.

Now place the green evenly on the metal collar and wrap the wire around it. If individual areas are too dense afterward, you can carefully thin them out with secateurs. It is best to lay the green clockwise and keep turning the wreath as you wrap the wire around it, so you can work well if you are right-handed. The conifer green is always laid slightly overlapping. Once you’re all the way around, use smaller pieces to smooth out the transition to the beginning.

Now the fir green comes into play

For the next layer, tie the fir green over the conifer green in the same way. This gives the wreath its Christmassy look. To finish, put the wire in a small loop, wrap it around itself a few times, and then cut it. You can either hang up the wreath or simply hide the loop under a branch.

Finally, decorate the Christmas wreath nicely

Finally, the decoration is attached. To do this, you cut off individual pieces of wire that are so long that you can twist them together on the back of the wreath. Dried fruit or other materials that are not too hard can also be impaled on a piece of wire and inserted into the wreath.

It’s pretty easy to make your own sweets, you just have to pay attention to a few things. You can find out what these are here. You know exactly what’s in the candy you make yourself. Making your own sweets can also be fun for the whole family, where the little ones are then rewarded with candy when the work is done.

Basic substance

The basic substance for all sweets is sugar, commercially available granulated sugar works well. If you choose 250 grams, then you should add 80 grams of water and then bring the whole thing to a boil in a saucepan while stirring constantly. It is best to use a stainless steel pot so that nothing can come off the pot. The candy base is ready when the water has boiled away and the sugar syrup has thickened. The sugar will bubble a lot as it cooks and gets extremely hot, so be careful not to splash and don’t touch the sugar with your hands.

You can color this with food coloring if you want. Silicone molds are good for portioning the candy mass. You can also use a spoon to spread small portions onto a baking sheet lined with parchment paper. After cooling for a few hours, sugar candies are formed that are still sticky. It is now advisable to roll the sweets in flour, then they lose their stickiness and it is then easier to fill them up. Another option is to sprinkle the candies with powdered sugar.

Variation of fruit candies

For the production of fruit candies, simply add approx. 80 ml of fruit juice, for example, cherry juice, to the candy base from above. The sweets are then already colored red and absorb the cherry aroma well. In order to get a more intensive fruit aroma, you can also add, for example, 3 drops of lemon aroma and approx. 80 ml of juice, for example, orange juice, to the sugar mass, boil it up as usual, and you get citrus fruit candies.

Variation cough drops

This variant of making cough drops yourself is nicely explained in the YouTube video www.youtube.com/watch?v=hoItDpxlydY. Cough drops help as an effective remedy for coughing.
Here half a cup of sugar is used, add:

  • a good handful of fresh sage leaves, alternatively 2 tablespoons of dried sage, finely ground
  • 1 tablespoon of honey, preferably organic
  • 1 tablespoon of freshly squeezed lemon juice
  • optional icing sugar for dusting

Here it is recommended to first prepare the sugar mass, then remove the pan from the heat and then add the other ingredients. Then make the sweets out of it, sprinkle with icing sugar, or roll in flour to take the stickiness out.

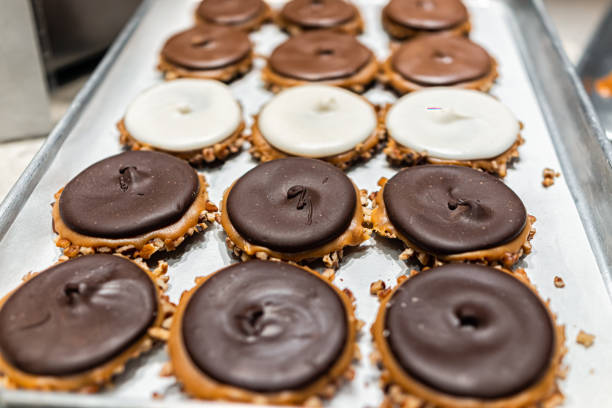
Variation caramel candies

Caramel candies are a tasty variation. You can find a good recipe on YouTube at www.youtube.com/watch?v=MtpNY2by-nU.


In addition to 250 grams of sugar, you need:

  • 100ml of water
  • 2 teaspoons of honey
  • 50 ml cream
  • 1 tablespoon of butter

The sugar, the water, and the honey are then first placed in a stainless steel pot, and the candy base mass is made from this again under high heat and constant stirring. Finally, add the butter and cream to the still-boiling mass. Then the mass has to cool down for approx. 15 minutes, stirring every 2 to 3 minutes to prevent layer formation. Candies can then be formed from the mass. After cooling, which takes 4 to 5 hours, the delicious caramel candies are ready.