Tag

tasty

Browsing

You can eat pointed cabbage very well raw, because that way no vitamins are lost. We’ll show you how to prepare raw pointed cabbage in a tasty and digestible way.

Combine raw pointed cabbage correctly

Many types of cabbage are difficult to digest and can cause flatulence. However, to make the raw pointed cabbage tasty and digestible, you should combine it with digestive spices and vegetables. With caraway, aniseed, marjoram, ginger or fennel you can stimulate digestion and prevent flatulence. At the same time, your dishes with raw vegetables will taste more varied and easily digestible. In addition, pointed cabbage contains a lot of vitamin C and is available all year round from regional cultivation.

Raw pointed cabbage mixed with ginger

Raw pointed cabbage combines well with ginger in a smoothie. It goes perfectly with sweet dishes and has a lot of vitamin C, vitamin B, iron and copper. Ginger also has an antibacterial effect on the intestinal flora.

Ingredients:

2leaves pointed cabbage
1 piece of ginger
1banana
0.5 pieces of apples
200 ml water

Directions:

Tear the cabbage leaves into smaller pieces.
Cut up the apple. You don’t need to peel it. This way no vitamins are lost. So that the fruit is not sprayed and you can use it without hesitation, pay attention to organic quality when buying.
Then mix all the ingredients together well so that there are no chunks left.
Add a little more water if the smoothie has become too thick.

Eat raw pointed cabbage in a salad with cumin

Pointed cabbage and cumin seeds are a wholesome combination, because the cumin has an antispasmodic, calming effect and relieves flatulence. Together with carrots, the salad is rich in vitamins and delicious. In addition, they are all regional products that have a good CO² balance.

Ingredients:

1pointed cabbage
2carrots
5 tsp cumin
7 tablespoons olive oil
10 tbsp white balsamic vinegar
5 pinch(s) of pepper
4 pinch(s) of salt

Directions:

Cut the cabbage into fine strips, the thinner the better.
Then grate the carrot and put it in a bowl with the cabbage.
Mix together the other ingredients for the dressing and add them to the bowl as well.
Finally, stir the salad thoroughly and let it sit for an hour before eating.

Eat pointed cabbage raw: in a dip
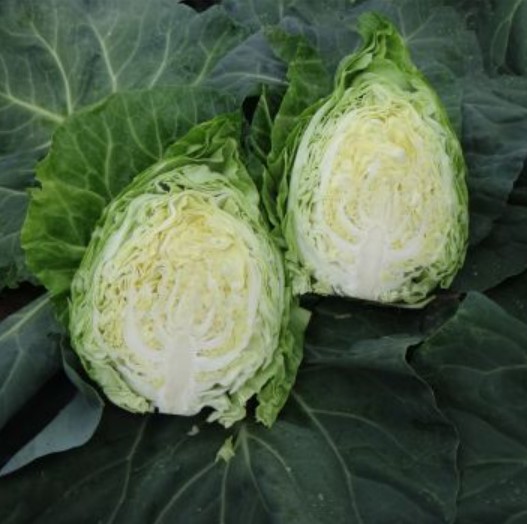
You can also combine raw pointed cabbage with raw fennel to make it digestible and tasty. The fennel bulb is considered a medicinal plant and also relieves flatulence and gastrointestinal complaints. In addition, fennel is very healthy and contains vitamin C, iron and potassium. The fennel season is between June and October. You can use the cream cheese cream made from pointed cabbage and fennel as a spread or as a healthy dip.

Ingredients:

150 g pointed cabbage
100 g fennel
fennel green
200 g cream cheese
3 pinch(s) of chilli powder
3 pinch(s) of pepper

Directions:

Cut the cabbage and fennel into very small pieces. The smaller you cut the pieces, the better the consistency of the cream will be.
Then mix the pointed cabbage and fennel with the cream cheese.
Season the cream with chilli powder and pepper.
As a topping, you can chop the fennel greens and add them to the dip. The delicious and wholesome pointed cabbage dip is ready. You can keep it in the fridge for at least 2-3 days.

There are good reasons to eat local vegetables even in winter. But which vegetables are in season in winter and taste good at the same time? We introduce you to five tasty varieties of winter vegetables.

Even in winter there are healthy vegetables that come from regional cultivation. Local winter vegetables have three advantages: You strengthen regional agriculture, protect the environment thanks to short transport routes and do something for your health. We show you five types of winter vegetables and suitable recipe ideas.

Would you like to get an overview of when which fruit and vegetables are in season? Then take a look at the Utopia season calendar.

More than winter vegetables: Mushrooms grow all year round

Mushrooms are harvested continuously in Germany. You can therefore count on the robust mushroom variety even in winter – no matter how early it comes or goes. Mushrooms contain a lot of potassium, are low in fat and calories and have a relatively high protein content.

Cabbage: The ultimate winter vegetable

Kale thrives late in the year and can be bought locally from November. You have four months to test recipes with kale, because the winter vegetable disappears from the stores at the end of February.

If you are running out of ideas on what to prepare with kale, we have a few recipe suggestions for you:

Green cabbage is particularly popular in East Friesland. Instead of the traditional Mettwurst, we recommend smoked tofu, fried eggs and potatoes as side dishes.
Kale is also wonderful in vegetable lasagne, quiche, casserole or vegan moussaka.
Kale can also be used as a pasta sauce. Mixed with some feta or blue cheese, kale on noodles makes a tasty noodle dish.
Also delicious: kale soup with vegetables, kale salad and kale chips
In addition to kale, other types of cabbage such as Brussels sprouts and savoy cabbage are also harvested in winter. From October to March you can find Brussels sprouts from regional cultivation in the sales counters. For example, you can find a Brussels sprouts recipe here: Winter recipes: Seasonal dishes that keep you warm. Savoy cabbage is available almost all year round, namely from June to the end of February. You can easily prepare vegetarian cabbage rolls from savoy cabbage and cabbage. In order to preserve as many of the cabbage’s nutrients as possible, we recommend that you prepare it in a steamer.

Storage vegetables in winter: potatoes

Although the potato harvest ends in October, you can still find German potatoes in stores during the winter months. If stored properly, they will last for months. If you buy potatoes from regional (organic) cultivation in winter, it is therefore all the more important to store them in the dark at low but not icy temperatures. The best place to store potatoes is a dry basement.

Black salsify: The winter alternative to asparagus

The black salsify harvest begins in October. Until the end of February you will find the vegetables, also known as winter asparagus, mainly at weekly markets. Regional salsify is rarely found in supermarkets. Even if it is tedious to prepare fresh black salsify because of the peeling, it is worth the effort. Because the winter vegetables are rich in nutrients and provide a tasty variety in winter.

The fruity winter vegetable: beetroot

Beetroot is harvested in Germany between September and March. It is rich in vitamin B, potassium, iron and folic acid. Many of the nutrients are preserved when you eat them raw, for example in salads or as juice. Many cooks avoid the delicious vegetables, mainly because of their intense color – there are very creative recipe ideas with beetroot.

Roasting Brussels sprouts is easy with these instructions. Roasted Brussels sprouts are a popular side dish in wintry temperatures. Three variants bring variety to the plate.

You can prepare Brussels sprouts in different ways – for example in a pan. We’ll show you three varied ways of roasting Brussels sprouts.

Brussels sprouts are a typical winter vegetable from the cabbage family. Harvest time in Germany begins at the end of September. Brussels sprouts are in high season between November and December. Since cabbage can be stored very well, you can buy regional Brussels sprouts until March.

The best way to buy fresh Brussels sprouts is organic and from regional suppliers. Because organic food usually contains far less pesticide residues – synthetic pesticides are forbidden in organic cultivation. In addition, Brussels sprouts from the region do not have to be transported so far, which saves CO2. An alternative to the shop or market around the corner is the delivery of an eco box** with regional fruit and vegetables directly to your home.

Roast Brussels sprouts: the ingredients

You need the following ingredients for four to six side dishes of roasted Brussels sprouts:

500 grams of Brussels sprouts
3-4 tbsp vegetable oil (e.g. olive oil)
Salt
pepper
1/2 tsp ground cumin
Be sure to use fresh Brussels sprouts for this recipe. Frozen cabbage florets cannot be fried until brown because they lose too much water.

Tip: The ground cumin will help you digest the cabbage better.

Roast Brussels sprouts properly

If you want to roast Brussels sprouts, you should be careful not to burn them. How to properly roast Brussels sprouts:

Clean the Brussels sprouts carefully.
Cut the cabbage florets in half.
Heat the olive oil in a pan on high.
Add the Brussels sprouts once the oil is hot.
Then reduce the heat and fry the halves of Brussels sprouts for about five minutes on medium-high. Stir constantly so the vegetables don’t burn.
Add the salt, pepper and ground cumin and mix the spices with the Brussels sprouts. Reduce the temperature to the lowest level and cover the pan with a lid.
Roast the Brussels sprouts for an additional 15 to 20 minutes, depending on how al dente you want them to be. Stir every 3 to 5 minutes to avoid burning the Brussels sprouts. Add 1-2 tablespoons of water if the veggies are too dry and sticking. Alternatively, you can also increase the amount of oil in this case.

Roast Brussels sprouts: three delicious variants

Roasted Brussels sprouts don’t have to taste boring: With a few simple steps and little effort, you can change the winter vegetables and add variety to your plate.

Brussels sprouts go very well with nuts. For example, add some roasted peanuts or cashew nuts to the finished dish.
With leftover rice from the day before, you can turn the fried Brussels sprouts into a delicious rice pan. Mix the cold rice with the fried florets and heat the rice pan for five more minutes. As a spice, curry goes very well here.
If you’re roasting Brussels sprouts, you can use breadcrumbs to give them a crispy crust. Simply add some oil or butter along with 2-3 tablespoons of breadcrumbs to the already cooked Brussels sprouts and sear them again.
Roast Brussels sprouts in the oven: Put the Brussels sprouts halves in a casserole dish and mix the vegetables with the spices. Pour some oil over it and put the mold in the oven. Then roast the Brussels sprouts for 45 to 50 minutes at 200 degrees Celsius top and bottom heat.
Brussels sprouts can also be combined with other types of vegetables to create a vegetable pan. But pay attention to the different cooking times of the vegetables.

Radicchio can be used in many ways in the kitchen. In this article we would like to show you a recipe on how to make radicchio fried and full of flavor.

You probably know radicchio as a salad ingredient. With this recipe you can also prepare the radicchio fried wonderfully.

It belongs to the chicory family and is particularly rich in vitamins, minerals and bitter substances as well as secondary plant substances. In particular, vitamin C, B vitamins, iron, potassium, calcium and anthocyanins are included.

Raddichio is mainly grown in Italy and can be found in supermarkets all year round. However, we recommend that you buy your ingredients from seasonal and regional cultivation, because this way you avoid long transport routes and CO2 emissions. In Germany, radicchio is in season between June and October. You can find a larger overview of other types of fruit and vegetables in our seasonal calendar. In addition, we recommend that you buy the ingredients in organic quality if possible. This is how you can avoid chemical-synthetic pesticides.

A recipe for fried radicchio

Ingredients:

1Radicchio
2 clove(s) garlic
4 tablespoons olive oil
1 tbsp almond butter
0.5 EL horn syrup
0.5 tsp salt
1 pinch(s) of pepper

Directions:

Wash the radicchio and cut it lengthwise into four equal pieces. Remove the stalk.
Peel the garlic and cut it into pieces as fine as possible. Alternatively, you can also press it and use it accordingly in the third step.
Mix together the 2 tablespoons olive oil, garlic, almond butter, maple syrup, and salt and pepper. To help the ingredients mix better, add a small sip of warm to hot water.
Spread the marinade evenly over the cut surfaces of the four radicchio pieces, so that some of the marinade can penetrate into the interior when frying.
Heat the remaining 2 tablespoons of olive oil in a pan. Fry the radicchio for about 2 to 3 minutes per side over medium heat.
Now you can serve the fried radicchio.

They joke that the ancient Romans were the first to invent steaks during the sacrifice to the gods. Apparently, some priest furtively licked his fingers, and … did not carry the victim to the altar. I ate, I was not afraid of the gods. But, perhaps, this is speculation. People obviously learned how to roast meat before they built altars.

The next milestone in steak history was the discovery of America. After Columbus, Europeans arrived there and brought with them cows of various breeds: LongHorn, Hereford, and Angus. This laid the foundation for American barbecue culture.

In 1735, the world’s first Steak Club opened in England. It even included members of the royal family. And the club existed for over a hundred years. Until now, one of the varieties of steaks bears its name – club steak.

  1. Look for steaks with good marbling. The best is the meat of young (150-180 days old) grain-fed gobies. Look for information on the label.
  2. A rib-eye steak is best for pan cooking. It is versatile. The name comes from two English words rib-eye, i.e. “Rib” and “eye”. The rib is where the cut comes from, and the eye is its cross-sectional shape, which is also inherited by ribeye steaks. The abundance of fatty layers, the very marbling of the meat, quickly melt when frying, making the ribeye the juiciest and most unpretentious of all steaks to cook.
  3. Before cooking the steak, you need to lie down a little so that it reaches room temperature. If you took a steak out of the refrigerator, where the temperature is “zero”, leave the meat on the plate for half an hour.
  4. Salt and pepper the meat before putting it in the pan or grill.
  5. You can make seasoning with salt, water, spices, lemon juice, and rosemary. Pour the steaks directly on the grill.
  6. After frying on each side at the maximum temperature, reduce it to 100-120 ° C. If you are cooking at home, just turn the heat down. When grilling, simply increase the distance from the grate to the coals.
  7. Use tongs or a spatula to turn the steaks. But, by no means a plug! Otherwise, the juice will flow out.
  8. The total cooking time for steaks to Medium level is about 7 minutes.
  9. Before serving, put a small piece of butter in a skillet, directly on top of the meat, cover with foil and leave for 5-8 minutes. The steaks will be delicious!

Tangelos are considered to be a type of tangerine and are noted for their juiciness and mildly sweet flavor. Tangelos (Citrus paradisi x Citrus reticulata) are hybrids of the tangerine and either the pomelo or the grapefruit. The first fruit hybrid was produced by Dr. Walter T. Swingle and Dr. Herbert J. Webber in 1911, and has been available in the market ever since.

  1. While it’s often erroneously believed to be genetically modified, the tangelo is actually a product of natural hybridization and does not require genetic manipulation for its production.
  2. Compared to oranges, tangerines are smaller in size and have a looser peel, which is easy to remove. These characteristics of tangerines make them an ideal snack.
  3. Tangelos are also widely known as the honeybell fruit, which is a hybrid fruit.
  4. They are a cross between the pomelo/grapefruit, and the mandarin orange.
  5. The Minneola variety is identified by its knob-like formation at the stem, and its deep orange color.
  6. Mandarin oranges are a cross between a tangerine and an orange.
  7. Tangerines have a deep orange color too, and a pebbly texture peel which is easy to remove.
  8. You can enjoy the fruit raw, cook it, add it to salads, etc.
  9. It is best eaten raw and is easy to peel. You can have the fruit or its juice during breakfast.
  10. Fresh and raw pieces can also be added to salads.
  11. You can use tangelos for recipes that require oranges for cooking but make sure you add them near the end of the cooking time so the fruits don’t break down.
  12. One of the most asked questions about this fruit is, “Do tangelos have seeds?” It’s interesting that unlike other citrus fruits, tangelos actually have little to no seeds. The amount of seeds largely depends on the environment where the trees thrive.
  13. Tangelo trees that are surrounded by other trees of their kind often produce fruits that have little to no seeds, while tangelo trees that are near tangerine or orange trees often contain small seeds.
  14. Aside from their sweet and zesty taste, another reason that you should consider eating tangelos is that they can offer you a handful of health benefits.  
  15. Tangelos, being the hybrid of the tangerine and pomelo/grapefruit, contain the nutritional benefits of both of these fruits.
  16. The tangelo fruit has been used in jams, marmalade, and cakes, and has also been included in salads and main dishes. Sliced segments of the fruit are also used as a decorative garnish, while its juice can provide a tangy twist to marinades and sauces. 
  17. Tangelos can also be used as a substitute for mandarin oranges, grapefruits, and even lemons.

Before you embark on this exciting business, try to create in your kitchen that magical atmosphere that accompanies the preparation of pizza in her homeland. Pizza has more than enough homeland, so in the process of culinary creativity you can imagine yourself anywhere.

  1. A thick layer of dough is good for fluffy, layered, and moist filling. You can also layout the main filling of vegetables and meat on it.
  2. The frying pan has a lot of advantages over baking on a baking sheet: the dough is easily removed, practically does not burn; you can bake different pizzas and put different toppings.
  3. Before baking, the pan, like the oven, is heated to the required temperature, a small amount of vegetable oil is poured to lubricate the bottom and soak the pizza, and heated. Then spread the dough, fry on one side, and remove from the pan.
  4. You can also bake pizza under the lid. This is even easier since it will be baked all at once, it does not need to be turned over. There are pans with thermal glass lids; they are most convenient for baking pizza.
  5. Roll out the dough in a small layer, spread it on a preheated pan greased with a large amount of vegetable oil, and immediately put the filling on it. Cover with a lid and reduce the heat to a minimum so that the dough is baked evenly.
  6. In a frying pan, pizza is cooked much faster than in an oven: the baking time is 15 minutes. The plain dough can be kept on the fire for 10 minutes, as it roasts faster than yeast dough. We remind you: its thickness should not be too large.
  7. Its readiness is checked with a match, piercing it in the thickest place. If the match is dry, the pizza is ready. In an open pan, the dough is baked in 2 steps, so the baking time is slightly increased (the pancake should be allowed to cool slightly before putting the filling). Thus, pizza preparation takes 20-25 minutes.
  8. Since the dough is baked pretty quickly, the raw filling simply won’t keep up with it. All of it must be prepared in advance – fried, stewed, or boiled.
  9. Its thickness must also be monitored so that it does not spread, as the juice or syrup will be absorbed into the dough and it will remain damp and tasteless. In addition, the liquid can seep through the layer of dough and burn the pizza. The best filling option, in this case, is when the bottom layer is meat or fish, dry boiled vegetables, and on top – slightly softer or raw foods. Then they will saturate the lower layers, but nothing will leak to the bottom of the pan.
  10. It is quite easy to bake sweet pizzas in a skillet: they usually do not flow, and they do not take a lot of time. The filling for sweet pizzas is mainly fresh fruits, dried fruits, or thick jam (apple, pear, etc.), which do not require prolonged heat treatment. The dough for sweet pizzas can be made with cottage cheese, with the addition of juices and jams: it turns out softer and bakes better.
  11. When baking pizza in a frying pan, do not top with mayonnaise or the like (to prevent the main layers from burning).
  12. Since, due to health problems, not every person can afford baked pizza, and the desire to try such a tasty treat is great. For these cases, the option of cooking on a steam bath is provided.