Tag

own

Browsing

Sweet potatoes and cinnamon rolls don’t go together at first glance? Wrong thought! Because the autumnal vegetables make the sweet cinnamon rolls particularly juicy and fluffy. We’ll show you how to make these special sweet potato cinnamon rolls yourself.

The best cinnamon rolls!

Who doesn’t love this cinnamon-sweet treat?! But yeast dough treats in particular are not that easy to make. Sometimes the dough does not rise or is too dry. However, with the addition of mashed sweet potatoes in this cinnamon roll cake, that problem isn’t there.

For the puree, the sweet potato simply has to be boiled and then pureed. It couldn’t be easier! With good organic spelled flour, the sweet treat becomes even healthier.

Sweet potatoes are so healthy

Sweet potatoes contain a lot of beta-carotene. This can be converted into vitamin A in the body and has a cell-protecting effect and strengthens our immune system. In addition, the vegetable provides more fat-soluble vitamin E than any other low-fat vegetable. 100 grams of sweet potatoes already cover a third of the daily requirement. Vitamin E protects cells and prevents fatty acids and other fat-soluble vitamins in our bodies from aging too quickly.

There is also plenty of potassium in the sweet potatoes, which regulates the fluid balance in the body: it flushes out excess water and can lower high blood pressure.

This healthy tuber can be on the menu more often. The first thing you should do is make these deliciously fluffy sweet potato cinnamon rolls yourself!

The recipe for the sweet potato cinnamon rolls

Ingredients for 14 cinnamon rolls

For the dough:

  • 160 ml milk
  • 115g butter
  • 1 egg (L)
  • 1 sweet potato
  • 390 g spelled flour
  • 70 grams of brown sugar
  • ¼ yeast cube
  • ½ tsp salt

For the filling:

  • 50 grams of brown sugar
  • 2 tsp cinnamon
  • ½ tsp salt
  • 2 tbsp butter

For the glaze:

  • 115 g cream cheese
  • 50 grams of brown sugar
  • 1 pinch of cinnamon
  • 1 pinch of salt
  • 3 tbsp milk

Preparation:

  1. Peel the sweet potato and let it cook. Then puree to a pulp.
  2. Bring the milk to a simmer, do not let it boil over. Remove from the heat and add the butter until melted.
  3. Pour the mixture into a small bowl and let cool slightly. Then add the egg, yeast, and sweet potato puree.
    In a large bowl, mix together the flour, sugar, and salt.
  4. In a food processor or with a wooden spoon, mix the dough thoroughly until elastic. Place in a buttered bowl, cover, and let rise in a warm place for 1 to 2 hours.
  5. When the dough is ready, prepare the filling: mix the sugar, cinnamon, and salt. Melt the butter over low heat.
  6. Grease a springform pan and dust the worktop with flour. The dough should now have doubled in size.
  7. Roll out the yeast dough into a rectangle (about 25 x 30 cm). Spread the melted butter evenly on top and sprinkle the cinnamon-sugar mixture on top. Now roll up the dough and pinch the ends together. Cut into 14 rolls and place in the springform pan, spiral side up. Cover with cling film and let rise for another 60 to 90 minutes.
  8. Preheat the oven to 180 degrees and bake the sweet potato cinnamon rolls until golden, about 20 to 25 minutes. Take out and let cool down a bit.
  9. For the glaze, mix together the cream cheese, sugar, and salt. Gradually mix with a spoonful of milk until the desired consistency is reached. Loosen the springform and sprinkle the cinnamon roll cake with the glaze. Enjoy!

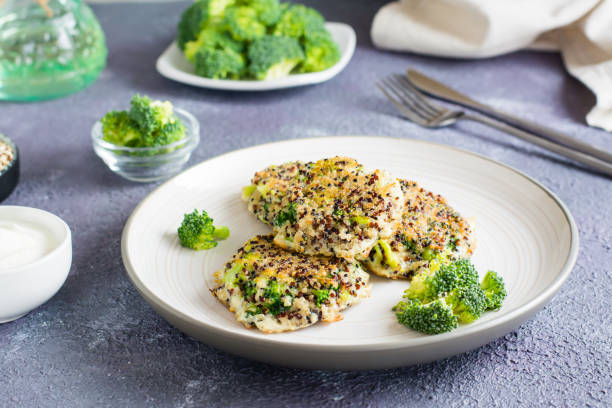
Fluffy, high in protein, filling – these attributes describe the quinoa pancakes perfectly! Instead of commercially available flour, protein-rich quinoa and almond flour form the basis for low-carb breakfast happiness. Topped with Greek yogurt, nuts, and berries, these pancakes are a real protein bomb and won’t leave those annoying cravings in the first place. Make quinoa pancakes yourself: We will tell you the quick recipe in this article.

Served golden brown in 20 minutes

Still, have quinoa from last night? Great! Simply process the rest into fluffy low-carb quinoa pancakes the next morning. Together with low-carb almond flour, Greek yogurt, and other favorite toppings, you can bake a wholesome breakfast in no time.

If you like it more chocolaty, you can also prepare the quinoa pancakes with de-oiled cocoa powder – there’s nothing wrong with a dollop of maple syrup on the cakes either. A meal that will delight not only fitness fans!

Quinoa pancakes are so healthy

Homemade quinoa pancakes not only bring variety to the plate but also lots of protein. And that is known to keep you full for a long time, preventing food cravings and boosting fat loss at the same time.

To round off the perfect breakfast, the homemade quinoa pancakes are topped with the sweetest berries of the season and crunchy walnuts. This provides secondary plant substances, valuable omega-3 fatty acids as well as vitamins and minerals. Make quinoa pancakes yourself: preheat your pan and look forward to a large and healthy portion of breakfast happiness!

Make your own quinoa pancakes

The ingredients:

  • 200 g quinoa (cooked)
  • 100 g almond flour
  • 1 tbsp baking powder
  • 1 pinch of salt
  • 3 egg whites
  • 100 g Greek yogurt
  • 1 vanilla pod (Mark)
  • 125 grams of blueberries
  • Coconut oil for frying

The preparation:

  1. For the low-carb quinoa pancakes, mix the quinoa, almond flour, baking powder, and salt together in a large bowl.
  2. In another bowl, cream together the egg white and yogurt. Then add to the quinoa mixture and fold in the pulp of a vanilla pod and the blueberries.
  3. Heat some coconut oil in a pan and add two tablespoons of quinoa batter to the pan for frying. Turn after about three minutes and cook on the other side until golden brown.
  4. Enjoy the low-carb quinoa pancakes together with Greek yogurt and berries.

Breakfast Muffins: A healthy and hearty breakfast doesn’t always have to consist of muesli or a sandwich: from now on we’ll be nibbling on these breakfast muffins with blueberries! Made with wholemeal flour and the sweetness of fruit, the little cakes are on the table in less than 30 minutes. They can either be eaten straight away or – if there are any leftovers – easily eaten on the go. Here’s the recipe for making breakfast muffins yourself!

Sweet muffin love in the morning

When the alarm clock rings early in the morning during the week, there is often not enough time left to prepare breakfast – at best, it should also be healthy. The solution: make nutritious breakfast muffins yourself! You can finish baking them in the evening and either eat them at home the next day or take them to work.

The highlight: The breakfast muffins consist of the main ingredients wholemeal spelled flour, eggs, and banana – you won’t find white flour or refined sugar in them! This combination of ingredients provides complex carbohydrates and high-quality protein, which keeps blood sugar levels constant over a long period of time, provides energy, keeps you full for a long time, and prevents food cravings in the first place.

Banana and blueberries provide a pleasant sweetness so that even those with a sweet tooth will love the little cakes! And best of all: A muffin provides only 107 kilocalories – also fiber, B vitamins, magnesium, iron, and phytochemicals. The perfect mix to start the day off right! The recipe for making breakfast muffins yourself follows here.

Make your own breakfast muffins

The ingredients:

  • 175 g wholemeal spelled flour
  • 1 tsp baking powder (heaped)
  • ½ tsp salt
  • 150 ml almond milk
  • 2 tbsp coconut oil (melted)
  • 2 eggs (beaten)
  • 1 banana
  • 125 grams of blueberries
  • Jam or powdered sugar to taste

The preparation:

  1. Preheat the oven to 190°C top and bottom heat. Mix flour, baking powder, and salt together in a bowl.
  2. Mix together almond milk, melted coconut oil, and beaten eggs. Add everything to the flour mixture and mix it into a dough using a hand mixer.
  3. Mash the banana with a fork and fold it into the batter along with the blueberries.
  4. Line the twelve cavities of a muffin tin with muffin cases and fill in the batter. Finish baking the breakfast muffins on the middle shelf for about 25 minutes.

Have you been invited to the Easter brunch and are you still missing an original souvenir? Perfect: why not give away a bottle of delicious Shrubs! The fruity vinegar syrup tastes great in drinks such as spritzers or cocktails, in chutneys or desserts, and as a salad dressing. In this do-it-yourself guide, we will tell you how to make your own scrub.

This is scrub

Ever heard of Shrub? It doesn’t matter, because the fruity vinegar syrup is just on the rise. The Arabic word “shrub” means “to drink” and that’s exactly what you do with the vinegar-based syrup: Mix the scrub with sparkling mineral water to make refreshing spritzers or mix it with alcohol to make exotic cocktails.

But the fruit vinegar is also ideal as a dressing for salads, chutneys, or desserts. When making your own scrub, personal taste decides whether you want your vinegar syrup to be a little sweeter or a little sourer. Of course, the variation can be based on your favorite fruits – either pure or in combination with other fruits or spices.

Make your own scrub

You only need three ingredients to make your own scrub: fruit, vinegar, and sugar. The fruits and vinegar can be varied according to personal preference. Rhubarb, raspberries, strawberries, oranges, plums, quinces, or apples can be chosen as fruit ingredients and poured with apple or white wine vinegar.

Rhubarb scrub

The ingredients for one bottle (0.5 liters):

  • 200 g rhubarb (prefer red-fleshed varieties)
  • 200 grams of sugar
  • 240 ml apple cider vinegar (or other vinegar)

The preparation:

  1. Wash and trim the rhubarb and cut it into small pieces. Then place in a large bowl, sprinkle with sugar, stir and cover with a clean kitchen towel.
  2. Leave the rhubarb must to stand at room temperature for at least two hours (preferably overnight) and stir in between.
  3. Pass the rhubarb through a fine sieve and collect the finished syrup.
  4. Pour the rhubarb syrup and apple cider vinegar into a clean bottle and store tightly sealed in the fridge. In this way, Shrub can be kept for several weeks.

Do you already know the yoghurt bomb? Fresh fruit, light and creamy yoghurt – this sweet dessert will delight your guests. EAT SMARTER shows you how you can easily make the yoghurt bomb yourself.

Yoghurt bomb: a perfect dessert for every occasion

Everyone loves a light dessert to eat on a hot summer day or a rainy Sunday afternoon. The yoghurt bomb is just the right dessert when guests come to visit at the weekend. It can be prepared quickly the day before – so the treatment can be served fresh the next day without stress.

That is why the yoghurt bomb is a protein bomb:

The yoghurt bomb consists mainly of natural yoghurt and cream. As a result, the protein content in the dessert is very high. The pistachio is also a source of protein and provides a fine nutty taste.

Top the yoghurt bomb with seasonal fruits, such as delicious berries, for that special freshness.

How healthy is the yoghurt bomb actually?

The berries provide us with filling fibre that is good for our intestines. The myrtillin from the blueberries ensures good elasticity of the blood vessels and thus has a preventive effect against heart and circulatory diseases. At the same time, it has an antioxidant effect and thus protects our body cells from free radicals.

The natural acidity and tannins in raspberries help our liver break down harmful substances and fight pathogens.

The green kernels of pistachios are rich in iron, which we need for blood formation. A lack of the important trace element leads to tiredness and premature exhaustion.

Make your own yoghurt bomb

The ingredients for 6 servings:

  • 500 g yoghurt (3.5% fat)
  • 3 tbsp honey
  • 1 tbsp lemon juice
  • 2 cups of whipped cream
  • 250 grams of raspberries
  • 250 grams of blueberries
  • 30 grams of pistachios

The preparation:

  1. Mix yoghurt with honey and lemon juice.
  2. Whip the cream in a bowl and fold it into the yoghurt mixture.
  3. Line a large sieve with a clean tea towel and place it in a large bowl. Then pour the yoghurt mass into the sieve and place the foil directly on the yoghurt surface.
  4. Now chill the prepared yoghurt bomb in the refrigerator for at least 12 hours.
  5. The next day, carefully remove the foil and turn the yoghurt bomb out onto a large plate. Slowly peel off the dish towel.
  6. Sort and wash the berries
  7. Decorate the yoghurt bomb with raspberries and blueberries and spread a handful of pistachios on the yoghurt bomb.

Enjoy your meal!

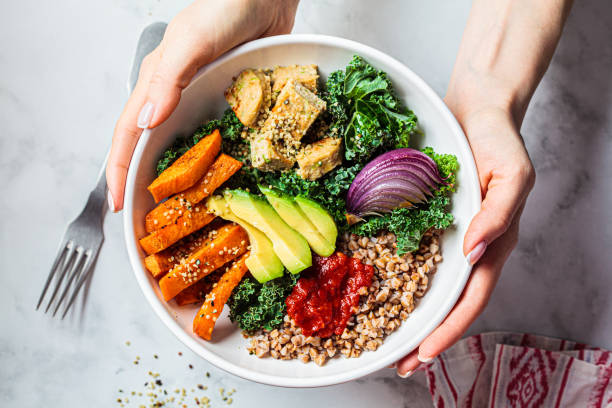
The smart bowl meals taste delicious, fill you up and give you power. With just a few ingredients, you can easily make your own healthy Buddha Bowl. Maybe our tips and ideas will help you conjure up tasty bowl creations. There are no limits to your creativity here!

No matter what time of year: With a Buddha Bowl you always have variety in the bowl. The ingredients can be so multifaceted and varied according to your mood. Buddha bowls score points with many fillers, vital substances, and, above all, their taste. Seasonal foods in particular are ideal for preparation.

The base

Cooked grains such as spelled, oats, millet, rice, or quinoa as well as legumes such as lentils, chickpeas, or beans form the basis of every Buddha Bowl. There is a lot of digestive fiber and blood sugar-regulating complex carbohydrates in it.

With vegetables such as peppers, sweet potatoes, carrots, broccoli, zucchini, mushrooms, eggplant, tomatoes, pumpkin, or beetroot, many vitamins, minerals, and secondary plant substances end up in the bowl. These vitamin boosters taste great raw, fried, or steamed.

The topping

As the icing on the cake, poached eggs, grilled cheese, roasted meat, fish, marinated tofu, or cottage cheese provide a good feeling of satiety and plenty of vital substances.

Components such as avocado, mango, pomegranate seeds, berries, and apples provide lots of vital substances. Nuts, kernels, and seeds provide plenty of anti-inflammatory omega-3 fatty acids, which can be sprinkled over the Buddha Bowl at the end. It’s that easy to make your own Buddha Bowl.

That certain something

If desired, the Buddha Bowl can be topped with a sauce or dip. How about a sauce made from pureed cashew nuts, a herb yogurt sauce, a turmeric quark dip, or a curry dressing made from peanut butter with soy sauce and curry powder? Sounds tempting, doesn’t it?

Create your own Buddha Bowl (ideally with seasonal foods) that will leave you feeling full and satisfied.

Still, need ideas for your next homemade Buddha Bowl? Here we have a fruity and delicious recipe for the strawberry season:

Quinoa bowl with strawberry dressing:

For 2 servings:

  • 150g quinoa
  • 1 large carrot
  • 150 g cherry tomatoes
  • 50 g leaf lettuce
  • 125 grams of strawberries
  • 2 sprigs of lemon thyme
  • 2 tbsp olive oil
  • 1 tbsp lemon juice
  • 1 tsp mustard
  • 1 tsp honey
  • chili flakes
  • salt and pepper

Preparation steps

  1. Rinse the quinoa and cook in double the amount of salted water for about 15 to 20 minutes over medium heat and allow to cool.
  2. Meanwhile, peel and coarsely grate the carrot. Wash and halve tomatoes. Wash lettuce, shake it dry, and tear it into small pieces.
  3. Clean, wash, and cut the strawberries into small cubes. Wash the thyme, shake it dry and pluck off the leaves. Whisk together the oil, lemon juice, mustard, and honey. Mix in the strawberries and season with salt, pepper, thyme, and chili.
  4. Arrange the ingredients in two bowls and serve drizzled with the dressing.

Enjoy your meal!

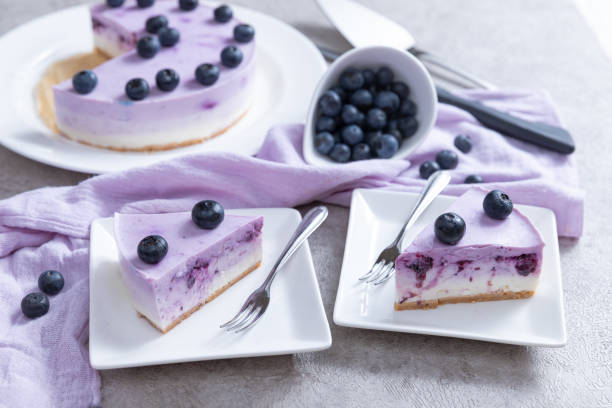
These cake minis not only look good enough to eat, but they also taste super delicious! And best of all: The blueberry cheesecake is complete without refined sugar – only blueberries, dates, and agave syrup provide the wonderful sweetness of the purple cake cubes. Get the Raw Blueberry Cheesecake recipe here!

Healthy cake minis with blueberries

Hardly anyone with a sweet tooth says no to cheesecake – and certainly not with this smart variant! Because the Raw Blueberry Cheesecake contains no industrial sugar, is vegan, and is full of healthy nuts.

The cake base made of almonds and dates is spread with an alternative made of cashew nuts instead of the usual cream cheese cream – also super creamy! Blueberries in the fresh and frozen version provide the beautiful summery purple. Of course, all other seasonal berries can also be used for this raw cheesecake.

And best of all: This recipe is also great for those who don’t like baking because the blueberry cheesecake is “finished” in the icy freezer instead of the hot oven. If guests come spontaneously, you are well prepared.

The Raw Blueberry Cheesecake is so healthy!

With only 42 grams of fat per 100 grams, cashew nuts are among the relatively low-fat nuts. They are rich in vegetable protein and magnesium. The latter makes them the perfect nerve food for vegetarians and vegans.

Blueberries contain plenty of myrtillin, a natural coloring agent that is not only responsible for the deep blue color: it primarily neutralizes free radicals, which play a key role in the development of chronic diseases and premature aging processes. It also promotes the elasticity of the blood vessels and thus has a preventive effect against heart and circulatory diseases.

Make your own raw blueberry cheesecake

The ingredients:

  • 300 g almonds (unpeeled)
  • 200 g dates (pitted)
  • 450 g cashew nuts (soaked overnight)
  • 50 ml agave syrup
  • 150 g coconut oil
  • 1 tsp vanilla pulp
  • 1 lemon (juice)
  • 5 tbsp grated coconut
  • 50 g blueberries (frozen)
  • 50 g blueberries (fresh)

The preparation:

  1. For the base of the Raw Blueberry Cheesecake, place the almonds and dates in a high-speed food processor and blend to form a “crust pastry”. Depending on how sticky the mixture is, add water or plant-based milk.
  2. Place the finished dough base in a freezer-proof form (e.g. 26 x 20 centimeters) and press firmly. Put in the freezer.
  3. Now put the cashew nuts, which have been soaked overnight, together with the agave syrup, melted coconut oil, vanilla pulp, and the juice of one lemon in a food processor and mix to a creamy mass.
  4. Halve the cashew mass. Mix one half with 3 tablespoons grated coconut, but the other half back into a food processor, and mix with the frozen blueberries.
  5. Take the dough base out of the freezer and first spread it with the light cashew coconut mixture. Then spread a few fresh blueberries on top and cover with the cashew-blueberry mixture. Garnish with more blueberries as you like or add them to the serving.
  6. Now put the Raw Blueberry Cheesecake in the freezer for about 30 minutes. About 10 minutes before serving, take the blueberry cheesecake out of the freezer and top with the remaining 2 tablespoons grated coconut and remaining blueberries.

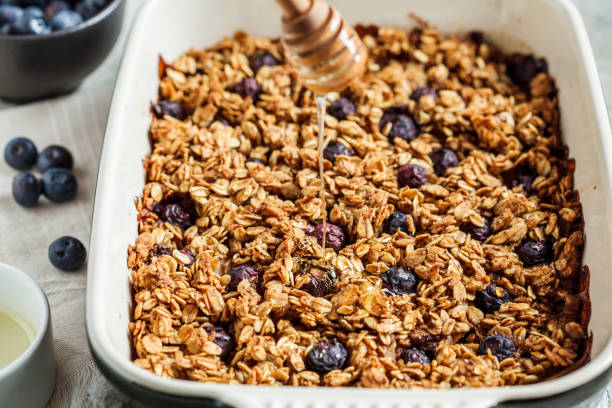
Heat up the oven, put in the oatmeal mixture, and set the table – the baked oats are done! This warm breakfast made of oatmeal, walnuts, and berries will lure any late riser out of bed and provide long-lasting energy for the day. The preparation is super easy: we will show you how quickly you can make baked oats yourself!

Oatmeal breakfast from the oven

Eating a balanced breakfast is not difficult or time-consuming at all – in addition to muesli and porridge, this is now also proven by homemade baked oats! In 30 minutes the warming morning meal is on the table. So you should make a note of this dish for cold days.

A handful of ingredients, including oatmeal, walnuts, almond milk, berries, and Greek yogurt, are quickly stirred together and finished in the oven until golden. Of course, the fruit can be changed depending on the season and preference. You can also vary the nuts or combine several with each other. A dab of yogurt provides that extra portion of creaminess!

Baked oats are so healthy

As the name suggests, baked oats are based on oatmeal. They are rich in fiber and minerals, vitamins, and vegetable protein. It is above all its high fiber content that keeps you full for a long time and has a positive effect on your health. The soluble dietary fiber beta-glucan has a positive effect on cholesterol levels from consumption of three grams per day and reduces the blood sugar increase after eating.

The walnuts in the baked oats also have positive nutrients in their luggage: 30 grams of the nuts already cover the daily requirement of linoleic acid, a polyunsaturated fatty acid that is essential for the body. They are also a good source of vitamin E, which also protects fats from spoilage within the body and thus prevents disruptions in fat metabolism.

Make your own baked oats

The ingredients:

  • 200 grams of rolled oats
  • 1 pinch of salt
  • 50 g walnuts (or other nuts)
  • 200 grams of berries
  • 180 ml almond milk
  • 1 vanilla pod (Mark)
  • 1 tsp coconut oil (melted)
  • 1 tbsp honey
  • Greek yogurt to taste

The preparation:

  1. Preheat the oven to 180 degrees. Place the rolled oats in a large bowl and pour 400 milliliters of boiling water over them. Add a pinch of salt, stir and leave to soak for ten minutes.
  2. In the meantime, roughly chop the walnuts and wash and sort the berries. Now add almond milk, the pulp of a vanilla bean, walnuts, and berries to the oat flakes – stir well.
  3. Grease a casserole dish (approx. 26×20 cm) with the melted coconut oil and spread the oatmeal and berries mixed in it. Drizzle everything with honey and bake in the oven for about 20-25 minutes.
  4. Serve the baked oats hot. If you like, you can enjoy your breakfast with Greek yogurt and other berries.

Low carb marble cake? That’s fine! Because this cake is actually low in carbohydrates and therefore has a few calories less than its classic colleague. Instead of flour, ground almonds are used here. And the result is really impressive: A light, fluffy cake that is reminiscent of childhood days. EAT SMARTER shows how to make the low-carb cake yourself.

Bake low carb

In a low-carb diet, carbohydrates are avoided completely or for the most part. Especially when it comes to low-carb baking, you are often faced with the question: Which low-carb alternatives are there?

Cakes based on quark or cream cheese are very suitable. But it shouldn’t always be a creamy cake. So if you want a classic low-carb cake, you can replace the flour with coconut or almond flour, for example, which is sometimes quite expensive. We simply used ground almonds for this recipe.

Of course, the normal sugar must also be left out for low-carb cakes. Examples include stevia and xylitol.

Xylitol as a sugar substitute

Although xylitol is a pure carbohydrate, Zucker is suitable for a low-carb diet. Fatty acids are mainly formed from xylitol, which is not metabolized as quickly as glucose (simple sugar). Therefore, it can be used well by diabetics.

Unlike sugar, the blood sugar level rises very little after consuming xylitol, which relieves the pancreas. Nevertheless, xylitol has no negative impact on lipid metabolism and blood lipid levels. Due to the constant blood sugar level, there are no food cravings, as these are usually caused by a drop in blood sugar levels. Therefore, xylitol is very suitable as a sugar substitute for low-carb cakes.

The recipe for the low carb marble cake

For 15 pieces

  • 100 g xylitol
  • 50 grams of butter
  • 6 eggs
  • 250 g cottage cheese
  • 1 lemon
  • 2 vanilla beans
  • 220 g ground almonds
  • 1 pinch of baking soda
  • 1 pinch of salt
  • 2 tbsp baking cocoa

Preparation steps

  1. Preheat the oven to 160 degrees. Grease the loaf tin (or Gugelhupf tin) with a little butter or oil.
  2. Set the eggs and egg whites aside. Wash the lemon in hot water and grate the zest, then scrape out the vanilla beans.
  3. In a large bowl, mix together the butter and xylitol until creamy. Gradually add the egg yolks.
  4. Now stir in the quark, lemon zest, and vanilla pulp.
  5. Add the ground almonds and baking soda to the batter and mix well to form a batter. Beat the egg whites with salt until stiff and carefully fold into the batter.
  6. Divide the dough in half and mix one half with the cocoa powder.
  7. Put the light dough in the mold and the chocolate part on top. Mix the batter with a wooden skewer or knife to create the typical marble cake pattern.
  8. Bake the cake for about 45 minutes and let it cool down a bit. Serve warm or cold.

These little cupcakes are really tasty – and bite again, and again… until there’s nothing left. Because this chocolaty, fluffy treat is simply delicious. The eggnog cream cheese cream gives the cakes their icing on the cake. We’ll show you how to make the eggnog cupcakes yourself.

Fine topped cupcakes

These fine little cakes have one big advantage: They are super easy and quick to make. Unfortunately, they are gone just as quickly, because they are simply too delicious.

The light cream cheese cream is the perfect counterpart to the chocolatey cake and brings a lot of freshness with it! The dough with wholemeal flour and coconut oil fills you up for a long time, so even a small tart is enough to satisfy your craving for sweets.

Although wholemeal flour contains more calories than normal wheat flour, it also has more fiber, so it keeps you full longer and supports digestion. So this sweet treat is definitely allowed – especially at Easter when you can finally snack.

If you want to make the eggnog cupcakes even lighter, you can do without the sugar in the batter – but the cupcakes will then be harder and not as well-formed.

Ingredients for 12 Eggnog Cupcakes:

  • 2 eggs
  • 100 g whole cane sugar
  • 50 ml coconut oil
  • 150 ml eggnog
  • 200 g wholemeal spelled flour
  • 2 teaspoons baking powder
  • 2 tablespoons cocoa
  • 1 pinch of salt
  • 50 g dark chocolate
  • 250 grams of cream cheese
  • 2.5 tablespoons powdered sugar made from raw cane sugar

Preparation steps

  1. In a large bowl, whisk the eggs, sugar, coconut oil and eggnog until fluffy. Mix flour with baking powder, cocoa and salt and gradually fold into the batter.
  2. Roughly chop the chocolate and mix the pieces into the batter. Pour the batter into twelve muffin cases and bake in a preheated oven at 180 °C (160 °C fan oven; gas: level 2-3) for about 20-25 minutes. Then let cool.
  3. Mix the cream cheese with 4 tablespoons of eggnog and 2 tablespoons of powdered sugar until you get a creamy mass. Place in a piping bag and pipe onto the muffins.
  4. For the topping, mix the remaining eggnog with the remaining powdered sugar to create a smooth, liquid sauce. Using a teaspoon, gently squirt a few sprinkles onto the cupcakes. Serve and enjoy!

We wish you a happy Easter and lots of fun baking and snacking!