Author

main-admin

Browsing

These tips are sure to help you cook the tastiest fish ever! 🙂

  1. The fish is easier to peel if the hard fins are cut off with scissors or a knife first.
  2. When boiling fish that smells like mud, you need to add a little spicy herbs and spices to the water.
  3. To prevent the fish from falling apart during frying, it must be salted 10-15 minutes before the start of heat treatment.
  4. Fish fried in breadcrumbs looks more appetizing than fish fried in flour, but inside it is not fried enough. Therefore, in order to bring the fish to full readiness, it is necessary to put it in a preheated oven for a short time.
  5. If the broth prepared for jellied fish turns out to be cloudy, it can be clarified with egg white. To do this, it is enough to pour the protein into the chilled broth, stir, heat to a boil and hold for 15 minutes over low heat. Then let it settle and carefully, without shaking, strain the broth through a napkin.
  6. Do not cook the fish over high heat: otherwise it will become tough, and the broth will become cloudy.
  7. The fish will be tastier if you fry it in a mixture of sunflower oil and butter (both equally). Do not cover the pan – and the pieces will be covered with a crispy appetizing crust.
  8. Herring will be very tender and juicy if, after cutting, it is soaked for 40 minutes in milk or in tea infusion.
  9. Boiled fish will be very tender if fresh milk is poured into boiling water.
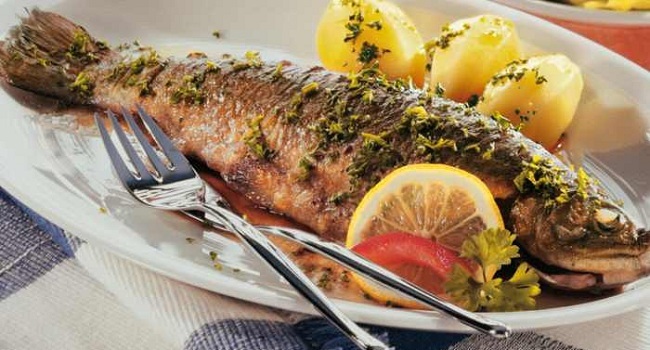
  10. Fish fried in foil is very tasty and juicy. The fish should be peeled, washed, salt, spices, wrapped in foil and placed in a preheated oven.

It’s actually pretty easy to make a great steak. The main thing is to be attentive to the process. For a truly perfect steak, follow the six basic rules.

  1. Remove the steak from the refrigerator 15-20 minutes before cooking.
  2. Blot the meat with a paper towel to remove excess moisture.
  3. Season with salt and pepper and let sit at room temperature for 10-20 minutes.
  4. Prepare your grill for direct high heat (230-290 ° C).
  5. Cook the steak for 1 minute per centimeter of thickness on each side (that is, if the steak is 3 cm thick, then 3 minutes on each side). This will give you a medium-rare steak.
  6. Remove the steak from the grill and let it “rest” on the board as much as you grilled it (read our other article on why steaks need “rest”). Season it again with salt and pepper to taste, and then serve.

We often don’t cook steaks at home because they are less juicy than in restaurants. In fact, making the perfect steak at home is a snap if you know the secrets and subtleties.

Mastering the art of making juicy and mouth-watering steaks is easy. The main thing is to strictly follow several rules and remember the difficulties that both beginners and regulars of the kitchen may encounter.

  1. The steak should only be prepared with fresh, chilled meat. The meat is usually brought to room temperature before frying. If the steak has been frozen, leave it in the refrigerator overnight. Wipe the meat dry before starting the cooking process.
  2. The width of the meat is also very important. Ideally, this is a piece of 2.5 to 4 centimeters.
  3. If you cut the meat yourself and at home, then it is worth remembering one simple rule: cut it strictly across the fibers.
  4. For steak, use a heavy skillet or grill pan. They make it easier for you to control the temperature and the frying process in general.
  5. It is important to preheat the pan correctly. It should be very hot, but not smoke. Otherwise, the meat will burn on the outside before it has time to cook on the inside. The steak should sizzle as it touches the surface of the pan.
  6. It is better to start frying meat at high temperatures, and then switch to lower ones. This will ensure even roasting and prevent the meat from losing its flavor and color.
  7. Typically, cook a medium-rare steak for 4 minutes on each side. Meat with the blood takes 1-3 minutes. A fully fried steak is fried for 3 minutes on each side over high heat and then cooked until fully cooked for 6-8 minutes. However, you should still carefully monitor the meat, because the cooking time can vary depending on several factors.
  8. The steak can be flipped frequently. This will ensure even frying, and the edges of the steak will not dry with this technique. If you decide to turn it over rarely, only 2-4 times during the cooking process, then the final result will be a beautiful lattice pattern. However, only if you are grilling the steak.
  9. You can check the readiness of the steak with your fingers. To do this, lightly press down on the steak with your fingertip. The bloody steak is soft and pliable to the touch; well done – hard; medium roast is a cross between the two previous options.
  10. After the meat is ready, you need to remove it with special cooking tongs and leave for 10-15 minutes. If you are afraid that the steak will cool, then use food foil. You should not neglect this rule, because this is the only way to get a really juicy, mouth-watering, and delicious dinner.
  11. The steak is best served on warm plates. Knives must be sharply sharpened.

These tips will definitely help you cook delicious fish 🙂

  1. Before processing fish, place it in a bowl of water, if the fish sinks – it is fresh, if not, then refuse to cook this product.
  2. Frozen fish is thawed in cold water with the addition of 1/2 tbsp. tablespoons of salt per 1 liter of water.
  3. Fish fillets are thawed without water to avoid losing nutrients and impairing the taste of the fish.
  4. It is not recommended to boil bream, carp, navaga, carp – the broth turns out to be bitter.
  5. To eliminate the strong smell of fish frying, place one potato, peeled and cut into slices, in vegetable oil.
  6. To eliminate the pungent specific odor of flounder, remove the skin from the dark side when cleaning it.
  7. Food waste left over from fish preparation for frying (head, bones, fins, tails) should be used to boil a small amount of broth, in which you can make a delicious sauce.
  8. Do not allow the liquid in which the fish is boiled to boil too much.
  9. Fish broth is salted at the very beginning of cooking.
  10. Fish cakes will taste better if you put finely chopped and lightly fried onions in the minced meat.

We’ve put together some important fish cooking tips for you!

  1. Before frying, the fish should be salted as follows: dilute one teaspoon of salt in a glass of cold water and pour the prepared fish with the resulting brine, drain the brine after 5-7 minutes.
  2. In order for the fish to brown well, it is recommended to dry it with a paper towel before frying.
  3. So that the fish is well browned during frying and does not burn, pork fat or butter is added to the vegetable oil.
  4. Fried fish turns out to be delicious if it is kept in milk before frying, then rolled in flour and fried in boiling vegetable oil. To prevent the fat from splashing and the fish to be fried better, cover the pan with an overturned colander.
  5. Regardless of the size, the fish is baked or fried in a highly heated oven.
  6. When frying, the fish will not fall apart if it is salted 10-15 minutes before cooking.
  7. Boiled fish is ready if its fins come off easily. Fried fish is ready if clear juice flows out when pressed with a spoon.
  8. After fish and fatty meals, you should not drink cold water.
  9. Do not store fish next to dairy products, as this can give them a fishy smell.
  10. If the dishes retained the smell of fish or onions, they should be rinsed with water and vinegar, then the smell will disappear.
  11. Herring will be tender and soft if soaked in milk.

Japan is the country that gave us healthy food, which includes the world’s most widespread dish “sushi”. It began to spread around the world since the 70s, but has conquered the world only recently. Since sushi and rolls are a rather specific dish that not everyone will like, they reworked it and introduced something new familiar to Europeans a huge number of times.

  1. Wasabi or Japanese mustard, as many call it, should be kept in the refrigerator for no more than 2 weeks.
  2. If ingredients fall out of the roll during cooking, press down on the ends (edges) with your fingers.
  3. For making sushi, you should use rice varieties with round short grains.
  4. In order for the rolls and sushi to have smooth edges and look beautiful when cutting, they should be cut with a very sharp knife with a thin blade.
  5. When preparing rolls and sushi, the nori should be placed with the shiny side on the mat, and the dull side on the inside of the roll.
  6. Store dried nori in a dry place.
  7. There is pickled ginger between meals of different types of sushi – this allows you to better feel the taste of the new dish. And so that it does not lose its taste and useful qualities, ginger must be properly stored.
  8. In order for sesame seeds to be fried quickly and evenly, they should be fried in a well-heated frying pan without oil.
  9. A bamboo mat (a special mat for making sushi and rolls) is an indispensable attribute of both a beginner and a professional sushi master. Many people unknowingly use a plastic bag to shape. However, such rolls and sushi do not hold their shape well and fall apart.
  10. Sushi is a perishable product and is recommended to be eaten within 2-6 hours. After the allotted time, the dish loses its taste.

Japanese cuisine has so long and firmly entered our lives that among your friends there can easily be more sushi lovers than salads. So throwing a sushi party is a very tempting idea. But what if your first attempt at making sushi on your own failed? Then this article is especially for you.

  1. Have you ever cut a tomato with a dull knife? Exactly. The fish knife should be very sharp. And long. To prevent a slice of fish from falling apart, it must be cut off in one, maximum two movements, then the slice will be smooth, even and, most importantly, whole. If you completely hit the authenticity, there are special Japanese knives for cutting fish and sushi with one-sided sharpening. Our chefs start every day with a sharpening knife. And before cutting the rolls, the knife is barely moistened with water. The fish should be cut at an angle of about 45⁰ along the grain, so that the slice will not fall apart.
  2. It’s hard to imagine Japanese cuisine without rice. But unlike rice, which we use for porridge, pilaf and other dishes, to prepare sushi we need a different type of product and a different method of cooking. First, the rice must be round grain. In stores, this rice is usually marked “for sushi”. Such polished grain is quite sticky, but at the same time it does not stick together in a lump. Of course, if you cook it properly. And it is necessary to cook clearly to the degree of al dente (when the rice is already ready, but has not yet lost its elasticity), in no case should it be overcooked. To simplify the task, you can use a slow cooker or rice cooker, in which the product will be ready in 25 minutes. You can add a special dressing of rice vinegar, salt and sugar to the finished rice – in addition to giving a special taste, it will allow the rolls to keep their shape better.
  3. The importance of choosing good fresh fish is hard to overstate. Take fish that has been shock-frozen. Temperatures from -18⁰C to -30⁰C kill absolutely everything that your stomach may not like. Buy fish in trusted stores, and in no case “off hand” in some spontaneous market. Choose vacuum-packed fish in stores.
  4. An indispensable sauce for most Japanese dishes is sold in our stores in powder form. Don’t worry, there is no chemistry in it, it just keeps the grated green Japanese horseradish. In order for it to take the form you know, it must be diluted with boiled water at room temperature. But be careful, when mixing the powder with water, the fumes are the same as when chopping onions. The strength level can be controlled independently – the more water, the less burning your wasabi will turn out to be.
  5. Wasabi. The correct soy sauce consists of only 4 ingredients: soybeans, wheat, salt and water. Read the composition carefully. It is advisable to buy soy sauce in a glass bottle – it is stored in it much longer than in a plastic container. Also, soy sauce can be sold concentrated or already diluted. Again, study the label. Restaurants serve ready-to-eat sauce, but when ordering delivery, couriers bring in a concentrate (as written on the cap), which must be diluted to taste.
  6. Before making your sushi, make sure you have the correct bamboo curling mat. Many novice “home sushi” use a plastic bag to shape the rice, which is fundamentally wrong and unproductive – the rice will still fall apart. So you can’t do without a mat. So, put the rice on nori (green sticky seaweed) and put it on the mat, after wetting your hands with vinegar water, evenly lay out the other ingredients – the filling, and twist with effort. We fix it for a few seconds and carefully unfold it. The result is the perfect rice sausage. Cut it with our super-sharp knife soaked in water and sprinkle with sesame seeds or other spices to taste. Knowledge, patience, sleight of hand and a little magic.

Most people associate barbecue with a warm summer breeze, with green tree branches hanging over the grill and sunlight that accompanies the party almost until its end. But the Big Green Egg grill shouldn’t get dusty in the garage in winter, because this is not seasonal sports equipment, it is suitable for use at any time of the year.

In winter, cooking is even more pleasant: insects do not get bored, gathering at the lamps; the drinks are not heated, and the guests are even more delighted to welcome your little culinary masterpieces.

  • Place the grill in the least windy corner of the yard, as it is the icy wind that penetrates the blower and cools the heat;
  • The day before your planned BBQ party, bring the charcoal into your home to warm it up and dry, making it easier to fire.
  • It is only necessary to store coal in paper bags, as condensation can form on the walls of the plastic packaging due to temperature differences. The resulting water droplets will be absorbed by the coal, from which its quality will only suffer.
  • Close the charcoal bag tightly. Many people store grill charcoal in their garage, which has a ton of chemical odors such as gasoline, paint, or furniture varnish. If this smelling air gets to the coal, then you risk getting a steak for lunch with the smell of gasoline, engine oil, etc.
  • Equip yourself with tools: buy Big Green Egg tongs for meat and vegetables, and a metal spatula for fish. Under no circumstances pierce the grilled food with a fork, as you will only damage them and lose juice, turn juicy tidbits into dry and sinewy. The fork is only useful for slicing the finished dish.
  • Don’t tackle complicated recipes in winter. Bad weather can quickly ruin plans, be prepared for this. Cook simply and with passion.
  • If you want something like that, then it’s time to get a set of spices from the cabinet and make a fragrant sauce. With the Big Green Egg Pickle Syringe, you can make your steak or poultry even more juicy and tender.

When buying meat for a steak, some do not risk taking cuts on the bone. Some consider the bone to be overweight, while others do not know how to grill steaks on the bone. Today we will dispel all doubts and tell you about the benefits of steaks on the bone and the intricacies of their preparation so that your dish will be delicious from the first try.

  • Tip # 1: choose the right meat. For steaks, it is better to buy marbled beef. It has a large number of small layers of fat, which give the meat a special softness. Moreover, such beef undergoes a dry or wet fermentation process, due to which the steaks on the bone are fried quite quickly. The meat acquires a richer taste and aroma.
  • Tip # 2: Choose the right thickness for your steaks. This is a very important point, because if the piece is thin, then the meat will dry out during frying, and the bone may be raw. Therefore, buy a cut with a thickness of at least 4-4.5 cm. And if it has a side layer of fat, do not cut it off, it will give juiciness.
  • Tip # 3: Grill it right. To cook meat properly, you need to create two heating zones. In the direct heat zone, a crust is applied, and in the indirect heat zone, the steak is brought to readiness. But for steaks on the bone, cooking begins in the cold zone. The meat is heated on it and then transferred to the direct heating zone for frying.
  • Tip # 4: Consider the characteristics of the bone steaks. For example, there are two types of meat in Tibon steak: striploin and tenderloin with a smooth, fine-grained structure. Place the Tibon steak on the grill so that the Striploin is in a hotter area than the tenderloin. Cook until low to medium cooking.
  • Tip # 5: Use a meat thermometer. It is especially needed for frying bone steaks. Unlike boneless steaks, meat on the bone takes a little longer to cook. First, the bone picks up the temperature on itself and then gives it back. For this reason, it can be difficult to determine the degree of roasting by eye, and the thermometer makes it possible to control the entire process. To measure the temperature correctly, place the thermometer in the pulp near the bone.
  • Tip # 6: Measure the doneness. Grill the boneless steaks until lightly cooked at 53-54 ° C, or medium at 57-58 ° C. Such roasting will preserve the juiciness of the meat. But, if you are cooking a large cut with good marbling, grill it to an internal temperature of 60-63 degrees to melt the fat as much as possible.

In fact, sushi is very simple: rice, fish, and various additives like cucumber or avocado. However, in order for your sushi to turn out really cool and not worse than in a restaurant, we advise you to adhere to a few rules.

  1. The knife is the main participant in the preparation of sushi after you. Therefore, he must be at his best. That is, it must be very sharp. Therefore, do not be too lazy to sharpen it before starting your culinary experiments. Choose knives with wooden handles: when wet, they won’t slip in your hands. Such knives in Japan are called “bento” and are used to make sushi.
  2. All ingredients must be exceptionally fresh or, as they say in the markets, the freshest. Otherwise, you risk not only tasteless rolls, but also your own health: we think we don’t need to say that stale fish is dangerous. In addition, whatever fish you choose – fresh, smoked or dried – it is important to cut it correctly. Do not cut tender fish fillets as they will lose their presentation. Here we go back to rule number one: the sharp knife.
  3. Fig. It is very important to prepare it properly. Sushi is made from warm round-grain rice prepared using a special technology. 460 g of rice requires 750 g of water. Rice must be washed and dried for an hour, then placed in a saucepan with a tight lid, pour in water and cook over minimum heat for 5 minutes after boiling. Then it needs to be steamed for 12-15 minutes on low heat, remove the pan from heat, remove the lid and cover with a towel for 15 minutes. Then gradually add vinegar dressing to the rice and let it dry.
  4. Mat. That is, the rug with which the rolls are rolled. It should be made of bamboo so you can press the sushi rice properly. Many beginners use a plastic bag for these purposes, but it does a poor job: rice will quickly fall apart.
  5. Acetic water. When forming sushi by hand, use vinegar water. It is convenient to wet your hands in this solution during cooking and rinse them after working with rice. To make vinegar water, mix two tablespoons of apple cider vinegar with a glass of water.
  6. Proportions. Do not coarsely chop the sushi ingredients; this can impair the appearance and taste of the dish.
  7. Nori. Supermarkets sell sliced nori sheets, which are convenient only for making traditional sushi. If you bought these algae by mistake, don’t throw them away. Lay the sheets tightly together and crush a few boiled rice at the joints. This technique will help you easily glue nori and use them to prepare any kind of sushi.
  8. Wasabi. Do not get carried away by it. An excessive amount of this sauce will not let you enjoy the taste of the dish, because its sharpness dulls the taste buds.
  9. Eat immediately. Sushi should be eaten immediately, because this dish, prepared from fresh products, deteriorates very quickly. The maximum shelf life of sushi is six hours, provided that special boxes are used.