Tag

cool

Browsing

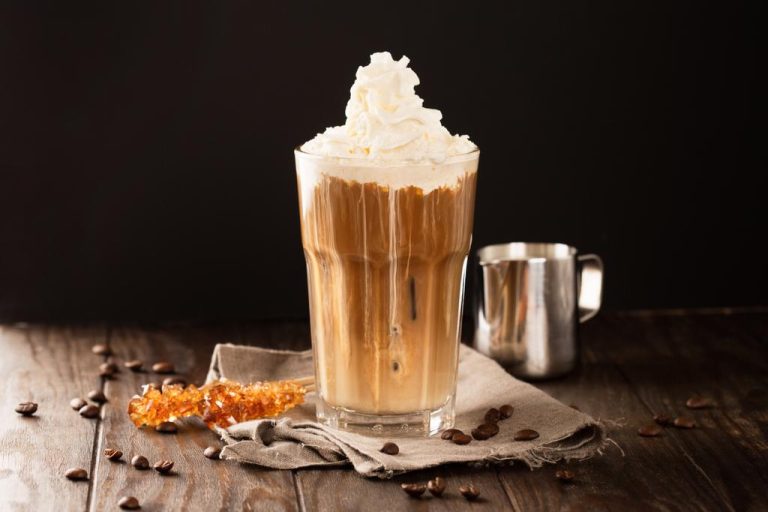
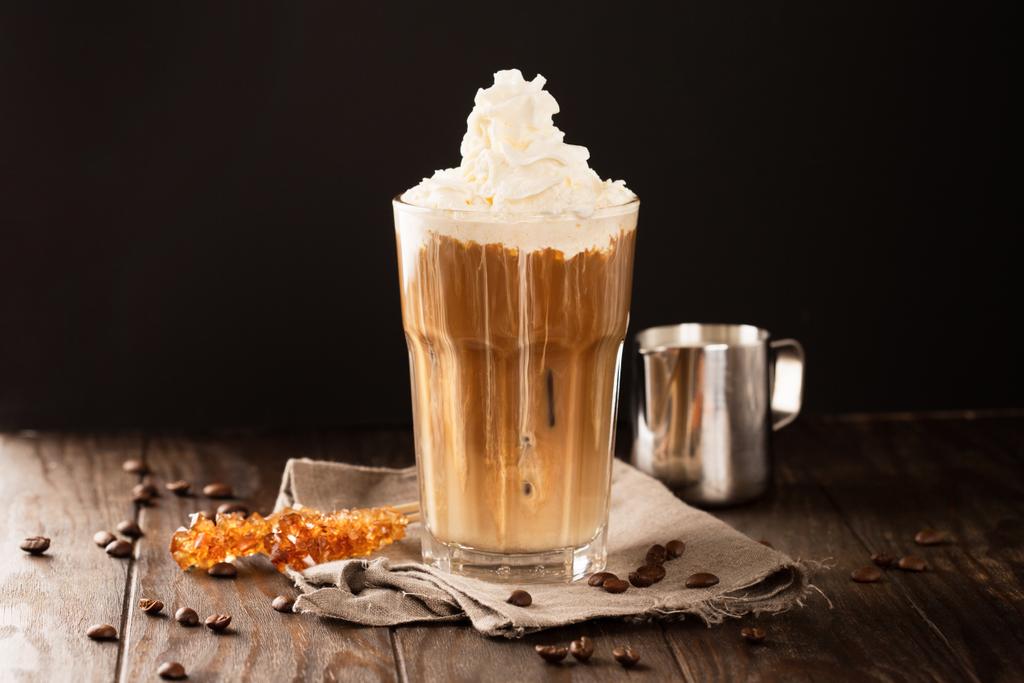
Homemade ice cubes can be found in almost every household in the freezer. But in addition to the variant with water, there are now more and more containers in which coconut milk ice cubes are stuck. They give smoothies a silky texture and add great flavor to iced coffees – perfect for spring and summer!

The exotic among the ice cubes

Coconut milk is made from the flesh of the coconut. The result is a creamy liquid that refines many dishes such as Indian curries. But coconut milk doesn’t just taste wonderful in hot meals: the latest trend is coconut milk ice cubes!

Instead of the usual water, the trendy ice cubes are made entirely from coconut milk. In terms of taste, this is particularly interesting for coffees or smoothies: the sweet coconut milk goes well with the bitter coffee aroma and ensures a creamier consistency and chilled drinks. In addition, the drinks are not watered down unnecessarily.

The coconut milk ice cubes are also easy to portion, so you no longer have to open and use up a whole can of coconut milk for a shot of milk. However, with a fat content of around 20 percent, commercial coconut milk is not lightweight. However, you can fall back on the reduced-fat version – which has twelve percent fat.

Make coconut milk ice cubes yourself – that’s how it works!

The ingredients:

  • 1 can of coconut milk
  • Ice cube molds of your choice

The Preparation:

  1. Shake the coconut milk well before opening to form a homogeneous mixture.
  2. Pour the coconut milk into the ice cube molds and place in the freezer for at least four hours.
  3. Depending on your needs, remove the coconut milk ice cubes from the mold and add them to creamy smoothies or cold iced coffees.

It’s finally warm and we’re looking forward to the next camping weekend or the upcoming festival in the great outdoors! We enjoy the sun, and the warm temperatures and enjoy life. If we now had a refreshingly cool drink in our hands, our happiness would be complete. But you can’t have everything – or can you?! We have the solution and today we will show you nine ways how you can cool your drinks on the go!

Who doesn’t know this: The camping trip is well prepared, tent, flashlight, insect spray, sunscreen – everything has been thought of. We even chilled the drinks in the fridge before we set off so that we could refresh ourselves later after the strenuous pitching of the tent. But after the car ride, the drinks are no longer cool but have taken on the summer outside temperature. The lukewarm water also quenches our thirst, but it’s not really refreshing.

We have the solution and not just one, but nine tricks on how to cool your drinks on the go! What are you waiting for: pack a tent and your friends and enjoy a wonderful weekend in the countryside – with cool drinks!

Trick 1: Cooling with wet socks

Soak your socks or towel in water and pull them over your soda bottle so it’s completely covered with the wet fabric. Now it is best to place the bottle in the shade so that it is a little drafty. But the trick also works in the sun. The sock water evaporates and thereby produces cold.

Trick 2: Cool with salt

Did you know that you can cool your drinks with salt? All you need is water, salt, and ice. Mix everything together in a 1:1:1 ratio in a large container that will fit all the drinks. The salt will make the ice melt. This requires energy, which is drawn from the beverage bottles.

This cools them down quickly to a few degrees Celsius above zero and you can enjoy cold drinks after a few minutes! However, make sure that you do not use too much salt and do not store the drinks in the mixture for too long. Otherwise, there is a risk that the bottles will burst.

Trick 3: Cooling with nitrogen fertilizer

You can buy nitrogen fertilizer from garden supply stores (buy on Amazon). So that it cools your drinks on the way, you have to mix the fertilizer with water in a ratio of 2:1 (fertilizer: water). A chemical reaction cools the water down to ten degrees Celsius. With this cooling variant, it should be noted that the mixture can be a bit sticky – so it is best to protect your drinks with plastic bags.

Trick 4: Cooling in a hole in the ground

This cooling variant is a bit more labor-intensive but works great. Dig a large enough hole about half a meter deep. The drinks are stored in this hole.

Now make a cover as dense as possible from earth and grass. Your drinks stay pleasantly cool under the lid for several days. At some campsites, digging a hole in the grass with a spade and shovel may not be well received. To avoid trouble, it is best to find out before digging whether this type of cooling is permitted on the campsite.

Trick 5: Cooling with dry ice

You can get dry ice quite cheaply from specialist retailers (buy it from Amazon). Five kilograms cost about 20 euros. It is best to find out on the Internet where the nearest dry ice supplier is in your area. The frozen carbonic acid is available in solid form as snow, blocks, or slices.

Depending on storage, the dry ice keeps the drinks cool for one to five days. But be careful: Never touch the dry ice with your hands, there is a risk of injury. In addition, dry ice is not suitable for adding to drinks!

Trick 6: Cooling with the grill

This cooling variant is a bit adventurous and only works on sandy ground. Dig a small hollow in the ground and put some bottles or cans in it. The drinks are now covered with sand, poured over with alcohol, and set on fire. Insanely, the fire cools the drinks because it extracts energy from the sand in the form of heat. But before you start torching, find out about the campground’s fire regulations!

Trick 7: Cooling with cutter ice

The fish in the display are cooled with cutter ice at the fresh food counter in the supermarket. The ice is inexpensive and keeps for up to four days, making it perfect for chilling drinks on the go. Unfortunately, it’s not that easy to get, it’s only available in gastro wholesalers or butcher shops.

Trick 8: Cool in layers

Here, a clever layer system is used for cooling. Measure how many bottles or cans fit in your toolbox. You then divide your supply of drinks into three groups of equal size: Some of the drinks are frozen in the freezer. The second part is cooled down to about one degree Celsius in the cooling compartment. The rest of the drinks are stored in the refrigerator as normal.

Once the drinks have reached the desired temperature, the cool box is filled as follows: the frozen drinks go all the way down. The frozen drinks are layered in the middle. The fridge-cold cans and bottles go on top. Now cover the cool box with a wet towel to make additional use of the evaporative cooling.

Trick 9: Cooling with the self-cooling beer keg

Attention all beer drinkers: With this cooling variant, you can have freshly tapped, cold beer all day long (buy from Amazon). The evaporative cooling cools the barrel down to a pleasantly refreshing drinking temperature within 45 minutes. Admittedly, this cooling option is not exactly cheap and the deposit for the barrel is relatively high. But with a self-cooling mini tap, the festival or camping weekend will be upgraded quite a bit – and the envious looks of your tent neighbors are guaranteed!

Tips for a cold apartment in summer. Now cleverly cool your apartment or get your room cold.

Who does not know it? It’s summer, over 30 degrees in the shade and the apartment is heating up to an unbearable temperature. But how can you counteract this and cool the hot apartment? We have summarized useful tips for you here.

Ventilate mornings and evenings

The simplest trick to not letting the apartment get too warm in the first place is to air it thoroughly in the morning and evening. During the day, the air that enters the apartment when it is ventilated is much warmer than in the morning or in the evening. With this simple trick, you can keep your own four walls cool. Also, note tips for reducing humidity in the room and household remedies for removing mold.

Leave blinds closed

When less sun falls into the apartment, it heats up less. So you should make sure to lower blinds after airing and avoid sun exposure. Also, read our article about the advantages of pleated blinds.

Turn off devices

Television, computers, etc. manage to produce enormous heat even in winter. Cooling the apartment and leaving the TV on at the same time or using the computer is not a good idea. It is better to switch off the devices if that is possible.

Hang up wet sheets

If you have an old cloth or bed sheet available, you should hang it hand-damp on a chair, in front of the window, or in front of a fan. When drying, moisture is removed from the wet fabric and the room cools down quickly.

Ice cubes

A similar option is available for people who do not have an old bed sheet available. You fill a bucket with ice cubes and place it in front of a fan. The cold air that forms around the ice cubes is distributed throughout the room by the fan and the apartment cools down. Also, read great ideas for making ice cubes for your next party planning.

Light walls

Since dark colors absorb more heat than light colors, you should take into account that the walls are usually painted in light colors, such as beige or orange. If the walls are painted in dark colors, a small renovation with fresh colors should be considered.

Window films

Window films are suitable to ensure that no warm air is generated in the apartment at all. You stick the film to the glass surfaces of the windows and can thus deflect solar radiation. The films are available for little money in hardware stores and can be attached to the windows very quickly and without any manual skills.

Clean up

If there is a lot of junk lying around, you should just clean it up quickly. This makes the room appear much tidier and cooler. Consequently, note valuable tips for tidying up and creating an order.

Tips for cooling hot tea quickly. Tea lovers can sing a song about it. Again the tea was drunk much too hot and the tongue is burned. It takes a little eternity for the tea to cool down to drinking temperature.

For those in a hurry, there are simple and highly effective ways to avoid hot tea and a burned tongue while still enjoying it quickly. So that you no longer lose valuable time in the morning and no longer have to wait for tea in between.

From hot to an enjoyable tea

Many ask themselves the question “How can tea cool down faster?” And this question is justified. Because we love tea and coffee in the morning. Or a delicious tea in the evening for supper. And in winter, this hot drink is also a must. In addition, it is enjoyed during the day in many warm countries. So one thing is certain: sooner or later you too will be drinking a cup of tea. That’s why we’ve collected a few tricks for you on how to cool your tea quickly. So you don’t have to wait any longer. In addition, note our tips for making tea with temperature and brewing time.

1) Hot tea with ice cubes

Hot tea tastes great and there are many different varieties. But it takes a while before the tea can be enjoyed. If you drink from it too quickly, you’ll burn your tongue. To prevent this from happening, you can put an ice cube in your hot drink. This allows the tea to cool down quickly. You should make sure to remove the ice cube as soon as the correct drinking temperature has been reached.

2) Quickly cool tea with a cold spoon

You can also bring your hot drink to the right drinking temperature with a chilled teaspoon. You can store a few teaspoons in the freezer for this. And if necessary, add them to the hot drink. So tea enjoyment is not long in coming. Also, read our article about the special properties of Match Tee.

3) Hot tea with cold milk or water

If you like green tea or black tea, you can also add a dash of cool milk or cold water. This allows the tea to cool down and enjoy quickly. You can add more or less cool liquid depending on your preference.

4) A cool water bath for the hot tea

You can also put your tea in a cool water bath. It’s a bit tedious, but it helps. To do this, fill a large bowl with cold water in which you can place a cup. Once you’ve brewed your tea, you can put it in there. Whether as a home remedy for abdominal pain or just because, with the water bath, hot tea can be enjoyed quickly.

So much for cold coffee – iced coffee is a classic that makes a comeback every summer. As Caffè freddo, it is traditionally served in Italy as an often sweetened espresso lengthened with ice-cold water, as a café frappé in Greece and in Cyprus as cold frothed coffee with pieces of ice. And even if people like to use ready-mixed powder bags these days – a home-made iced coffee is a pleasure that is well worth the little effort!

Our favorite iced coffee: Nutella iced coffee

Similar, but alcohol-free and a bit sweeter, is “Nutella Iced Coffee”. Here the glass is first garnished with chocolate and caramel sauce, then cold coffee or espresso (depending on your taste) is filled with vanilla ice cream. Then stir in a spoonful of Nutella, decorate with cream and grated chocolate and enjoy.

Viennese Iced Coffee & Co

The variation of the frozen cappuccino is also enjoying increasing popularity. To prepare it, you need a blender with a cup of espresso, about three quarters of a cup of milk, a teaspoon of brown sugar and 60 grams of ice cubes. After mixing the ingredients, let stand briefly and then pour into a glass. Of course you can also use sugar syrup instead of cane sugar here or use other syrup variations as you like. Another specialty is Viennese iced coffee. Here the vanilla ice cream is poured directly into the still warm coffee, then milk and sugar are added and the whole thing is carefully stirred. This sweet mixture then goes into the freezer for two hours. Before serving, briefly whip the melange again and serve with a little cream if desired. For a fruity variation on cold coffee, take two tablespoons of freshly brewed or instant coffee, stir in a tablespoon of sugar and allow the drink to cool. Add 100 milliliters of orange juice and the coffee to about 250 grams of whipped cream. Mix well and add 320 grams of vanilla ice cream, finish with coffee beans and, if desired, additional whipped cream. If you prefer something stronger, you can take a chilled double espresso as the basis and refine it with one or two scoops of ice cream and some frothed milk.

No holiday is complete without fish. Following these tips, you will have the most delicious fish on your holiday! 🙂

  1. Cook fish in a sealed container so that moisture does not evaporate unnecessarily.
  2. When frying fish, you can add a few pieces of raw potatoes to boiling vegetable oil. It will eliminate unpleasant roasting odors.
  3. Fish dishes can be served with lemon slices, sliced tomatoes, various dressings, and sauces.
  4. Thick-bottomed pans are good for frying fish.
  5. To prevent the fish from falling apart during frying, it is salted 15 minutes before cooking.
  6. You need to bake fish dishes in a highly heated oven.
  7. The cutlet mass is prepared from low-bone fish, minced fish is prepared only before cooking. Fish cakes will be tastier if you add finely chopped fried onions to the minced meat.
  8. Fish will not stick to the pan when frying if you add a little salt to the vegetable oil.
  9. For cooking 1 kg of fish, take 2 liters of water. The fish broth is salted at the beginning of cooking. Whole cooked fish is juicier and tastier, and steamed fish tastes better than boiled in water.
  10. When boiling, fish soup is cleaned, but scales and fins are not removed. The prepared fish is placed in cold water and very slowly, in 30-40 minutes, brought to a boil. When heated slowly, the fins (partially) and scales (completely) dissolve, giving the ear a density and a unique broth. When heated quickly, they brew and become tough, insoluble. With slow heating, the ear is ready 3-5 minutes after boiling.
  11. When cooking fish soup, it is useful to pour in from 50 ml to 100 ml of vodka per liter before heating.
  12. Small fish should be placed in boiling water for cooking, large fish in cold water. To boil the fish soup, the fish is placed in cold water, removing the eyes and gills.
  13. Pike perch, carp, pike, cut into pieces, boil for 15-20 minutes; fish weighing over 1 kg is cooked for about 1 hour.
  14. The most delicious fish soup is obtained from fresh ruffs, tench and perch.
  15. Sometimes, to improve the taste of the broth, add cucumber pickle or put a pod of fresh sweet pepper, dill, and an onion.

Some homemade baking tricks.

  1. Do not put the cake in a very hot oven right away, otherwise the top of the dough will be hard and the middle will not bake.
  2. The dough will become gelatinous if the oven is not hot enough before baking or the dough does not rise well.
  3. The finished cake, if it is not baked, will surely settle, so it must first be baked in the oven at a moderate temperature, unless otherwise provided by the recipe.
  4. When baking a cake, if possible, do not open the door of the oven or open and close it very carefully, without slamming it, otherwise the middle of the cake will immediately settle and the cake will turn out to be “tempered”.
  5. The finished cake will not settle if it is kept in a warm place immediately after the end of baking or if you remove the fire from the oven, let it cool slightly without removing it from it.
  6. Cut a fresh cake into portions with a sharp long knife, dipping it into hot water each time and wiping it quickly. At the same time, the product does not condense, does not crumble, and the pieces of cake are smooth.

These tips will definitely come in handy!

  1. Cold whites whisk much more easily than at room temperature.
  2. Do not beat egg whites using aluminum dishes (spoon, fork, bowl …), the whites darken.
  3. It is better to bake thin cake cakes not on the baking sheet itself, but on cooking paper. So the cakes do not break, it is convenient to remove them from the baking sheet.
  4. After baking, the sponge cake should cool well. If you try to cut a warm or hot sponge cake, the cakes are crumpled.
  5. Cool well before whipping the cream. Cream should be fresh, fat content of at least 30-35%. Low fat cooking cream is not suitable for whipping.
  6. The cream is whipped with a frame mixer. Cream is considered well-whipped if its mass has increased several times and at the same time holds well on the broom.
  7. For Tiramisu cake, expensive mascarpone cheese can be replaced with whipped cream with sugar.

Do you want to be able to bake the most delicious cakes? Then these tips will definitely come in handy!

  1. The whites whisk well if they are fresh and chilled. It is best to do this in a cool place.
  2. Yolks with sugar are easier to grind slightly warmed up.
  3. Before use, it is better to dilute soda with water, or mix thoroughly with flour.
  4. The glazed product does not dry out for a long time and is better preserved.
  5. A filled cake must be left standing for at least half a day to acquire the appropriate flavor.
  6. The fruit pie will be especially juicy if you put a layer of curd under the fruit.
  7. The fruit is sprinkled with sugar at the end of cooking, otherwise it will ooze too much juice.
  8. Products made from unleavened dough will be crumbly if you add a spoonful of cognac to the dough.
  9. The icing for cakes and cookies can be colored red with beet juice and orange with orange juice.
  10. You can get a good icing by melting chocolates and mint candies, adding a couple of tablespoons of water or milk.

Salad is a light, tasty and nutritious dish. Salads can be independent dishes or serve as a side dish for meat, fish or poultry. Both its taste and appearance depend on how the salad is prepared, and therefore it is worth following some simple rules for preparing salads.

  1. It is better to cook salads in glass, enamel or ceramic dishes.
  2. Vegetables for salad are cut there finer, the denser their tissue.
  3. All raw vegetable salads are best prepared just before serving, rather than beforehand.
  4. It is better to heat vegetables in a gentle way: either cook in a little water, or simmer in a little fat.
  5. It is better to cook potatoes, beets and carrots immediately before preparing the salad unpeeled, this way vitamin C is better preserved.
  6. Cooked vegetables should be stored unpeeled, and peeled immediately before preparing the salad.
  7. Products cooked for salad must be cooled. Do not mix warm foods with cold ones.
  8. Quick-frozen vegetables need to be cooked without defrosting for 10-15 minutes.
  9. For dressing salads, in addition to sour cream and mayonnaise, vegetable oil is used in pure form or mixed with vinegar, salt, sugar and pepper. To give different flavors, mustard, a variety of hot and tomato sauces are added to salad dressings.
  10. Sauces and condiments not only improve the flavor of the salad. The fat in them protects vitamins from destruction. Salt should be salted before serving, and vegetable oil is added to the salad only after it has been salted, vinegar and pepper have been added.
  11. Salad should be seasoned with mayonnaise or sour cream just before meals.
  12. Ready-made salads are transferred from the bowl in which it was seasoned to clean salad bowls, trying not to stain the edges of the dishes, and decorated with herbs or decorations cut from the products that make up the salad.