Tag

Food tips and tricks

Browsing

Everyone knows how good homemade pizza is. To make it successful, follow the advice of Dr. Etker.

  1. Do not be lazy to peel and fluff the flour before you start cooking. Use a sieve. The process fills the product with air – the pizza dough will be fluffier.
  2. Stick yeast is good, but freshness can be questionable. Use the granular version from the Etker collection.
  3. The awakening of yeast-like organisms requires conditions – warmth and a sweetish environment.
  4. Too much-granulated sugar makes the baked goods tough.
  5. A properly rolled layer of dough is the foundation of the art of a pizza maker. The base should not be high, but nobody canceled softness and airiness.
  6. Make a border around the perimeter of the cake before placing the pizza filling on it – the products will not spread out.
  7. By the way, the filling is different – from meat, smoked meats, fish, seafood, vegetables, fruits. Of the canonical components, the type of hard cheese and the taste of ketchup are important.
  8. The cheese for the dish should not be of sweet varieties. Choose spicy or creamy.
  9. Choose ketchup according to the type of filling. Spicy taste for meat and smoked meats, without spices for fish and seafood.
  10. The pizza in the oven doesn’t have to be giant in diameter. Make comfortable little cakes.

Despite the wide selection of pans and ovens, you can only grill a steak with a unique campfire aroma. Flawless meat has its own secrets: the right choice of cuts, a good recipe, and many small nuances of cooking. We will gladly open them for you.

  1. The claim that salt makes a steak tough is rooted in not knowing when to salt meat. Dip it in salt and pepper just before going to the grill. If you do this in advance, the salt will wash out all the juice from the meat, and it will become dry. Timely application of spices will help create a crispy crust and a distinct flavor.
  2. To get a good crust, you also need to remember: the meat is turned over once during frying.
  3. Make sure that the fire does not come into direct contact with the meat. Otherwise, the fat will char, and carcinogens will begin to be produced in it.
  4. Do not cut or pierce the steak to find out what stage of cooking it is. It is checked by pressing the piece with your finger. If it quickly takes its former shape, the meat is raw or lightly cooked. If slow, medium. And if it regains its shape, the steak is overcooked.
  5. The intense heat will quickly give the meat a ruddy color and crust. Preheat the grill before grilling on all burners for 5 minutes.
  6. Marinate and put the meat on the wire rack with your hands. And to turn the pieces – with forceps with silicone tips. The fork will make holes in the steak, through which the precious juice will flow out.
  7. Remember that meat will still cook after removing it from the wire rack. Due to the redistribution of the juice, the temperature inside will even rise. Do not cut the piece right away, but leave it to condition on a warm plate for 5 minutes or wrap it in foil.
  8. Food photography tip: melted butter or olive oil will add juiciness and shine to the dish.

For several centuries, the technology of making pizza has hardly undergone any changes – except that the ovens became gas and electric. And everything else, including the obligatory manual preparation of the dough, remained traditional. Real Italian pizza, despite all the speed of its preparation, does not like fuss: all processes should proceed clearly and measuredly.

  1. Pizza is a rather simple product, and any housewife can bake it. At home, pizza is made in several ways: baked in the oven or in the microwave, stewed or fried – here the flight of your imagination is unlimited.
  2. If you decide to bake your pizza in the oven, it is best to knead the yeast dough. Let it stand for 30-60 minutes before baking. The dough must be precipitated 2 times and only then can it be laid out in the mold.
  3. You can bake pizza in the oven in 2 ways – on a baking sheet or in a frying pan, and its thickness should be at least 2 mm. Thin baking pans are not suitable! Grease the baking sheet with vegetable oil.
  4. The frying pan has a lot of advantages over baking on a baking sheet: the dough is easily removed, practically does not burn; you can bake different pizzas and put different toppings.
  5. When baking sweet pizza, you can also use cooking oil, which is then sprinkled with flour to prevent the dish from burning.
  6. You don’t have to roll out the pizza crust – the dough is laid out on a baking sheet and evenly stretched with your fingers over the entire surface so that its edges hang slightly over the edges. Before putting the dough in the oven, it needs to stand for 5-7 minutes.
  7. If you prefer to bake pizza in a frying pan – the classic round shape, generously grease the bottom and edges with vegetable oil, as the dough will rise a lot, and then sprinkle a little with semolina – so that the finished pizza can be freely removed from the mold. Put the dough in a skillet and place in a warm place for 10-15 minutes, and then in the oven.
  8. Before baking, the pan, like the oven, is heated to the required temperature, a small amount of vegetable oil is poured to lubricate the bottom and soak the pizza, and heated. Then spread the dough, fry on one side, and remove from the pan.

Homemade pizza like from a pizzeria? Is quite real. To make the perfect pizza in the most ordinary oven, it is important to remember the following:

  1. The dough recipe is not so important, the sauce recipe and the type of filling are not so important as the baking temperature. Italian pizza is originally cooked in a wood-burning oven at a temperature of 450-550 C, no more than 1 minute, due to which it turns out to be crispy on the outside, with a thin elastic crust, it is not easy to simulate a wood-burning oven with such a high baking temperature at home, therefore such methods are used: preheat the oven to the maximum (250-300 C), instead of a baking sheet, use a special stone sheet, which is heated together with the oven. Pizza is baked on the stone for no longer than 10-15 minutes. Since I have no stone, I bake on a metal baking sheet, but at the highest temperature (250-300 C) in an oven very well preheated to this temperature. It takes 10-15 minutes to bake, depending on the size of the product. As soon as the sides of the dough are browned, and the cheese melts and begins to bubble, the pizza is ready. Take it out immediately! It is important not to overdry the pizza, this often happens if it is baked at medium temperatures (about 180 C) for a long time (20-30 minutes).
  2. The pizza dough is made according to the simplest recipe for lean yeast dough with the addition of olive oil, the ascended dough is not crushed a second time but immediately stretched with the palms of the cake to the desired size. It is believed that the rolling pin destroys air bubbles in the dough, so it is not used. I still roll out the dough with a rolling pin, but I let the base “breathe” for about 20 minutes so that air bubbles inside again form.
  3. To prevent the pizza base from becoming dry and greasy during baking, after rolling out the cake, place it on a baking sheet sprinkled with flour (you do not need to grease it with butter, only flour).
  4. To prevent the base from becoming wet from excess moisture in the filling and sauce, after placing the dough in a baking sheet, first of all, grease the side on which you will spread the filling with olive oil, only then distribute the sauce and filling.
  5. To make the pizza tasty and baked well in a short time, do not overload it with ingredients, distribute the cheese in slides at a short distance.
  6. When baking pizzas in new modern ovens, use the oven manufacturer’s recommendations. See instructions. Why is it so important? Old ovens are almost always a little leaky and natural ventilation (convection) is provided during baking. In the old oven, it is enough to set the maximum heating temperature, warm up the oven itself well and the pizza turns out to be perfect – with dry crispy sides and a juicy cheese center. Furnace effect. Modern ovens are hermetically sealed and therefore with standard heating (classic heating top + bottom) moisture does not evaporate and the pizza turns out to be moist. The result is not at all the same. Therefore, I recommend using the mode for baking pizza, which is offered in the instructions for your oven, usually, it includes powerful heating + fan mode. I have such a mode called “Heating from below + ventilation heating” while the baking sheet should be placed not in the middle, but closer to the bottom of the oven. I set the temperature to 220C. The pizza turns out to be perfect, not wet, very tasty!

Pizza preparation has been familiar to us for a long time. Over time, the recipe for making pizza has not changed dramatically, only the range of filling has expanded, and each chef has his own secrets in cooking. The main ingredients of the pizza are cheese and tomato paste. Even schoolchildren know how to make pizza with these ingredients.

  1. Better to use two types of cheese – hard and soft. Put soft cheese in a small amount on the sauce, but it is better to grate hard cheese on the pizza with a top layer. Using homemade sauce will greatly improve the taste of the pizza and make it taste the most individual, allowing you to use your favorite spices and herbs. Basil and “oregano” will be the key to the taste of pizza.
  2. It is necessary to cook pizza at high temperatures, which ensures fast cooking. In addition, either vegetable is used as a filling, which does not require a long cooking time, or meat brought to a half-cooked level in a pan.
  3. The use of olive oil adds a certain flavor to the cooked pizza. Provided that natural olive oil is taken. You can knead the pizza dough in a food processor, but manual kneading is preferable in this case. Pizza yeast dough is most common in recipes and uses raw yeast. You can replace natural yeast with dry, which will speed up the dough preparation process.
  4. The simplicity of preparation and the variety of flavors of pizza makes it more and more popular. Baking pizza takes a little time, most of the time is spent making the dough and filling. The taste of pizza directly depends on the taste of the dough.
  5. All food products at hand can be a filling in pizza: just tomatoes, tomatoes combined with smoked or boiled sausage, fried chicken and champignons, bell peppers, various seafood.

If you search on the Internet, you find an illogical, albeit explainable, pattern: there are so many recipes that you cannot cook in a lifetime, and you will not find sensible information on how to choose the right products for this recipe during the day with fire. Meat is a special product that requires the right approach, and therefore, in no way considering myself an expert, I will still give a few tips that I follow myself.

First tip – the market, not the store

Meat is not yogurt or biscuits in a standard package that you can take from the supermarket shelf without looking. If you want to buy good meat, it is best to go to the market, where it is easier to choose and the quality is often higher. Another reason not to buy meat in stores is various dishonest tricks, which are sometimes used to make the meat look more appetizing and weigh more. Not that the market doesn’t do this, but at least you can look the seller in the eye.

Second tip – a personal butcher

Those of us who have not embarked on the path of vegetarianism eat meat more or less regularly. The best thing to do in this situation is to get “your own” butcher who will know you by sight, offer the best cuts, give valuable advice, and order meat for you if it is not available now. Choose a butcher who is humanly pleasant to you and sells decent goods – and do not forget to exchange at least a couple of words with him with every purchase. The rest is a matter of patience and personal contact.

Tip three – learn color

The butcher is a butcher, but it doesn’t hurt to figure out the meat yourself. The color of the meat is one of the main signs of its freshness: good beef should be confidently red, pork should be pinkish, veal is similar to pork but pinker, lamb is similar to beef, but of a darker and more intense shade.

Tip four – inspect the surface

A thin pale pink or pale red crust from drying meat is quite normal, but there should be no extraneous shades or spots on the meat. There should be no mucus either: if you put your hand on fresh meat, it will remain almost dry.

Fifth tip – sniff

As with fish, the smell is another good guide when determining the quality of a product. We are predators, and the barely perceptible fresh smell of good meat is pleasant for us. For example, beef should smell so that you want to immediately make a Tatar steak or carpaccio out of it. A distinct unpleasant smell suggests that this meat is no longer the first and not even the second freshness; in no case should you buy it. An old, proven way to sniff a piece of meat “from the inside” is to pierce it with a heated knife.

Sixth tip – study fat

Fat, even if you intend to cut it and throw it away, can tell a lot by its appearance. Firstly, it must be white (or cream in the case of lamb), secondly, it must have the correct consistency (beef must crumble, mutton, on the contrary, must be dense enough), and thirdly, it must not have an unpleasant or rancid odor. Well, if you want to buy not only fresh but also high-quality meat – pay attention to its “marbling”: on a cut of really good meat, you can see that fat is dispersed over its entire surface.

Seventh tip – elasticity test

The same as with fish: fresh meat, when pressed, bounces, and the hole you left with your finger is immediately smoothed out.

Eighth tip – buy frozen

When buying frozen meat, pay attention to the sound that it makes when tapping, and even cut, a bright color that appears if you put your finger on it. Defrost meat gently, the longer the better (for example, in the refrigerator), and if it has been properly frozen, then, cooked, it will be almost indistinguishable from chilled.

Tip nine – cunning cuts

When buying this or that cut, it is good to know where in the animal carcass it is and how many bones it contains. With this knowledge, you will not overpay for bones and will be able to correctly calculate the number of servings.

Tip ten – end and means

Often people, having bought a good piece of meat, spoil it beyond recognition when cooking – and there will already be no one to blame but themselves. When choosing meat, have a clear idea of ​​what you want to cook, and feel free to share this with the butcher. Frying, stewing, baking, boiling to obtain broth, jelly, or boiled meat – all these and many other types of preparation involve the use of different cuts. Of course, no one will forbid you to buy beef fillet and cook broth from it – but then you will overpay the money, and ruin the meat, and the broth will turn out so-so.
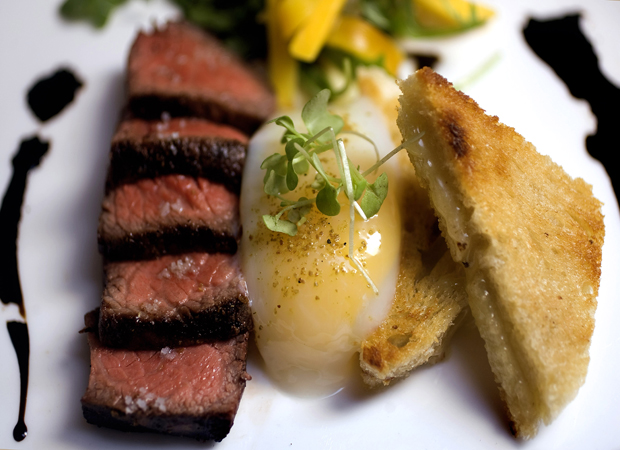
Meat is the most common food cooked and eaten in all countries. But how to make sure that the meat is not dry, or how not to forget about it and then not be content with “coal”? What is better to serve as a side dish and what sauce to season?

  1. Always cook meat at room temperature – let it rest for an hour after the refrigerator, then the meat will be juicier and the roasting will be more predictable.
  2. The dishes are simple: a frying pan or a grill – it doesn’t matter. This also does not affect the taste. But it is still very important – the dishes must be heavy enough so that the pan can gain maximum energy and heat. If we use a very light frying pan, then it keeps little heat and as a result, when we spread the steak, it loses its power very quickly, and we get low-quality frying: the meat can give juice, and then we get not a fried steak, but its likeness!
  3. Heat the pan: the first smoke from the pan will be the signal for cooking. If you have one, you can proceed.
  4. Well-cooked meat goes well with a sauce based on ripe tomatoes, garlic, and cilantro. As a side dish, we offer boiled basmati rice with butter and a salad of fresh cucumbers and tomatoes with fragrant cilantro, red onion, and olive oil. Also, potatoes fried with onions go well with meat.
  5. But everyone’s favorite side dish for meat is vegetables fried over an open fire: eggplants, zucchini, tomatoes, and bell peppers.

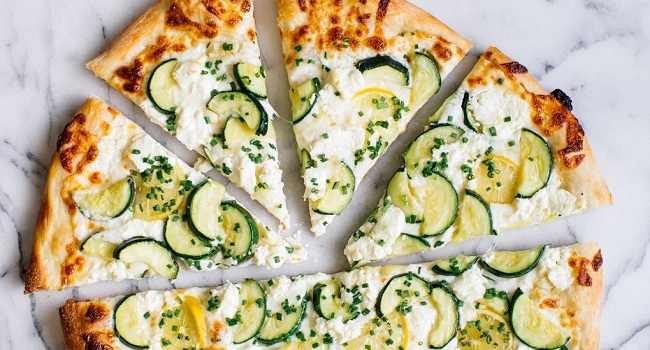
We’ve prepared tips for you to make the most delicious pizza base! This recipe is for one rectangular pizza (25 x 35 cm) or two round pizzas with a diameter of 30 cm.

  1. In a small bowl, stir in warm water (40-46 ° C) 1 tsp. Sahara. Pour in 1 tsp. dry yeast and stir. Cover loosely and let stand for about 5 minutes, until foam forms.
  2. In a food processor with a dough attachment, mix 2 cups wheat flour with 1 tbsp. l. olive oil and 1/2 tsp. salt. Combine the ingredients in a pulse mode. Add diluted yeast and 1/2 cup lukewarm water (not as warm as for yeast fermentation). Mix until a soft dough is obtained and continue kneading for 1 minute.
  3. Powder your hands lightly with flour and remove the dough. Knead with your hands for another minute. Place in a bowl dipped in olive oil. Turn the dough over so that the top is also covered with butter. Cover loosely with plastic wrap and place the bowl in a larger bowl, half full of warm water.
  4. Let it rise for 1-1.5 hours until the dough has doubled in volume. Do not crush. Lightly dust the work surface with flour. Place the dough on top of it carefully. Quickly knead and stretch the dough with your hands into a 25 x 35 cm rectangular slab. Sprinkle cornmeal on a large wooden pizza spade or baking sheet without a rim.
  5. Place the dough on a spade or baking sheet near the edge. Cover with plastic wrap and let rise for 30 minutes. Meanwhile, heat a flat baking stone or baking sheet on the lowest rack in the oven at 250 ° C for 30 minutes.
  6. Remove the foil from the dough and place the filling on the crust. Bring a shovel or baking sheet to the edge of a heated pizza stone or baking sheet. Briskly shake the pizza onto a stone or baking sheet. Bake 10 minutes until light brown and bubbles form on the filling.

Making the perfect steak over a fire is no easy task, even for a professional. A few useful tips from experienced grill masters will allow even a novice chef to prepare a real culinary masterpiece.

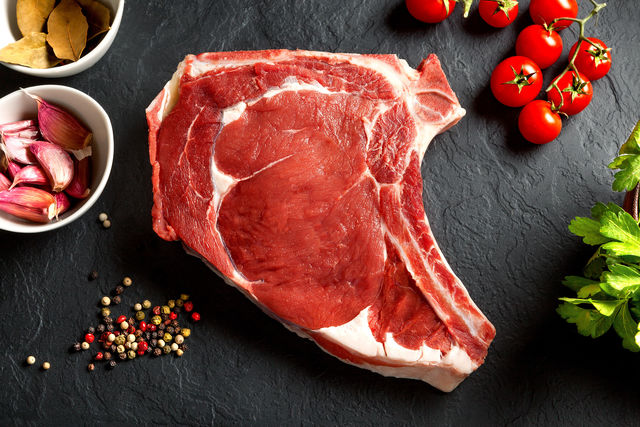
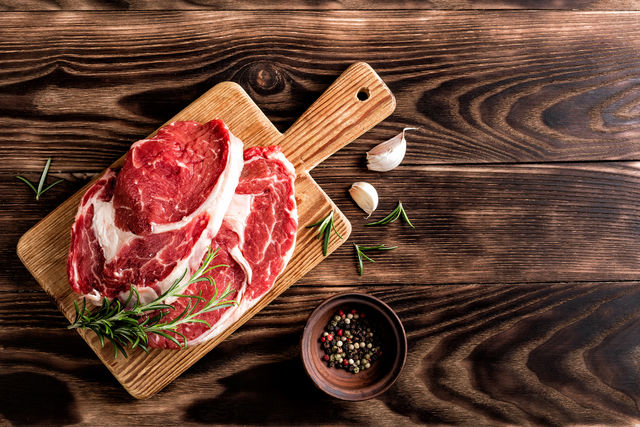
  1. The steaks to start grilling with are rib eye and rib steak. The high marbling of such meat indicates a significant supply of juiciness, so it is rather difficult to cook it incorrectly. Besides, the more veins of fat in a piece of meat, the longer it can be cooked without losing juiciness. You should not try to cook a steak from cheap beef, in most cases, the result will not live up to expectations.
  2. If you have a limited budget for meat and you’ve bought inexpensive cuts of beef, the marinade is the best way to cook them. Of course, the presence of the marinade will not turn them into expensive steaks, but it will make the taste more pronounced, and the meat itself – more juicy and tender.
  3. It is not recommended to fry the meat immediately after taking it out of the refrigerator. Let the steak sit at room temperature for 1 to 2 hours. The internal temperature of the meat should be 10-12 ° C. This will help achieve an even roast, texture, and color of the meat.
  4. The best option is an 80/20 or 10/90 mixture of olive oil and canola oil. Oil is applied to the steak with your hands before sprinkling. The combustion of the oil provides a firm crust on the surface of the steak, which retains the juices inside the meat and ensures a beautiful appearance. It is not recommended to choose cold-pressed olive oils as they emit 3 times more carcinogens when burned. Before placing the steak on the grill rack, blot it with a soaked paper tea towel.
  5. The best spices for meat are sea salt and freshly ground pepper. However, even with pepper, you should be careful. The more spices, the faster they burn on the fire. Salt should be added after cooking. Salting the steak ahead of time can draw out moisture from the steak.
  6. A perfect steak will require intense heat. It will provide a delicious crust on the outside, while the inside of the meat will not have time to completely dry. If tongues of flame are visible in the coals, then the heat is sufficient. If there is a lot of flames, urgent action is needed. All parts of the grill should be hot and the coals should be in an even layer. This will allow you to transfer the steak to a spare place at the moment when a strong flame from dripping fat flares up. It is not recommended to extinguish the fire with water as this will drastically reduce the temperature of the grill and meat.
  7. You should not often turn or move the steak on the wire rack, you risk ruining the drawing and burning all the spices on it. Turn the meat in one quick, confident movement.
  8. After the product is removed from the grate, the temperature inside it continues to rise for some time, which contributes to the redistribution of internal juices. Let the steak rest for 5 minutes. Then you get a delicate, juicy dish with an even color. If the beef is cut too early, most of the juice will leak out.
  9. After “resting”, the steak can be grilled and held for another 30 seconds on each side. When served, such meat will look very appetizing. It’s time to salt the dish!
  10. It is recommended to clean the grill while it is hot. There are special brushes for these purposes. With these, the grill will be ready to use again after just 10 minutes.

Someone thinks that a steak is too expensive, and a simple stew is more economical, someone thinks that a good steak cannot be cooked at home. But in reality, meat lovers will pay much more for a restaurant steak than for a homemade one. Although they could easily cook the same in their own kitchen.

  1. Which meat to choose from? Of course, only high-quality, fresh chilled meat should be chosen for the steak. And certainly beef. We cook steak at home, that is, in a pan. For these purposes, ribeye is suitable, it has a large amount of thin fat layers, so it will turn out better in a pan than all other steaks.
  2. Preparation. It is best to fry warm meat, at room temperature. This is easy to arrange if you are not in a hurry – 2 hours before cooking, remove the meat from the refrigerator, close it with something so that it does not get weather – the path heats up. But if you come home from work and you need to fry the meat now? Then it can be wrapped in cling film, but only tightly enough and in several layers. And put in warm (about 50 ° C) water. For half an hour. The meat will heat up while you wash your hands and ask the children if they have done their homework. Second point. Do not cook moist meat. Dry it with a paper towel before cooking. Otherwise, the meat may develop an unpleasant odor.
  3. Thickness. It all depends on personal taste and the degree of roast that you prefer. If you like lightly roasted meat, then you can cut the steaks about 4 cm thick. If the roasting is supposed to be more serious, then you can make the steaks thinner, about 3 cm thick. But it must be borne in mind that you did not get thinly sliced meat will not be juicy, so less than 2.5 cm thick is no longer a steak.
  4. Salt and spices. It is often not recommended to salt the meat until the end of its cooking. Because of salt, the meat loses its juiciness. But this point of view also has a downside. After the meat has been fried, you cannot salt it so that the seasonings are evenly distributed over the piece. And that’s a big loss for the steak. Therefore, it is best to rub the meat with salt and spices and leave to lie down for 5-7 minutes. This will help the seasoning spread evenly. And the meat, by the way, will be fried more evenly. For meat, sea salt and freshly ground black pepper are ideal. Perhaps nothing else is required.
  5. Fat for frying. Steaks are usually fried in a dry skillet. But you can grease a piece of meat with a drop of odorless oil before frying. This will give it a shine, help in crust formation, and prevent the meat from drying out. The second option: drip a little olive (refined) oil and a few drops of lemon juice on the meat. The aroma will be extraordinary.
  6. Scent. The oil can give the meat a great flavor. For example, you can add it in the middle of frying, when a firm crust has formed on the meat. A slice of butter mixed with minced garlic will make the steak simply unforgettable. Attention: after you put the oil in the pan, you do not need to fry for a long time so that the oil and garlic do not start burning.
  7. Temperature. First, we heat the frying pan on the fire. Very much. If you carry your hand over it at a distance of 15 cm, then strong heat should be felt. With such a strong heat, the meat will immediately grab a crust and may even char a little. Just a little bit, just to give off a nice roasted flavor. After the steak is in the skillet and you have formed a crust, you can lower the temperature. Medium fire will be just right.
  8. Be sure to turn over. The more often you turn the meat, the juicier it becomes. That is, you cannot fry the meat on one side, then on the other and it will calm down. First, you need to form a crust. To do this, fry the meat for a minute over high heat, pressing the meat to the pan with a spatula. Then you can reduce the heat a little and fry the meat for 6-8 minutes, turning it over every minute. If you want a steak with blood, almost soggy inside, then turn it over even more often. That is, first form a crust, and then twirl the steak in a pan every half a minute. It will turn out juicy and hardly fried. The frying time should be shortened slightly. But remember that it depends on the thickness of the meat too.
  9. Finally, when the steak is fried, let it rest for 5 minutes. And only then garnish with mustard, vegetables, or something else.