Tag

cook

Browsing

Asian cuisine and medicine have used lotus root for thousands of years. Here you can find out everything you need to know about the root and how to prepare it.

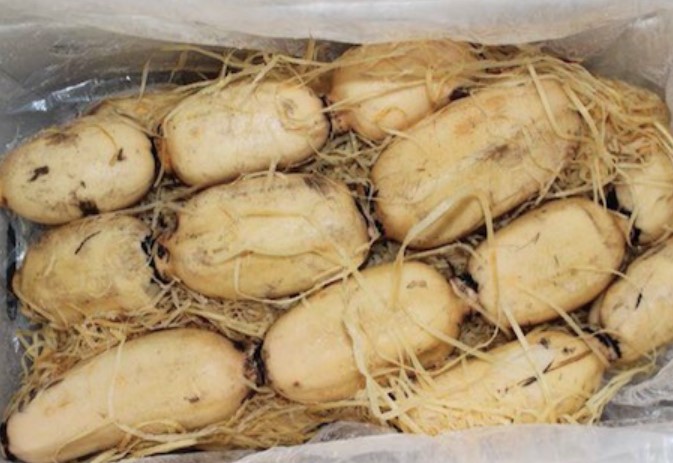
The lotus root is the edible root ball of the plant of the same name. Lotus belongs to the water lily family and originally comes from Asia. The plant is valued there for its symbolic value. At the same time, it is a popular ingredient in soups and other dishes.

The lotus root is a product that does not grow in Germany. It is flown in from Asian countries and thus contributes to high CO2 emissions. Therefore, only use them in moderation or on special occasions.

You can buy the lotus root in a well-stocked specialist shop. Alternatively, you can find them online. Choose fresh lotus root whenever possible to avoid the packaging waste of canned foods.

Worth knowing about the lotus root

Prepare the lotus root raw or cooked. When raw, it tastes like a mixture of mushrooms and celeriac. When cooked, it is more reminiscent of potatoes. However, the flavor of the lotus root in a dish is quickly overpowered by the aroma of the other ingredients.

Peel the lotus root before you start preparing it. Lotus roots are suitable for cooking, steaming, baking or stewing. Serve the raw lotus root in thin slices with salad or stir-fry recipes.

This is how the lotus root is traditionally served:

  • In soups
  • Squeezed as juice
  • Fried as a snack
  • Boiled as tea
  • In stir-fries
  • As a striking side dish or decoration

Scientific evidence on the health benefits is limited. However, the effect of the lotus root seems to be broad. According to various studies, the root can achieve the following effects:

  • promote blood circulation
  • lower blood pressure
  • release mucus
  • reduce fever
  • Strengthen heart and kidneys

In general, the root is healthy because it contains vitamin C, vitamin A, and, among other things, iron and potassium.

Cook the lotus root in the wok

Ingredients:

200 g lotus root (fresh)
1 tbsp ginger, fresh
1 clove(s) garlic
2carrots
1spring onion
2 tbsp sesame oil
30 mlsoy sauce
1 tablespoon of sugar
20 g sesame, toasted
1 tbsp water

Directions:

Peel the lotus root, ginger, and garlic. Wash carrots and spring onions.
Cut the lotus root and carrots into very thin slices. Finely chop the garlic and ginger. Cut the spring onion into fine rings.
Heat the sesame oil in a wok. First, sauté the garlic and ginger in it.
After a minute, add the lotus root. Fry until the color changes slightly and turn the lotus root over.
After about four minutes, add the carrots and spring onions to the wok.
Fry the vegetables for another four minutes. Then add the soy sauce, sugar, sesame seeds, and a tablespoon of water to the wok.
Boil the ingredients for about five minutes. The vegetables should be cooked but still crisp.

Tip: Serve your wok dish with cooked rice noodles or udon noodles.

With wild garlic flower recipes you ensure culinary variety in spring. You can harvest the flowers from May. Here are three simple recipe ideas.

Wild garlic is in season in Germany from the end of March to the end of May. In late April and early May, the aromatic herb begins to bloom for two to three weeks – and these delicate wild garlic flowers are edible.

You can collect wild garlic and wild garlic blossoms yourself in spring in many places. In another article you will find out what you should consider when harvesting wild garlic.

When it comes to the ingredients for the wild garlic flower recipes, make sure they are organic if possible. You are supporting ecologically more sustainable agriculture that treats the earth’s natural resources with care. The organic seals from Demeter, Bioland and Naturland are particularly recommended, as they require stricter criteria than the EU organic seal.

Wild Garlic Blossom Recipes: Pesto

Wild garlic blossom pesto gives pasta dishes a fresh and aromatic note. Preparation is easy and doesn’t take long. Important: The pesto has to steep for at least four weeks before you can use it.

Unopened, the wild garlic blossom pesto can be stored in the refrigerator for up to four weeks. Opened jars should be used within a week.

Ingredients:

5 handfuls of wild garlic flowers
1 tbsp pine nuts
5 tbsp olive oil
3 tsp salt
1 pinch(s) of pepper

Directions:

Wash the wild garlic flowers carefully but thoroughly. Remove their stems. Chop the pine nuts. Place both ingredients in a medium-sized bowl.
Add about half the olive oil, salt and pepper. Mix the ingredients together until the wild garlic pesto has a slightly mushy consistency.
Put the wild garlic pesto in a sterilized jar that you can seal airtight. Cover it with the remaining olive oil. Important: Let the pesto sit for four to eight weeks before using it.

Wild Garlic Blossom Recipes: Aromatic Oil

The preparation of wild garlic blossom oil is also very easy. This herbal oil goes well with pasta, vegetable dishes or to flavor herb quark. You should plan some time again, because the oil also has to steep for at least four weeks before it is ready for consumption.

Unopened and protected from light and heat, wild garlic blossom oil can be kept for up to six months. Opened oil should be used up within six weeks.

Ingredients:

1 handful of wild garlic blossoms
100 ml rapeseed oil
1 pinch(s) of pepper

Directions:

Wash the wild garlic flowers carefully but thoroughly. Remove their stems. Then place them on a clean tea towel and pat them as dry as possible.
Put the wild garlic blossoms together with the rapeseed oil and the pepper in a sterilized jar that you can seal airtight. Brown glass is particularly suitable because it protects the herbal oil from environmental influences and thus extends its shelf life. The wild garlic blossoms should be completely covered by the oil.
Let the wild garlic blossom oil steep in as dark a place as possible for four weeks. Strain the wild garlic blossoms before using the oil.

Wild garlic blossom vinegar

Wild garlic blossom vinegar is prepared in a similar way to the oil. The herbal vinegar is well suited for quick salads. With this recipe, too, you have to allow three to four weeks for the vinegar to steep.

Wild garlic blossom vinegar can be kept unopened for up to five years. Once opened, you should use it within six months.

Ingredients:

1 handful of wild garlic blossoms
100 ml white wine vinegar colored peppercorns

Directions:

Wash the wild garlic flowers carefully but thoroughly. Remove their stems. Then place them on a clean tea towel and pat them as dry as possible.
Put the wild garlic blossoms together with the white wine vinegar and the peppercorns in a sterilized jar that you can seal airtight. The wild garlic blossoms should be completely covered by the vinegar.
Let the wild garlic blossom vinegar steep for three to four weeks. Then strain the wild garlic blossoms and peppercorns and fill the vinegar into a clean bottle.

Wild garlic blossoms as an aromatic ingredient

You can also use wild garlic blossoms in their unprocessed form as an ingredient for various dishes. For example, you can mix the washed flowers with fresh wild herb salads or decorate various dips with them.

Most of us love fish dishes. Useful tips will help you learn how to cook fish quickly, tasty and hassle-free.

  1. You need to cook fish on low heat. If you smell fish in the kitchen, it means that it takes too long or too fast to cook.
  2. The best way to preserve the flavor of the fish during the cooking process is to grill it, in the oven, steam it, simmer it in a sauce or broth, or fry it in a little fat. To enjoy the taste of fish, it is better to forget about cooking.
  3. Overcooked fish becomes too oily to be eaten. You cannot salt the fish in advance – as a result, it will lose juice and become tasteless. 30 minutes before cooking, you should keep the fish in the marinade and sprinkle with lemon juice.
  4. Finished fish of some varieties lose their inherent transparency and become snow-white (flounder, haddock, cod). To check if the dish is ready, you need to pierce the thickest part of it with the tip of a knife: the fish is ready if the fibers are easily separated from each other. Cooking too long will soften the fish and give off an unpleasant odor.
  5. A slightly dry fish will taste better with a garnish of peas, parsley, mushrooms, cheese, green beans, onions, and milk or tomato sauce.
  6. Fatty fish (herring, mackerel, pink salmon) go well with seasonings based on sour fruits such as lemon or gooseberry.
  7. It is better to make vegetable garnish and salads in advance so that the fish can be served on the table as soon as it is ready. If you try to keep it warm, it will become tasteless. If you do not have time with the side dish, and the fish is already ready, you need to remove it from the heat and pour over the sauce, and reheat it before serving.
  8. Before giving a fish to a child, you need to carefully check if there are any bones in it: once having experienced fright, having choked on a fish bone, he can maintain a dislike for this valuable product for life. Some adults never eat fish just for fear of choking on the bone. It is necessary to teach the child to always check the fish that is given to him and find bones.
  9. For cooking, use: fish in its entirety, links, portioned pieces, portioned pieces from plastered fish with skin and bones, with skin and without bones. The pieces are cut across the fibers, while holding the knife at right angles to the fish. On each piece, the skin is cut in 2-3 places so that the fish does not change its shape during heat treatment.
  10. Fish in whole form, medium-sized links, portioned pieces of plastered fish with skin without bones, without skin and bones (pure fillet) are used for poduspaniya. The pieces are cut starting from the tail, holding the knife at a 30 ° angle to the fish. In this case, flat wide pieces are obtained, convenient for quick and uniform heating in a small amount of liquid.
  11. For frying, the main method is used: fish in its entirety, links, portioned pieces, portioned pieces cut from plastered fish with skin and bones, with skin without bones, without skin and bones. Round and fillets with vertebral bone are cut, holding the knife at right angles to the fish; fillets with rib bones or without bones are cut at an angle of 30 ° into wide flat pieces that have a large surface of contact with the frying surface.
  12. So that the fish does not lose a lot of liquid and nutrients during frying, and a crispy crust forms on its surface, the prepared fish is breaded. Breading is the application of breading to the surface of a semi-finished product. Depending on the further use, different breading methods and different breading are used. For a better attachment of the breading to the product, it is moistened in a special liquid – llezone, which is a mixture of raw eggs with milk or water, with the addition of salt. For deep-fat frying, fish is used in its entirety, portioned pieces cut from plastered fish without skin and bones. The fish is cut, holding a knife at an angle of 30 °, dried, sprinkled with salt, breaded in flour, moistened with lezon and breaded in breadcrumbs.

Do you like healthy and wholesome food? The electric grill will help you keep all the nutrients and vitamins in your food! With its help, barbecue, fish with a golden crust are quickly and tasty cooked, chicken is fried, vegetables and fruits are baked, pancakes, pies, pancakes, and pies are baked. This is not yet a complete list of grilled dishes. The electric grill improves the taste of food and prepares it so that it is easily absorbed by the human body.

Millions of consumers deservedly love the home grill; it is practical, convenient, and versatile. True gourmets have already appreciated the delicious taste of the dishes that can be prepared with this modern household appliance. All dishes have a unique taste and excellent appearance! Both novice chefs and masters of the kitchen can cook on the grill.

Safety rules when working on the electric grill

  • Connect the appliance only to a properly grounded, safe electrical outlet.
  • Multi-pin socket-outlet models cannot be used.
  • You cannot cook indoors without a hood and a vent.
  • Protect contact points from moisture.
  • Install the device strictly on a flat surface.
  • The thermostat should be inserted into the grill only before plugging in the power cord.
  • Do not allow small children to access technology.

Benefits of grilled food

  • Grilling pork, lamb, beef, or chicken cannot be compared to other cooking methods and is suitable for the perfect golden crust. Fish, meat, vegetables, and other food cooked on an electric grill are considered a healthy food, they are cooked without oil, there is no excess fat, cholesterol, carcinogens, impurities of harmful tar from real coals, and poisonous smell of burning.
  • Cooking food with this household appliance is a simple process, it allows even inexperienced chefs to create delicious and appetizing dishes. The grill is used to prepare hot snacks, pancakes, pancakes, sandwiches, meat, vegetables, fish, fruits, pies, and pies. When starting to cook, it should be remembered that this will take much less time than with the usual method.

Creating the perfect steak is more challenging than just choosing a stove to cook your food until it’s cooked! Here are some practical tips to help you with this task:

  1. The right choice of meat. For flavor and tenderness combined, Ribeye is considered one of the best cuts. A high degree of marbling, which means juiciness, allows you to cook a steak quickly and easily. Inspect the piece before you start cooking. A large number of veins allows you to cook meat without losing juiciness. Even with a great desire and ability to cook the perfect steak from low-quality beef, it will not work;
  2. The use of marinades. Good beef for a steak is expensive (from 2,000 rubles per piece), you can buy more affordable tenderloins and then use various marinades to improve the taste. The meat, of course, will not become expensive, but it will be softer and juicier;
  3. Grill beef should be at room temperature. Before you start frying the steak, remove the meat from the refrigerator, leave it at room conditions for a couple of hours. After such a rest, the pieces will be evenly fried, the texture and color of the finished product will be uniform;
  4. Steak thickness. The thickness of a classic piece of beef for a steak is 3-4 centimeters. Minions are cut 5-7 centimeters thick and the width of the piece is made smaller;
  5. Oil use. The oil is applied in a thin layer on both sides. The need to use the product is that when frying, the oil burns out, and a golden crust forms on the piece, which holds all the meat juices of the steak. It is not recommended to use cold-pressed oil, the taste and aroma are too pronounced;
  6. The use of spices. The perfect grilled steak does not require a large amount and variety of spices, just freshly ground black pepper and salt is enough. Grilled marbled beef will be great without adding unnecessary ingredients. The real taste of the meat is lost when the steaks are seasoned with a lot of aromatic herbs. Never pre-salt the meat you are going to fry. The salt will draw out all the juices and the finished product will be dry and tough;
  7. Fire. A delicious steak requires good grill heat. The coals are distributed evenly so that the temperature on the surface of the grate is uniform. A small fire will not hurt, it will quickly fry the meat on top, while it will not be completely fried inside;
  8. Don’t turn the steak. For a deliciously tasty meal, don’t flip the piece too often. Constant fussing on the grate will not give a beautiful trellis pattern, the spices will be burnt;
  9. The degree of doneness of the steak. From what kind of meat is preferred, so much it is necessary to fry it on fire. With a crust and red cold meat inside, the dish is cooked for 1-2 minutes on each side (the meat should cool down under the foil for nine minutes after cooking). The steak is cooked with blood for 2-3 minutes (cools down for 8 minutes). A more fried piece with less blood is fried for 3-4 minutes (cools down for 7 minutes). To get pink meat cut and blood inside the piece, grill it for about 4-5 minutes, then let it brew for six minutes. After frying the meat for 6 or 7 minutes on each side, you will get a baked gray-brown steak, as a rule, this roasting makes the meat dryish. The need to cool the steak after frying is necessary to distribute the temperature and juiciness inside the piece;
  10. Serving to the table. Steaks are best served with vegetables and herbs, this combination will emphasize the tenderness of the meat and give it spicy notes. Red wine perfectly sets off the unique taste of grilled beef.

Not everyone succeeds in cooking the right and perfect steak the first time; a little practice and patience will fix this defect with ease. Cook, use the proven advice of professionals, enjoy delicious and aromatic steaks, cooked with your own hands!

Cooking delicious, juicy steaks at home is a snap. It is necessary to learn and clearly follow certain rules. They will help to avoid the difficulties faced by both beginners and experienced chefs.

  1. Cooking a steak is allowed only from fresh, refrigerated products. If the meat has been previously frozen, it should be allowed to thaw overnight.
  2. Before you start creating culinary masterpieces, the meat is heated at room temperature for several hours. Subsequently, it will be much easier to control the uniformity and degree of roasting.
  3. The meat should not be wet, so it is wiped dry with paper towels before cooking.
  4. The width of the meat is of no small importance. The ideal piece of steak is 2.5 to 4 centimeters in size.
  5. When cutting meat yourself, you need to move the knife across the fibers.
  6. Do not place more than 2 pieces of steak in the skillet, as the more there is on the surface, the lower the frying temperature will be, and this will lead to excessive juicing.
  7. Do not be afraid to season the meat well, because exactly “that” restaurant taste is achieved precisely due to the abundance of used seasonings.
  8. The frying process is best done in a heavy pan. This will make it easier to control the process. If it is not a cast-iron product, it is better to warm it up well, but avoid the appearance of smoke, otherwise, the steak will burn before it is cooked inside.
  9. Begin to fry the meat on a high and then at a moderate temperature. This approach ensures uniform roasting, rich taste, and color of the dish. The protein on the surface of the meat curls up and prevents the loss of juice.
  10. A good cook knows how long to fry a beef steak! According to cooking rules, a medium-rare steak takes 4 minutes on each side. With blood, it will fry from 1 to 3, for medium roasting it takes about 3 minutes each, and 6-8 minutes from each side – for a full one.
  11. Do not use forks when turning the steak. This can lead to loss of fluid, so it is best to use special cooking tools.
  12. If in doubt about the readiness of the meat, you can control the process with your fingers. The softer and more pliable it is when touched, the more blood is inside. Be careful not to burn yourself.
  13. Serving meat is desirable on warm plates. In this case, the knives must be sharp.

There is a culinary law: the less the steak is roasted, the juicier and tastier it will turn out. That is why medium-rare is recommended for high-quality beef with pronounced marbling. In this article, we’ll share professional tips and proven recipes on how to make a Medium Rare Steak in your home kitchen.

  1. To begin with, the classic steak is made from aged beef, which has a layer of fat. Moreover, the higher the marbling of the meat, the higher the degree of its roasting can be. Accordingly, if there are few fat layers in the meat, it is better to cook it quickly, choosing the degree of roasting no higher than medium.
  2. A medium-rare steak is not raw meat, as some people think of it. This is a properly cooked steak with a soft pink core inside and an abundance of red juice. Those who call such a steak “meat with blood” do not know that the red liquid is meat juice. Just under the influence of temperature, the protein myoglobin stains it in a reddish tint.
  3. The classic boneless marbled beef steak is fried for 2-3 minutes on both sides. Add to this time another 20 minutes for the steak to heat, and another 5 minutes for the steak to “rest” after cooking.
  4. Most chefs recommend taking steaks from marbled meat, at least 2 cm thick, optimally 2.5 cm. It is believed that this height will not allow the cut to dry out in a pan or grill. Most of the recommendations on how much to fry a medium-rare steak are based on the assumption that the steak is 2.5 cm thick. Fast frying for 4 minutes in a pan instantly seals the meat with a crust, but at the same time, it has time to warm up from the inside. The beefsteak turns out to be juicy, not overdried, and appetizing in appearance.
  5. Our tip: By lengthening the cooking time of the steak, increase the rest time as well. Use the versatile formula by dividing the cooking time in half – this is how much the finished meat will need to evenly distribute the juices.
  6. With a well-heated skillet, cook steaks 2–2.5 cm thick for a couple of minutes on each side. Steaks 4 cm thick – 6 minutes in total, and cuts over 4 cm – 8 minutes. The medium-rare roast has an internal temperature of 54-55 degrees. Another couple of degrees, the meat “picks up” when it is resting. Fully cooked medium-rare steaks have an internal temperature of 57 degrees.
  7. To prepare a classic beef steak, we recommend buying Ribeye marbled beef. Use chilled meats that are moist or dry. It is better to refuse frozen. If there are no options, take blast-frozen meat. With this method of freezing, it retains the maximum useful properties and its excellent taste.
  8. This is a very important point. Observe it if you want to get a juicy medium-rare beef steak. By allowing the meat to catch its breath, you will give it time to distribute the meat juices, which accumulate in one place during the frying process. The average “rest” time is 3-5 minutes. It is better to keep the meat under foil so that there is no sudden temperature drop.

We often give up the idea of pleasing ourselves with a steak at home because of the stereotype that a self-cooked piece of meat will not be as juicy and tasty as in a restaurant. But this is a mistake. Steak can be fried at home no less delicious. The main thing is to find the best recipe, choose the right meat, marinate it (or not marinate: the secrets of this kind will be discussed below), and voila – the culinary masterpiece is ready!

  1. Quality meat – 80% success. The chief market brings the highest quality – from trusted manufacturers. We also pickle it in advance!
  2. The steak should be no thinner than 2.5 cm (filet mignon – from 5 cm).
  3. Before frying the steak, let the meat “breathe” at room temperature for at least 30 minutes (up to 2 hours).
  4. The meat must be dry: pat dry with a paper towel. The main thing is not to wash.
  5. Don’t put more than 2 steaks in one pan. Otherwise, the meat will be cramped: the temperature inside the pan will drop, and the steaks will begin to stew instead of frying and delighting you with a golden crust. By the way, the crust not only crunches deliciously, but also preserves appetizing meat juice inside the steak.
  6. Use the tongs to turn the steak over – not with a fork! You can pierce the meat with a fork: this will drain the precious juice.
  7. Let the cooked steak “rest” for 1-3 minutes, then you can cut it and eat it.

Today in the culinary world steaks are prepared from fish, veal, pork, and other meats, but beef is still considered a classic dish. An impeccably cooked steak can be a tough task even for a seasoned cook, as sometimes the meat comes out dry and tough, scorching on the outside before being cooked on the inside. To prevent this from happening, and the dish turned out to be correct and truly tasty, you should know some subtleties.

  1. For the steak, choose a beef tenderloin of a mature animal, but not old or young. The meat should be red or dark red in color, but not pink or burgundy. It is advisable to choose parts of the carcass with fewer tendons and powerful muscles, with fat evenly distributed throughout the piece.
  2. You can determine the softness of the steak with your finger by pressing on the raw meat – the finger is easily immersed, leaving a deep hole, which, after pressing, returns to its original position. If this happens, then the meat is good. If the hole does not expand, the meat is not fresh enough, and if it is difficult to press on it, the steak will be tough.
  3. For a tasty steak, the meat should be properly prepared – remove the film and upper tendons. Cut a piece that is not too thin, and at least 7 cm long. Otherwise, the meat will lose moisture, shrink and become dry. Then, in the center of the piece on the side where the fibers are located along, an incision is made to the middle of the thickness, and the meat is opened like a butterfly.
  4. The steak is marinated from 12 to 48 hours, and before going to the fire, it is well dried with a paper towel. The traditional marinade mixture is vegetable oil, soy sauce, wine vinegar, salt, and seasonings.
  5. The frozen stack is thawed in the refrigerator for 12-14 hours. After that, it is wiped dry and left for 20 minutes before marinating, so that it warms up to room temperature. It is not recommended to defrost the steak in the microwave. Since the top layers of meat are already starting to cook in defrosting mode, the middle remains cold. Subsequently, it will be difficult to get an even roast. Also, it is not advised to defrost meat at room temperature and in warm water.
  6. Meat is fried exclusively in a well-heated heavy frying pan or grill pan. In this case, the pan should not smoke, otherwise, the steak will burn on the outside, but inside will not have time to cook, which will turn out tough. During frying, the protein quickly curls up on the surface of the piece and prevents the liquid from escaping, so the steak is first fried over high heat for 1 minute on each side. This will “seal” the fibers and the meat will retain the juice, which means the steak will be juicy and soft. Next, the dish is brought to the desired degree of roasting at a lower temperature.
  7. The finished meat should be left to lie down for a while. During this time, the juice will be distributed inside the piece, the temperature inside and outside will equalize, and the steak will become warm, tender, and juicy everywhere.
  8. Serve the steak on warm plates, then it will not cool down so quickly. For use, you need sharp knives without chipping so that you can even cut the meat.

Burgers are a fairly simple dish, but there are cooking tricks that can help you get a great taste. To prepare this treat according to the rules, follow the simple tips from the chefs.

  1. The ideal burger meat is the ground beef neck. It contains about 20% fat and 80% meat, so the burgers are the most juicy with it.
  2. Use minced meat as close to room temperature as possible to form cutlets. However, before grilling cutlets, it is still better to keep them in the refrigerator so as not to lose their shape.
  3. Salt and pepper minced meat or cutlets just before cooking.
  4. If you form cutlets with your hands, then make sure that the thickness is at least 1.5-2 cm. Cutlets of a smaller thickness will turn out to be dry.
  5. After the cutlets are formed, be sure to make a depression in the center of each of them with your thumb or a tablespoon – this is necessary so that they remain flat after grilling. The safest option for forming patties is to use a burger press.
  6. When placing the patties on the grill, do not press down on them with a spatula to keep them juicy.
  7. Grill burgers for about 6-8 minutes indirect medium heat turn once.