Follow these tips and all guests will ask you for a recipe for your cake!
There should be no draft in the room where the dough is prepared, because of it, a rough crust is obtained on the products.
Over-salted dough can be corrected by kneading a new batch without salt and then mixing them thoroughly.
An excess of baking soda in the dough gives the products a darkish color, unpleasant color and taste; if lacking, it loosens poorly.
You can put a little soda in the flour for gingerbread and dough, and add a little vinegar or citric acid to the water for the dough.
If there is little sugar in the dough, then the product turns out to be pale. If there is an excess of sugar, then the dough rises less, and the middle remains unbaked.
When baking from choux pastry, you should only lightly grease, otherwise cracks will appear on the underside.
Yeast will not lose its properties for several weeks if mixed with flour, rubbed, dried and put in a glass.
These tips are very important when baking! With them it will be the most delicious!
Use a brush to grease the mold with oil. If your metal mold has a lot of cracks, apply the softened butter with a cooking brush.
Reduce the temperature for dark dishes. Dark dishes absorb more energy and transfer heat faster. Therefore, if you are baking pastries in a dark dish, set the oven temperature slightly lower than the recipe indicates.
Use toothpicks to check the dough. It is better to check the readiness of the dough not with metal sticks, but with toothpicks. The metal will slip and tell you little about the baked goods. In contrast, the tree will show the actual state of the test.
Chill the cake with the top down. If you want the top of the pie to be flat, after baking, turn it upside down and chill. There will be less unevenness on the surface of the cake.
Cool the cake properly. Chill the cake on a stand to allow air to circulate from below. Don’t do this in the fridge – just leave the baked goods on the counter. To speed up the process, bring it near an open window or fan.
Use the frosting as glue. If you are making a piece with icing, place some of it on a platter and then start assembling the cake. When cooled, the baked goods will stick to the dish and will not move.
Cover the cake with the icing before freezing. Before freezing and icing the cake, lightly glaze all baking surfaces. It will protect the cakes from the negative effects of cold. After 15 minutes in the refrigerator, you can take out the cake and cover it with a thick layer of icing.
Use a cold knife for warm desserts and a warm knife for cold ones. Use a cold knife to cut evenly warm desserts (you can put it in the freezer for a few minutes). Conversely, for cold desserts, heat the knife by dipping it under running hot water and then wiping it dry.
Do not put baked goods in plastic until they have cooled down. Never put warm cookies in a plastic container or wrap an uncooled cake in plastic. Otherwise, condensation will start and your baked goods will get wet and spoil.
Defrost baked goods without film or packaging. If you defrost baked goods in a wrapper or a closed container, condensation will form on the surface. Therefore, always remove the packaging.
One final tip: cook with love is the best ingredient for any dessert. Successful culinary feats!
For a delicious cake, it is very important to bake the base correctly. This is exactly what we will help you do!
The exact oven temperature is very important, so if you do a lot of baking, an oven thermometer is a good investment. Ventilation ovens are hotter than conventional ovens, so reduce the temperature by 10-20 ° C.
Place the pan in the bottom third of the oven with the top of the cake in the middle of the oven.
The cake is ready when it starts to move away from the walls of the form, and its top becomes springy.
As a final check, insert a toothpick into the center of the pie – it should come out dry. If no crumbs adhere, bake for another 5 minutes, then try again.
In the preparation of delicious salads, like any other dish, there are tricks and tricks. To list them all, one page of the site is definitely not enough. A whole book could be written about this. Therefore, I tried to choose only the most basic and useful. Hope these salad dressing tips come in handy for beginners and seasoned chefs alike.
For the preparation of salads, you can use any vegetables – boiled, fresh, salted, pickled, and fruits – fresh, dried, canned. Boiled meat, ham, sausage, eggs are used in meat salads.
Serve salads, especially for the festive table, should be beautifully and neatly laid. To do this, place them in a salad bowl or on a dish without pressing or smoothing the surface.
You need to decorate the salad sparingly so that you can see what it consists of.
If there are several salads on the table, do not decorate them the same way. Show your imagination and your table will amaze with a variety of dishes.
There are different types of salad serving. In a salad bowl, on a platter, in separate portions in small salad bowls, on slices of bread. They are stuffed with other vegetables, such as tomatoes and cucumbers. They are placed in shortcrust pastry baskets or on slices of fried boiled sausage. In some cases, they even make baskets of vegetables, fastening their slices with gelatin at the base.
In no case should you salt and season the salads in advance – they will give juice and spoil quickly, which can lead to poisoning. Do this before serving.
To prevent the apples for the salad from darkening, immediately after peeling and slicing, put them in cold water for 10 minutes.
To prevent the skins of potatoes “in their uniforms” from cracking, pierce each tuber with a fork in several places before cooking.
For dressing tomato salad, it is better to use lemon juice rather than vinegar.
Mayonnaise for salad can be replaced with sour cream by adding pounded egg yolk and a teaspoon of mustard to it.
Fresh onions can be added or pickled (vinegar, salt, pepper).
We recommend using lemon juice, apple cider vinegar, or wine vinegar instead of vinegar. They will give a less harsh and more sophisticated aroma and taste.
Onions can also be caramelized. To do this, melt the sugar in a frying pan, then, putting the onion in it, hold it for another couple of minutes. It is appropriate to add a couple more spoons of red wine.
For a change, make onions in batter.
Mix egg, flour, salt, add spices to taste. We recommend oregano. Onion rings should be dipped in batter and fried in a large amount of vegetable oil (deep-fried), and after a couple of minutes on the grill.
The sauce is a moment of creativity in the process of preparing any dish. Pesto (Italian – based on olive oil, basil, and cheese), salsa (Mexican – made from tomatoes and chili, with garlic and black pepper), dzatziki (Greek – based on yogurt with herbs and garlic). In general, play fantasy, prepare the sauce!
The most commonly used ketchup. You can do it yourself. One of the recipes: peel tomatoes (6 pcs.). Boil sugar (4 tablespoons) with vinegar (half a glass), add tomatoes. Add mustard powder (2 tablespoons), garlic (2-3 cloves), salt, pepper to taste, tomato paste (2 tablespoons), and chili pepper. Cook everything over low heat until the tomatoes soften – about 15 minutes. Turn into a homogeneous mass with a hand mixer, cool.
Many people love burgers, but not everyone knows how to cook them at home. On average, any amateur culinary specialist makes at least one of 7 mistakes during their preparation. We will tell you how to avoid these mistakes and get the perfect burger at home.
Mistake # 1 Wrong choice of meat for a burger. The principle “the more expensive the better” does not work here. But other works: the fatter, the better. Our goal is to make burger patties as juicy as possible, and these can only come from cuts with a lot of fat. The ideal ratio of meat to fat in minced meat should be 80% meat and 20% fat or 75% meat and 25% fat. For example, minced meat made from 2/3 shoulder beef and 1/3 of the flank is perfect for a burger.
Mistake # 2 The abundance of unnecessary ingredients in the burger mince. A bun, mustard, egg, spices, and herbs soaked in milk … All this is good in meatloaf, but not in a burger cutlet. It is enough to add only onions, salt, and freshly ground black pepper to the minced meat. Add pepper to the minced meat immediately, but sprinkle the ready-made raw cutlet with salt, otherwise, it may simply fall apart during cooking and may become harsh after cooking.
Mistake # 3 We make the perfect cutlet. Cook the minced meat yourself by turning it through the largest nozzle. And be sure to cool it before modeling so that the fat does not stick to your hands, and so that the cutlets do not stick to the pan, remove the cutlets in the refrigerator before frying (laying them with pieces of baking paper). It is even better if you scroll the meat chilled in the refrigerator. To keep your patties juicy, do not try to sculpt them perfectly even and thick. Make a notch in the center of each, so it will be both thick and regular when fried. If you cook burgers often, buy a special minced meat press or at least a cooking ring. Make the cutlet a little larger in diameter than necessary, because it will fry anyway. The cutlet with high-fat content is especially lost in size.
Mistake # 4 Using too fluffy burger buns. When we eat a burger, we want to taste the taste of meat, cheese, sauce, tomatoes, cucumbers, onions, and … buns, not just the taste of a wonderful soft bun. Therefore, fluffy buns, in this case, are not the right choice. You can even make a pita burger if you want. This dish is less high in calories and tastes as good as a classic burger. A good option is a brioche. Yes, she is lush but squeezed wonderfully by her hands. Remember burger is eaten by hand! Before assembling, cut the bun in half and be sure to fry in a dry frying pan or grill on the crumb side.
Mistake # 5 Constantly checking the readiness of the burger cutlet. Do not stir the meat while it is cooking in the pan. Do not cut it open to check its readiness, do not turn it over every 15 seconds. Trust me, it will cook in 10-15 minutes (depending on thickness) and without your super-sensitive guidance. If you want to control the process, check the readiness of the burger patty with a special probe or thermometer. This way you will damage the cutlet less and keep it juicy. And fry the cutlet in a very preheated pan or grill, not forgetting about the vegetable oil. Only the cutlet should not float in it!
Mistake # 6 We use an abundance of sauces and additives when assembling a burger. A generous serving of sauce or even sauces looks incredible in Instagram photos, but in real life, it’s better to limit yourself to three additional elements (tomato/cucumber, bacon, a slice of cheese) and 1-2 sauce. The combination of mayonnaise and ketchup with lettuce, tomato, and onion may seem trivial, but that’s where you need to start! Firstly, you can easily bite off a piece of such a juicy burger, and, secondly, you probably won’t oversalt anything, don’t over-pepper, or spoil it with an inappropriate filling. The harmony of flavors in a burger is equally important for the right meat and buns.
Mistake # 7 Incorrect assembly of the burger. An approximate assembly scheme for a classic hamburger should be as follows (from bottom to top): half a toasted bun + onion + sauce + cutlet + tomato/cucumber + green salad + sauce + the second half of a toasted bun. Remember that the sauce should not get the bread wet!
Persimmon is an interesting berry and not everyone likes it. To date, the astringent effect that persimmon peel gives has practically disappeared due to crossing it with other fruits. Sweet, aromatic, and pleasant texture – persimmon is a vitamin and medicinal product. Here are some facts that reveal this orange berry from all sides:
Translated from the Latin persimmon – food of the gods. It is also called winter cherry, the plum of the gods, Chinese peach, heart apple.
Persimmons contain a lot of beta-carotene – its amount exceeds the amount of beta-carotene in pumpkin, tomatoes, peppers. This element is responsible for skin health and visual acuity. It is also useful for those who have a harmful nicotine addiction.
Persimmons are considered healthier than apples due to their higher content of calcium, sodium, iron, and manganese. Persimmons also contain a lot of dietary fiber, which is useful for the stomach and remove toxins from the body.
Persimmon helps in the fight against depression and autumn blues. It contains a lot of magnesium, which soothes and tunes a person to a positive, and fructose with glucose, which simply improves mood. Persimmon makes the day more enjoyable with its bright color!
Persimmon satisfies hunger well while being a low-calorie product. This is used by athletes and all those who carefully monitor their weight.
Ripe persimmons have hard and smooth skin, but so transparent that you can see the fibers and jelly-like pulp of the berry. The softer to the touch the persimmon, the tastier and riper it is.
Persimmons are rich in vitamin C, and therefore will be an excellent assistant to you in the fight and prevention of seasonal colds. There are even recipes for rinsing and tinctures based on persimmon, but it is enough to just eat it.
To get rid of the astringent effect of persimmon peel, you need to put it in the freezer for several hours. Or for several days in a plastic bag along with apples. Persimmon will ripen and lose its tasteless quality. Or just peel off the peel.
Persimmons are not only used as a dessert, they are added to salads, baked goods, dried, and then eaten as candy. Persimmon adds spice and variety to the dish!
Persimmons also contain a lot of potassium, which affects the work of the heart and blood vessels.
We invite you to become a guest of the best London restaurants. Here, chefs know how to satisfy the most sophisticated gastronomic tastes. Having visited such a place, you can not only appreciate the haute cuisine, unique decor, cozy atmosphere, attentive staff, and a luxurious wine list but also get to know the capital of Great Britain – a little prim but charming Mr. London, its history and culture. A visit to any of these restaurants will bring pleasant emotions and an amazing aftertaste. So, the top 10 most popular restaurants in London!
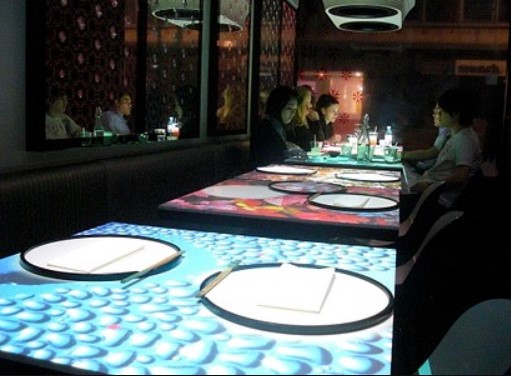
Inamo
Be sure to check out this restaurant if you find yourself near Wardour Street. Sample Chinese and Japanese cuisine at Inamo. At this place, you will be served a mouth-watering pork belly, dragon roll, and avocado sushi. The waiters serve good brownies, gelato, and Thai crepes.
The wine list is very varied in this establishment. This restaurant offers good tea, latte or lemonade. According to customers, the staff here are helpful. According to visitors’ reviews, the service is excellent. Many visitors say the prices are attractive. Inamo has a pleasant atmosphere and first-class interiors.
At The Wolseley, you can enjoy British cuisine. Here you can order delicious eggs benedict, smoked salmon, and haggis. Many guests come to this place to taste good fruit rolls, French toast, and pasta cookies. They recommend ordering good champagne, homemade wine, or whiskey. Order some good mint tea, fresh juices, or cappuccino.
The atmosphere of this place is perfect for a family dinner, meeting with friends or colleagues. Many customers point out that the staff at this cafe is excellent. Here you can taste dishes at attractive prices. You will definitely appreciate the impressive ambience and delightful interior.
Address: Piccadilly 160 (Piccadilly), London, W1J 9EB Working hours: Monday – Friday 07: 00–00: 00, Saturday 08: 00–00: 00, Sunday 08: 00–23: 00 Website: www.thewolseley.com Public transport: Green Park Phone: +44 20 7499 6996 Email address: [email protected]
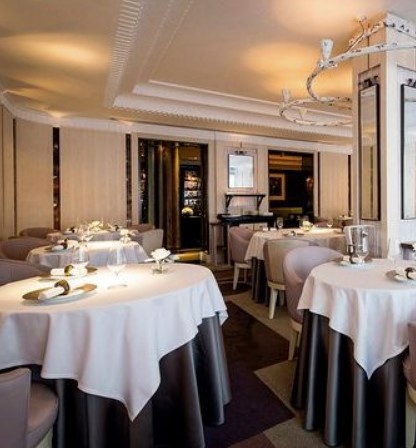
Restaurant Gordon Ramsay
If you like British and French cuisine, take a look here. Here you can order delicious lobster ravioli, bacon, and broth. Try the good tart taten, vanilla ice cream, and chocolate custard. They recommend ordering wonderful prosecco, champagne, or liqueur here. Many guests claim that Restaurant Gordon Ramsay has excellent chocolate frappe, lemonade, or mint tea.
Here you can celebrate an anniversary, wedding or birthday. According to visitors, the staff here is competent. According to customers, the service is amazing. They offer food at good prices. In this place, you will love the excellent interiors and charming atmosphere.
Address: 68 Royal Hospital Road, London SW3 4HP Opening hours: Monday – Friday 12: 00-14: 15 and 18: 30-22: 15 Website: www.gordonramsayrestaurants.com Public Transportation: South Kensington, Sloane Square Phone: +44 20 7352 4441 Email address: [email protected]
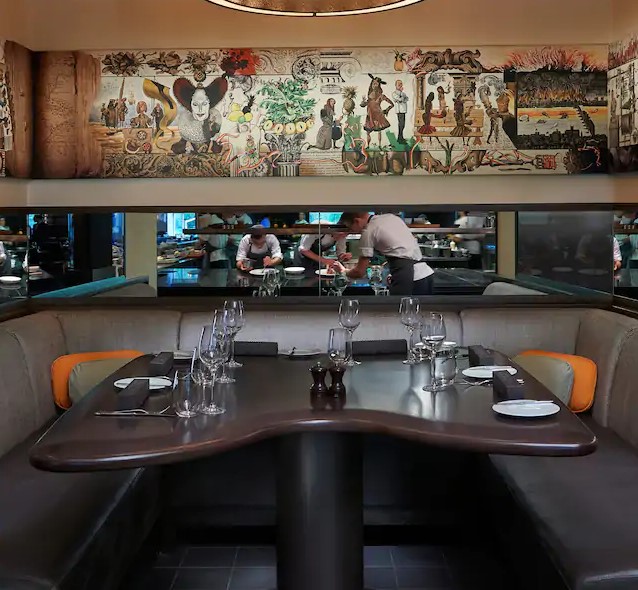
Dinner by Heston Blumenthal
This restaurant is close to the local landmark One Hyde Park. If you want to try British cuisine, then you should book a table at Dinner by Heston Blumenthal. Grab some delicious pork chops, grilled octopus, and duck breast here. Spend a wonderful evening here and order delicious popsicles, platzki, and cream cake. This place is known for its good sauvignon blanc, cider, or ale. Good iced tea, chocolate frappe, and juice, according to guests.
In this place you can celebrate an anniversary, wedding or birthday. Customers claim that the staff at this restaurant are courteous. According to customers, the service is amazing. Dinner by Heston Blumenthal offers food at attractive prices. You will definitely appreciate the charming atmosphere and superb interior.
Address: 66 Knightsbridge, London SW1X 7LA Further information: Located inside the Mandarin Oriental Hyde Park Hotel Opening hours: Daily 12: 00-14: 30 and 18: 30-22: 30 Website: www.dinnerbyheston.com Public transport: Knightsbridge Phone: +44 20 7201 3833 Email address: [email protected]
OXO Tower Restaurant
Be sure to check out this bar if you find yourself near Bargehouse, Oxo Tower Wharf. OXO Tower Restaurant serves British cuisine. Here you should definitely order good pork belly, crabs, and fillet steak. This place offers good lemon pie, soufflé, and pudding. They recommend trying good prosecco, champagne, or beer. This place is famous for its good tea or a great coffee.
The cozy atmosphere of this establishment allows visitors to relax after a hard day. Guests claim that the staff at this bar is professional. Most customers say the prices are attractive. According to visitors, OXO Tower Restaurant has a stunning interior.
Address: Barge House Street, Oxo Tower Wharf, South Bank, London (London), SE1 9PH Website: www.harveynichols.com/restaurant/the-oxo-tower Public Transport: Blackfriars Station Phone: +44 20 7803 3888 Email address: [email protected]
Mestizo Mexican Restaurant & Tequila Bar
Mestizo serves Mexican cuisine on the restaurant’s menu. Deliciously cooked Juan, Mexican burritos, and pozole can be ordered here. It is worth trying the delicious “three milk” cake, cheesecake, and banana pancakes. Be sure to order the wonderful margarita, espresso martini, or michelada cocktails here. This place will offer you a good espresso, horchata, or freshly squeezed juices.
This bar has a cozy atmosphere. According to visitors, the staff is friendly. According to guests, the service is excellent. Mestizo customers say the prices are good. According to visitors, this place has a first-class interior.
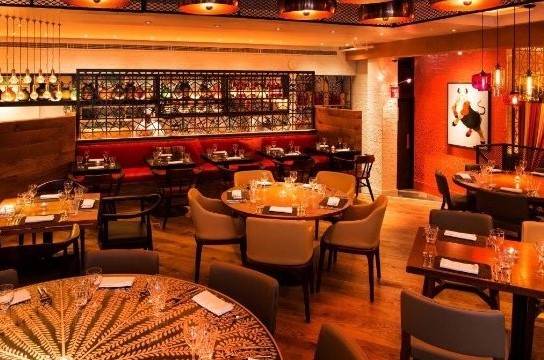
This steakhouse is located next to St. James’s Church. Menu Gaucho – Piccadilly specializes in Argentinean cuisine. This place offers delicious rib steaks, ribeye, and roast beef. Order some decent cheesecake, chocolate truffles, and ice cream. This place serves good Malbec wine, champagne, or prosecco. From a visitor’s point of view, it serves good espresso, cortado, or juice.
Here you can celebrate an anniversary, wedding or birthday. Many customers report that the staff at this steak house is patient. Amazing service is a big plus for Gaucho – Piccadilly. The prices are attractive here. You will surely appreciate the excellent atmosphere and superb interior.
Address: 25 Swallow Street, London W1B 4QR Further information: Located near Regent Street, W1 Working hours: Monday – Saturday 12: 00–00: 00, Sunday 12: 00–23: 00 Website: www.gauchorestaurants.co.uk Public Transportation: Piccadilly Circus, Green Park Phone: +44 20 7734 4040
Sketch
This restaurant is located near Regent Street. Here you can taste French cuisine. You can order amazing amuse bush, caviar, and canapés here. You will love good lemon pie, petit fours, and ice cream. Many customers order good prosecco, champagne, or scotch tape. Order some nice rose tea, latte, or grape juice.
Sketch (The Lecture Room & Library) is perfect for celebrating an anniversary, wedding or birthday. Most visitors say the staff is professional. According to guests’ reviews, this place has attractive prices. Most of the clients report that it has a delightful interior and a great atmosphere.
Masala Zone will appeal to connoisseurs of Indian and Pakistani cuisines. Have a wonderful evening here and try the good chicken in creamy tomato sauce, chicken biryani, and chicken curry. Get some good ice cream from this place. According to visitors, a good beer or delicious wine is served here. Be sure to order the wonderful mango lassi, masala tea, or coffee.
In this place, you can take food with you or order at home. Most guests find the staff to be qualified. Customers love great service. According to guests’ reviews, this restaurant has attractive prices. You will surely appreciate the excellent atmosphere and first-class interior.
Address: Bishops Bridge Road, 75, Bayswater, London, W2 6BG Further information: Located at the corner of Bishops Bridge Road and Inverness Teres Working hours: Monday – Friday 12: 30-15: 00 and 17: 30-23: 00, Saturday 12: 30-23: 00, Sunday 12: 30-22: 30 Website: www.masalazone.com Public Transportation: Royal Oak, Bayswater Phone: +44 20 7221 0055 Email address: [email protected]
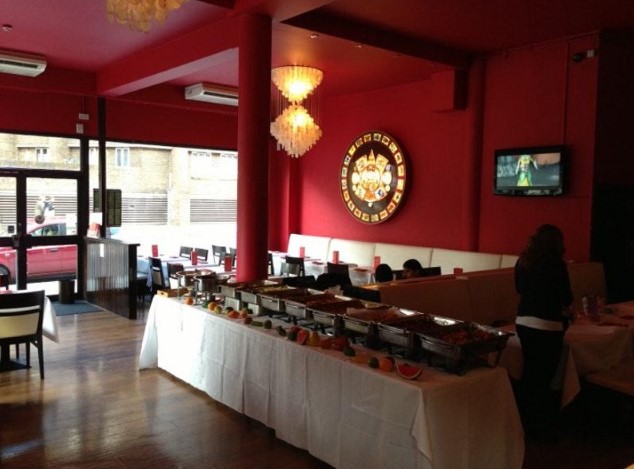
Sarastro
The restaurant serves the Mediterranean and Turkish cuisine. Sarastro offers mouth-watering lamb shanks, chicken skewers, and salmon. Here you should definitely try the deliciously cooked pasta cookies, tiramisu, and baklava. In this place, be sure to try some good house wine, champagne, or prosecco. Order a good latte, tea, or lemonade.
Be sure to come here with children, you will be offered an extensive children’s menu. Many visitors write that the staff at this establishment is attentive. Visitors find the service to be great. According to guests’ reviews, this restaurant has attractive prices. You will surely appreciate the charming atmosphere and first-class interiors.