


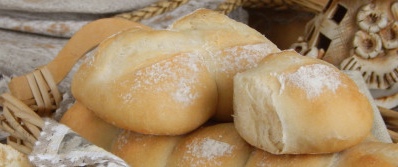
The recipe for this simple and tasty bread has been familiar to me for a long time. It appears on our table quite often, not only because of its excellent taste, but also because of its attractive appearance. There is no need to cut the bread from Ticino: an appetizing loaf is easily divided into portioned airy buns with a thin crust and the most delicate crumb - it's so convenient!
This wheat bread comes from the Italian canton of Switzerland - Ticino / Tessin. According to sources, there he is known under the name Bread of Ticino (Pain tessinois, Tessiner Brot). Most likely, this beautiful and tasty pastry came to Switzerland from Italy (riia pan means lined up). I strongly advise you to try homemade Ticino bread made with your own hands.
Sign up to receive email updates on new recipes.
FoodNerdy is a powerful platform to manage and keep your recipes You do not need any experience in web development, It is very easy to use and customize
Some example text some example text. John Doe is an architect and engineer
.jpg)


