


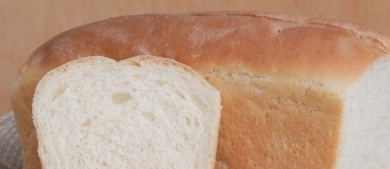
A wheat bread recipe that simply cannot leave indifferent any lover of tender, airy, soft and aromatic pastries. Homemade bread called White Mountain is a great option for toast, sandwiches and sandwiches. It is so good that it disappears from the table in the shortest possible time - you want to cook it again and again.
From the specified amount of ingredients used, a rather large loaf is obtained, which is unusually light and weighs only 740 grams. If you want, you can try to bake White Gora bread with a hearth, that is, on a baking sheet, but in this case there is a high probability that the baking will be low. Although this will not affect the taste and aroma in any way, believe me.
Sign up to receive email updates on new recipes.
FoodNerdy is a powerful platform to manage and keep your recipes You do not need any experience in web development, It is very easy to use and customize
Some example text some example text. John Doe is an architect and engineer
.jpg)


