
 | FoodNerdy Recipes Management System")

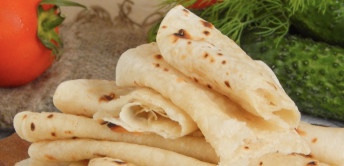
Let's make chapatis - unleavened Indian flatbreads based on wheat flour that resemble thin pita bread. Despite the fact that this bread is most common in India and Nepal, many hostesses prepare it at home around the world. There is nothing complicated in the recipe for chapatis, so feel free to get down to business and please your family with fresh homemade bread.
In general, it is customary to cook Indian chapatis cakes first in a dry frying pan, and then bake over an open fire. I have no hearth, so I suggest using a regular gas stove. Interestingly, when baked with steam, the chapatis swell so much that they become round like a ball.
You can eat Indian tortillas as you like, but most often pieces of chapatis are torn off and dipped in sauce. You can also use slices instead of a spoon, grabbing pieces of food. From this amount of food, I make 10 medium sized chapatis. Similar to thin pita bread, they can be eaten immediately, stored in the refrigerator for a long time, or even frozen!
Sign up to receive email updates on new recipes.
FoodNerdy is a powerful platform to manage and keep your recipes You do not need any experience in web development, It is very easy to use and customize
Some example text some example text. John Doe is an architect and engineer
.jpg)


