


Of the many (I would even say countless) options for homemade bread in our family, children prefer baguettes. Moreover, it does not matter at all what recipe they are prepared according to and what is in the composition - they probably like the shape of this simple, but very tasty bread. And all my loved ones love cheese, so today we will bake fragrant and ruddy cheese baguettes.
In fact, this is cheese bread, but in the form of long and rather thin flour products. However, in most cases, baguettes differ from a round loaf, plump loaf or standard brick in a more delicate and coarse-porous crumb. This is because baguette dough contains a fairly decent amount of liquid in relation to flour, so it turns out to be very tender, soft and sticky.
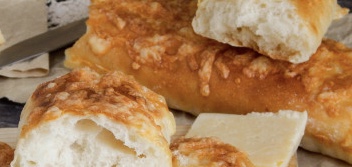
This recipe cheese baguettes can be made with any hard or semi-hard cheese of your choice. The main thing is that it melts well, and then browns. From the specified number of products used, I get 4 baguettes weighing 205 grams each.
Of the many (I would even say countless) options for homemade bread in our family, children prefer baguettes. Moreover, it does not matter at all what recipe they are prepared according to and what is in the composition - they probably like the shape of this simple, but very tasty bread. And all my loved ones love cheese, so today we will bake fragrant and ruddy cheese baguettes.
In fact, this is cheese bread, but in the form of long and rather thin flour products. However, in most cases, baguettes differ from a round loaf, plump loaf or standard brick in a more delicate and coarse-porous crumb. This is because baguette dough contains a fairly decent amount of liquid in relation to flour, so it turns out to be very tender, soft and sticky.
This recipe cheese baguettes can be made with any hard or semi-hard cheese of your choice. The main thing is that it melts well, and then browns. From the specified number of products used, I get 4 baguettes weighing 205 grams each.
Sign up to receive email updates on new recipes.
FoodNerdy is a powerful platform to manage and keep your recipes You do not need any experience in web development, It is very easy to use and customize
Some example text some example text. John Doe is an architect and engineer
.jpg)


