- Serves: 10 People
- Prepare Time: -
- Cooking Time: 1 hours
- Calories: 2966
- Difficulty:
Easy
Print
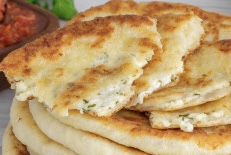
An appetizing stack of delicious, soft, tender and satisfying cheese cakes on kefir, which we cooked in a pan. The dough is kneaded on kefir without yeast, so the recipe for such cakes does not take much time. The flatbreads turn out to be very tasty - there is cheese not only in the filling, but also in the dough!
I use wheat flour of the highest grade, and kefir is suitable for any fat content. By the way, you can replace it with liquid natural yogurt, yogurt, sour milk or fermented baked milk (any sour milk that is at home). We put two types of cheese in the dough and in the filling: Adyghe and any semi-hard (such as Russian, Poshekhonsky, Holland and the like). Choose greens according to your taste or refuse them altogether if you don't like them.
From the specified amount of ingredients used, I get 8 delicious cakes with a diameter of 15 centimeters. You can make them thicker or thinner. Alternatively, make smaller, larger cheesecakes if you like. Experiment, don't hesitate!
Ingredients
Directions
- To prepare these tasty and satisfying cheese cakes in a pan, we need the following ingredients: wheat flour (I use the highest grade), kefir of any fat content (in my case, 1.5% fat), Adyghe cheese and semi-hard cheese, fresh herbs, refined (then odorless) vegetable oil, salt, baking soda, and sugar. All food should be at room temperature, so remove it from the refrigerator beforehand
- Grind 200 grams of any semi-hard cheese on a fine grater. In my case, the cheese was called Russian Special, and you take the one that you like best. The main thing is that it melts well and has a rather rich taste, since the Adyghe cheese does not differ in richness.
- Pour 250 milliliters of kefir into a deep volumetric dish, add half a teaspoon of salt, sugar and soda each. Mix and add half (100 grams) of grated cheese.
- Mix everything with a fork and pour in parts sifted wheat flour (300 grams). We will leave 20 grams of flour for forming blanks for cheese cakes.
- First, with a fork, and then quickly knead the dough with your hand. You do not need to knead for a long time - as soon as the dough gathers in a lump and there are no dry areas left, we round it into a bun and cover the bowl with a towel. We leave it on the table for 30 minutes - this is enough time for the gluten to develop and the dough becomes elastic and pliable. In consistency, such a dough is very soft, tender and sticky. You do not need to hammer it with flour, otherwise the finished cakes turn out to be tough.
- For the filling, 250 grams of Adyghe
- cheese must be chopped in any convenient way. Can be crumbled with your fingers, kneaded with a fork or on a fine grater (like me).
- Just finely chop a small bunch of fresh herbs with a knife. It doesn't have to be dill and parsley. Use your favorite, like cilantro, mint, or basil.
- Transfer two types of shredded cheese to a bowl. Add chopped greens and mix everything.
- We get a decent amount of fillings, which is great, because we will have cheese both in the dough and inside.
- Divide the filling into 8 equal parts: scoop up a part with the palm of your hand and immediately crush it into a lump. Grated cheese is perfectly molded and does not fall apart.
- It's time to tackle the cheese dough. We divide it into 8 equal parts: you can cut it with a knife or just tear off the pieces.
- We roll each piece into a ball: the dough is rested, it has become very tender and easy to work with.
- Forming cheese cakes is not difficult. Now we need the same 20 grams (maybe a little more) of wheat flour that we left in advance. Knead the ball of dough with your fingers into the layer.
- Put a cheese ball in the center.
- Pulling the edges of the dough up, collect them over the cheese ball in the form of a bag. We pinch so that the filling is not visible.
- After that, gently knead the ball with the palm of your hand to make a thick cake. Then we roll it out much thinner with a rolling pin (I have such a baby for working with small items). The thickness of the workpiece should be no more than 5 millimeters.
- In a frying pan, heat a little vegetable (I have sunflower) oil and put the blank. Fry it over medium heat under the lid until an appetizing blush forms on the underside.
- Then turn the cake over and cook on the other side until it is browned. It is normal for the tortillas to swell as they cook.
- Thus, we cook all 8 cheese cakes in a pan. The most convenient way is to mold the next workpiece while the previous one is being fried.
- We serve mouth-watering, ruddy and very tasty cakes with cheese in the heat of the heat. If you don't eat them all at once, put them in a bag and store them in the refrigerator for a couple of days. After heating in the microwave, they will be soft and tender again. Cook for your health, friends, and bon appetit!
Cheese cakes on kefir in a pan
- Serves: 10 People
- Prepare Time: -
- Cooking Time: 1 hours
- Calories: 2966
- Difficulty:
Easy
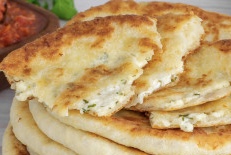
An appetizing stack of delicious, soft, tender and satisfying cheese cakes on kefir, which we cooked in a pan. The dough is kneaded on kefir without yeast, so the recipe for such cakes does not take much time. The flatbreads turn out to be very tasty - there is cheese not only in the filling, but also in the dough!
I use wheat flour of the highest grade, and kefir is suitable for any fat content. By the way, you can replace it with liquid natural yogurt, yogurt, sour milk or fermented baked milk (any sour milk that is at home). We put two types of cheese in the dough and in the filling: Adyghe and any semi-hard (such as Russian, Poshekhonsky, Holland and the like). Choose greens according to your taste or refuse them altogether if you don't like them.
From the specified amount of ingredients used, I get 8 delicious cakes with a diameter of 15 centimeters. You can make them thicker or thinner. Alternatively, make smaller, larger cheesecakes if you like. Experiment, don't hesitate!
Ingredients
Directions
- To prepare these tasty and satisfying cheese cakes in a pan, we need the following ingredients: wheat flour (I use the highest grade), kefir of any fat content (in my case, 1.5% fat), Adyghe cheese and semi-hard cheese, fresh herbs, refined (then odorless) vegetable oil, salt, baking soda, and sugar. All food should be at room temperature, so remove it from the refrigerator beforehand
- Grind 200 grams of any semi-hard cheese on a fine grater. In my case, the cheese was called Russian Special, and you take the one that you like best. The main thing is that it melts well and has a rather rich taste, since the Adyghe cheese does not differ in richness.
- Pour 250 milliliters of kefir into a deep volumetric dish, add half a teaspoon of salt, sugar and soda each. Mix and add half (100 grams) of grated cheese.
- Mix everything with a fork and pour in parts sifted wheat flour (300 grams). We will leave 20 grams of flour for forming blanks for cheese cakes.
- First, with a fork, and then quickly knead the dough with your hand. You do not need to knead for a long time - as soon as the dough gathers in a lump and there are no dry areas left, we round it into a bun and cover the bowl with a towel. We leave it on the table for 30 minutes - this is enough time for the gluten to develop and the dough becomes elastic and pliable. In consistency, such a dough is very soft, tender and sticky. You do not need to hammer it with flour, otherwise the finished cakes turn out to be tough.
- For the filling, 250 grams of Adyghe
- cheese must be chopped in any convenient way. Can be crumbled with your fingers, kneaded with a fork or on a fine grater (like me).
- Just finely chop a small bunch of fresh herbs with a knife. It doesn't have to be dill and parsley. Use your favorite, like cilantro, mint, or basil.
- Transfer two types of shredded cheese to a bowl. Add chopped greens and mix everything.
- We get a decent amount of fillings, which is great, because we will have cheese both in the dough and inside.
- Divide the filling into 8 equal parts: scoop up a part with the palm of your hand and immediately crush it into a lump. Grated cheese is perfectly molded and does not fall apart.
- It's time to tackle the cheese dough. We divide it into 8 equal parts: you can cut it with a knife or just tear off the pieces.
- We roll each piece into a ball: the dough is rested, it has become very tender and easy to work with.
- Forming cheese cakes is not difficult. Now we need the same 20 grams (maybe a little more) of wheat flour that we left in advance. Knead the ball of dough with your fingers into the layer.
- Put a cheese ball in the center.
- Pulling the edges of the dough up, collect them over the cheese ball in the form of a bag. We pinch so that the filling is not visible.
- After that, gently knead the ball with the palm of your hand to make a thick cake. Then we roll it out much thinner with a rolling pin (I have such a baby for working with small items). The thickness of the workpiece should be no more than 5 millimeters.
- In a frying pan, heat a little vegetable (I have sunflower) oil and put the blank. Fry it over medium heat under the lid until an appetizing blush forms on the underside.
- Then turn the cake over and cook on the other side until it is browned. It is normal for the tortillas to swell as they cook.
- Thus, we cook all 8 cheese cakes in a pan. The most convenient way is to mold the next workpiece while the previous one is being fried.
- We serve mouth-watering, ruddy and very tasty cakes with cheese in the heat of the heat. If you don't eat them all at once, put them in a bag and store them in the refrigerator for a couple of days. After heating in the microwave, they will be soft and tender again. Cook for your health, friends, and bon appetit!
You may also like


