


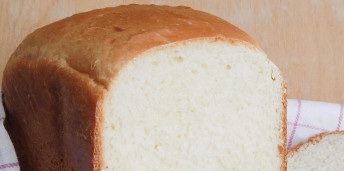
Egg bread according to this recipe turns out to be just perfect in every way. It is tall, ruddy, the loaf is even, the crumb is tender and fluffy, it does not crumble when cut. Ready-made homemade bread does not stale for a long time, while maintaining its softness for about 3-4 days.
I suggest cooking egg bread in a bread maker - this is exactly the recipe that went in the brochure along with the kitchen device. The loaf is designed for 750 grams. The program is in use Basic, the cooking time is automatically exactly 3 hours. My bread maker provides for such a bookmark of products: first liquid, then loose. If it's the other way around, do it according to the instructions.
By the way, according to this recipe, egg bread can be prepared without any problems without a bread machine: knead the dough with your hands, and bake a loaf in the oven. Then we cook it at 180 degrees for 1 hour. I paint the amount of products not in multi-glasses, but in grams, so that you can make egg bread in the oven.
Sign up to receive email updates on new recipes.
FoodNerdy is a powerful platform to manage and keep your recipes You do not need any experience in web development, It is very easy to use and customize
Some example text some example text. John Doe is an architect and engineer
.jpg)


