
 | FoodNerdy Recipes Management System")

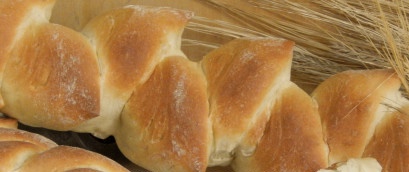
Another recipe for simple and delicious pastries - let's make Epi bread from France. There, these original baguettes in the shape of a spike can be found in almost any bakery. Due to the fact that most of the surface of the bread is open, there is more in baguettes and everyone's favorite crisp. Usually it is customary to put Epi bread in the middle of the table - so each guest can break off an appetizing grain for himself.
In general, the original recipe for this simple bread contains only 4 ingredients (flour, water, salt and yeast), but I additionally use very little sugar and butter. Thanks to them, spikelet baguettes are even more aromatic, ruddy and tasty. We like them very much, be sure to try them too!
Sign up to receive email updates on new recipes.
FoodNerdy is a powerful platform to manage and keep your recipes You do not need any experience in web development, It is very easy to use and customize
Some example text some example text. John Doe is an architect and engineer
.jpg)


