


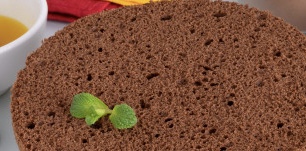
A fluffy, delicious and beautiful biscuit for a cake according to a simple recipe. The Polish-style chocolate sponge cake, which we cook in the oven, is obtained even by novice cooks, if you strictly follow the recipe for this homemade baking.
They say that such a chocolate sponge cake is very popular in Poland, and it is called abandoned because immediately after baking, right in the form of a cake, you need to throw it on a flat surface. Thanks to this procedure, excess air leaves the biscuit, and after cooling, the baked goods remain ideally high, airy and porous.
We use medium-sized chicken eggs for making Polish chocolate biscuit (about 50 grams each, category C-1), and wheat flour - the highest grade. Choose good quality and unsweetened cocoa powder. I do not recommend changing the amount of sugar in the composition of the Polish chocolate biscuit. This recipe does not use baking powder or baking soda.
Sign up to receive email updates on new recipes.
FoodNerdy is a powerful platform to manage and keep your recipes You do not need any experience in web development, It is very easy to use and customize
Some example text some example text. John Doe is an architect and engineer
.jpg)


