


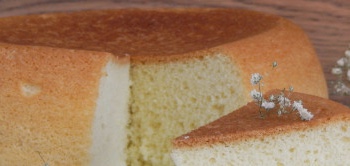
Today we have homemade cakes again, but not bread, but a new biscuit recipe. We will cook it in a slow cooker on rice flour without adding wheat, so it will turn out gluten-free. In the finished biscuit, notes of rice taste are only remotely caught, but they can be easily eliminated by adding flavors (vanillin, citrus zest).
A sponge cake on rice flour will delight you not only with its delicate taste and delicate aroma, but also with its splendor. It turns out to be decently tall - about 8-9 centimeters in height. That is why it can be easily cut lengthwise into 2-3, or even as much as 4 cakes, and then layered with your favorite filling. This will be an amazing homemade cake for a family tea party. And if it is also decorated with taste, it will not be a shame to serve it even to guests at the festive table.
Sign up to receive email updates on new recipes.
FoodNerdy is a powerful platform to manage and keep your recipes You do not need any experience in web development, It is very easy to use and customize
Some example text some example text. John Doe is an architect and engineer
.jpg)


