


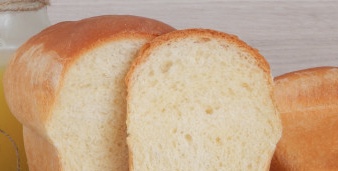
Homemade wheat bread with whey combines the tenderness and porosity of airy dough, thin crust, magical aroma and pleasant taste. It is great for both sweet and savory sandwiches and sandwiches, although it can be easily served with first courses.
From the specified amount of ingredients used, 1 huge, 2 medium, or 4 small loaves are obtained. Moreover, this white bread can be baked both in molds and in a hearth, that is, on a baking sheet. You can buy whey for making this wheat bread at the store, but it's easier to make homemade cottage cheese - at the end you will have 2 wonderful and necessary products.
Sign up to receive email updates on new recipes.
FoodNerdy is a powerful platform to manage and keep your recipes You do not need any experience in web development, It is very easy to use and customize
Some example text some example text. John Doe is an architect and engineer
.jpg)


