


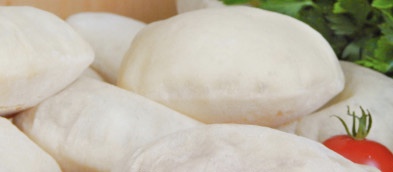
Let's make a traditional Arabic bread - pita bread. These are very simple homemade baked goods that use only the most affordable ingredients. The peculiarity of pita can be called its round flat shape, and also the emptiness in the middle. Thanks to the water vapor that forms inside the cake during baking, the dough swells like a ball and flakes. It turns out a kind of pocket, in which you can easily put absolutely any filling of your choice.
Pitas are usually made from wallpaper flour, but I prefer to use premium wheat flour. Of course, the finished cakes will not be brown, but this does not at all affect the taste and aroma of this unleavened bread. In a city apartment, blanks are baked in a well-heated oven at a high temperature directly on a dry baking sheet. I hope that the recipe will be useful to you and you will often indulge in homemade Arabian pits.
Sign up to receive email updates on new recipes.
FoodNerdy is a powerful platform to manage and keep your recipes You do not need any experience in web development, It is very easy to use and customize
Some example text some example text. John Doe is an architect and engineer
.jpg)


