


This aromatic wheat-rye bread has long won over many people with its taste. Today, Riga bread can be bought in a store without any problems, but some chefs are happy to cook it at home. Riga bread is good even by itself, goes well with any first and second courses, and is also used as a base for sandwiches.
In general, Riga bread is baked with a hearth (that is, not in a baking form, but on a hearth or on a baking sheet) in the form of an oblong loaf with blunt ends. This bread is characterized by a delicate caraway aroma with malt notes, a pleasant sour-sweet taste, a thin crust and a rather dense crumb.
I must say that it is quite difficult to prepare real Riga bread by all standards. In particular, such bread is cooked on a brew, and it is necessary to maintain its certain temperature for a decent long time. That is why I offer you a more simplified version of Riga bread, which even a novice baker can handle. It will turn out to be quite a worthy alternative to this tasty and aromatic bread.
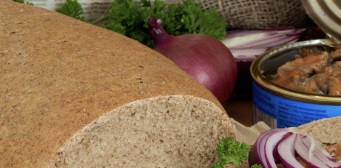
Sign up to receive email updates on new recipes.
FoodNerdy is a powerful platform to manage and keep your recipes You do not need any experience in web development, It is very easy to use and customize
Some example text some example text. John Doe is an architect and engineer
.jpg)


